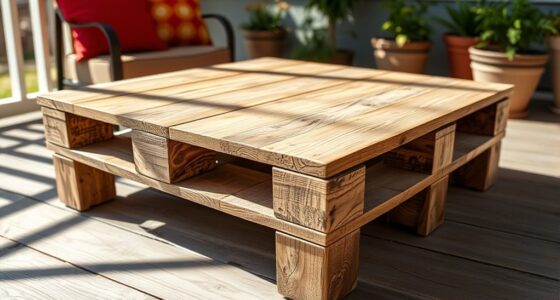
To make a DIY bath tray from scrap wood, start by selecting sturdy, clean pieces like reclaimed pallet wood. Measure your bathtub’s width and cut the wood accordingly, sanding all edges smooth. Reinforce the tray with supports underneath, gluing and nailing them in place for added stability. Finish with waterproof sealant or stain to protect against moisture. With these simple steps, you can craft a charming, functional bath tray—keep exploring for detailed tips and ideas.
Key Takeaways
- Select durable, waterproof hardwood like oak or reclaimed wood, ensuring it is smooth and free of splinters.
- Measure bathtub width and cut the wood to size with a fine-tooth saw, then sand all edges thoroughly.
- Attach supports underneath the tray using leftover scraps, glued or nailed securely for added stability.
- Finish with waterproof sealants or stain to protect against moisture and match bathroom decor.
- Place the tray securely across the tub, ensuring stability before use for a functional, rustic spa accessory.

A relaxing bath becomes even better with a personalized touch—a DIY bath tray. Creating your own from scrap wood is a simple way to enhance your bathroom decor while adding functionality. You can customize it to fit your space, style, and needs, making every bath feel like a spa experience. Before you start, gather some basic woodworking tips to guarantee your project turns out sturdy and attractive. First, choose the right scrap wood—preferably hardwood like oak, maple, or even reclaimed pallet wood. These materials are durable and will hold up well in a humid environment. Make sure the wood is clean, free of splinters, and sanded smooth to prevent any injuries or snags.
Create a durable, stylish DIY bath tray from scrap hardwood for a personalized spa experience.
When measuring for your bath tray, consider the width of your bathtub and how much overhang you prefer on each side. Use a tape measure and a pencil to mark your cuts precisely. A key woodworking tip is to cut slowly and steadily, especially if you’re working with rough or reclaimed wood, which might be uneven. A saw with a fine-tooth blade helps produce cleaner cuts. Once cut, sand all edges thoroughly—this step is essential not only for safety but also for a polished appearance. Sanding smoothens out rough patches and ensures your tray fits comfortably across the tub without sharp corners.
For added stability, consider incorporating small braces or supports underneath the tray. These can be made from leftover wood scraps and glued or nailed into place. When attaching these supports, use wood glue and clamps to guarantee a tight bond. If you want to add a personal touch, paint or stain your tray with waterproof finishes or sealants. This protects the wood from moisture and prolongs its life, and it allows you to match your bathroom decor seamlessly. If you’re feeling creative, drill small holes on the sides to hold items like candles, a book, or a glass of wine. Just be sure to use waterproof, mildew-resistant finishes if you plan to add any paint or stain. Additionally, paying attention to color accuracy during the finishing process can help ensure your tray complements your bathroom’s overall aesthetic.
With these woodworking tips in mind, your scrap wood bath tray will become a charming, functional addition to your bathroom decor. It’s a project that combines practicality with a personal touch, turning a simple piece of wood into a centerpiece of relaxation. Once finished, place it securely across your bathtub, and enjoy the satisfaction of having crafted something uniquely yours—something that elevates your bath experience while adding a rustic, charming vibe to your bathroom.
Frequently Asked Questions
What Types of Scrap Wood Are Best for This Project?
You should choose scrap wood types with straight, tight grain for your bath tray, like cedar, pine, or oak. These woods are sturdy and hold up well to moisture. Avoid warped or soft woods, as they won’t last long. Check the wood grain to verify it’s smooth and even, making your project more durable and safer for everyday use. Properly sand and seal the wood for the best results.
How Do I Prevent the Tray From Wobbling?
Think of your bath tray as a ship steering calm waters—stability is key. To prevent wobbling, apply stability tips like sanding uneven edges and securing joints tightly. Use wobble fixes such as adding non-slip pads underneath or shimming uneven legs. These small adjustments anchor your tray firmly, ensuring it stays steady during your relaxing soak, turning your DIY project into a stable sanctuary.
Can I Customize the Tray’s Size and Design Easily?
Yes, you can easily customize the tray’s size and design to match your preferences. Use adjustable dimensions by measuring your bathtub and cutting your scrap wood accordingly. For a personalized design, add decorative elements like painted patterns or engraved details. This approach allows you to create a unique, functional bath tray that fits perfectly and reflects your style, making your bath time more relaxing and customized.
What Safety Precautions Should I Take During Assembly?
Think of building your tray as shaping a safe foundation for relaxation. You should always wear personal protective equipment like safety goggles and gloves, symbolizing your commitment to safety. Use power tool safety protocols: keep blades sharp, unplug when not in use, and handle tools carefully. These precautions protect you from harm, ensuring your project becomes a symbol of craftsmanship and relaxation, not accident or regret.
How Do I Seal or Finish the Wood for Water Resistance?
To make your bath tray water-resistant, start by sanding the wood smoothly. Then, apply a wood stain to enhance the look and allow it to dry completely. Follow up with a waterproof sealant, making sure to cover all surfaces thoroughly. This will protect your tray from water damage and keep it looking great. Reapply the sealant periodically for continued water resistance and durability.
Conclusion
Now that you’ve crafted your own bath tray from scrap wood, you’ve built more than just a piece of decor—you’ve created a personal oasis. Think of your tray as a sturdy ship, ready to carry your favorite book, a glass of wine, or your morning coffee across calm, relaxing waters. Every time you use it, you’ll feel the satisfaction of turning simple scraps into a sanctuary of comfort. Enjoy your new DIY masterpiece and let it set sail on your relaxation voyages.