
To decorate your Christmas cake with royal icing, start by preparing the cake 1-2 weeks in advance. Once cooled, apply a thick layer of marzipan using warmed apricot jam and let it dry for 5-7 days. Prepare the royal icing by mixing egg whites, sifted icing sugar, glycerine, and lemon juice until stiff peaks form. Decorate with a flat palette knife and let it dry for 24 hours to 3 days. Get creative with seasonal colors and intricate designs using piping bags or stencils. Each tip can elevate your cake's appearance—discover more techniques to make your cake truly shine.
Key Takeaways
- Start by applying a thick layer of marzipan with warmed apricot jam for better adhesion before icing.
- Prepare royal icing by whisking egg whites, icing sugar, glycerine, and lemon juice until stiff peaks form.
- Use piping bags with different tips to create intricate designs and seasonal decorations on the cake.
- Allow each layer of icing and decoration to dry completely before adding additional layers for a polished finish.
- Store the decorated cake in an airtight container at room temperature to maintain texture and prevent moisture issues.
As an affiliate, we earn on qualifying purchases.
Timing and Preparation for Icing

When you're ready to tackle icing your Christmas cake, it's vital to start the process at least one to two weeks before the big day. Proper timing and preparation are essential for a beautiful finish.
First, confirm your cake is completely cooled and leveled; this creates a smooth surface for marzipan application. Spread a thick layer of marzipan over the cake, using warmed apricot jam to help it stick. Allow this to dry for at least 5-7 days.
Once dried, mix royal icing until stiff peaks form and spread it over the marzipan with a flat palette knife. Let it dry uncovered for a minimum of 24 hours, or up to three days, for a firm finish that makes your cake a stunning centerpiece.
Marzipan Application and Benefits

Applying marzipan to your Christmas cake not only enhances its appearance but also serves several practical purposes. This delightful layer, with its almond flavor, acts as a moisture barrier, sealing in freshness and preventing your cake from drying out during the icing process.
To guarantee proper adhesion, brush your cake with warmed apricot jam before applying a thick layer of marzipan, at least ⅛ inch thick to cover effectively. After application, allow it to dry at room temperature for 5-7 days, creating a smooth surface for the royal icing.
Using homemade marzipan, made from simple ingredients, avoids preservatives and boosts your cake's freshness, while also protecting the royal icing from moisture, maintaining its texture and appearance.
Royal Icing Techniques
To create stunning decorations, you'll first need to prepare your royal icing to achieve that perfect thick consistency.
Once your icing is ready, use an offset spatula to apply it evenly over your cake, ensuring a smooth finish.
This step sets the stage for your creative designs, making your Christmas cake truly special.
Preparing Royal Icing
Although preparing royal icing might seem intimidating, it's actually a straightforward process that yields impressive results for your Christmas cake decoration.
Start with a royal icing recipe that combines 3 egg whites, 600g of sifted icing sugar, 1 tsp glycerine, and 1 tsp lemon juice. Whisk these ingredients together until stiff peaks form, creating a smooth icing perfect for your cake.
Gradually add the icing sugar while whisking to guarantee it holds its shape when piped. Use a piping bag fitted with fine tips to add intricate designs.
Once you've spread the royal icing evenly over your marzipan layer, let it dry uncovered at room temperature for at least 24 hours to achieve a hard, glossy finish before adding any additional decorations.
Applying Icing Evenly
Once you've let the royal icing dry to a hard, glossy finish, it's time to focus on applying it evenly over your cake.
Start by spreading the royal icing over the marzipan with a flat palette knife, ensuring the icing is thick enough to avoid drips. Aim for a smooth layer that showcases the shape of your cake.
For that perfect glossy finish, use a spatula to further smooth the icing. Allow the icing to dry uncovered for at least one night, or up to three days for ideal results.
If you want to add decorative elements, pipe them onto the cake while the icing is still slightly tacky—practice your piping techniques on parchment paper to gain confidence and precision.
Creative Decorating Ideas

When it comes to decorating your Christmas cake, think about how you can bring your vision to life with seasonal color combinations and decorative piping techniques.
You can also enhance your cake with festive fondant embellishments that really capture the spirit of the holiday.
Let your creativity shine as you create a cake that's uniquely yours!
Seasonal Color Combinations
To create a stunning Christmas cake, you'll want to embrace seasonal color combinations that capture the festive spirit of the holiday.
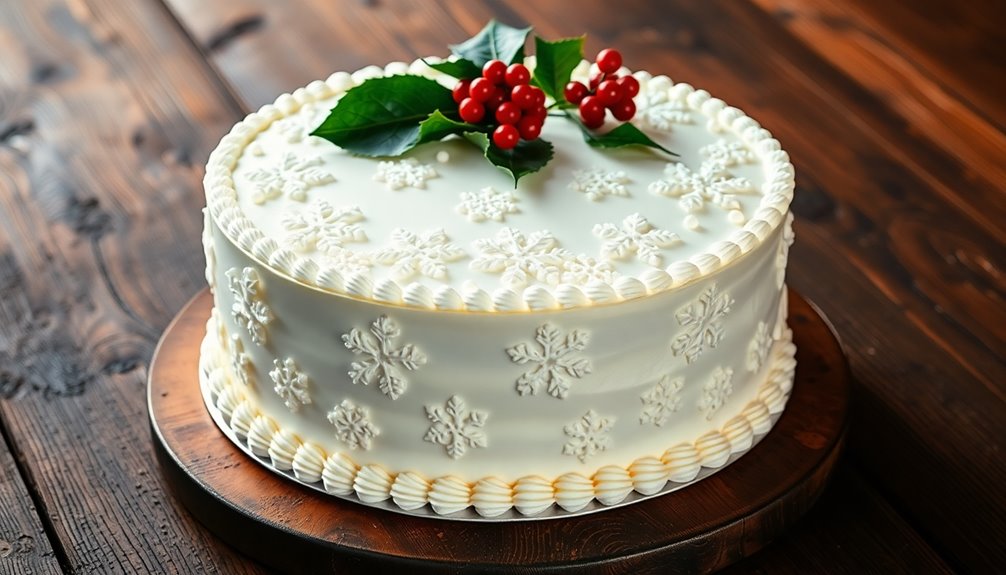
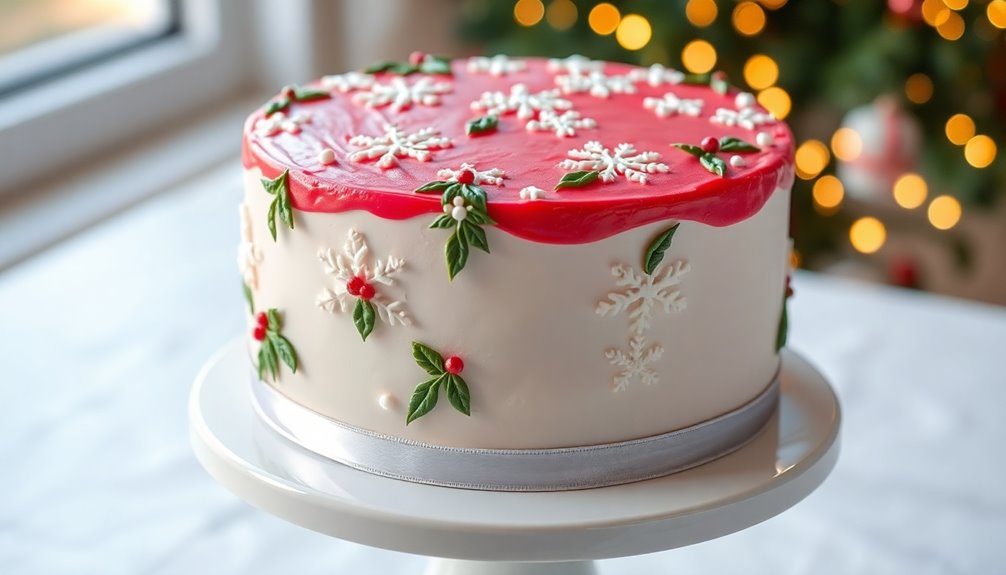
Start with classic colors like red, green, and gold to evoke traditional themes. For a winter wonderland effect, consider using rolled fondant icing in shades of white and blue, reminiscent of snowy landscapes.
If you prefer a rustic look, earthy tones like browns and greens will enhance your cake's charm. Don't forget to add vibrant pops of color with edible decorations, such as marzipan fruit or sugar flowers, in bright reds and yellows.
Finally, use metallic edible paints or luster dust in gold or silver for an elegant touch, making your cake a true centerpiece at gatherings.
Decorative Piping Techniques
Decorating a Christmas cake can be truly transformed with just a few creative piping techniques. Start by using a piping bag fitted with various tips to create decorative patterns like rosettes and snowflakes. For a classic snowy effect, pipe peaks and swirls with a star tip. Experiment with colored royal icing for vibrant details—think holly leaves and berries. Here's a quick reference table for your piping ideas:
| Technique | Description | Festive Elements |
|---|---|---|
| Peaks and Swirls | Create a textured surface with a star tip. | Snowy finish |
| Continuous Border | Pipe around the cake for a polished look. | Elegant decoration |
| Intricate Designs | Use fine tips for detailed patterns. | Holly, berries |
| Edible Glitter | Sprinkle over designs for sparkle. | Adds charm and festivity |
| Colored Icing | Mix in gel colors for vibrant accents. | Bright, festive touches |
These techniques will elevate your cake decoration!
Festive Fondant Embellishments
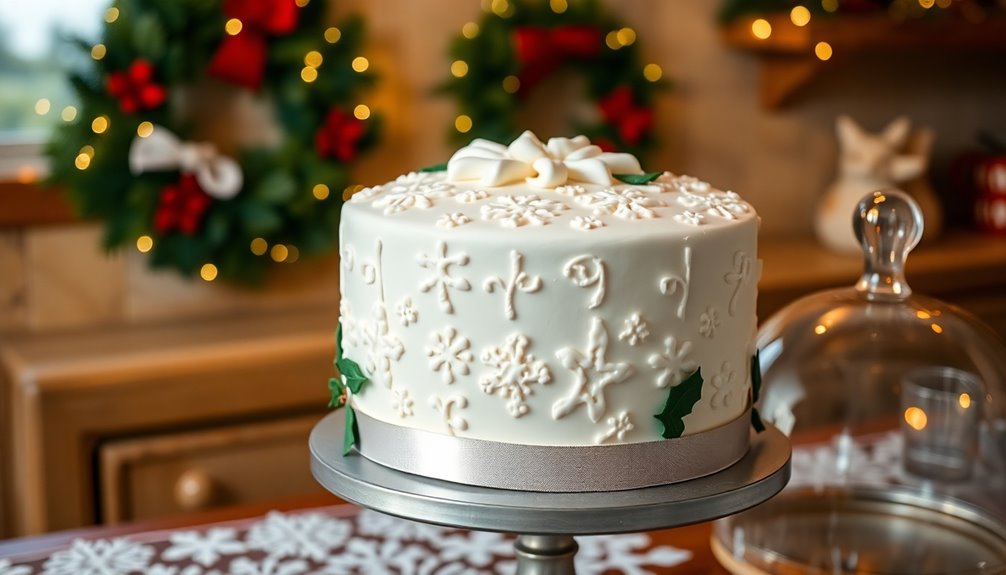
There's something magical about using fondant to dress up your Christmas cake. You can roll out fondant to about 1/8 inch thick for a smooth, polished finish that enhances the festive look.
Get creative with decorations by using cookie cutters to make fun shapes like snowflakes, holly leaves, or Christmas ornaments. Tint your fondant with gel food coloring to match your theme—think traditional reds and greens or a winter wonderland with blues and whites.
Secure your fondant embellishments with a dab of royal icing or melted chocolate to keep them in place. To truly make your decorations pop, brush on some edible glitter or luster dust for a sparkling effect that will wow your guests! Additionally, consider incorporating fiber-rich ingredients into your cake to enhance its health benefits while enjoying festive treats.
Storage and Shelf Life
When you store an iced Christmas cake properly, it can last several weeks while maintaining its freshness.
To keep the cake at its best, wrap it tightly in plastic wrap and place it in an airtight container at room temperature. Avoid refrigeration, as it can alter the texture and lead to unwanted moisture.
After icing, allow the cake to set hard for ideal presentation and durability.
For long-term storage, you can wrap a whole cake in plastic and aluminum foil, guaranteeing it lasts over a year if sealed well.
Always check for signs of spoilage, like mold or off smells, to make sure your cake remains safe to eat.
Happy baking!
Tips for Successful Decorating

To achieve a stunning Christmas cake, it's essential that you start with a completely cooled base; otherwise, the icing might melt and ruin your design.
Here are some tips to help you successfully decorate your cake with royal icing:
- Use a turntable for even icing application, ensuring a smooth surface.
- Practice piping techniques on parchment paper to build confidence.
- Allow each layer of icing to dry thoroughly—at least 24 hours—before adding more decorations.
Frequently Asked Questions
How to Use Royal Icing on a Christmas Cake?
To use royal icing on your Christmas cake, start by preparing the icing until it reaches stiff peaks.
Make sure your marzipan layer has dried for at least 24 hours.
Then, use a flat palette knife to spread a smooth layer of royal icing over the marzipan, letting it dry uncovered for a night or up to three days.
Once dry, pipe decorative designs and finish with embellishments like edible glitter or ribbons for a festive touch.
How Far in Advance Can You Royal Ice a Christmas Cake?
You can royal ice a Christmas cake up to one week before serving it. This timing allows the icing to dry properly and harden, ensuring a beautiful finish.
Each layer of icing should dry for at least 24 hours before you add the next one. Ideally, you'll want to prepare and ice your cake one to two weeks ahead of Christmas, giving the flavors a chance to develop and enhancing its moisture.
What Is the Easiest Way to Decorate a Christmas Cake?
The easiest way to decorate a Christmas cake is to start with a smooth layer of marzipan.
Once that's set, you can spread royal icing over it for a glossy finish.
If you're looking for a quicker option, rolled fondant works wonders and gives a polished look without much fuss.
To add some flair, use pre-made decorations like sugar balls or fondant cutouts, making your cake festive without the need for intricate skills.
Can You Put Royal Icing Straight Onto a Fruit Cake?
You wouldn't want to rush into a royal icing embrace without some preparation.
Yes, you can apply royal icing directly onto a fruit cake, but it's a good idea to first lay down a layer of marzipan. This creates a cozy barrier, keeping the cake's moisture at bay.
Once you've smoothed on the marzipan, let it dry for a few days. Then, you can lovingly spread the royal icing for a beautiful finish.
Conclusion
Decorating your Christmas cake with royal icing can be as joyful as unwrapping a gift on Christmas morning. By meticulously timing your preparations, applying marzipan, and employing various icing techniques, you'll create a stunning centerpiece for your holiday celebrations. Remember to store your cake properly to maintain its freshness, and don't hesitate to get creative with your designs. With a little practice and imagination, your cake will shine like a holiday star, delighting everyone who sees it!