Appliances
Ceiling Fan Support: Is Your Box Ready?
2025

Were you aware that nearly 20% of the energy consumption in homes across the United States can be attributed to ceiling fans? Given their capacity to move air around and offer a cooling effect, it’s hardly surprising that numerous homeowners are thinking about adding a ceiling fan to their residences.
However, before you rush into the installation process, it’s important to ensure that your ceiling box can support the weight and movement of a fan. In this guide, we will discuss how to determine if your ceiling box is up to the task.
By following these steps, you can ensure a safe and secure installation, and enjoy the benefits of a properly functioning ceiling fan in your home.
Key Takeaways
- A strong ceiling box is crucial for safety and stability during fan installation.
- Ceiling boxes have weight ratings indicating their maximum load capacity.
- Visually inspect the ceiling box for cracks, dents, or other damage.
- Take into account the weight and size of the fan when assessing the ceiling box.
Importance of a Strong Ceiling Box
Having a strong ceiling box is of utmost importance when installing a fan to ensure safety and stability. Ensuring proper installation of a ceiling box is crucial to avoid potential accidents. The ceiling box serves as the anchor point for the fan, supporting its weight and preventing it from falling. Without a strong and secure ceiling box, the fan may become loose or detached, posing a serious risk to anyone below.
To ensure proper installation, it’s essential to choose a ceiling box that’s specifically designed for fan support. These boxes are typically made of durable materials such as metal or reinforced plastic, and they’re designed to handle the weight and vibrations of a fan. It’s also important to ensure that the ceiling box is securely attached to a joist or other structural support. This will provide the necessary stability to prevent the fan from wobbling or falling.
Understanding Ceiling Box Weight Ratings
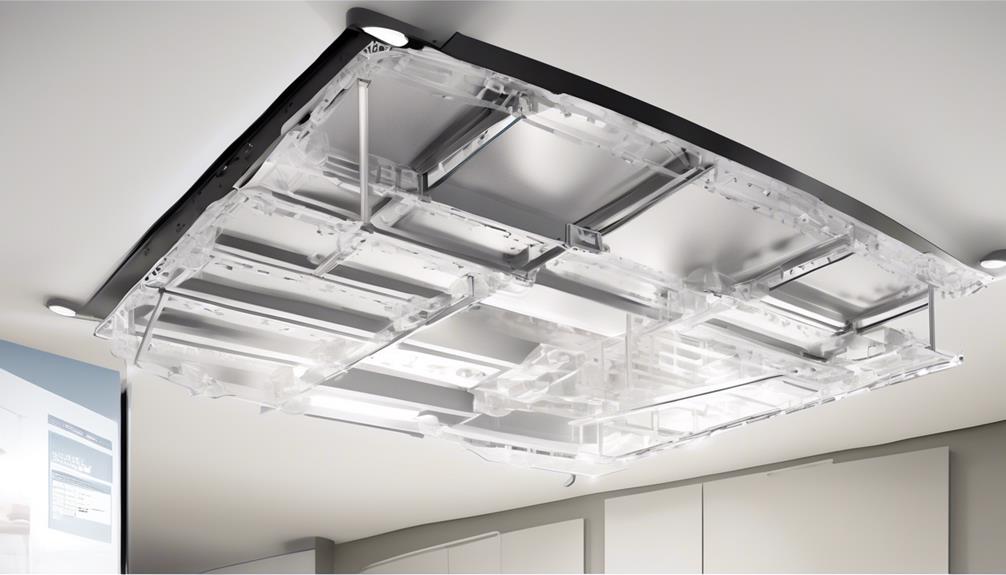
Understanding the weight ratings of ceiling boxes is crucial for ensuring the safe and secure installation of a fan. When evaluating installation requirements, it is essential to consider the weight limitations of the ceiling box to prevent any potential accidents or damages. Ceiling boxes are designed to support various types of fixtures, including fans, lights, and chandeliers. However, each ceiling box comes with a specific weight rating that indicates the maximum load it can safely bear.
To help you understand the weight ratings better, here is a table that provides an overview of common ceiling box weight ratings and their corresponding load capacities:
| Ceiling Box Weight Rating | Load Capacity (in pounds) |
|---|---|
| 15 pounds | Light fixtures only |
| 25 pounds | Light fixtures and small fans |
| 50 pounds | Heavy-duty fans, chandeliers, and other heavy fixtures |
Checking for Visible Signs of Damage
To ensure the safety of the installation, it’s important to carefully examine the ceiling box for any visible signs of damage. Checking for visible signs and assessing the condition of the ceiling box will help determine if it’s suitable for supporting a fan.
Begin by visually inspecting the box for any cracks, dents, or other forms of damage. Look for any signs of wear and tear, such as rust or corrosion, which can weaken the structure over time. Pay close attention to the mounting bracket and screws, as they’re crucial for the stability of the fan.
Next, check the electrical connections inside the box. Make sure the wires are properly secured and there are no exposed or frayed ends. Inspect the insulation around the wires to ensure it’s intact and not damaged.
Additionally, check for any signs of moisture or water damage. Water can weaken the ceiling box and compromise its ability to support the fan safely. Look for discoloration, stains, or mold growth, as these are indicators of water infiltration.
If you notice any visible signs of damage or have concerns about the condition of the ceiling box, it’s recommended to consult a professional electrician. They’ll be able to assess the situation accurately and advise on the necessary steps to ensure a safe and secure fan installation.
Assessing the Age and Condition of the Ceiling Box
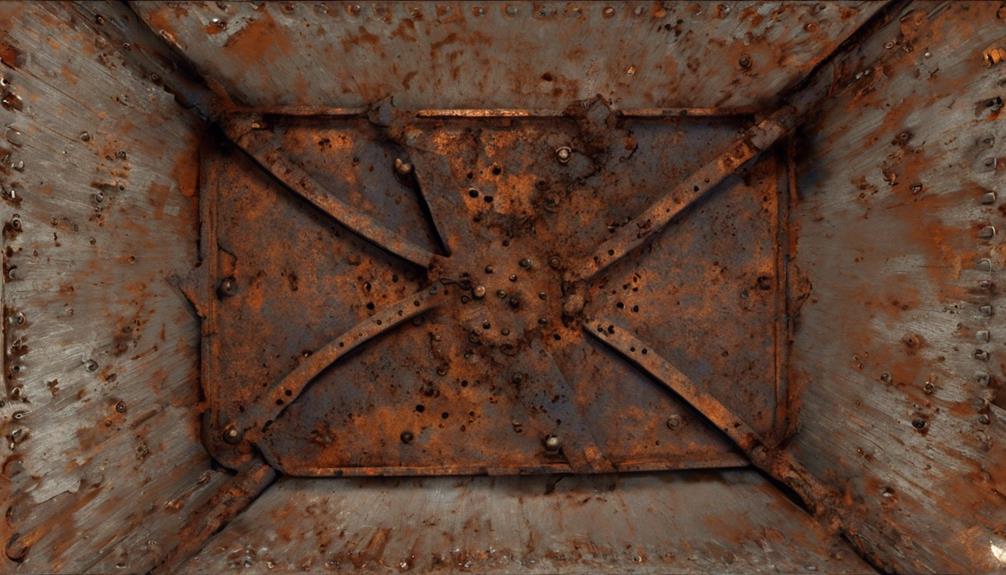
Upon inspecting the ceiling box, it’s crucial to evaluate the age and overall condition of the structure to determine its suitability for supporting a fan. Assessing the safety and potential risks associated with the age and condition of the ceiling box is essential to ensure the longevity and functionality of the fan installation.
Firstly, consider the age of the ceiling box. Older homes may have outdated electrical systems that may not be equipped to handle the additional weight and movement of a fan. Wiring and electrical components may be outdated, posing a safety hazard. It’s important to have a licensed electrician assess the electrical system and make any necessary updates to ensure it meets current safety standards.
Next, evaluate the overall condition of the ceiling box. Look for signs of wear and tear, such as cracks, rust, or sagging. These could indicate structural weaknesses that may compromise the stability of the fan. Additionally, check for proper reinforcement, such as support braces or sturdy mounting hardware. Insufficient support can lead to the ceiling box becoming loose or detached, posing a significant risk. If you notice any issues, address them promptly to ensure the ceiling box can safely support the fan’s weight and motion. A poorly secured or damaged ceiling box is one of the common reasons why ceiling fan shakes during operation, as it creates instability. Ensuring the ceiling box is properly installed and reinforced will not only prevent shaking but also extend the lifespan of your fan and improve safety.
To accurately assess the safety and potential risks, it’s advisable to consult with a professional, such as an electrician or contractor, who’s experience in evaluating ceiling boxes and fan installations. They’ll be able to provide expert guidance and ensure that the ceiling box is in good condition and can safely support a fan.
Considering the Weight and Size of the Fan
Before installing a fan, it’s crucial to analyze the weight capacity of the ceiling box. This assessment ensures that the box can adequately support the weight of the fan, preventing any potential safety hazards.
Additionally, it’s important to check the size compatibility of the fan with the ceiling box to ensure a proper fit and secure installation.
Weight Capacity Analysis
Create an image depicting a ceiling box with an arrow pointing upwards, indicating the weight capacity analysis. Show a large fan symbolizing weight, and measurements of fan dimensions alongside weight limits, emphasizing the importance of considering both size and weight for ceiling box support.

Considering the weight and size of the fan, it’s important to conduct a thorough weight capacity analysis for the ceiling box support. This analysis will ensure that the ceiling box is capable of safely supporting the weight of the fan and preventing any potential accidents or damage. Here are four key factors to consider during the weight capacity analysis:
- Weight Distribution: Assess how the weight of the fan is distributed across the ceiling box. This includes determining if the weight is evenly distributed or if there are any concentrated points of stress.
- Installation Process: Evaluate the installation process to ensure that the ceiling box is securely attached to the ceiling joists. This will provide the necessary support for the weight of the fan.
- Fan Size: Consider the size of the fan, as larger fans tend to be heavier. Take into account the dimensions and weight specifications provided by the manufacturer.
- Maximum Weight Capacity: Determine the maximum weight capacity of the ceiling box and compare it to the weight of the fan. Ensure that the weight of the fan doesn’t exceed the maximum capacity to maintain safety and stability.
Size Compatibility Check
Create an image depicting a sturdy, reinforced ceiling box with measurements and weight limits clearly labeled. Show a fan of appropriate size and weight, suspended from the box, to visually explain the concept of size compatibility check.

After conducting a weight capacity analysis, it’s crucial to assess the size compatibility of the fan with the ceiling box support.
When it comes to compatibility considerations, both the weight and dimensions of the fan play a significant role in determining whether the ceiling box can support it.
To ensure a successful installation process, it’s essential to check if the fan’s weight falls within the weight capacity limit of the ceiling box.
Additionally, the size of the fan should be compatible with the dimensions of the ceiling box. This means that the fan should fit properly within the box without any interference or overcrowding.
Examining the Support Structure of the Ceiling Box

We will now thoroughly examine the support structure of the ceiling box for the fan installation. It’s crucial to assess the support structure analysis and evaluate its load bearing capacity to ensure the safe installation of a fan.
Here are the key aspects to consider when examining the support structure:
- Mounting Brackets: Check if the ceiling box has sturdy mounting brackets that are securely attached to the ceiling joist. These brackets provide the primary support for the fan and must be capable of withstanding the weight and movement.
- Ceiling Joist: Inspect the ceiling joist, which is the horizontal beam that supports the ceiling box. Ensure that it’s in good condition, without any signs of sagging or damage. The joist should be able to handle the additional weight and vibrations caused by the fan.
- Screws and Fasteners: Examine the screws and fasteners that secure the ceiling box to the joist. They should be tight and properly installed to ensure a strong connection between the box and the support structure.
- Support Brace: Evaluate if a support brace is present. This additional structure reinforces the ceiling box and provides extra stability. It’s particularly important for heavier or larger fans.
Thoroughly analyzing the support structure and evaluating its load bearing capacity will ensure that the ceiling box can safely support the fan installation. By taking these steps, you can be confident in the stability and longevity of your ceiling fan.
Consulting the Manufacturer’s Guidelines
To ensure the proper installation of the ceiling fan, it is imperative to consult the guidelines provided by the manufacturer. These guidelines, often found in the product manual or on the manufacturer’s website, contain valuable information about the specific requirements and recommendations for installing the fan. By following the manufacturer’s recommendations, you can ensure the safety and optimal performance of your ceiling fan.
The manufacturer’s guidelines typically cover various aspects of the installation process, including the suitable ceiling box support for the fan. They provide specific instructions on the type of ceiling box required and the weight capacity it should have to support the fan. It is important to carefully review these guidelines before proceeding with the installation to ensure that your ceiling box is capable of supporting the weight and movement of the fan.
To make it easier to understand the manufacturer’s recommendations and select the appropriate ceiling box support, refer to the table below:
Manufacturer’s Recommendations Safety Considerations Select a ceiling box rated for fan support Ensure proper electrical wiring Use a ceiling box with a minimum weight capacity of X lbs Securely mount the ceiling box Follow any additional instructions provided by the manufacturer Regularly inspect the fan and ceiling box for any signs of damage or wear
Seeking Professional Opinion and Assistance
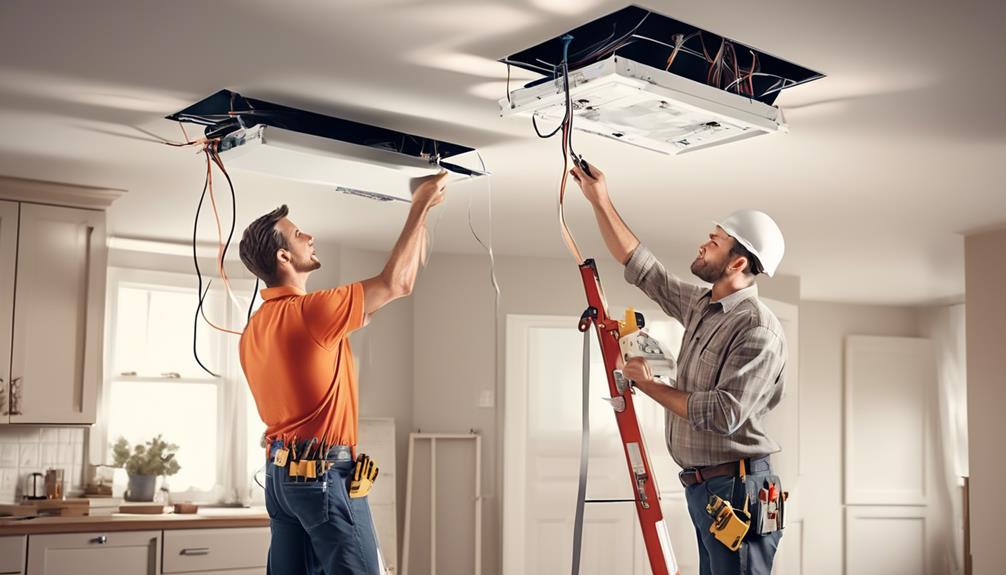
Seeking professional opinion and assistance is highly recommended to ensure the safe and proper installation of the ceiling fan. When it comes to matters of electrical work and structural integrity, it’s always best to rely on the expertise of professionals who’ve the necessary knowledge and experience. Here are four reasons why hiring experts for professional advice is crucial:
- Assessment of Ceiling Box Strength: Professionals can assess the strength and suitability of your ceiling box to support a ceiling fan. They’ll consider factors such as the box’s material, its attachment to the ceiling joist, and any reinforcements needed for added support.
- Identification of Electrical Wiring Requirements: Installing a ceiling fan often requires electrical connections. Hiring experts ensures that the existing wiring can handle the additional load and that all connections are properly made, minimizing the risk of electrical issues or accidents.
- Proper Mounting and Balancing: Professionals have the expertise to securely mount the fan to the ceiling box, ensuring it’s fixed in place and doesn’t wobble or pose a safety hazard during operation.
- Compliance with Building Codes: Building codes vary, and professionals are well-versed in local regulations. They’ll ensure that the installation meets all safety requirements and code specifications, providing peace of mind and avoiding potential legal issues.
Reinforcing the Ceiling Box if Necessary

If the strength of the ceiling box is insufficient to support a ceiling fan, reinforcing measures may be necessary. It’s important to ensure that the ceiling box is capable of safely supporting the weight and movement of a fan to prevent any potential hazards. There are several reinforcing methods that can be employed to strengthen the ceiling box and provide adequate support.
One common mistake that homeowners make is attempting to reinforce the ceiling box by simply using longer screws. While this may seem like a quick fix, it isn’t a reliable or safe solution. Longer screws can cause damage to the ceiling box or the surrounding structure, leading to potential accidents.
A more effective method is to install a fan-rated brace or support box. These devices are specifically designed to handle the additional weight and movement of a ceiling fan. They provide a secure and stable foundation for the fan, ensuring its safe operation. It’s important to follow the manufacturer’s instructions and guidelines when installing these braces or support boxes to ensure proper reinforcement.
Another reinforcing method involves adding additional support beams or joists to the ceiling structure. This can help distribute the weight of the fan more evenly and provide added stability. However, this method may require professional assistance, as it involves structural modifications to the ceiling.
Enjoying the Benefits of a Safe and Secure Ceiling Fan Installation
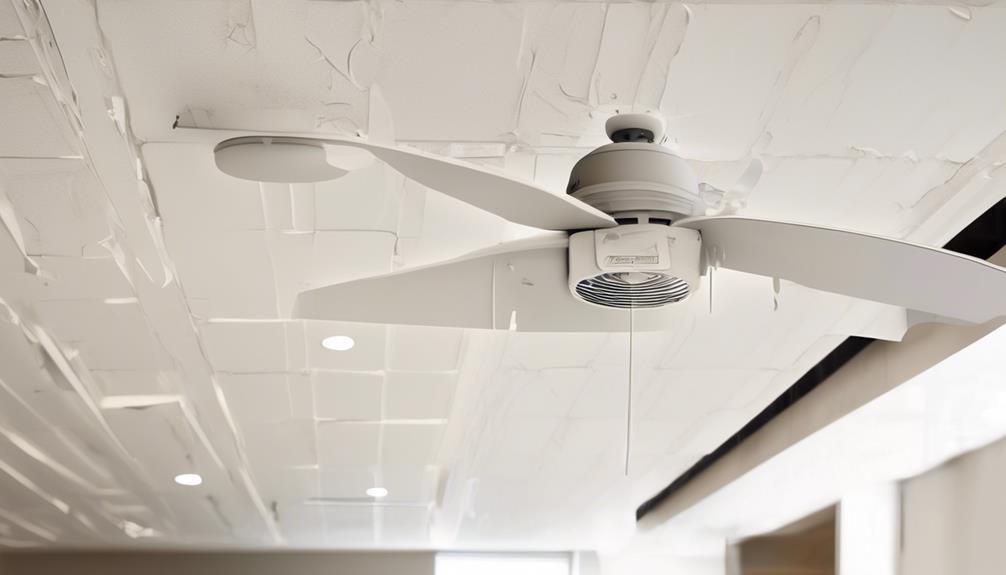
Once the ceiling box has been properly reinforced to support a ceiling fan, homeowners can now enjoy the benefits of a safe and secure installation. Here are the advantages of a proper ceiling fan installation:
- Enhanced Comfort: A ceiling fan creates a gentle breeze that helps circulate the air in the room, providing a cooling effect during the hot summer months. With a properly installed fan, you can enjoy a more comfortable living space.
- Energy Efficiency: Ceiling fans are an energy-efficient alternative to air conditioning. By using a fan alongside your AC, you can raise the thermostat by a few degrees without sacrificing comfort. This can lead to significant energy savings and lower utility bills.
- Improved Air Quality: Ceiling fans help to improve air circulation, preventing stagnant air and reducing the accumulation of dust and allergens. This can result in better indoor air quality, especially for individuals with respiratory issues or allergies.
- Aesthetically Pleasing: Aside from their practical benefits, ceiling fans can also enhance the overall aesthetics of a room. With a wide range of styles, finishes, and designs available, you can find a fan that complements your decor and adds a touch of elegance to your space.
Frequently Asked Questions
Can I Install a Ceiling Fan in a Room With a Low Ceiling?
We can definitely install a ceiling fan in a room with a low ceiling.
There are various low ceiling fan options available that are specifically designed to fit in such spaces.
Installing a ceiling fan in a low ceiling room can provide several benefits, such as improved air circulation, energy efficiency, and enhanced comfort.
It’s important to choose a fan that’s specifically designed for low ceilings to ensure proper installation and functionality.
Can I Use a Ceiling Box That Is Already in Place for a Light Fixture to Support a Ceiling Fan?
Before embarking on a ceiling fan installation, it’s crucial to ensure that your existing ceiling box is compatible. Assessing the electrical box compatibility is a vital step in guaranteeing a safe and sturdy installation.
To determine if your ceiling box can support a fan, consider its weight capacity and structural integrity. Remember, ‘measure twice, cut once’ – taking the time to confirm the box’s suitability will save you from potential hazards and ensure a secure fan installation.
How Can I Determine the Weight Rating of My Existing Ceiling Box?
To determine the weight capacity of our existing ceiling box, we need to take a few steps.
First, we should locate the manufacturer’s label or documentation for the ceiling box, which usually includes this information.
If that’s not available, we can reinforce the ceiling box by adding a support brace or installing an approved fan-rated box.
It’s crucial to ensure the ceiling box can support the weight of the fan to prevent any safety hazards or damage.
Is It Possible to Install a Ceiling Fan in a Room With a Sloped Ceiling?
Installing a ceiling fan on a vaulted ceiling can be a challenge. However, there are alternative options for cooling a room with a sloped ceiling.
One option is to use a downrod extension kit, which allows you to mount the fan at a proper height.
Another option is to install a ductless mini-split air conditioning system, which can provide both cooling and heating.
These alternatives ensure comfort and climate control in rooms with sloped ceilings.
Can I Install a Ceiling Fan in a Room With a Plaster Ceiling Instead of Drywall?
When installing ceiling fans in rooms with different types of ceilings, it’s crucial to understand the importance of proper ceiling fan support.
In the case of a plaster ceiling, it’s essential to ensure that the ceiling box can support the weight and movement of the fan. This can be determined by examining the construction and stability of the ceiling box.
Consulting with a professional or conducting thorough research can provide the necessary guidance for a safe and successful installation.
Conclusion
In conclusion, ensuring that your ceiling box can support a fan is crucial for a safe and secure installation. By understanding the weight ratings, checking for signs of damage, and assessing the age and condition of the box, you can determine its capability.
It’s important to consult the manufacturer’s guidelines and seek professional assistance if needed. If necessary, reinforcing the ceiling box will provide added strength and peace of mind.
With these precautions in place, you can enjoy the benefits of a properly installed ceiling fan.
- About the Author
- Latest Posts
Introducing Ron, the home decor aficionado at ByRetreat, whose passion for creating beautiful and inviting spaces is at the heart of his work. With his deep knowledge of home decor and his innate sense of style, Ron brings a wealth of expertise and a keen eye for detail to the ByRetreat team.
Ron’s love for home decor goes beyond aesthetics; he understands that our surroundings play a significant role in our overall well-being and productivity. With this in mind, Ron is dedicated to transforming remote workspaces into havens of comfort, functionality, and beauty.
Garage Door Opener
What Makes a Fingerprint Garage Door Opener Secure?
Secure your garage with cutting-edge fingerprint technology – but is it truly foolproof?

In the realm of security, it is commonly said that it is better to prevent than to cure.
When it comes to fingerprint garage door openers, the question of what truly makes them secure lingers in our minds.
The intricate technology behind these devices promises a blend of convenience and protection, but how reliable are they in safeguarding our homes?
Let's explore the layers of security measures embedded in these biometric systems that promise to keep our garage access exclusive and our belongings safe.
Key Takeaways
- Cutting-edge encryption technology safeguards biometric data integrity
- Unique fingerprint analysis ensures secure access control
- Robust data storage mechanisms encrypt and protect sensitive information
- Anti-spoofing measures prevent unauthorized entry attempts
Advanced Encryption Technology
Using cutting-edge encryption technology, we ensure the utmost security of biometric data in fingerprint garage door openers. Encryption algorithms play a crucial role in protecting the fingerprint templates stored within the system, ensuring that sensitive information remains safeguarded from unauthorized access.
Biometric access control systems rely on secure communication protocols to maintain data integrity and prevent any potential breaches. By implementing robust encryption key management practices, we enhance the overall security posture of the garage door opener, mitigating the risks associated with unauthorized data exposure.
Strong encryption standards such as the Advanced Encryption Standard (AES) are commonly employed to fortify the security of biometric authentication processes, providing users with a reliable and liberating experience.
Through the effective integration of encryption technology and secure communication protocols, we prioritize the confidentiality and integrity of fingerprint data, offering a seamless and secure access control solution for modern garage door systems.
Biometric Authentication Process

Utilizing the distinct biological features of fingerprints, the biometric authentication process in fingerprint garage door openers meticulously analyzes individual fingerprint patterns to verify user identities, ensuring secure access control. The biometric fingerprint scanner captures the unique ridges and valleys of a person's fingerprint, converting them into a digital template for comparison. This process allows only registered users with pre-scanned fingerprints to unlock the garage door, enhancing security measures. The high level of accuracy in matching fingerprints provides reliable access control, significantly reducing the risk of unauthorized entry. Compared to traditional methods like keypads or remotes, biometric authentication offers a more robust security solution by relying on the inherent uniqueness of each person's fingerprints. Here is a table to summarize the key points of the biometric authentication process in fingerprint garage door openers:
| Biometric Authentication Process |
|---|
| Utilizes distinct fingerprint features |
| Analyzes individual fingerprint patterns |
| Verifies user identities |
| Ensures secure access control |
| Provides high level of security |
Secure Data Storage Mechanism
Moving from the biometric authentication process, our focus now shifts to the secure data storage mechanism employed in fingerprint garage door openers to safeguard biometric information.
Fingerprint garage door openers use secure data storage mechanisms to ensure that biometric data is kept safe from unauthorized access. Instead of storing fingerprint templates as plain images, complex mathematical representations are utilized for enhanced security. The biometric data is encrypted and stored either on the device itself or in a cloud server, employing advanced encryption techniques to protect user privacy.
To further enhance security, advanced measures such as hashing and salting are implemented to safeguard the fingerprint data from potential breaches or cyber attacks. Hashing converts the fingerprint data into a unique string of characters, while salting adds extra random data to the process, making it even more secure.
Continuous monitoring and regular updates to security protocols are crucial to maintaining the integrity of the stored fingerprint information in garage door openers. These measures collectively contribute to ensuring the secure storage and protection of sensitive biometric data in fingerprint garage door openers.
Anti-Spoofing Measures

Our implementation of anti-spoofing measures in fingerprint garage door openers significantly enhances security by detecting and preventing unauthorized access through advanced biometric technology. Keyless locks on garage doors are safeguarded by anti-spoofing features that ensure only genuine fingerprints are recognized for access.
To achieve this, cutting-edge algorithms and sensors are utilized to distinguish real fingerprints from replicas, adding layers of security against unauthorized entry attempts. By incorporating these anti-spoofing measures, the garage door opener system becomes more resilient to unauthorized access, providing users with peace of mind regarding the protection of their property.
These measures go beyond traditional security methods, offering a sophisticated solution to prevent unauthorized individuals from gaining access to the garage. Overall, the integration of anti-spoofing technology into fingerprint garage door openers enhances their security capabilities, making them a reliable and secure choice for homeowners seeking advanced access control mechanisms.
Remote Access Security Features
Remote access security features in fingerprint garage door openers employ advanced biometric authentication to ensure only authorized fingerprints can trigger the garage door opening remotely. This technology adds a robust layer of protection, preventing unauthorized access to the garage. By requiring a unique fingerprint scan for remote access, these systems effectively thwart unauthorized entry attempts. The table below highlights the key aspects of remote access security features in fingerprint garage door openers:
| Feature | Description |
|---|---|
| Biometric Security | Utilizes fingerprints to authenticate and allow access to the garage |
| Control Panel Access | Some systems offer remote access through a control panel inside the garage |
| Garage Door Opening | Enables users to open the garage door remotely with authorized fingerprints |
| Secure Access | Ensures only authorized individuals have access to the garage |
These security measures provide peace of mind by enhancing the overall security of your garage door system.
Frequently Asked Questions
How Secure Are Keypad Garage Door Openers?
Keypad garage door openers offer a secure method of accessing garages without keys or remotes. Users can create personalized PIN codes for entry, adding an extra layer of security.
These systems can store multiple access codes, making it easy to manage authorized users. The convenience of keypad entry eliminates the risk of lost or stolen keys.
Keypad garage door openers are cost-effective and dependable security solutions for modern homes.
Are Smart Garage Door Openers Secure?
We've explored the security of smart garage door openers. These systems provide advanced protection through biometric authentication, ensuring only authorized users can access the garage.
Integration with SmartThings offers tailored security solutions, leveraging fingerprint readers for keyless entry.
With these features, smart garage door openers enhance security measures, making them a reliable choice for safeguarding your property.
How Does a Fingerprint Door Lock Work?
Fingerprint door locks work by scanning and storing unique fingerprint patterns as access credentials. These locks utilize biometric technology to authenticate users based on their fingerprints, which are highly secure due to their uniqueness.
When a user tries to gain entry, the lock compares the scanned fingerprint with stored data to either grant or deny access. This method offers convenience and enhanced security compared to traditional key-based or code-based locks.
How Can I Make My Garage Door More Secure?
To enhance our garage door security, we prioritize utilizing advanced biometric technology like fingerprint locks. These locks provide exclusive access control and deter unauthorized entry effectively.
Conclusion
In conclusion, the fingerprint garage door opener's security is bolstered by advanced encryption technology, biometric authentication processes, secure data storage mechanisms, anti-spoofing measures, and remote access security features.
Like a fortress guarded by vigilant sentinels, these sophisticated security measures ensure that only authorized individuals can access the garage, providing peace of mind and protection for homeowners.
The integration of biometric locks with existing security systems creates a robust defense against unauthorized access, making the fingerprint garage door opener a secure and convenient choice for modern homes.
- About the Author
- Latest Posts
Introducing Ron, the home decor aficionado at ByRetreat, whose passion for creating beautiful and inviting spaces is at the heart of his work. With his deep knowledge of home decor and his innate sense of style, Ron brings a wealth of expertise and a keen eye for detail to the ByRetreat team.
Ron’s love for home decor goes beyond aesthetics; he understands that our surroundings play a significant role in our overall well-being and productivity. With this in mind, Ron is dedicated to transforming remote workspaces into havens of comfort, functionality, and beauty.

Are you fed up with inconsistent heating and cooling throughout your house? Look no further – we have the perfect solution for you!
In this guide, we will walk you through 9 simple steps to resolve this common HVAC issue.
You may not know this, but there are various factors that can contribute to uneven temperatures throughout your home. By following our expert advice, you’ll be able to identify and address these issues like a pro.
From checking air filters and inspecting ductwork for leaks to adjusting thermostat settings and considering a zoning system installation, we’ve got you covered.
Say goodbye to hot and cold spots, and say hello to a perfectly balanced indoor climate.
Get ready to master your HVAC system and enjoy ultimate comfort all year round!
Key Takeaways
- Regular maintenance and inspection, such as checking air filters and inspecting ductwork, can help identify and resolve issues that may be causing uneven heating and cooling.
- Proper insulation is important for maintaining temperature control and reducing heat transfer, which can help address uneven heating and cooling.
- Adjusting thermostat settings, including temperature zoning and fan speed, can help achieve more even temperature distribution throughout the space.
- Upgrading insulation materials and adding insulation to attics, walls, and floors can improve energy efficiency and create a more comfortable living environment by addressing uneven heating and cooling.
Check Air Filters
We should start by checking our air filters to resolve uneven HVAC heating and cooling. Air filter maintenance is essential for proper functioning of your HVAC system. Over time, air filters accumulate dust, dirt, and other particles, which can obstruct the airflow and compromise the efficiency of the system. To maintain optimal performance, it’s recommended to replace air filters regularly, typically every 1 to 3 months, depending on usage and the type of filter. Neglecting filter replacement can result in reduced airflow, increased energy consumption, and even system breakdowns.
To check your air filters, locate the filter compartment, usually found near the air handler or furnace. Turn off the system before removing the filter. Inspect the filter for dirt and debris accumulation. If the filter appears dirty or clogged, it’s time for a replacement. When replacing the filter, ensure you select the correct size and type for your HVAC system. High-efficiency filters may provide better air quality, but they may also restrict airflow if not compatible with your system. Consult the manufacturer’s recommendations or seek professional advice if unsure.
By regularly maintaining and replacing your air filters, you can improve the performance and longevity of your HVAC system. Moreover, addressing air filter issues is just the first step towards achieving balanced heating and cooling.
Now, let’s move on to the next section and inspect the ductwork for leaks.
Inspect Ductwork for Leaks
Now let’s examine the ductwork for any potential leaks. Inspecting the ductwork thoroughly is crucial in resolving uneven HVAC heating and cooling. Leaky ducts can lead to significant energy loss and reduced system efficiency, resulting in uneven temperature distribution throughout your home or building.
To inspect the ductwork, start by visually examining the ducts for any visible signs of damage or disconnection. Look for loose connections, holes, cracks, or gaps in the ducts. Pay close attention to joints, bends, and areas where the ducts connect to the registers or air handler.
After a visual inspection, it’s important to perform a more detailed assessment using ductwork repair techniques. One effective method is the smoke test, where smoke is blown into the ducts to identify any leaks. Another technique involves using an infrared camera to detect temperature variations along the ducts, indicating potential air leaks.
Once the leaks are identified, ductwork repair techniques can be employed to fix them. These techniques may include sealing the leaks with duct tape or mastic sealant, or replacing damaged sections of the ductwork altogether.
Balance Air Registers
To achieve optimal HVAC performance and resolve uneven heating and cooling, it’s essential to balance the air registers throughout your home or building. Proper airflow balance and register placement play a crucial role in maintaining a comfortable indoor environment. Here are three key considerations to keep in mind:
- Evaluate register locations: Assess the placement of air registers in each room to ensure they’re positioned strategically. Ideally, registers should be located near windows or exterior walls to promote efficient air circulation. Additionally, ensure that furniture or obstructions aren’t blocking the registers, as this can impede airflow.
- Adjust damper settings: Most air registers are equipped with dampers that allow you to control the amount of air flowing into a room. By adjusting the damper settings, you can redirect airflow to areas that require more heating or cooling. This helps to balance the temperature throughout your home or building.
- Consider zoning systems: If you have a larger space or multiple floors, implementing a zoning system can further enhance airflow balance. This system allows you to divide your home into different zones, each with its own thermostat and separate control over airflow. By individually regulating the temperature in each zone, you can optimize comfort and energy efficiency.
Clean and Maintain Outdoor Unit
After evaluating register locations and adjusting damper settings, it’s important to clean and maintain the outdoor unit of your HVAC system to ensure optimal performance. Outdoor unit maintenance plays a crucial role in the overall functionality and efficiency of your HVAC system. Neglecting proper cleaning and maintenance can lead to common maintenance mistakes that can impact the system’s performance and lifespan.
Regularly cleaning the outdoor unit is essential to remove dirt, debris, and leaves that can accumulate on the unit’s coils, fins, and fan blades. These contaminants can hinder proper airflow and reduce the unit’s efficiency. Using a soft brush or vacuum cleaner, gently remove any debris from the fins and coils. Be cautious not to damage the delicate fins during the cleaning process.
Another important aspect of outdoor unit maintenance is inspecting and cleaning the condenser coils. Over time, these coils can become dirty and clogged, affecting the unit’s ability to transfer heat. Use a coil cleaner or a mild detergent mixed with water to clean the coils, ensuring they’re free from dirt and grime.
Additionally, it’s crucial to trim any vegetation or overgrown plants around the outdoor unit. Plants or shrubs too close to the unit can obstruct airflow and impede proper heat dissipation. Maintain a clearance of at least two feet around the unit to allow adequate airflow and prevent any potential damage.
Ensure Proper Insulation
Proper insulation plays a crucial role in maintaining temperature control within a building. It helps to prevent heat transfer, ensuring that the desired temperature is maintained throughout the space.
Inadequate insulation can lead to uneven heating and cooling, as well as increased energy consumption.
Insulation and Temperature Control
We frequently check and maintain proper insulation to ensure optimal temperature control in our HVAC system. Insulation plays a crucial role in maintaining a consistent and comfortable temperature inside our homes. Here are three key benefits of proper insulation:
- Energy efficiency: Proper insulation helps to reduce heat transfer between the interior and exterior of our home. By minimizing the amount of heat that escapes during winter and enters during summer, we can significantly reduce our energy consumption. This not only lowers our utility bills but also reduces our carbon footprint.
- Improved comfort: Good insulation ensures that the temperature remains consistent throughout our living spaces. It prevents drafts, cold spots, and heat loss, creating a more comfortable environment for us and our families.
- Noise reduction: Insulation also acts as a sound barrier, reducing the transmission of noise from outside to inside our homes. This helps create a quieter and more peaceful living environment.
Proper insulation is crucial for achieving efficient temperature control and overall comfort in our HVAC system. By ensuring that our homes are adequately insulated, we can enjoy the benefits of energy efficiency, improved comfort, and reduced noise levels.
Importance of Insulation
Ensuring proper insulation is an essential step in resolving uneven HVAC heating and cooling. Insulation acts as a barrier that prevents the transfer of heat between the inside and outside of a building. By installing the right type of insulation, you can create a more consistent and comfortable indoor environment. There are several types of insulation available, including fiberglass, cellulose, and spray foam. Each type has its own benefits and considerations, such as cost, R-value, and installation requirements.
To emphasize the importance of insulation, let’s take a look at the benefits it provides:
| Benefits of Insulation |
|---|
| Reduced energy costs |
| Improved comfort |
| Enhanced indoor air quality |
Insulation helps to reduce energy costs by minimizing heat loss or gain, allowing your HVAC system to work more efficiently. It also improves comfort by maintaining a more stable temperature throughout your home. Additionally, insulation can contribute to better indoor air quality by reducing the infiltration of outside pollutants. Therefore, it is crucial to ensure that your building has proper insulation to achieve optimal HVAC performance and overall comfort.
Adjust Thermostat Settings
To resolve uneven HVAC heating and cooling, there are several points to consider when adjusting thermostat settings.
One technique is temperature zoning, which allows for different temperatures in different areas of the house.
Adjusting the fan speed can also help distribute air more evenly.
Additionally, upgrading insulation can prevent heat loss or gain, improving overall temperature control.
Temperature Zoning Techniques
By adjusting thermostat settings, we can effectively implement temperature zoning techniques to address uneven HVAC heating and cooling. Here are three temperature zoning techniques that can help optimize temperature control and improve energy efficiency:
- Programmable Thermostats: By setting different temperature zones throughout your home or building, programmable thermostats allow you to customize heating and cooling schedules based on occupancy patterns. This ensures that rooms are only heated or cooled when needed, resulting in energy savings.
- Zone Dampers: Zone dampers are installed within the ductwork of a HVAC system to control the airflow to different areas or zones. By adjusting the dampers, you can direct more heated or cooled air to specific zones, ensuring even temperature distribution and comfort throughout the space.
- Smart HVAC Systems: Smart HVAC systems use sensors and advanced algorithms to monitor and adjust temperature settings based on occupancy, weather conditions, and user preferences. These systems can automatically adapt to changing conditions, optimizing energy usage and providing personalized comfort.
Implementing these temperature zoning techniques can help resolve uneven HVAC heating and cooling, providing better temperature control and improving energy efficiency.
Fan Speed Adjustment
We can optimize temperature control and improve energy efficiency by adjusting the thermostat settings for fan speed. Fan speed optimization is an effective way to ensure an even distribution of conditioned air throughout your home. By controlling the fan speed, you can regulate the amount of air being circulated, preventing hot or cold spots. Adjusting the fan speed can also help reduce energy consumption and lower utility bills. Here is a table outlining the different fan speed settings and their corresponding benefits:
| Fan Speed Setting | Benefits |
|---|---|
| Low | Energy efficiency, reduced noise |
| Medium | Balanced comfort and energy usage |
| High | Rapid cooling or heating, improved air circulation |
Consider Insulation Upgrades
To further enhance the efficiency of our HVAC system, it’s important to consider insulation upgrades and adjust the thermostat settings. Insulation plays a crucial role in maintaining the desired temperature inside our homes and preventing heat loss or gain. Here are three key reasons why insulation upgrades contribute to improved energy efficiency:
- Enhanced Insulation Effectiveness: Upgrading insulation materials, such as adding insulation to attics, walls, and floors, can significantly improve their effectiveness in preventing heat transfer. This helps to maintain a consistent temperature throughout the house and reduces the workload on the HVAC system.
- Reduced Energy Consumption: By improving insulation, we can minimize the amount of energy required for heating or cooling our homes. This leads to lower utility bills and reduces our carbon footprint.
- Increased Comfort: Proper insulation ensures a more comfortable living environment by minimizing drafts, cold spots, and temperature fluctuations. It allows our HVAC system to operate more efficiently, providing consistent heating and cooling throughout the day.
Consider Zoning System Installation
When addressing the issue of uneven HVAC heating & cooling, it is important to consider the installation of a zoning system. A zoning system allows for the division of a home into different zones, each with its own temperature control. This ensures that each zone receives the appropriate amount of heating or cooling, resulting in a more comfortable living environment and potentially reducing energy costs.
One of the main benefits of a zoning system is the ability to customize the temperature in different areas of the home. This is especially useful in larger homes or multi-story buildings where different areas may have varying temperature needs. By installing a zoning system, homeowners can avoid wasting energy by heating or cooling unoccupied rooms.
Another advantage of a zoning system is the potential for energy savings. With traditional HVAC systems, the entire home is heated or cooled to the same temperature, even if certain areas don’t require it. By only heating or cooling the zones that are in use, a zoning system can help reduce energy consumption and lower utility bills.
However, it is important to consider the costs associated with installing a zoning system. The upfront investment can be significant, as it involves installing dampers and separate thermostats for each zone. Additionally, professional installation may be required, adding to the overall cost.
In summary, a zoning system offers the benefits of customizable temperature control and potential energy savings. While the initial costs may be higher, the long-term benefits make it a worthwhile consideration for addressing uneven HVAC heating & cooling.
| Zoning System Benefits | Zoning System Costs |
|---|---|
| Customizable temperature control | Significant upfront investment |
| Energy savings | Professional installation may be required |
| More comfortable living environment | Additional costs for dampers and thermostats |
Schedule Regular HVAC Maintenance
Regular HVAC maintenance is essential for ensuring optimal performance and addressing any issues that may cause uneven heating and cooling. By scheduling regular maintenance, you can improve the efficiency of your HVAC system and prevent potential problems from arising. Here are three reasons why regular maintenance is crucial:
- Preventive Maintenance: Regular HVAC maintenance allows technicians to identify and address any potential issues before they become major problems. This helps to avoid unexpected breakdowns and costly repairs, ensuring that your system operates smoothly.
- Improved Efficiency: Over time, HVAC systems can accumulate dirt, dust, and debris, which can hinder their performance and reduce their efficiency. Regular maintenance includes cleaning vital components, such as air filters and coils, to ensure proper airflow and maximize energy efficiency.
- Extended Lifespan: Just like any other mechanical system, regular maintenance can extend the lifespan of your HVAC system. By keeping all components in good working condition, you can prolong the life of your equipment, saving you money on premature replacements.
Consult a Professional for Further Assistance
After scheduling regular HVAC maintenance, we can consult a professional for further assistance with resolving uneven heating and cooling. While regular maintenance can help prevent issues, there may be instances where professional recommendations and troubleshooting tips are needed to address specific problems. A professional can provide expert advice and guidance based on their knowledge and experience in HVAC systems.
When consulting a professional, it’s important to provide them with detailed information about the issue you’re experiencing. This can help them diagnose the problem more accurately and provide targeted solutions. They may also perform additional tests and inspections to identify any underlying issues that may be causing the uneven heating and cooling.
Professional recommendations may include adjustments to the HVAC system settings, such as thermostat calibration or airflow adjustments. They may also suggest repairs or replacements of faulty components, such as ductwork or air filters. In some cases, they may recommend upgrading the HVAC system to a more efficient model to improve overall performance and energy efficiency.
Troubleshooting tips provided by professionals can help you address minor issues on your own. This may include checking and cleaning air vents, ensuring proper insulation in your home, and regular filter replacement.
Frequently Asked Questions
How Often Should I Replace My Air Filters?
We replace our air filters regularly to maintain optimal HVAC performance. The frequency of air filter replacement depends on various factors such as the type of filter and the air quality in our environment.
Regular air filter maintenance is crucial to ensure clean air circulation, prevent dust buildup, and maintain proper airflow. By following a recommended air filter replacement schedule, we can improve indoor air quality and prolong the lifespan of our HVAC system.
What Are the Signs of a Ductwork Leak?
When it comes to ductwork repair and troubleshooting HVAC systems, it’s important to recognize the signs of a ductwork leak. These leaks can lead to uneven heating and cooling throughout your home. Look out for increased energy bills, weak airflow, and inconsistent temperature control.
If you suspect a leak, it’s crucial to address it promptly to avoid further damage and inefficiency. Professional inspection and sealing of the ductwork are recommended steps to resolve this issue.
Can I Balance Air Registers Myself or Do I Need to Hire a Professional?
When it comes to DIY air register balancing, it’s important to consider the complexity and potential risks involved.
While some homeowners may feel confident in tackling this task themselves, it’s generally recommended to hire a professional HVAC technician.
A professional will have the knowledge, experience, and specialized tools to properly assess and adjust the airflow in your HVAC system.
This ensures a more accurate and effective solution to resolve uneven heating and cooling in your home.
How Can I Clean and Maintain My Outdoor Unit?
When it comes to cleaning and maintaining our outdoor unit, there are a few key cleaning techniques and troubleshooting tips we can follow.
Firstly, make sure to turn off the power to the unit before starting any cleaning.
Remove any debris or leaves from the unit using a brush or vacuum.
Next, gently hose down the unit to remove any dirt or grime.
Finally, check for any damaged or loose parts and make any necessary repairs.
Regular maintenance like this can help keep our outdoor unit running smoothly.
What Are the Benefits of Installing a Zoning System in My HVAC System?
Installing a zoning system in your HVAC system can have numerous benefits.
It allows for more precise control over the temperature in different areas of your home, ensuring comfort for everyone.
Additionally, it can help improve indoor air quality by minimizing the spread of allergens and pollutants.
By only heating or cooling the rooms that are being used, you can also save energy and reduce your utility bills.
What Are the Best Steps to Take to Resolve Uneven HVAC Heating & Cooling?
When dealing with uneven heating in your HVAC system, it’s important to follow expert tips for uneven heating to effectively resolve the issue. Start by checking for blocked vents, insulating ductwork, and ensuring proper maintenance of your HVAC system. Consulting a professional for a thorough inspection may also be necessary.
Conclusion
In conclusion, resolving uneven HVAC heating and cooling can be achieved by following these 9 simple steps.
- Check air filters.
- Inspect ductwork for leaks.
- Balance air registers.
- Clean and maintain the outdoor unit.
- Ensure proper insulation.
- Adjust thermostat settings.
- Consider zoning system installation.
- Schedule regular HVAC maintenance.
- Consult a professional for further assistance.
By following these steps, you can ensure a comfortable and efficient climate control system.
Don’t let your HVAC system play hot and cold with you, take control and enjoy the perfect temperature throughout your space.
- About the Author
- Latest Posts
Introducing Charles, the Editor in Chief at ByRetreat, whose passion for interior design and editorial excellence elevates every remote workspace to new heights. With his keen eye for detail, impeccable taste, and expertise in design, Charles brings a wealth of knowledge and creativity to the ByRetreat team.
As the Editor in Chief of a renowned lifestyle blog, Charles has honed his skills in curating captivating content and staying up-to-date with the latest trends in interior design. His deep understanding of aesthetics and the power of storytelling through design enables him to create remote workspaces that are not only visually stunning but also rich in personality and meaning.
Garage Door Opener
Replacing Raynor Garage Door Opener Parts: A How-To Guide
A comprehensive guide to replacing Raynor garage door opener parts, essential for troubleshooting and maintaining your garage door – find out how!

When it comes to keeping our garage door openers in top condition, sometimes parts need a little update. In our newest guide, we explain step-by-step how to replace Raynor garage door opener components with accuracy and simplicity.
From deciphering which parts may be causing issues to mastering the art of installation, this how-to guide is a must-have for anyone seeking to keep their garage in top shape.
Stay tuned for expert tips on troubleshooting, identifying faulty parts, and ensuring your garage door opener is running smoothly for the long haul.
Key Takeaways
- Ensure safety by disconnecting power before replacing parts.
- Use proper tools and refer to the manual for efficient replacement.
- Test the new components thoroughly for smooth operation.
- Maintain long-term opener health with regular maintenance and inspections.
Troubleshooting Common Raynor Opener Problems
When troubleshooting common Raynor opener problems, it's crucial to systematically address each potential issue to pinpoint the root cause efficiently.
Starting with the garage door opener, ensure that power sources are intact and functioning correctly. Check for any loose connections or tripped circuit breakers that may be impeding the opener's operation.
Next, inspect the remote control and replace the batteries if necessary to rule out any issues with the signal transmission. Align the safety sensors in the garage to guarantee they're facing each other and unobstructed, as misalignment can prevent the door from closing properly.
If the opener exhibits erratic movements or produces loud noises, consider adjusting the settings or lubricating the components to improve its performance. Refer to the opener's manual to understand any error codes displayed, aiding in the identification of specific problems.
Identifying Faulty Garage Door Opener Parts

To accurately identify faulty garage door opener parts, we must thoroughly inspect each component for signs of wear, malfunction, or damage that could be contributing to operational issues. When troubleshooting issues with a garage door opener, common problematic parts include the motor, circuit board, gears, sensors, belts, chains, and remote control. Noisy operation, slow opening or closing, or complete failure are indicators of potential faults within these components. Regular maintenance and inspection are crucial to prevent sudden failures and extend the lifespan of the garage door opener.
To pinpoint the specific faulty part, a systematic approach is necessary. Start by visually examining each part for any visible signs of wear or damage. Next, test the functionality of the opener to identify which component is causing the problem. Consulting the owner's manual or seeking professional assistance can provide valuable insights into diagnosing and replacing the faulty garage door opener parts accurately. By identifying and addressing these issues promptly, you can ensure smooth and efficient operation of your garage door opener.
Steps for Replacing Raynor Opener Components
For efficient replacement of Raynor opener components, meticulously identify the specific faulty part necessitating attention. Once you have pinpointed the problematic component, follow these steps to seamlessly replace it:
- Refer to the Raynor garage door opener manual: This document provides essential guidance on the disassembly and replacement procedures specific to your model.
- Ensure safety measures: Prioritize safety by disconnecting power to the opener before commencing any repair work to prevent accidents.
- Utilize the right tools: Employ tools like screwdrivers and pliers to carefully remove and replace the faulty opener part, ensuring a precise and secure fit.
- Thoroughly test the new component: Before reassembling the opener, verify the proper functioning of the replaced part through comprehensive testing to guarantee optimal performance.
Following these steps will facilitate a successful garage door repair, allowing you to restore your Raynor opener to full functionality efficiently.
Testing the Replaced Parts for Functionality

Testing the functionality of replaced Raynor garage door opener parts involves operating the door multiple times to ensure smooth and proper functioning. After replacing the parts, it's crucial to check for any unusual noises, jerky movements, or malfunctioning features that may indicate underlying issues.
Observing how the door responds to remote commands is essential to ensure that the opener parts are working accurately and promptly. Additionally, verifying the correct operation of safety features, such as auto-reverse mechanisms, is paramount for the safe use of garage doors.
A thorough final inspection should be conducted to confirm that the replaced parts have effectively addressed the previous problems and that the garage door opener is now operating smoothly and safely. By meticulously testing the functionality of the replaced parts, you can ensure the optimal performance of your Raynor garage door opener and maintain a secure and efficient operation of your garage doors.
Maintenance Tips for Long-Term Opener Health
After ensuring the functionality of replaced Raynor garage door opener parts, maintaining long-term opener health is crucial for optimal performance and safety. Here are some essential maintenance tips to keep your Raynor Garage door opener in top condition:
- Regular Lubrication: Keep chains, screws, and hinges well-lubricated to minimize friction and wear, ensuring smooth operation.
- Hardware Inspection: Periodically inspect and tighten all hardware on the opener to prevent loose parts that could lead to malfunctions.
- Clean Photo-eye Sensors: Ensure the photo-eye sensors are clean to prevent any obstructions that could affect the opener's safety features.
- Check Door Balance: Regularly check and adjust the balance of the garage door to reduce strain on the opener, extending its lifespan.
Frequently Asked Questions
Where Is the Model Number on a Raynor Garage Door Opener?
We can find the model number of a Raynor garage door opener on the motor housing or remote control. Look for a sticker or label on the opener unit itself. Having this number is crucial for ordering the correct replacement parts.
If the model number isn't on the opener, check the owner's manual or contact Raynor customer support. This information guarantees you get the right parts when fixing or replacing components of your Raynor garage door opener.
How Do I Know What Model Garage Door I Have?
To determine the model of your garage door, look for a label or tag with the manufacturer's information. Check the owner's manual or search online for images of Raynor garage doors.
Contact customer service for help using the serial number. Measure the door's dimensions against standard sizes for Raynor models. These methods will help identify the specific model of your garage door.
Are Raynor and Liftmaster Garage Door Openers the Same?
Like comparing apples to oranges, Raynor and Liftmaster garage door openers aren't the same. While both brands offer quality products, they've distinct differences in features, warranties, and compatibility with various garage door systems.
It's essential to research and select the brand that best fits your specific needs and preferences to ensure optimal performance and satisfaction with your garage door opener.
What Parts Come With a New Garage Door Opener?
When you purchase a new garage door opener, it typically includes the motor unit, remote controls, safety sensors, wall control panel, rail assembly, and mounting hardware.
The motor unit functions as the core component responsible for lifting and lowering the door, while the remote controls allow you to operate the opener from a distance.
Safety sensors detect obstructions for safe operation, and the wall control panel provides convenient access from inside the garage.
Conclusion
After following our step-by-step guide to replacing Raynor garage door opener parts, you'll be amazed at how simple and cost-effective DIY repairs can be.
By identifying faulty components, performing the replacement process, and testing for functionality, you'll have your garage door opener running smoothly in no time.
Remember to regularly maintain your opener for long-term health and enjoy the satisfaction of a job well done.
Happy repairing!
- About the Author
- Latest Posts
Introducing Ron, the home decor aficionado at ByRetreat, whose passion for creating beautiful and inviting spaces is at the heart of his work. With his deep knowledge of home decor and his innate sense of style, Ron brings a wealth of expertise and a keen eye for detail to the ByRetreat team.
Ron’s love for home decor goes beyond aesthetics; he understands that our surroundings play a significant role in our overall well-being and productivity. With this in mind, Ron is dedicated to transforming remote workspaces into havens of comfort, functionality, and beauty.
-

 Vetted2 weeks ago
15 Best Drip Irrigation Systems to Keep Your Garden Thriving
-

 Vetted2 days ago
15 Best Sports Laundry Detergents for Keeping Your Activewear Fresh and Clean
-

 Vetted4 days ago
15 Best Tall Toilets for Seniors That Combine Comfort and Safety
-

 Vetted1 week ago
15 Best Dish Scrubbers to Keep Your Kitchen Sparkling Clean
-

 Beginners Guides3 weeks ago
Designing Your Retreat Center – Essential Tips
-

 Vetted3 weeks ago
15 Best Tile Adhesives for Outdoor Use – Top Picks for Durable and Weather-Resistant Installations
-

 Beginners Guides3 weeks ago
Are Retreats Profitable
-

 Decor1 week ago
What Is Eclectic Home Decor


