Beginners Guides
Can You Use Milk in Pancake Mix

Have you ever wondered if you can use milk instead of water in pancake mix?
The answer might surprise you. While some people swear by using water for their pancakes, using milk can actually provide a richer, creamier texture and add a subtle hint of sweetness to your pancakes.
But before you reach for the milk, there are a few things to consider.
Key Takeaways
- Milk enhances the overall texture and flavor of pancakes.
- Milk provides a moist and rich pancake.
- Milk is an excellent source of calcium for strong bones and teeth.
- Milk may not be suitable for lactose intolerant individuals or vegans, but alternatives like almond milk, soy milk, or oat milk can be used.
Benefits of Using Milk in Pancake Mix
When using milk in pancake mix, it enhances the overall texture and flavor, resulting in a more moist and rich pancake. The nutritional benefits of incorporating milk into pancake batter are significant.
Milk is an excellent source of calcium, which is essential for maintaining strong bones and teeth. Additionally, it provides a good amount of protein, necessary for muscle repair and growth. These nutritional elements contribute to the overall health value of the pancake, making it a more wholesome breakfast option.
Furthermore, the flavor enhancement achieved by using milk is noteworthy. Milk adds a subtle creamy undertone to the pancake, elevating its taste profile. The natural sugars present in milk also contribute to a slightly sweet flavor, reducing the need for excessive amounts of added sugar. This results in a more balanced and enjoyable culinary experience.
Potential Drawbacks of Using Milk

What are the potential drawbacks of using milk in pancake mix, and how do they affect the overall quality and nutritional composition of the pancakes?
When using milk in pancake mix, there are several potential drawbacks that should be considered:
- Lactose Intolerance: Milk contains lactose, a natural sugar that some individuals have difficulty digesting. For those with lactose intolerance, using milk in pancake mix may lead to digestive discomfort or other symptoms.
- Consistency: The use of milk can affect the consistency of the pancake batter. Depending on the fat content of the milk, the pancakes may turn out denser or lighter than desired.
- Nutritional Composition: While milk adds calcium and protein to the pancake mix, it also contributes to the overall calorie and fat content. For those seeking a lower calorie or lower fat option, using milk may not align with their dietary preferences.
- Alternatives: There are alternative liquids such as water, buttermilk, or plant-based milk substitutes like almond milk or soy milk that can be used in pancake mix. These alternatives can address some of the drawbacks associated with using milk while still providing a liquid base for the batter.
Considering these drawbacks, it's important to carefully evaluate the use of milk in pancake mix and explore alternative options to achieve the desired pancake consistency and nutritional composition.
Tips for Using Milk in Pancake Mix
To enhance the texture and flavor of pancakes, incorporating milk into the mix has been a common practice among home cooks and professional chefs alike. When using milk in pancake mix, it's important to consider milk alternatives for those with dietary restrictions or preferences. Popular milk alternatives such as almond milk, soy milk, or oat milk can be used as substitutes in pancake mix without significantly altering the taste or texture. These alternatives can offer a unique flavor profile and cater to individuals with lactose intolerance or dairy-free diets.
In addition to choosing the right milk alternative, mastering the mixing techniques is crucial for achieving the desired pancake texture. When using milk in pancake mix, it's essential to avoid overmixing the batter. Overmixing can lead to tough and dense pancakes due to the excess development of gluten in the flour. Instead, gently mix the ingredients until just combined to maintain a light and fluffy texture. Moreover, allowing the batter to rest for a few minutes before cooking can help the gluten relax, resulting in more tender pancakes.
How to Adjust Other Ingredients

Adjusting the proportions of flour and liquid in the pancake mix can significantly impact the texture and consistency of the final product. When it comes to adjusting other ingredients in your pancake mix, there are several factors to consider in order to achieve the desired results.
- Flour-to-Liquid Ratio: Adjusting the amount of flour and liquid in the mix can help achieve the desired consistency. Adding more flour will result in thicker pancakes, while adding more liquid will yield thinner pancakes.
- Sweeteners and Flavorings: Experimenting with different sweeteners such as sugar, honey, or maple syrup, as well as flavorings like vanilla extract or cinnamon, can enhance the overall flavor of the pancakes.
- Leavening Agents: Controlling the amount of leavening agents such as baking powder or baking soda can affect the fluffiness and rise of the pancakes.
- Salt: Adjusting the amount of salt can subtly influence the overall flavor profile of the pancakes.
- Incorporating Mix-ins: Adding ingredients like chocolate chips, blueberries, or nuts can't only enhance flavor but also add texture to the pancakes.
Conclusion: Should You Use Milk?
When considering the use of milk in pancake mix, it's important to understand its potential impact on the overall texture and flavor of the pancakes, building upon the adjustments made to other ingredients.
Using milk in pancake mix has both pros and cons. One of the main advantages is that milk adds richness and tenderness to the pancakes, resulting in a softer texture. Additionally, milk contributes to the Maillard reaction, enhancing the flavor and browning of the pancakes.
However, using milk may not be suitable for individuals with lactose intolerance or those following a vegan diet. In such cases, the best alternatives to using milk in pancake mix include plant-based milk such as almond milk, soy milk, or oat milk. These alternatives can provide similar richness and flavor while catering to dietary restrictions.
Ultimately, the decision to use milk in pancake mix depends on individual preferences and dietary considerations. While milk can enhance the texture and flavor of pancakes, it's important to consider the potential limitations and explore the best alternatives to achieve the desired results.
Frequently Asked Questions
Can You Use Alternative Milk Options in Pancake Mix, Such as Almond Milk or Soy Milk?
Yes, alternative milk options like almond or soy milk can be used in pancake mix.
Almond milk offers nutritional benefits like being low in calories and high in vitamin E, while soy milk provides a good source of protein.
These alternatives also introduce unique flavor profiles and can be seamlessly incorporated into various cooking techniques and recipe variations, catering to diverse dietary preferences and enhancing the overall pancake experience.
Are There Any Specific Types of Pancake Mixes That Work Best With Milk?
When it comes to the best pancake mix for buttermilk pancakes, we've found that certain types work exceptionally well with milk.
Our research-driven analysis of pancake mix recipes has led us to conclude that a mix with a higher protein content tends to yield superior results when combined with milk.
This combination enhances the texture and flavor of the pancakes, resulting in a more satisfying and indulgent breakfast experience.
Can You Use Flavored Milk, Such as Chocolate Milk, in Pancake Mix?
Yes, flavored milk, such as chocolate milk, can be used in pancake mix. However, it's important to consider the impact on pancake texture and sweetness levels.
When exploring milk alternatives, various dairy-free options can also be incorporated for those with dietary restrictions. Experimenting with different types of milk can provide unique flavor profiles and cater to individual preferences.
What Is the Shelf Life of Pancake Mix Once Milk Has Been Added?
Once milk is added to pancake mix, the shelf life decreases due to the perishable nature of milk. Proper storage conditions, such as refrigeration, can extend the shelf life, but it's best to use the mix within a few days.
For alternative ingredients, consider using buttermilk for a tangy twist. Experiment with recipe variations by adding vanilla extract for extra flavor.
Incorporating technical knowledge into cooking techniques can elevate the texture and taste of the pancakes.
Can You Use Milk Substitutes, Such as Water or Juice, in Place of Milk in Pancake Mix?
Yes, milk substitutes can be used in pancake mix. Some benefits of using milk substitutes include accommodating dietary restrictions and adding unique flavors to recipes.
When considering which milk substitute to use, it's important to consider the cooking techniques and how the substitution may affect the texture and flavor of the pancakes. Common substitution options for milk in pancake mix include almond milk, soy milk, and oat milk, each bringing its own unique qualities to the recipe.
:Can I Use Milk in Pancake Mix Instead of Water?
Yes, you can use milk in pancake mix instead of water for a richer and creamier texture. Using milk can add more flavor and protein to your pancakes, making them a delicious and nutritious breakfast option. Try using different types of milk, like almond or oat, for added variety.
Conclusion
After conducting thorough research, it's evident that using milk in pancake mix offers numerous benefits such as adding richness and flavor to the batter.
However, it's important to consider potential drawbacks such as a slight increase in calories and fat content. By adjusting other ingredients, such as reducing the amount of butter or oil, you can still enjoy delicious pancakes while using milk in the mix.
Ultimately, the choice to use milk in pancake mix is a personal preference based on individual dietary needs and taste preferences.
- About the Author
- Latest Posts
Introducing Ron, the home decor aficionado at ByRetreat, whose passion for creating beautiful and inviting spaces is at the heart of his work. With his deep knowledge of home decor and his innate sense of style, Ron brings a wealth of expertise and a keen eye for detail to the ByRetreat team.
Ron’s love for home decor goes beyond aesthetics; he understands that our surroundings play a significant role in our overall well-being and productivity. With this in mind, Ron is dedicated to transforming remote workspaces into havens of comfort, functionality, and beauty.
Beginners Guides
Shower Door Handle Height
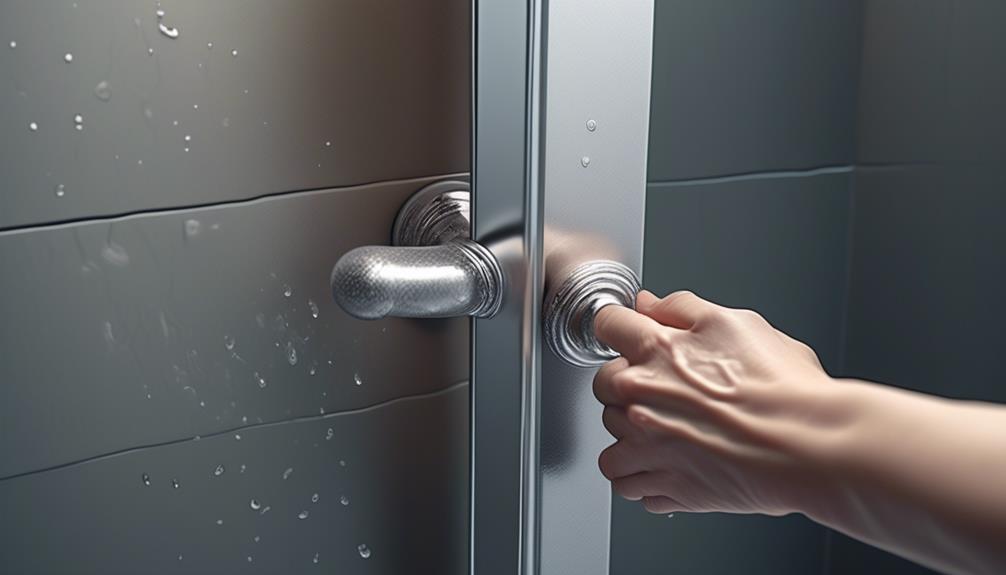
We have all had the frustrating experience of trying to reach for a shower door handle that is either too high or too low, turning a basic task into a difficult contortionist act.
The placement of shower door handles may seem like a trivial detail, but it can significantly impact our daily routine.
Have you ever wondered about the ideal height for shower door handles and how it can affect your overall shower experience?
Key Takeaways
- Proper handle height is essential for user comfort and a seamless shower routine.
- Incorrect handle placement can cause discomfort and strain on the shoulders and arms.
- Optimal handle height eliminates unnecessary stretching or bending.
- Safety, user comfort, and accessibility guidelines should be followed when determining handle placement.
Importance of Shower Door Handle Height
Why is the height of the shower door handle so crucial to a comfortable and functional shower experience?
Well, it all comes down to ergonomic design and user comfort. When the handle is positioned at the right height, it allows for easy accessibility and effortless operation.
Picture this: you step into the shower, ready to indulge in a revitalizing experience, and the handle is perfectly within reach, eliminating any unnecessary stretching or bending. This not only enhances user comfort but also promotes a seamless and enjoyable shower routine.
Consider the impact of an improperly placed handle. If it's too high, it may require uncomfortable reaching, causing strain on the shoulders and arms. Conversely, if it's too low, it could lead to awkward bending, impacting overall user comfort.
As advocates for mastery in design, we understand the significance of these seemingly small details. By prioritizing the optimal height of the shower door handle, we elevate the shower experience, ensuring that every moment spent in this space is nothing short of delightful.
After all, in the pursuit of excellence, every aspect matters.
Ergonomic Considerations for Handle Placement
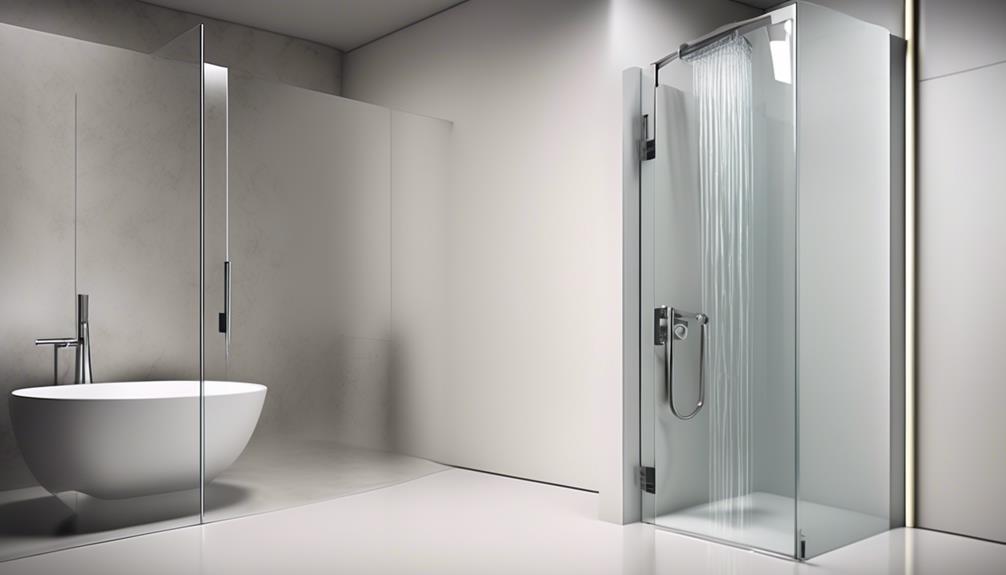
Positioning the shower door handle at the optimal height is vital for ensuring ergonomic comfort and effortless accessibility during every shower experience. When considering ergonomic considerations for handle placement, safety concerns and user comfort are paramount.
Safety concerns dictate that the handle should be installed at a height that minimizes the risk of slipping or falling in the shower, especially for individuals with limited mobility. This means positioning the handle within easy reach, allowing for a secure grip without the need to stretch or strain.
Additionally, user comfort is crucial for a pleasurable shower experience. The handle should be placed at a height that feels natural and comfortable for the majority of users, taking into account factors such as average shoulder height and arm reach.
Standard Height Guidelines for Shower Door Handles
Taking into account safety and comfort considerations, the standard height guidelines for shower door handles ensure an optimal placement that promotes effortless accessibility and ergonomic support. When it comes to the placement of shower door handles, there are several important factors to consider:
- Safety concerns: The standard height guidelines take into account the safety of all users, ensuring that the handle is positioned at a height that reduces the risk of accidents and injuries, especially for individuals with limited mobility.
- Accessibility: The guidelines aim to ensure that the handle is easily reachable for all users, including children and individuals with disabilities, promoting a more inclusive and user-friendly shower experience.
- Ergonomic support: By adhering to the standard height guidelines, the handle is positioned to provide ergonomic support, allowing for a comfortable grip and effortless operation, enhancing the overall shower experience.
- Aesthetic appeal: In addition to functionality, the guidelines also consider the visual appeal of the handle placement, ensuring that it complements the design of the shower enclosure while maintaining its practicality.
Adhering to these standard height guidelines ensures that the shower door handle isn't only safe and ergonomic but also aesthetically pleasing, providing a well-rounded and user-friendly experience.
Adjusting Handle Height for Accessibility
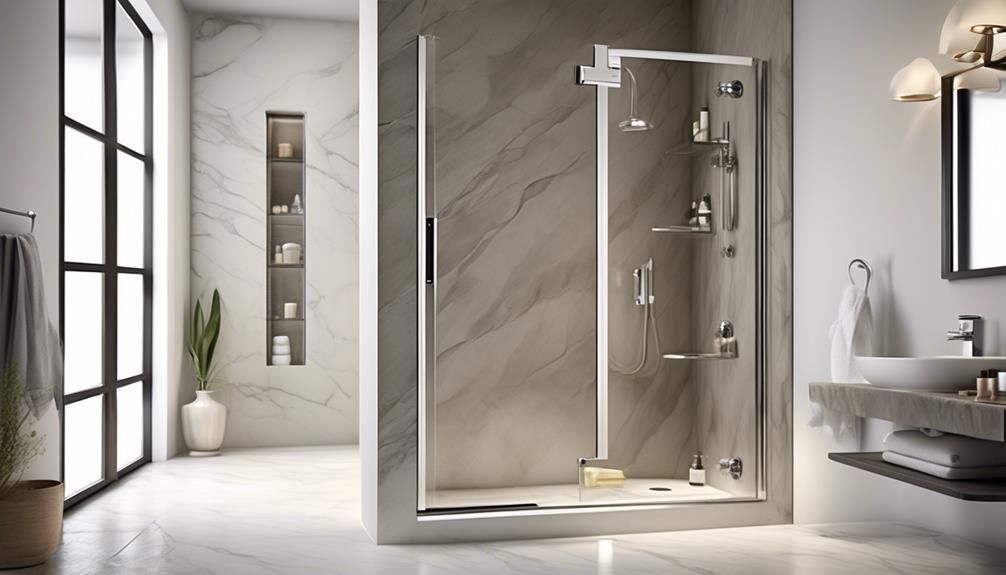
Adjusting the handle height for accessibility ensures that all users, regardless of mobility or stature, can comfortably and safely operate the shower door handle, building upon the standard guidelines for optimal usability.
Safety is paramount when considering handle height adjustments for accessibility. By positioning the handle within easy reach and grasp, the risk of accidents or strain is greatly reduced, promoting a secure and functional shower environment. It's crucial to prioritize user comfort without compromising design aesthetics. The handle's placement should blend seamlessly with the overall shower design, offering a harmonious balance between accessibility and style.
When addressing handle height adjustments for accessibility, it's essential to consider the diverse needs of users. Adhering to accessibility standards ensures that the handle is within reach for individuals with varying levels of mobility, promoting an inclusive and user-friendly shower experience. Additionally, these adjustments can be seamlessly integrated into the overall design, enhancing the aesthetic appeal of the shower space while prioritizing accessibility.
Ultimately, by carefully adjusting the handle height for accessibility, we can create a safe, comfortable, and aesthetically pleasing shower environment for all users.
Enhancing Shower Experience With Proper Handle Placement
Enhancing the shower experience with proper handle placement ensures a seamless blend of functionality and style, elevating the overall design and usability of the shower space.
When it comes to handle design, there are several key elements to consider:
- Ergonomic Grip: A well-designed handle should offer a comfortable and secure grip, enhancing user comfort and safety during use.
- Aesthetic Appeal: Properly placed handles can serve as stylish accents, adding a touch of elegance to the shower enclosure.
- Accessibility: Strategic handle placement enhances accessibility for users of all ages and abilities, promoting a more inclusive shower experience.
- Durability: The right handle placement not only improves usability but also ensures long-lasting performance, contributing to the overall quality of the shower space.
Frequently Asked Questions
What Materials Are Shower Door Handles Typically Made From, and How Do These Materials Affect the Handle's Placement and Height?
When discussing shower door handle materials, we consider their impact on handle placement.
The materials used can affect the handle's height, influencing user customization and potential height adjustment.
Different materials may require different mounting methods, which can impact the handle's position and height.
Users should consider the material's durability, aesthetics, and maintenance requirements when selecting handle materials, as these factors can also influence the handle's placement and height.
Are There Any Specific Building Codes or Regulations That Dictate the Height of Shower Door Handles in Different Regions or Countries?
We've researched international standards and regulations regarding shower door handle height. These standards focus on user accessibility and ergonomics, ensuring that the handle is conveniently placed for all users.
Building codes and regulations may vary by region or country, but the overarching goal is to accommodate individuals of different heights and abilities.
Can the Height of a Shower Door Handle Be Customized or Adjusted Based on the Individual User's Height or Needs?
We can definitely customize shower door handle heights to meet individual needs.
This allows for an ergonomic design, considering accessibility and user comfort.
Adjusting the handle height based on the user's height or specific requirements ensures a more functional and stylish approach.
It's crucial to consider these details to achieve mastery in the design and installation of shower door handles.
Are There Any Recommendations for the Type of Handle (E.G. Knob, Bar, or Lever) That Is Best for Different Heights and Abilities?
When choosing a shower door handle, it's important to consider the individual's height and abilities.
Lever handles offer benefits for people with limited mobility, providing easier grip and manipulation.
On the other hand, knob handles may have limitations for those with hand dexterity issues.
Understanding these differences can help in selecting the most suitable handle type based on the user's needs and preferences.
How Do Different Types of Shower Door Designs (E.G. Sliding, Hinged, or Pivot) Affect the Ideal Height for the Handle Placement?
When considering sliding door options, handle placement is crucial for ergonomic design.
Hinged doors offer flexibility in handle placement, ensuring accessibility and comfort.
It's important to understand how different door designs affect the ideal handle height.
Sliding doors require strategic handle placement to accommodate various users, while hinged doors offer more customization.
We must consider the impact of door type on handle placement to ensure a functional and stylish bathroom experience.
Can I Use a Different Handle Height for My Shower Door?
Yes, you can use a different handle height for your shower door. Just make sure it is comfortable for you to reach and operate easily. You can substitute water for milk in your recipes if you’re looking for a dairy-free alternative.
Conclusion
So, next time you reach for that shower door handle, just remember the importance of handle height.
It's not just about convenience, it's about creating a luxurious, spa-like experience.
Imagine reaching for the handle and feeling like royalty, with the perfect placement tailored to your needs.
It's the little things that can make a big difference in your daily routine.
So, go ahead, elevate your shower experience with the right handle height.
- About the Author
- Latest Posts
Introducing Ron, the home decor aficionado at ByRetreat, whose passion for creating beautiful and inviting spaces is at the heart of his work. With his deep knowledge of home decor and his innate sense of style, Ron brings a wealth of expertise and a keen eye for detail to the ByRetreat team.
Ron’s love for home decor goes beyond aesthetics; he understands that our surroundings play a significant role in our overall well-being and productivity. With this in mind, Ron is dedicated to transforming remote workspaces into havens of comfort, functionality, and beauty.
Beginners Guides
3 or 5 Blade Ceiling Fan
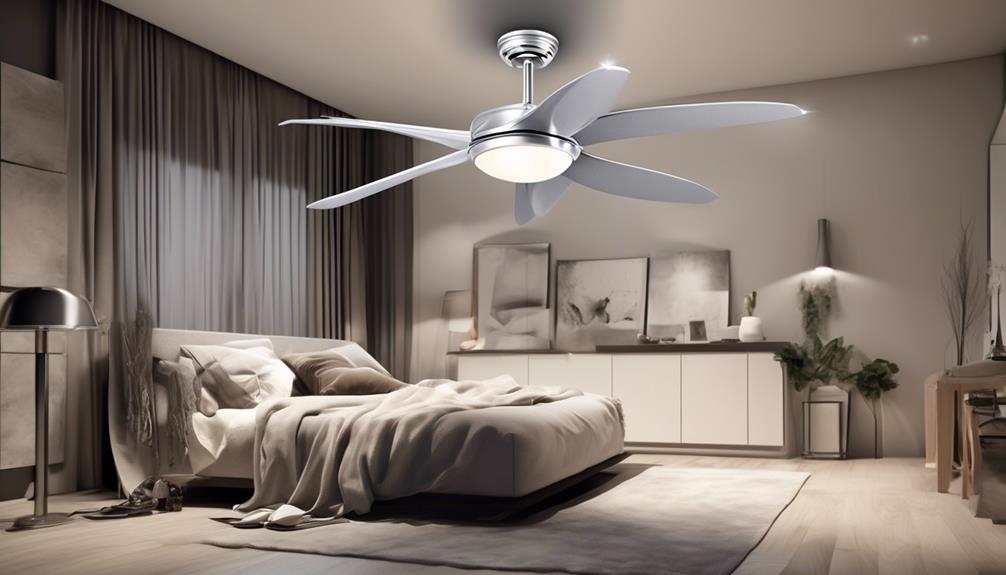
Have you ever considered whether the number of blades on a ceiling fan affects its performance? There is a popular belief that more blades result in better airflow, but is that truly the case?
As we explore the factors that influence the effectiveness of ceiling fans, we'll examine the impact of blade count on air circulation, energy consumption, noise level, and overall comfort.
By the end of this discussion, you might just rethink your assumptions about the ideal number of blades for your ceiling fan.
Key Takeaways
- The number of blades affects the air circulation efficiency of a ceiling fan.
- Fans with fewer blades tend to be quieter and more efficient in moving air.
- The blade count should be chosen based on the room size to ensure proper air movement.
- Consider personal design preferences and room decor when selecting the color and installation style of a ceiling fan.
Air Circulation Efficiency
We usually find that ceiling fans are most effective in improving air circulation efficiency when they're set to run counterclockwise during the summer months. This direction creates a downdraft, which produces a wind-chill effect, making the room feel cooler. Understanding airflow direction is crucial for maximizing the benefits of a ceiling fan. During the winter months, running the fan clockwise at a low speed can help redistribute warm air trapped near the ceiling, improving overall heating efficiency.
When considering air circulation efficiency, the material of the fan blades also plays a significant role. Most ceiling fans have blades made of wood, plastic, or metal. Each material has its advantages and drawbacks. Wooden blades, for example, are stylish and can provide a traditional aesthetic, but they may not be as durable as metal or plastic. On the other hand, metal blades are sturdy and easy to clean, but they can be noisier compared to wooden or plastic blades. Plastic blades are lightweight and often cost-effective, but they may not offer the same level of performance as wooden or metal blades.
Understanding the airflow direction and selecting the right blade material are essential factors in optimizing air circulation efficiency with a ceiling fan.
Energy Consumption and Cost
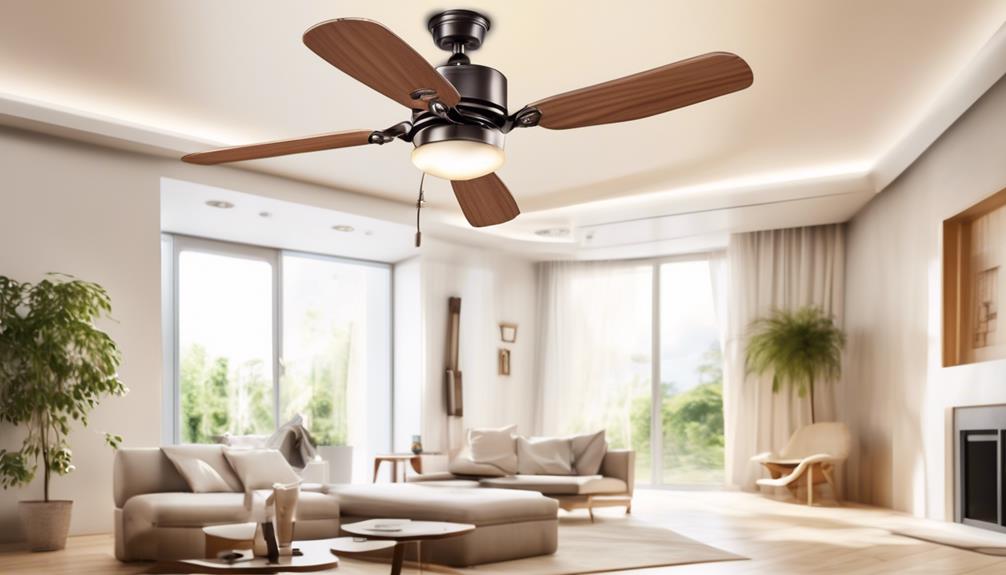
Investigating the energy consumption and associated costs of ceiling fans can help homeowners make informed decisions about their usage and potential savings. When considering the energy efficiency of ceiling fans, it's important to understand the long-term benefits and cost savings they can offer.
Here are some key points to consider:
- Energy Efficiency: Choosing a ceiling fan with an ENERGY STAR rating can significantly reduce energy consumption, leading to lower utility bills and cost savings over time.
- Cost Savings: Investing in a high-quality, energy-efficient ceiling fan may require a larger upfront cost, but the long-term savings on energy bills make it a financially wise decision.
- Environmental Impact: Opting for an energy-efficient ceiling fan contributes to a reduced carbon footprint and helps conserve energy resources, aligning with environmentally conscious choices.
- Long-Term Benefits: Energy-efficient ceiling fans not only provide immediate cost savings but also offer long-term benefits by extending the lifespan of the fan and reducing the need for frequent replacements.
- Smart Usage: Utilizing features such as adjustable speed settings and timers can further enhance energy efficiency and maximize cost savings.
Room Size and Blade Count

When selecting a ceiling fan, it's essential to consider the room size and the number of blades for optimal air circulation and cooling efficiency.
The size of the room determines the blade length needed for proper air movement. For rooms up to 75 square feet, fans with a blade span of 29 to 36 inches are ideal. Medium-sized rooms between 76 and 144 square feet require fans with a blade span of 36 to 42 inches. Larger rooms up to 225 square feet benefit from fans with a blade span of 44 inches or more.
Additionally, the number of blades on a fan can impact its performance. While more blades may seem more effective, it's not always the case. Fans with fewer blades tend to move air more efficiently and are generally quieter.
When considering the installation process, the number of blades can also affect the weight of the fan, making it easier or more challenging to install. Therefore, it's crucial to balance blade count with the room size and the installation process to ensure optimal air circulation and cooling efficiency.
Noise Level and Comfort
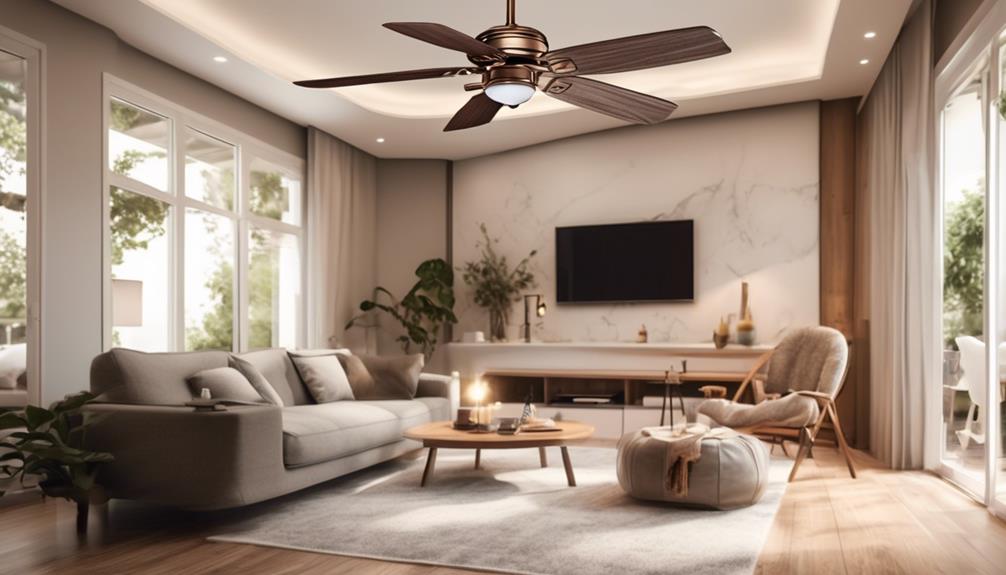
Considering the impact of blade count on fan performance, we can evaluate the noise level and comfort of the ceiling fan to ensure an optimal cooling experience in the room. When it comes to noise level, a ceiling fan with fewer blades tends to operate more quietly due to less air disturbance. This can significantly contribute to a peaceful environment, positively impacting sleep quality.
Comfort is also influenced by the fan's ability to circulate air effectively, which can be achieved with a well-designed 4 or 5 blade fan. Here are five key aspects to consider when evaluating noise level and comfort:
- Whisper-quiet Operation: A fan with fewer blades creates minimal noise, promoting tranquility in the room.
- Balanced Airflow: Optimal blade count ensures consistent and gentle airflow, enhancing comfort during hot days and nights.
- Improved Sleep Quality: Reduced noise level contributes to better sleep, enhancing overall well-being.
- Enhanced Relaxation: A quiet fan creates a serene atmosphere, promoting relaxation and comfort.
- Maximum Comfort: Proper blade count ensures an ideal balance between noise level and airflow, maximizing comfort in the living space.
Aesthetics and Design Preferences
Exploring various design options for ceiling fans allows us to enhance the aesthetic appeal of our living spaces while optimizing comfort and functionality. When considering aesthetics and design preferences, color options play a crucial role in ensuring that the ceiling fan seamlessly integrates with the overall decor of the room. Whether it's a sleek matte black finish for a modern look or a classic white for a more traditional feel, the color choice can significantly impact the visual impact of the ceiling fan.
Furthermore, the installation process is another aspect to consider when it comes to design preferences. Some may prefer a ceiling fan that seamlessly integrates into the ceiling without a visible downrod, creating a streamlined and minimalist look. On the other hand, others might prefer a more industrial or rustic aesthetic with a visible downrod for a statement piece in the room.
Considering these design preferences is essential to ensure that the ceiling fan not only complements the aesthetics of the space but also aligns with personal design preferences. By carefully selecting the color options and considering the installation process, we can elevate the overall design and functionality of our living spaces.
Frequently Asked Questions
Can the Fan Be Used in Outdoor Settings or Damp Locations?
Yes, the fan can be used in outdoor settings or damp locations. Our weatherproofing options ensure durability in these conditions.
Installation requirements are straightforward, making it easy to set up the fan for outdoor use.
The fan is designed to withstand the elements and provide optimal performance in outdoor environments.
Is the Fan Compatible With Remote Controls or Smart Home Automation Systems?
Yes, the fan is compatible with remote controls and smart home automation systems.
It's designed for energy efficiency and low noise levels, making it ideal for smart home integration.
Our product excels in remote compatibility and smart home automation, ensuring seamless control from anywhere.
Additionally, the fan's energy-efficient design and low noise levels enhance its performance, aligning with the demands of modern home automation systems.
Are There Options for Customizable Blade Finishes or Designs?
Are there options for customizable blade finishes or unique designs?
When it comes to blade finishes and designs, our fans offer a variety of customizable options, allowing you to personalize your fan to match your style and decor. The blade material is carefully selected for both aesthetics and energy efficiency.
Our fans provide a perfect blend of functionality and style, giving you the flexibility to create a truly unique and personalized fan for your home.
Does the Fan Come With a Warranty or Guarantee for Longevity and Performance?
We offer a longevity guarantee and performance warranty for our products.
It's essential to follow maintenance tips to ensure the fan's longevity and performance.
Additionally, our fans are designed with energy efficiency in mind. These features ensure that our fans not only provide optimal performance but also last for a long time.
We're committed to providing high-quality products that meet the needs of our customers.
Can the Fan Be Installed on Angled or Vaulted Ceilings?
Yes, the fan can be installed on angled ceilings and is compatible with vaulted ceilings.
The installation process for angled ceilings requires a special mounting kit, while for vaulted ceilings, an angled mounting bracket is needed to ensure proper installation.
It's important to follow the manufacturer's instructions carefully to ensure safe and secure installation on these types of ceilings.
Should I Choose a 3 or 5 Blade Ceiling Fan to Help Prevent Dust Buildup?
When deciding between a 3 or 5 blade ceiling fan, consider how the shape and angle of the blades affect air circulation. More blades provide better airflow, but also create more surface area for dust to collect. This is why fans collect dust, and why regular cleaning is important for preventing buildup.
Conclusion
In conclusion, whether we choose a 3 or 5 blade ceiling fan, we prioritize air circulation efficiency, energy consumption, room size, noise level, and aesthetics.
By considering these factors, we can maximize comfort and style while minimizing cost and environmental impact.
Ultimately, we seek the perfect balance of functionality and design in our ceiling fan choice.
- About the Author
- Latest Posts
Introducing Ron, the home decor aficionado at ByRetreat, whose passion for creating beautiful and inviting spaces is at the heart of his work. With his deep knowledge of home decor and his innate sense of style, Ron brings a wealth of expertise and a keen eye for detail to the ByRetreat team.
Ron’s love for home decor goes beyond aesthetics; he understands that our surroundings play a significant role in our overall well-being and productivity. With this in mind, Ron is dedicated to transforming remote workspaces into havens of comfort, functionality, and beauty.
Beginners Guides
Reset Carrier Furnace

As homeowners, we tend to overlook the convenience offered by our heating systems until they unexpectedly stop working. It can be annoying when our Carrier furnace breaks down, leaving us without heat. However, there are simple steps we can take to troubleshoot and possibly fix the problem.
In this discussion, we will explore the process of resetting a Carrier furnace, covering the common reasons why it may be necessary and the steps to take to get it up and running again.
So, if you've ever found yourself in the situation where your Carrier furnace seems to have gone on strike, stick around to discover the simple solutions to this common problem.
Key Takeaways
- Regular maintenance is important to prevent frequent resets of a Carrier furnace.
- Checking for power supply issues, such as tripped circuit breakers or loose electrical connections, is crucial.
- Performing a basic power cycle by turning off the power switch and allowing the system to restart can help troubleshoot errors.
- Accessing and using the reset button on the furnace's service panel is a step to take after addressing specific issues identified through error codes.
Understanding the Need to Reset
To understand the need to reset a Carrier furnace, it's essential to recognize the specific circumstances that may prompt this action. Understanding the reset process is crucial for maintaining the optimal performance of the furnace. One common reason for a reset is when the furnace experiences a sudden shutdown due to a power outage or a tripped circuit breaker. In such cases, resetting the furnace is necessary to restore its operation.
Importance of regular maintenance can't be emphasized enough. Neglecting regular maintenance can lead to issues that may require a reset. Accumulation of dirt and debris in the furnace components can cause overheating and automatic shutdown, necessitating a reset to resolve the issue. Additionally, irregular maintenance may lead to sensor malfunctions, which can also trigger the need for a reset.
It is important to note that while resetting the furnace may resolve immediate issues, it's imperative to address the root cause to prevent frequent resets. Regular maintenance, including cleaning, inspecting, and servicing the furnace, is vital to ensure its smooth operation and minimize the need for resets.
Checking for Power Supply Issues

When diagnosing issues with a Carrier furnace, it's crucial to first verify the availability of a consistent and adequate power supply to the unit. Here are the steps to check for power supply issues:
- Troubleshooting Thermostat
Ensure the thermostat is set to “heat” mode and the temperature is set higher than the current room temperature. Verify that the thermostat has power and the display is functioning properly. If the thermostat is battery-powered, replace the batteries to rule out power issues.
- Testing Electrical Connections
Turn off the power to the furnace at the circuit breaker. Check the furnace's electrical connections, including the power switch, circuit breaker, and fuse. Tighten any loose connections and replace any blown fuses. Use a multimeter to test for voltage at the furnace's terminal block to confirm the presence of power.
- Inspecting Power Source
Ensure that the furnace is receiving power from the electrical panel. Check the circuit breaker and reset it if necessary. If the furnace is connected to a power outlet, verify that the outlet is functioning by plugging in another device.
Performing a Basic Power Cycle
After verifying the availability of a consistent and adequate power supply to the Carrier furnace, the next step is to perform a basic power cycle to reset the system and potentially resolve any underlying issues. Performing maintenance on the furnace by carrying out a power cycle can help in troubleshooting errors and restoring the furnace to its optimal functionality. Follow the steps below to perform a basic power cycle:
| Steps | Instructions |
|---|---|
| 1. Turn off the power | Locate the power switch on the furnace and switch it off. Ensure that the furnace is completely powered down. |
| 2. Wait for 30 seconds | Allow the furnace to remain off for at least 30 seconds to ensure that all residual power is completely drained. |
| 3. Turn the power back on | After the 30 seconds have passed, switch the power back on. Wait for the system to fully restart and stabilize. |
Accessing and Using the Reset Button
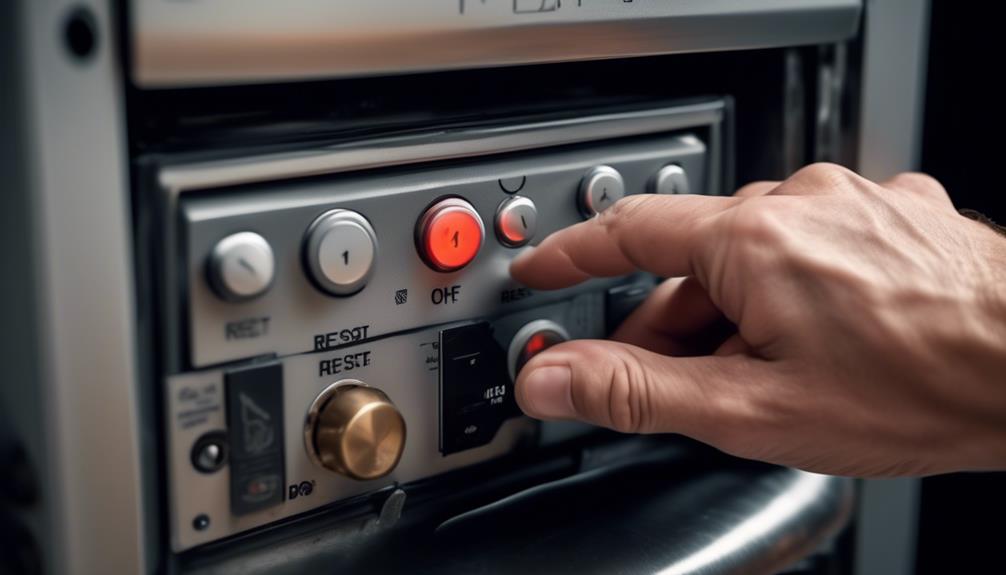
We can access the reset button on the Carrier furnace by locating the service panel and removing it to reveal the reset button. When using safety precautions, it's important to turn off the power to the furnace before accessing the reset button to avoid any electrical hazards.
Here's how we can access and use the reset button:
- Locating the reset button:
- With the power off, locate the service panel on the furnace.
- Remove the screws or fasteners holding the panel in place.
- Once the panel is removed, the reset button should be visible near the burner assembly.
- Identifying error codes:
- Before pressing the reset button, it's crucial to take note of any error codes displayed on the furnace's control board.
- Refer to the furnace's manual to interpret the error codes and understand the underlying issue.
- Resetting furnace operations:
- After identifying and addressing the issue indicated by the error codes, gently press the reset button.
- Turn the power back on and observe the furnace to ensure that it restarts and operates normally.
Troubleshooting Common Reset Problems
To troubleshoot common reset problems with the Carrier furnace, understanding the possible issues indicated by error codes is essential for effective resolution.
One common issue is a dirty air filter, which can restrict airflow and cause the furnace to overheat, triggering a reset. To address this, turn off the furnace, replace the filter, and reset the system.
Another frequent problem is a malfunctioning thermostat, leading to inaccurate temperature readings and improper furnace operation. Troubleshooting techniques for this include checking the thermostat settings, replacing the batteries, and ensuring it's correctly wired.
Additionally, clogged condensate lines may cause the furnace to shut down and require a reset. To resolve this, inspect the lines for blockages and clear them if necessary.
Furthermore, issues with the flame sensor, gas supply, or electrical connections can also lead to reset problems. Troubleshooting these requires inspecting and cleaning the flame sensor, ensuring the gas supply is uninterrupted, and checking for loose or damaged electrical connections.
Frequently Asked Questions
Can I Reset My Carrier Furnace Without Turning off the Power Supply?
We can't reset a Carrier furnace without turning off the power supply. However, for maintenance tips and troubleshooting, it's essential to ensure the power is off to prevent electrical hazards.
To improve energy efficiency, consider adjusting thermostat settings and scheduling regular maintenance. This can help identify any potential issues early, ensuring the furnace operates efficiently.
Always prioritize safety and follow the manufacturer's guidelines when performing any maintenance or troubleshooting tasks.
What Should I Do if the Reset Button on My Carrier Furnace Is Not Working?
If the reset button on your Carrier furnace isn't working, troubleshooting reset issues involves checking for any obstructions or damage.
One alternative to the reset button is to power off the furnace at the breaker switch for a few minutes and then switch it back on.
If the issue persists, it may be necessary to consult a professional technician to diagnose and repair the problem.
How Often Should I Need to Reset My Carrier Furnace?
We perform regular furnace maintenance to ensure the heating system functions optimally. This includes troubleshooting for any issues that may arise.
It's crucial for energy efficiency and to prevent frequent resets. Proper maintenance helps identify and address any potential problems before they escalate.
Will Resetting My Carrier Furnace Affect Any of the Settings or Programming?
Resetting the Carrier furnace won't affect thermostat settings or programming. However, it's crucial to ensure that maintenance is up to date to maintain energy efficiency. If you're troubleshooting issues, resetting the furnace can be a step in the process. Always refer to the user manual for specific instructions.
Regular maintenance and attention to thermostat settings are key to ensuring the system operates at its best.
Is There a Specific Time of Day That Is Best for Resetting My Carrier Furnace?
The best time for resetting a Carrier furnace is during periods of low energy demand, such as early morning or midday. This can help optimize energy efficiency and minimize temperature impact on your home.
It's also an ideal time for equipment maintenance and troubleshooting as it allows the system to recalibrate without disrupting regular usage patterns. By performing resets during these times, you can ensure optimal performance and minimize disruptions to your temperature control.
How Can I Reset My Carrier Furnace If I See Three Bars on the Dyson?
If you see three bars on the Dyson f three bars, it means there is a communication error between the thermostat and the furnace. To reset your Carrier furnace, locate the reset button on the furnace’s control panel and press it. Wait a few minutes before turning the furnace back on.
Conclusion
In conclusion, resetting a Carrier furnace is a simple yet crucial troubleshooting step for resolving issues with the system. By following the steps outlined in this article, you can easily identify and address power supply issues and reset the furnace to restore it to proper functioning.
Remember, when in doubt, 'don't throw the baby out with the bathwater' – take the time to troubleshoot and reset before considering more drastic measures.
- About the Author
- Latest Posts
Introducing Ron, the home decor aficionado at ByRetreat, whose passion for creating beautiful and inviting spaces is at the heart of his work. With his deep knowledge of home decor and his innate sense of style, Ron brings a wealth of expertise and a keen eye for detail to the ByRetreat team.
Ron’s love for home decor goes beyond aesthetics; he understands that our surroundings play a significant role in our overall well-being and productivity. With this in mind, Ron is dedicated to transforming remote workspaces into havens of comfort, functionality, and beauty.
-

 Vetted3 weeks ago
15 Best Contact Paper for Kitchen Cabinets to Elevate Your Home Decor
-

 Vetted1 week ago
15 Best Poe Cameras for Home Security – Reviews & Buying Guide
-

 Vetted4 weeks ago
15 Best Leather Restorer Products to Revive Your Furniture and Accessories
-

 Vetted3 weeks ago
15 Best Drain Snakes to Unclog Your Pipes Like a Pro
-

 Beginners Guides1 hour ago
I Inhaled Vinegar Fumes
-

 Beginners Guides2 weeks ago
Swinger Porch Light Color
-

 Vetted3 weeks ago
14 Best Stationery Brands for Your Next Writing Adventure
-

 Mardi Gras Decoration3 weeks ago
Why Does Hobby Lobby Not Do Mardi Gras?


