Decor
DIY Your Springtime Wreath With a Birdhouse in 7 Simple Steps
Create a charming springtime wreath featuring a birdhouse centerpiece in just 7 easy steps, with a dash of creativity and seasonal flair.
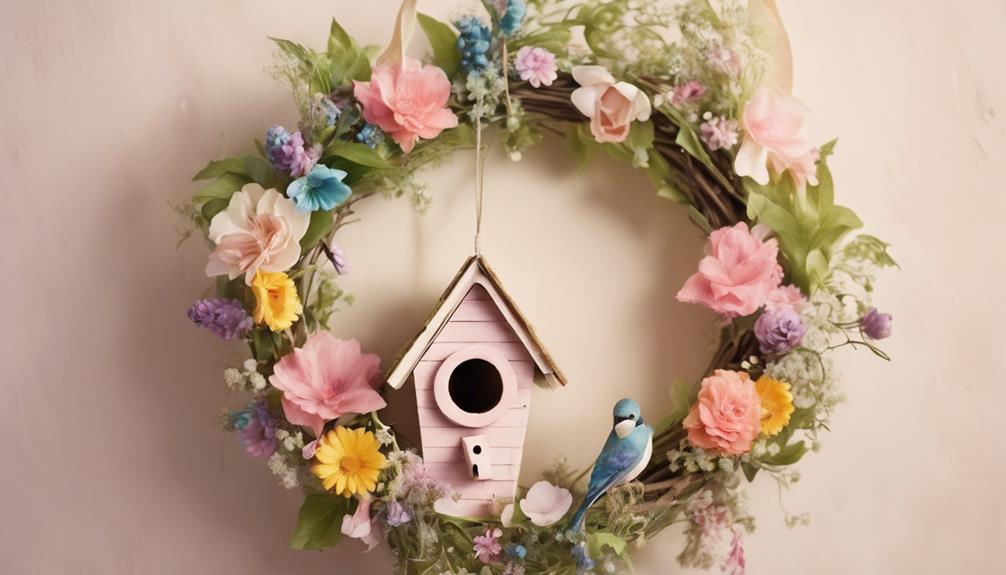
We're thrilled to embark on creating a stunning springtime wreath featuring a charming birdhouse as its centerpiece. To get started, we'll prepare a sturdy grapevine wreath base, carefully attaching the birdhouse off-center for visual appeal. Next, we'll add vibrant faux flowers around the birdhouse, followed by elegant ribbons and bows. We'll conceal hot glue spots with additional flowers or leaves, and incorporate textures like moss, twine, or burlap to enhance the seasonal theme. With a few final touches, our beautiful wreath will be ready to display. Let's delve into the details to bring this stunning DIY project to life.
Key Takeaways
• Prepare a sturdy grapevine wreath base in good condition to set a solid foundation for your springtime wreath design.
• Position a birdhouse off-center on the wreath base to create visual appeal and add depth with wooden stems if needed.
• Strategically place vibrant faux flowers around the birdhouse, securing them with hot glue, to create a beautiful floral arrangement.
• Embellish your wreath with ribbons and bows that complement the colors of your flowers, adding a focal point near the birdhouse.
• Conceal hot glue spots by placing additional flowers or leaves, and inspect your wreath from different angles for a flawless finish.
Prepare the Grapevine Wreath Base
As we begin crafting our springtime wreath, we select a sturdy grapevine wreath base that serves as a natural and rustic foundation for our creative vision. The grapevine wreath adds texture and dimension to our overall design, enhancing its visual appeal.
Before we start decorating, we make sure our wreath is in good condition, sturdy enough to hold our birdhouse and flowers. We choose a grapevine wreath that fits the scale of our design, ensuring a balanced and harmonious look. The versatility of the grapevine wreath allows us to express our creativity, serving as a backdrop for various decorative elements.
With our base ready, we're excited to start adding the birdhouse and flowers, bringing our springtime wreath to life. By starting with a solid foundation, we set ourselves up for success, and our wreath is sure to be a beautiful representation of the season.
With our grapevine wreath base prepared, we're ready to move on to the next step in creating our stunning DIY springtime wreath.
Attach the Birdhouse Securely
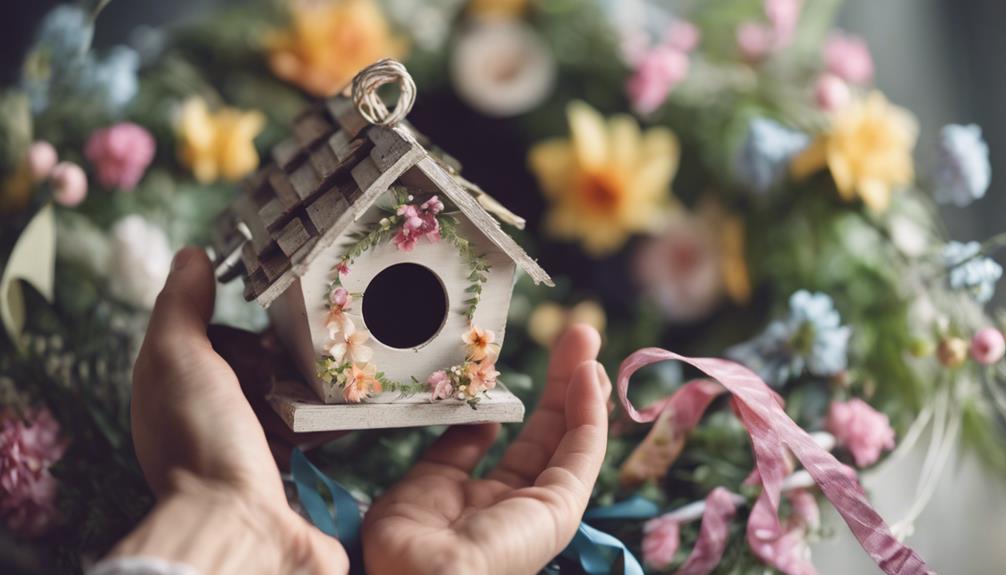
As we move forward with attaching the birdhouse securely to our wreath, we'll explore the key considerations that guarantee a sturdy and visually appealing result.
We'll examine the various birdhouse placement options that create a charming springtime look, discuss the secure attachment methods that prevent the birdhouse from toppling over, and weigh the pros and cons of different hanging hardware choices.
Birdhouse Placement Options
We position the birdhouse off-center on the wreath to create a visually appealing arrangement.
When it comes to birdhouse placement options, we consider a few factors to make sure our springtime wreath looks stunning.
We test the placement of the birdhouse before gluing to guarantee it fits well with the other elements on the wreath.
We also consider elevating the birdhouse using wooden stems to create depth and interest. This adds dimension to our wreath and draws the eye to the birdhouse.
We make sure the birdhouse is prominent but balanced with the other elements on the wreath. We don't want it to overpower the rest of the design.
By experimenting with different placement options, we can create a unique and alluring springtime wreath that showcases our creativity.
With a little patience and experimentation, we can achieve a beautiful arrangement that's sure to impress.
Secure Attachment Methods
We'll secure our birdhouse to the grape vine wreath using a hot glue gun, guaranteeing a sturdy attachment that can withstand outdoor conditions.
Before applying the hot glue, we'll position the birdhouse stably on the wreath to confirm it's perfectly aligned.
Next, we'll apply a generous amount of hot glue to the base of the birdhouse, making sure to cover the entire surface.
Then, we'll press the birdhouse firmly onto the wreath, applying gentle pressure to ensure it sticks securely.
We'll hold the birdhouse in place for a few seconds to allow the glue to set initially.
Finally, we'll let the hot glue fully dry and set before moving or hanging our wreath.
This secure attachment method will guarantee our birdhouse remains securely attached to the wreath, even in windy or rainy conditions.
Hanging Hardware Choices
Our birdhouse needs sturdy hanging hardware to securely attach it to the wreath, so we opt for D-ring hangers or heavy-duty wire that can support its weight and additional decorations. We want to make sure our birdhouse hangs straight and secure, so we'll choose the right hanging hardware for the job.
| Hanging Hardware | Description |
|---|---|
| D-Ring Hangers | Sturdy and reliable, perfect for heavier birdhouses |
| Heavy-Duty Wire | Strong and flexible, ideal for birdhouses with multiple decorations |
| Screws | Secure attachment method for hanging hardware |
| Nails | Alternative attachment method for hanging hardware |
We'll attach the hanging hardware securely to the back of the birdhouse using screws or nails, positioning it at the center or slightly above to guarantee it hangs straight. Before hanging the wreath, we'll test the stability of the hanging hardware to prevent any accidents. With the right hanging hardware, our birdhouse will be safely and securely attached to the wreath, ready to add a touch of springtime charm to our home.
Add Faux Flowers Around Birdhouse
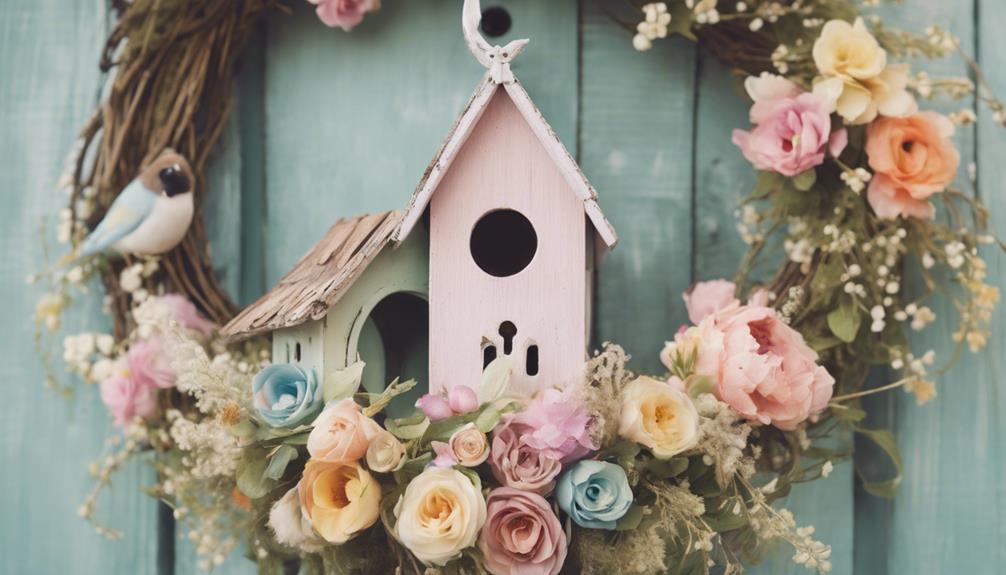
Now that our birdhouse is securely attached, we're ready to add some vibrant faux flowers around it to bring our springtime wreath to life.
To create a beautiful floral arrangement, we'll need to strategically place the flowers to highlight the birdhouse as the focal point while complementing its design.
Floral Arrangement Tips
As we surround the birdhouse with a medley of faux flowers, our springtime wreath begins to burst with vibrancy and life. The key to a beautiful floral arrangement lies in strategic placement and a mix of textures and sizes.
To create a stunning arrangement, follow these tips:
- Choose a variety of faux flowers in springtime colors like yellow, orange, and white to add vibrancy to the wreath.
- Mix different flower sizes and textures to create depth and interest in the floral design.
- Consider adding small greenery or leaves to fill in any gaps and complement the overall floral arrangement.
- Use hot glue to secure the faux flowers to the wreath base, ensuring they stay in place.
Birdhouse Blooming Beauty
We'll surround the birdhouse with an array of colorful faux flowers, carefully arranging them to create a lush, blooming effect. To achieve this, we'll use a mix of flower sizes and shapes to add dimension and interest to our wreath. We'll position them evenly around the birdhouse, ensuring a balanced and visually appealing arrangement. Securely attaching the flowers with hot glue will prevent them from falling off, allowing us to create a stunning floral arrangement.
As we arrange the flowers, we'll consider incorporating some greenery and foliage to complement them and enhance the natural look of our wreath. This will add depth and texture to our design, making it more visually appealing.
Embellish With Ribbons and Bows
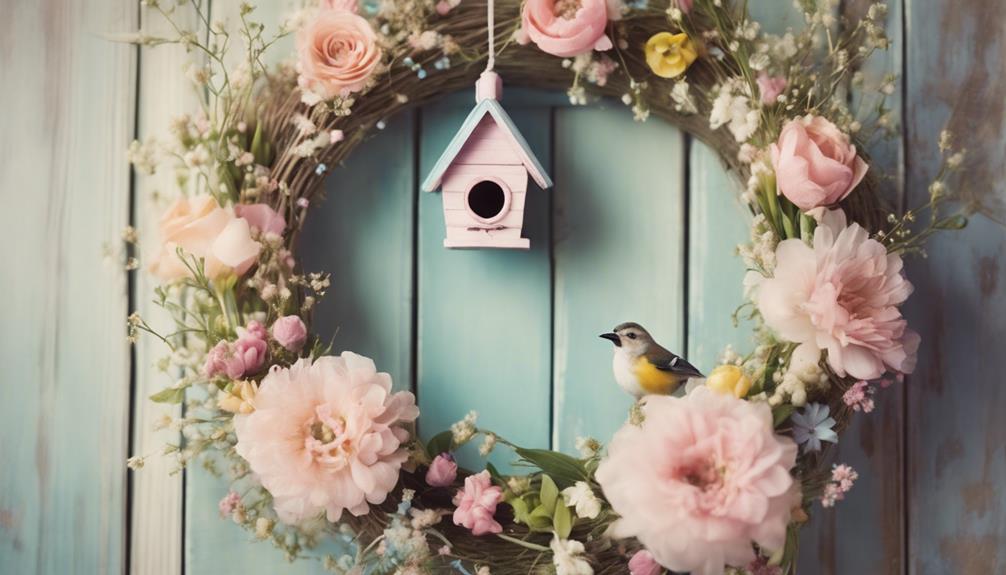
We add a touch of elegance to our springtime wreath by selecting a ribbon that complements the color scheme of our wreath and birdhouse. This subtle yet impactful detail elevates our DIY project from ordinary to extraordinary.
Here are some essential tips to keep in mind when embellishing with ribbons and bows:
- Choose a ribbon that harmonizes with the colors of your wreath and birdhouse
- Create a beautiful bow by looping the ribbon and securing the loops with wire or hot glue
- Attach the bow to the wreath near the birdhouse for a stunning focal point
- Consider using a contrasting ribbon to add visual interest and dimension to the wreath
Conceal Hot Glue Spots Completely

By strategically placing additional flowers, leaves, or decorative elements, we can effectively conceal hot glue spots on our springtime wreath, guaranteeing a polished finish. To do this, we'll apply a generous amount of hot glue to securely attach the elements that will hide the glue spots.
As we add these decorations, we'll press down firmly to ensure they stick well and cover any visible hot glue areas completely. To avoid overwhelming the design, we'll opt for smaller flowers or leaves to strategically cover the glue spots.
Take a step back and inspect the wreath from different angles to make sure all hot glue spots are effectively concealed before displaying it. We want our wreath to look flawless, and a little extra attention to detail will make all the difference.
Add Seasonal Elements and Textures
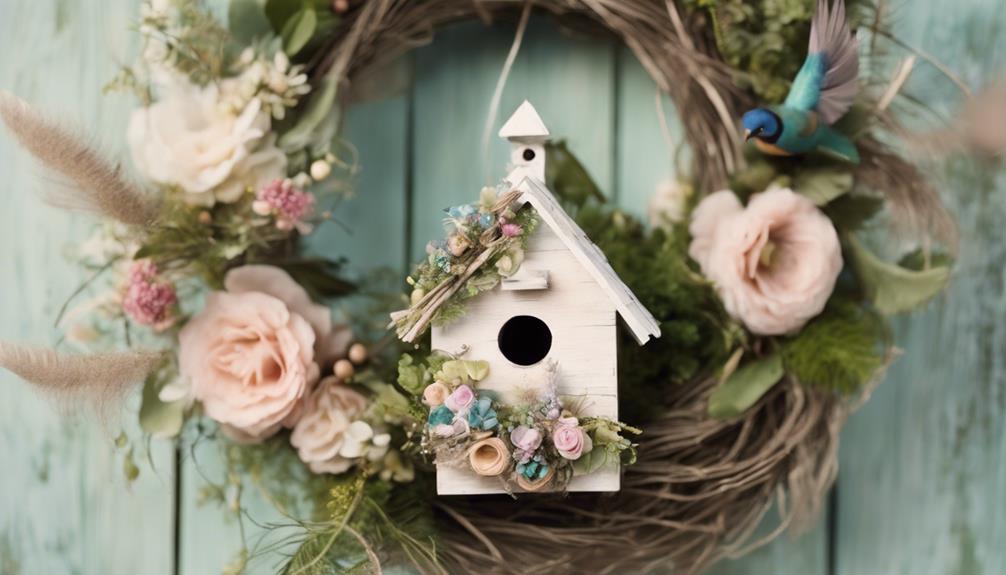
With our hot glue spots expertly concealed, we're ready to infuse our springtime wreath with seasonal charm by incorporating a variety of textures and elements that evoke the freshness of the season.
To add depth and visual interest to our wreath, we'll incorporate different textures such as moss, twine, or burlap. We can also experiment with colorful ribbons or bows in light, airy fabrics to bring a soft and whimsical touch to the wreath.
Here are some seasonal elements we can add to our wreath:
- Pastel flowers and greenery to enhance the seasonal theme
- Bird-themed accents like nests, eggs, or feathers to complement the birdhouse focal point
- Floral picks with delicate blossoms like cherry blossoms, daisies, or tulips to evoke a fresh springtime feel
- Textured elements like burlap, twine, or moss to add depth and visual interest
Final Touches and Display
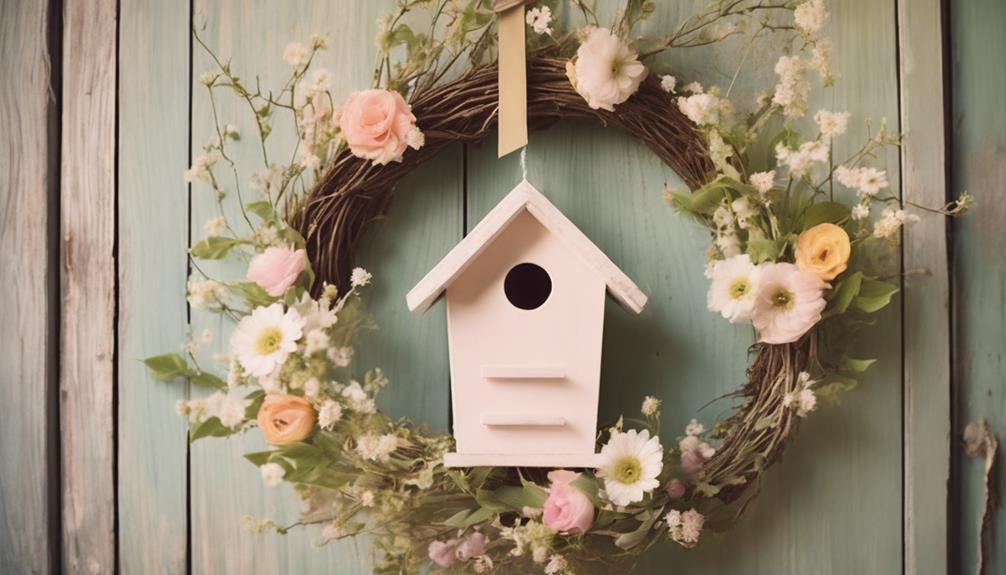
Let's position our finished wreath in a spot that showcases its beauty, and then take a step back to admire our handiwork from different angles.
We've worked hard to create a stunning springtime wreath with a birdhouse, and now it's time to display it proudly. To guarantee our wreath gets the attention it deserves, let's place it at eye level, where it can be easily admired. Consider hanging it on a door, above a fireplace, or as a centerpiece on a wall.
Take a step back to appreciate the wreath's full beauty from different angles – you might be surprised at how it catches the light! Once we're happy with the display, let's share our creative design with others by posting photos on social media. Who knows, we might just inspire someone to create their own DIY masterpiece!
Frequently Asked Questions
How Do You Make a Live Spring Wreath?
We start by gathering our materials – a wire or foam base, floral wire, and our chosen flowers and greenery.
We then prepare our flowers by trimming their stems and removing any leaves that'll be below the waterline.
Next, we attach the flowers to the base using floral wire, working our way around to create a lush, full look.
We finish by adding any embellishments and giving our wreath a final fluff.
How Do You Make a Simple Wire Wreath?
As we begin, we envision a blank canvas, a wire wreath frame waiting to be transformed.
To make a simple wire wreath, we start with a metal or wire mesh frame as our base. We then securely attach decorative elements like faux flowers, ribbons, and even a birdhouse using floral wire or zip ties.
Next, we add some greenery to fill out the wreath, arranging the elements to guarantee a balanced design.
Conclusion
Our DIY springtime wreath with a birdhouse is now ready to brighten up our doors or walls.
Don't worry if yours doesn't turn out exactly as expected – it's all about embracing imperfections and having fun.
Remember, the most important thing is to make it your own and display it proudly.
If you're worried about the birdhouse being too small, just think of it as a charming focal point that draws attention to the surrounding flowers and ribbons.
Now, go hang that wreath and enjoy the oohs and aahs!
- About the Author
- Latest Posts
Introducing Ron, the home decor aficionado at ByRetreat, whose passion for creating beautiful and inviting spaces is at the heart of his work. With his deep knowledge of home decor and his innate sense of style, Ron brings a wealth of expertise and a keen eye for detail to the ByRetreat team.
Ron’s love for home decor goes beyond aesthetics; he understands that our surroundings play a significant role in our overall well-being and productivity. With this in mind, Ron is dedicated to transforming remote workspaces into havens of comfort, functionality, and beauty.
Alfresco
What Is Alfresco Seating? Comfort and Style Outdoors!
Uncover the allure of alfresco seating, where comfort meets style outdoors, for an unforgettable dining experience that revitalizes your senses.

Alfresco seating combines comfort and style for outdoor dining. It provides a invigorating experience, allowing you to enjoy delicious meals in a rejuvenating setting. The term 'alfresco' originates from Italian, meaning 'in the cool air.' This dining experience offers a stronger connection to nature, enhances social interactions, and creates a relaxing ambiance. Alfresco seating provides therapeutic benefits and fosters shared experiences, building a community atmosphere. If you want to discover more about enhancing alfresco dining, explore the benefits, decor tips, types of seating areas, and advice for setting up a perfect outdoor dining space.
Key Takeaways
- Alfresco seating offers a refreshing dining experience outdoors, combining comfort, style, and a connection with nature.
- Enjoy fresh air, vitamin D, and a tranquil ambiance, enhancing well-being and reducing stress.
- Decor and accessories like unique centerpieces and elegant tableware elevate the visual appeal and sophistication of alfresco dining.
- Different types of alfresco seating areas cater to various preferences, from intimate patio dining to casual outdoor cafés.
- Setting up alfresco dining involves selecting a convenient location, weather-resistant furniture, ambient lighting, and defining the dining area for a sensory experience.
Definition of Alfresco Seating
Alfresco seating, for those unfamiliar, denotes the act of dining or lounging outdoors in settings like gardens, patios, or open-air spaces. It offers an invigorating outdoor dining experience, allowing individuals to savor their meals in the midst of nature's beauty.
Dining al fresco provides a rejuvenating escape from indoor settings, inviting guests to enjoy the fresh air while indulging in delicious cuisine. Whether it's a casual picnic or an elegant outdoor dining affair, alfresco seating caters to various preferences and occasions.
The term 'alfresco' originates from the Italian phrase 'al fresco,' meaning 'in the fresh air,' perfectly encapsulating the essence of dining outdoors. This style of dining not only provides a unique culinary experience but also fosters a deeper connection with nature.
Embracing alfresco dining means relishing comfort and style in a relaxed outdoor setting. It's a delightful way to unwind, socialize, and appreciate the simple pleasures of life amidst the beauty of the natural world.
Benefits of Outdoor Dining
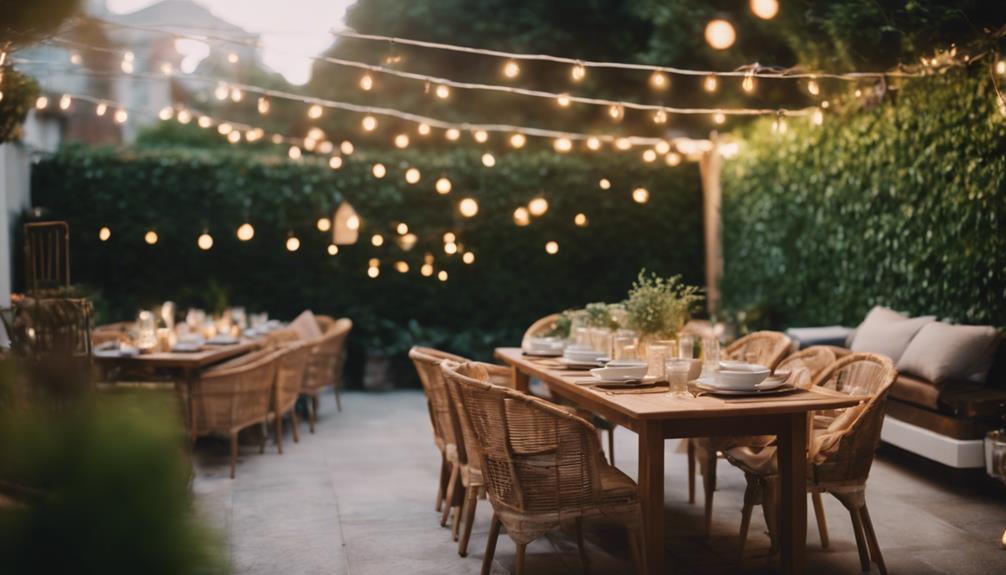
Outdoor dining offers a multitude of benefits, including improved social interaction, an invigorating experience of fresh air, and a relaxing ambiance.
Whether enjoying a meal with friends or family, alfresco seating provides a unique setting for fostering connections and conversations.
The outdoor environment promotes a sense of well-being and relaxation, making dining outdoors a popular choice for many.
Enhanced Social Interaction
Gathering around a table under the open sky enhances social interaction and strengthens bonds between individuals. When dining outdoors, we experience a heightened sense of community and togetherness.
Here are four ways alfresco seating enhances social interaction:
- Bonding: Sharing a meal outdoors fosters deeper connections among family and friends.
- Happiness: Studies indicate that dining al fresco can boost happiness levels and overall well-being.
- Community: Alfresco seating creates a communal atmosphere, bringing people together in a relaxed setting.
- Shared Experiences: Outdoor dining provides the perfect backdrop for meaningful conversations and shared memories.
Fresh Air Experience
When dining outside, we can immerse ourselves in an invigorating environment that offers relaxation, fresh air, and various therapeutic benefits. Alfresco seating allows us to enjoy the benefits of sunshine, fresh air, and a change of scenery while dining, enhancing the overall dining experience. Here is a breakdown of the benefits of outdoor dining:
| Benefits of Outdoor Dining | |
|---|---|
| 1. Connection with Nature | Alfresco dining provides a connection to natural surroundings, promoting relaxation and well-being. |
| 2. Fresh Air | Outdoor seating offers the benefit of breathing in fresh air, contributing to a sense of rejuvenation. |
| 3. Therapeutic Benefits | Dining outdoors can combat fatigue, reduce stress, and enhance overall well-being through exposure to nature. |
| 4. Increased Vitamin D Intake | Alfresco seating allows for increased exposure to sunlight, aiding in boosting mood and vitamin D levels. |
Outdoor dining not only offers a change of scenery but also provides an opportunity to reap the numerous benefits of nature, fresh air, and natural surroundings.
Relaxation and Ambiance
Indulging in alfresco dining brings about a tranquil atmosphere and a sense of relaxation that elevates the overall dining experience. When considering the benefits of outdoor dining, the relaxation and ambiance play a significant role:
- Connection with Nature: Outdoor dining areas provide a direct link to the natural world, offering a calming environment to unwind and enjoy a meal.
- Reduced Stress: The fresh air and open spaces can help lower stress levels, promoting a sense of calm and well-being.
- Enhanced Well-being: Comfortable seating in outdoor settings contributes to a more pleasant dining experience, fostering relaxation and contentment.
- Social Interaction: The relaxed ambiance of outdoor dining spaces encourages social engagement, creating opportunities for meaningful connections in a serene setting.
Designing Outdoor Dining Spaces
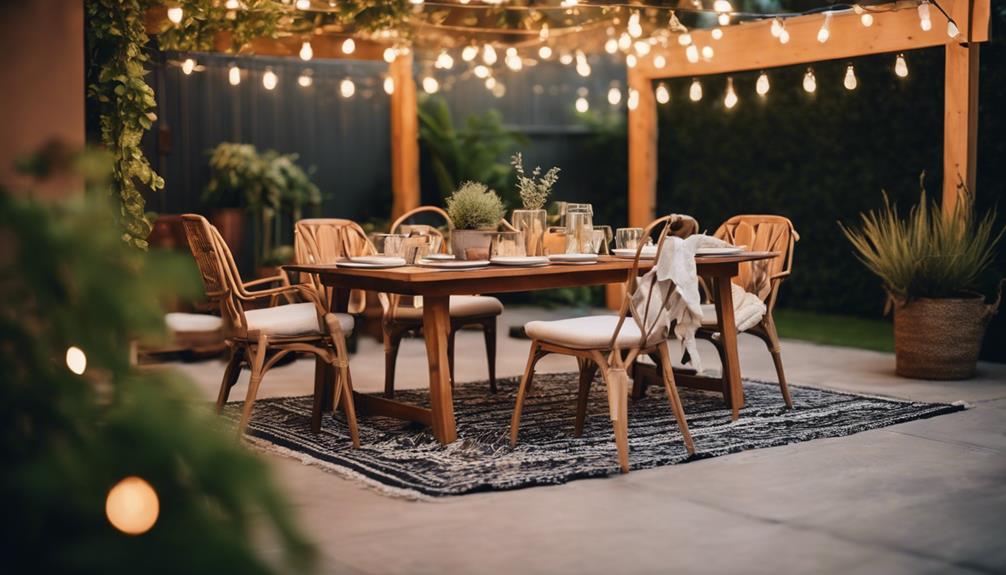
When designing outdoor dining spaces, our focus is on the layout and arrangement, as well as furniture selection. These elements play a vital role in creating a functional and inviting environment for guests.
Layout and Arrangement
Creating an inviting layout and arrangement is crucial for designing functional and aesthetically pleasing outdoor dining spaces. When setting up outdoor seating areas, consider the following key points:
- Patio Dining: Dedicated patio areas offer a charming setting for outdoor meals, providing a cozy and intimate atmosphere for guests.
- Cafés and Bistros: Emulate the cozy and intimate vibe of cafes and bistros by arranging seating in a way that encourages conversation and relaxation.
- Communal Tables: For entertaining outdoors, consider creating a party-like setting with communal tables, fostering a sense of togetherness and camaraderie among guests.
- Seasonal Considerations: To secure comfort in various climates, consider factors like shade, heating options, and shelter from the wind when arranging outdoor dining spaces.
Furniture Selection
Let's now focus on selecting the right furniture to enhance the design of outdoor dining spaces, ensuring both comfort and style are seamlessly integrated.
When choosing outdoor furniture, opt for materials like powder-coated steel that are weather-resistant to prolong their lifespan. To add a cozy touch, consider including plush cushions and throws, ideal for extended gatherings where comfort is key.
Prioritizing importance doesn't mean sacrificing style; finding a balance is vital. Additionally, make sure there's ample space around the table and chairs in the outdoor dining area to allow for easy movement and a comfortable dining experience.
Choosing the Right Furniture
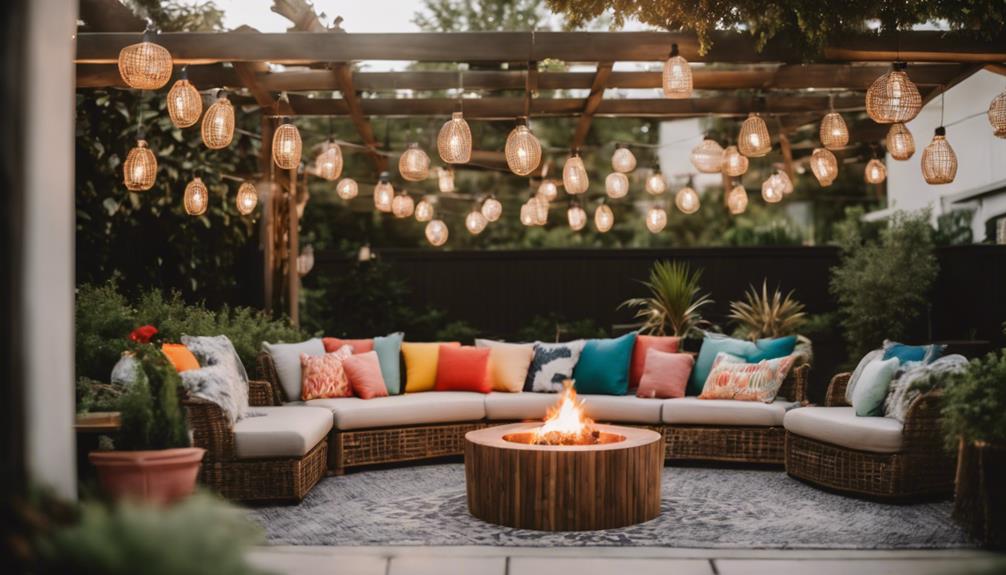
To guarantee comfort and style in your alfresco seating area, choosing weather-resistant furniture like teak, aluminum, or wicker is essential. When selecting outdoor furniture, it's important to take into account both durability and aesthetics.
Here are some key points to bear in mind:
- Durability is Key: Opt for materials such as teak, aluminum, or wicker that can withstand outdoor elements without compromising on style.
- Comfort Matters: Look for seating options with plush cushions and throws to create a cozy atmosphere for long gatherings.
- Style Coherence: Choose furniture that complements the overall style of your outdoor space to maintain a cohesive and visually appealing look.
- Ample Seating: Make sure you have enough seating for larger gatherings while still maintaining a stylish and inviting ambiance.
Enhancing Ambiance With Decor
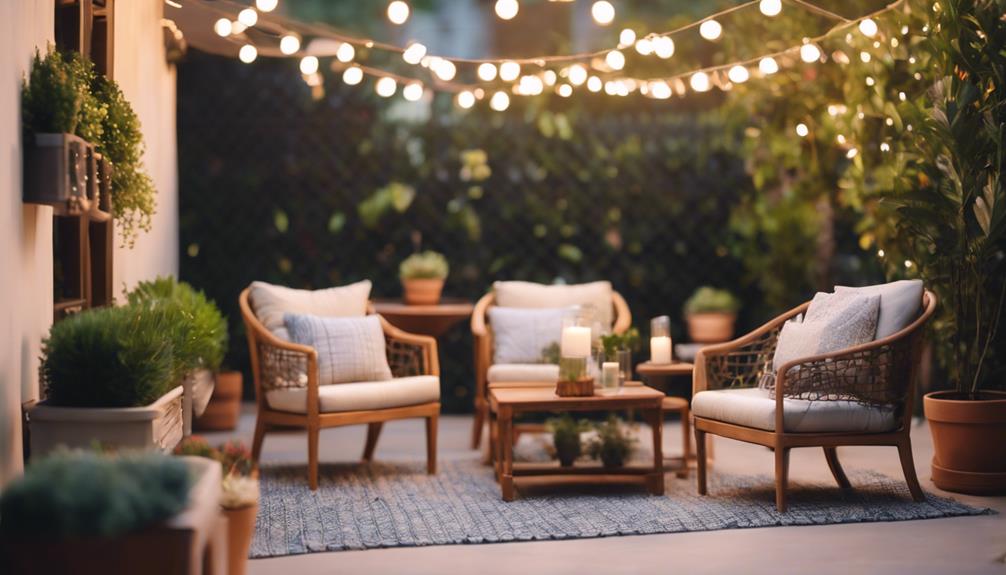
When it comes to alfresco seating, enhancing the ambiance with carefully selected decor elements can truly elevate the outdoor dining experience. Centerpieces play a crucial role in creating a welcoming atmosphere in the seating area. Incorporating unique centerpieces such as fresh flowers, potted plants, and colorful fruits can add life and color to the outdoor dining space. Additionally, utilizing trays, baskets, and platters for displaying food not only enhances the visual appeal but also creates an inviting setting for dining outdoors. Opting for pretty dinnerware, glassware, and cloth napkins as part of the decor can further elevate the dining experience.
| Decor Elements | Description | Importance |
|---|---|---|
| Unique Centerpieces | Fresh flowers, potted plants, and colorful fruits add life and color. | Enhances visual appeal |
| Display Accessories | Trays, baskets, and platters create an inviting atmosphere. | Sets the stage for outdoor dining |
| Elegant Tableware | Pretty dinnerware, glassware, and cloth napkins elevate the experience. | Adds sophistication |
Types of Alfresco Seating Areas
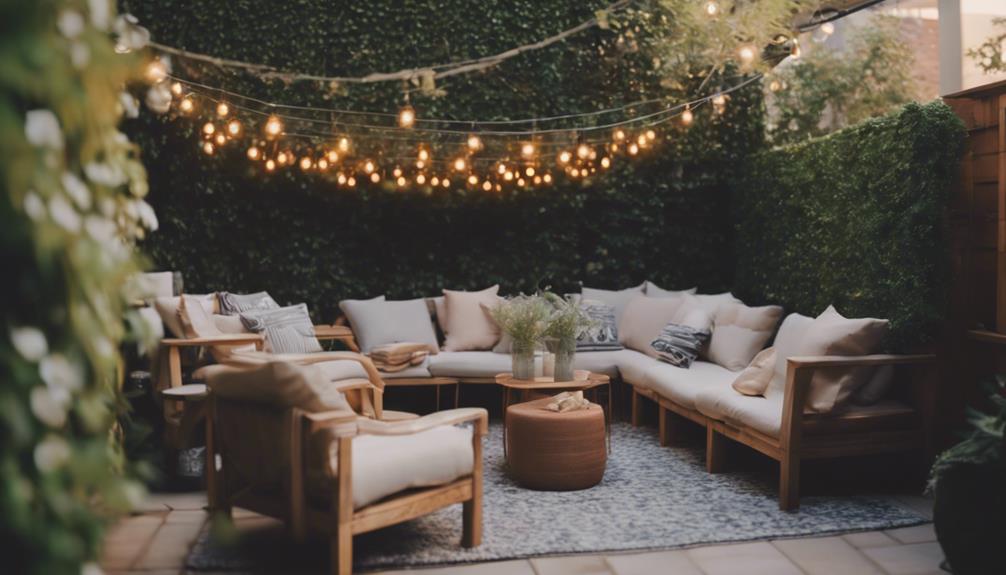
Alfresco seating areas encompass a variety of spaces, ranging from patio dining spots and outdoor cafés to communal tables in festive settings. When it comes to alfresco dining, the design and layout of outdoor spaces play an essential role in creating a comfortable and enjoyable experience.
Here are some common types of alfresco seating areas:
- Patio Dining Spaces: These are typically set up with tables and chairs, offering a cozy setting for intimate gatherings or meals enjoyed in the fresh air.
- Outdoor Cafés and Bistros: These spaces often feature a more casual vibe, with options for both dining and socializing in a relaxed outdoor setting.
- Communal Tables in Party-Like Settings: Ideal for larger gatherings or events, communal tables encourage a sense of community and are perfect for festive occasions.
- Seasonal Considerations: Alfresco seating areas need to take into account seasonal changes to ensure guests are comfortable year-round, making them versatile for different climates.
Tips for Setting Up Al Fresco Dining
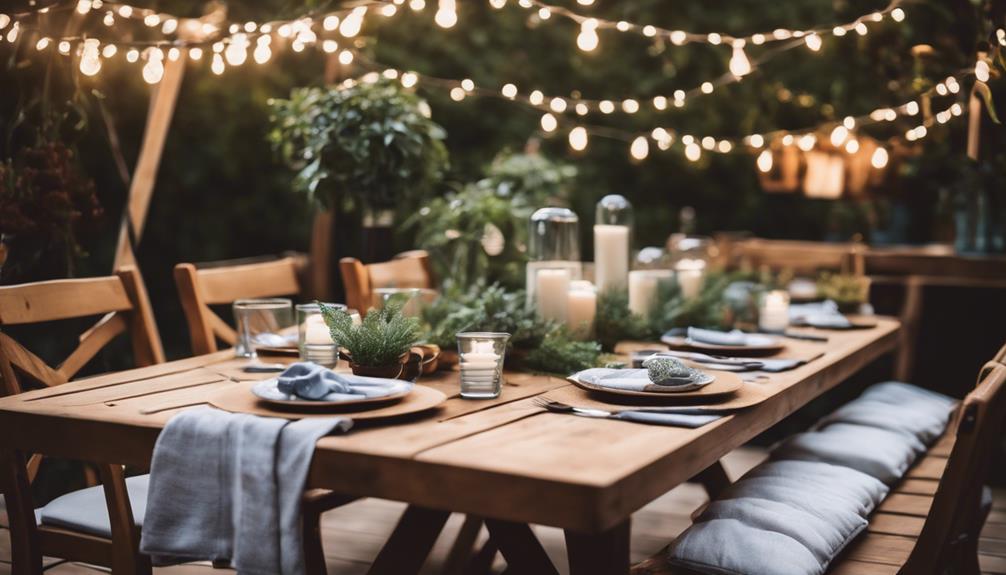
Let's prioritize selecting a convenient and appealing location for our al fresco dining setup. When preparing the outdoor space, it's essential to shield from elements like wind, sun, and rain to elevate the dining experience. Opt for comfortable seating arrangements with weather-resistant furniture to accommodate gatherings comfortably. Enhance the ambiance by incorporating ambient lighting, creating a cozy and inviting atmosphere for dining al fresco. To define the dining area, consider using walls, hedges, or borders, enhancing the sensory experience with fragrant plants. Below is a table summarizing the key tips for setting up al fresco dining:
| Tips for Al Fresco Dining | Description |
|---|---|
| Convenient Location | Select a convenient and appealing spot for your outdoor dining setup. |
| Shield from Elements | Protect from wind, sun, and rain to enhance the dining experience. |
| Comfortable Seating Arrangements | Choose weather-resistant furniture for comfortable gatherings. |
Al Fresco Dining Etiquette

To guarantee a pleasant dining experience outdoors, practicing proper al fresco dining etiquette is crucial. Here are some essential tips to make sure you and your fellow diners have a delightful time:
- Use Proper Table Manners:
Remember to use utensils appropriately, chew with your mouth closed, and avoid talking with food in your mouth to maintain a respectful dining atmosphere.
- Be Considerate of Others:
Arrive on time for your reservation, treat staff and other guests with courtesy, and avoid loud or disruptive behavior that could disturb the peaceful outdoor setting.
- Dress Appropriately:
Whether you're dining at a casual picnic spot or an upscale outdoor restaurant, dress in accordance with the setting to show respect for the occasion.
- Tip Appropriately:
Show appreciation for the service provided by tipping your server accordingly, reflecting your gratitude for their efforts in enhancing your alfresco dining experience.
Seasonal Considerations for Outdoor Dining
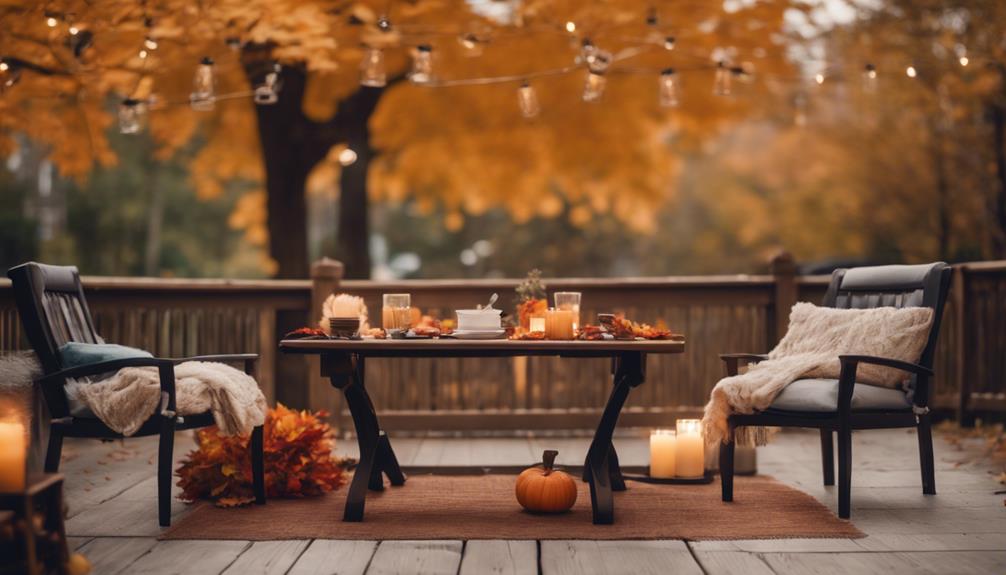
Considering seasonal weather changes is vital when planning for outdoor dining to ensure a comfortable and enjoyable experience. Seasonal considerations like wind, sun, and rain can greatly impact alfresco seating.
To combat these elements, it's important to choose outdoor furniture made from quality materials such as powder-coated steel that can withstand various climates. Additionally, equipping your outdoor dining area with elements like umbrellas or pergolas can provide much-needed shade and protection from the elements.
Al Fresco Dining Inspiration
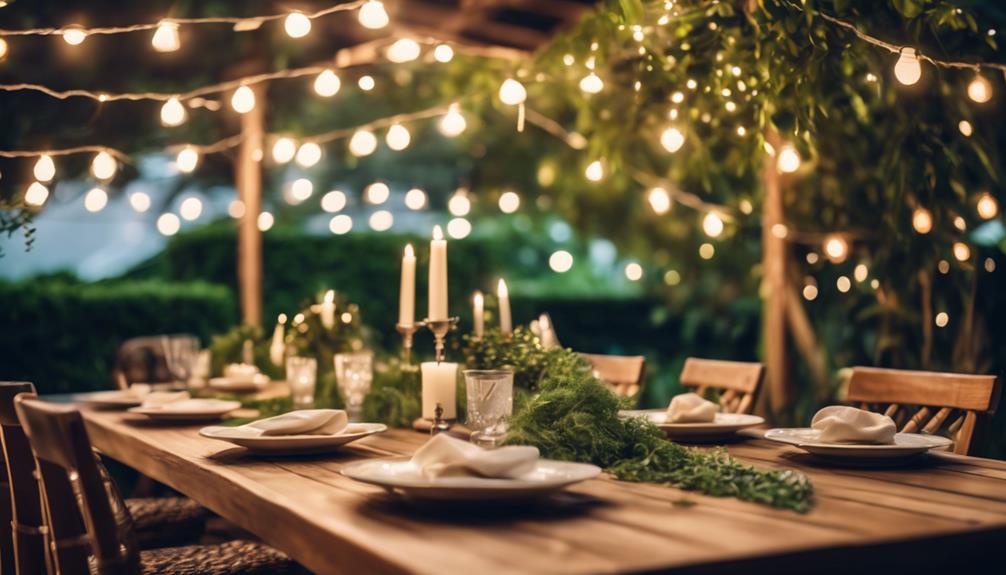
Our al fresco dining inspiration centers around creating a casual and inviting outdoor dining experience.
When setting up for outdoor dining, we focus on these key elements:
- Comfortable Seating: Opt for cushioned chairs or benches to guarantee guests can relax and linger comfortably at the table.
- Soft Lighting: Incorporate string lights, lanterns, or candles to create a warm and inviting ambiance as the sun sets.
- Greenery: Integrate potted plants, hanging baskets, or a small herb garden to add a touch of nature and vitality to the dining area.
- Food Focal Point: Arrange the dining table with care, highlighting delicious dishes and invigorating drinks to be the centerpiece of the al fresco dining experience.
Frequently Asked Questions
What Is the Meaning of Alfresco Seating?
Alfresco seating entails dining or relaxing outdoors amidst the fresh air. It provides a unique experience of connecting with nature. From casual picnics to fine dining, alfresco seating offers various styles for enjoying the outdoors.
What Does Alfresco Style Mean?
Alfresco style means dining or seating outdoors in fresh air, often incorporating comfortable seating, ambient lighting, and greenery for a stylish experience. It's a popular way to enjoy meals, ranging from casual picnics to upscale dining.
What Is Outdoor Alfresco?
When we think about outdoor alfresco, we envision dining under the open sky, immersed in nature's embrace. It's a delightful experience that elevates meals and fosters connection with the environment, enhancing our overall well-being.
What Is the Purpose of Alfresco Dining?
Alfresco dining brings people together in the fresh air, creating a soothing and enjoyable dining experience. It fosters relaxation, social connections, and a deeper appreciation for nature. We love dining alfresco for its therapeutic benefits and the change of scenery it offers.
Conclusion
To sum up, alfresco seating offers a perfect blend of comfort and style for enjoying meals outdoors. The benefits of outdoor dining, along with well-designed spaces and quality furniture, create a welcoming ambiance for al fresco experiences.
By following etiquette and considering seasonal variations, outdoor dining can be an enjoyable and memorable experience. So next time you plan a meal outdoors, remember to create a cozy alfresco setting that enhances your dining experience.
- About the Author
- Latest Posts
Introducing Ron, the home decor aficionado at ByRetreat, whose passion for creating beautiful and inviting spaces is at the heart of his work. With his deep knowledge of home decor and his innate sense of style, Ron brings a wealth of expertise and a keen eye for detail to the ByRetreat team.
Ron’s love for home decor goes beyond aesthetics; he understands that our surroundings play a significant role in our overall well-being and productivity. With this in mind, Ron is dedicated to transforming remote workspaces into havens of comfort, functionality, and beauty.
Alfresco
What Is Alfresco Roof? Functional and Stylish Designs!
Discover how alfresco roofs combine functionality and style to transform outdoor spaces, offering protection and customization options that elevate outdoor living.
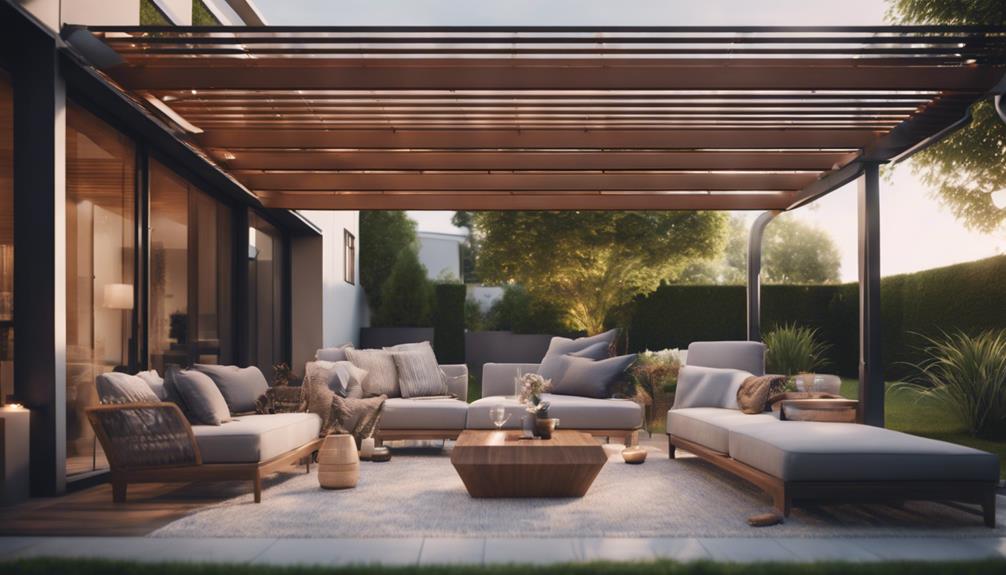
Alfresco roofs, also called outdoor living covers, offer functional and stylish designs that enhance outdoor spaces year-round. They provide protection from elements like sun, rain, and wind while integrating lighting options and customizable features such as retractable awnings. These roofs also add value to the property. Different materials like polycarbonate, Colorbond steel, and glass offer various benefits. Incorporating strategic lighting and proper maintenance can elevate the alfresco roof's appeal and longevity. Cost considerations depend on size, materials, and design complexity. Alfresco roofs bridge indoor and outdoor living, enhancing outdoor usability with their practical and aesthetic features.
Key Takeaways
- Alfresco roofs provide year-round outdoor usability.
- They offer protection from sun, rain, and wind.
- Integrated lighting options enhance ambiance.
- Customization features like retractable awnings are available.
- Adds property value with stylish and functional design.
Benefits of Alfresco Roofs
Alfresco roofs offer a myriad of benefits for homeowners seeking to maximize their outdoor living spaces. These structures provide protection from the elements, allowing for year-round use of outdoor areas. By shielding against sun, rain, and wind, alfresco roofs create a comfortable and functional outdoor environment perfect for dining and relaxation. Integrated lighting options further enhance the usability of outdoor spaces, extending their functionality well into the evening hours. Additionally, customization features like retractable awnings and louvre systems offer versatility and style, catering to individual preferences and needs.
Investing in an alfresco roof not only enhances your outdoor living experience but also adds value to your property. By seamlessly extending your living space into the outdoors, alfresco roofs elevate the overall appeal and utility of your home. Whether enjoying a meal al fresco or simply relaxing in the fresh air, the benefits of alfresco roofs make them a valuable addition for any homeowner looking to make the most of their outdoor space.
Types of Alfresco Roofing Materials

When considering options for roofing materials, homeowners can choose from a variety of materials to suit their alfresco design needs. Here are some common types of alfresco roofing materials:
- Polycarbonate: This material is lightweight, durable, and provides UV protection for outdoor spaces, making it a popular choice for alfresco areas.
- Colorbond steel: Offering a sleek and modern look, Colorbond steel comes in a wide range of colors, allowing homeowners to match their alfresco design seamlessly with their outdoor space.
- Glass: Glass roofing allows natural light to filter through, creating a bright and open atmosphere in alfresco areas, perfect for those who want to enjoy the outdoors while staying protected under a roof.
Each of these materials has its own unique advantages, catering to different preferences and needs when it comes to creating stylish and functional outdoor living spaces.
Design Ideas for Stylish Alfresco Roofs
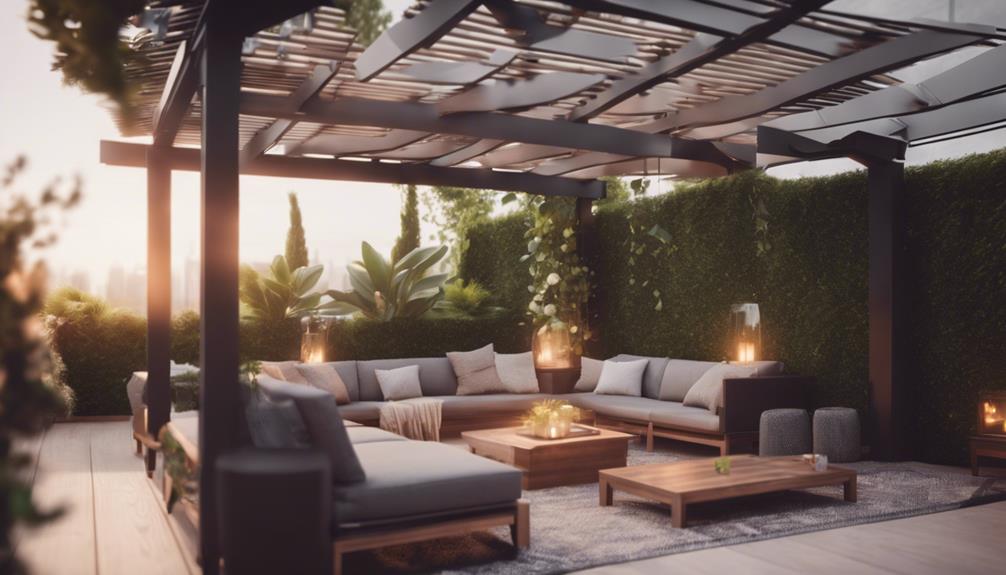
When contemplating design ideas for stylish alfresco roofs, it's crucial to explore roofing material options that suit both aesthetic and practical needs.
Incorporating strategic lighting and ambiance elements can create a welcoming outdoor space for various activities and gatherings.
Additionally, thoughtful outdoor furniture layout can enhance comfort and functionality, maximizing the alfresco area's usability and visual appeal.
Roofing Material Options
Among the various roofing material options for stylish alfresco roofs, timber stands out for its natural and rustic charm that seamlessly blends with outdoor surroundings. Timber roofing adds warmth and character to the outdoor patio or alfresco area, creating a cozy and inviting atmosphere for gatherings and relaxation.
- Polycarbonate: Durable, lightweight, and allows natural light to filter through, creating a bright and airy space.
- Colorbond Steel: Offers a modern and sleek look, available in a range of colors to complement different design schemes.
- Insulated Roofing Panels: Provide excellent thermal insulation, keeping the alfresco area comfortable in both hot and cold weather.
Each material option brings its unique benefits to the alfresco roof design. While timber exudes a natural feel, polycarbonate allows for ample natural light, Colorbond steel offers a contemporary aesthetic, and insulated roofing panels promote comfort year-round. Consider the desired ambiance and functionality when selecting the roofing material for your alfresco area.
Lighting and Ambiance
Integrated lighting plays a pivotal role in enhancing the ambiance of stylish alfresco roofs, especially for evening dining settings. By incorporating adjustable lighting features, different light levels can be achieved to create the perfect atmosphere for outdoor dining. Stylish designs seamlessly integrate lighting elements into the roof structure, adding both sophistication and functionality to the space. Strategic placement of lighting fixtures helps highlight key areas within the alfresco environment, enhancing its overall appeal.
When planning the lighting for an alfresco roof, it's crucial to take into account the desired ambiance and functionality. Soft, warm lighting can create a cozy and inviting atmosphere for intimate dinners, while brighter lights may be more suitable for lively gatherings. Well-thought-out lighting not only contributes to the aesthetics but also ensures practicality for nighttime use of the outdoor dining space.
Outdoor Furniture Layout
Strategically arranging outdoor furniture in stylish alfresco roofs is essential for optimizing space and enhancing the overall dining and lounging experience.
When designing the layout for your alfresco space, consider the following:
- Dining Sets: Utilize dining sets to create designated eating areas that are perfect for enjoying meals with family and friends.
- Benches: Incorporate benches for flexible seating options that can accommodate more guests or provide a cozy spot for lounging.
- Loungers: Adding loungers can enhance relaxation and create a spa-like atmosphere for unwinding in your outdoor sanctuary.
Incorporating Lighting in Alfresco Roof Design
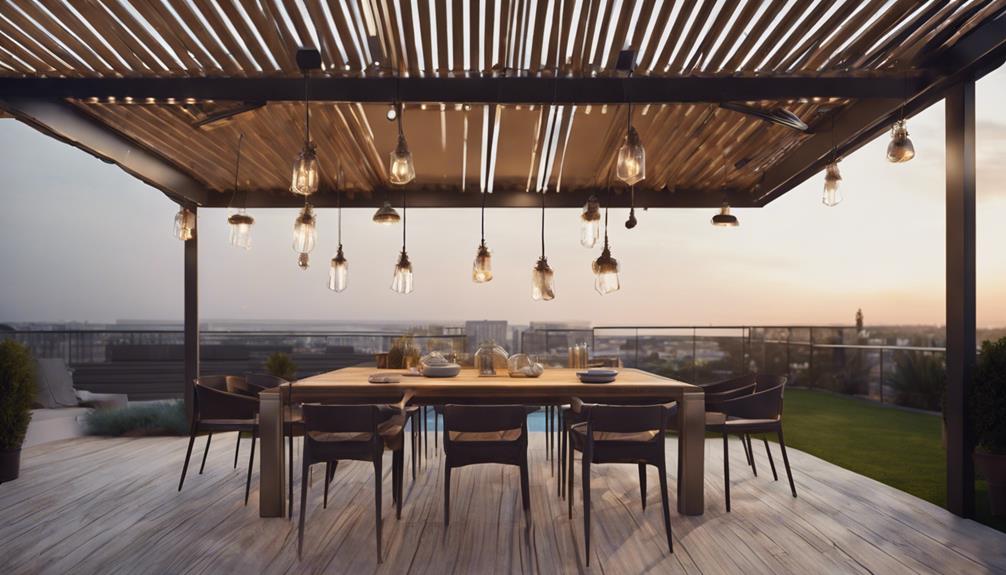
To enhance the ambiance and functionality of alfresco roof designs, incorporating lighting is essential. Lighting plays a crucial role in creating a welcoming atmosphere for both daytime and nighttime use. By strategically placing integrated lighting fixtures, different light levels can be achieved to cater to various activities in the alfresco living space, enhancing the overall dining experience. Popular choices for alfresco roof lighting include downlights, strip lights, and pendant lights, each offering a unique ambiance to the area. The right lighting design can transform the outdoor space into a cozy retreat, perfect for evening gatherings and dining experiences. Additionally, a well-thought-out lighting plan can extend the usability of the alfresco roof into the night, allowing for continued enjoyment of the outdoor living space after the sun sets.
| Lighting Type | Description | Best Use Cases |
|---|---|---|
| Downlights | Recessed lights in ceiling | General illumination |
| Strip Lights | Linear lights along edges | Accentuating architectural features |
| Pendant Lights | Hanging lights fixtures | Over dining or seating areas |
Alfresco Roof Maintenance Tips
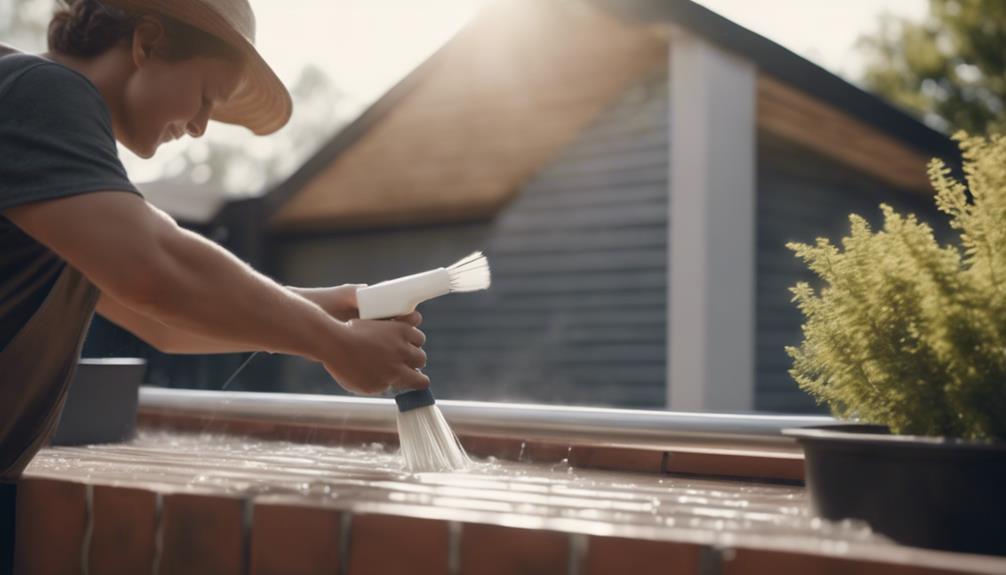
We must prioritize regular cleaning of the alfresco roof to prevent water pooling and debris accumulation.
It's essential to inspect for any signs of damage like cracks or leaks and address them promptly to maintain the roof's integrity.
Trimming nearby trees can also help prevent roof damage caused by branches and blockages.
Cleaning Alfresco Roof
Let's keep our alfresco roof in top condition by regularly cleaning it with a soft brush or cloth using mild soap and water to prevent dirt and debris buildup.
This simple maintenance routine can help preserve the roof's appearance and functionality for years to come. Remember to avoid harsh chemicals or abrasive materials that could potentially damage the surface of the roof.
- Use a soft brush or cloth with mild soap and water for gentle cleaning.
- Avoid harsh chemicals that may harm the roof material.
- Regularly inspect for damages and leaks to preserve the roof's integrity.
Maintaining a clean alfresco roof not only enhances the aesthetics of your outdoor kitchen but also creates a comfortable setting for gatherings and relaxation. By following these cleaning tips, you can guarantee that your alfresco roof remains in excellent condition, providing a pleasant outdoor experience for you and your guests.
Preventing Roof Leaks
Regularly inspecting seals, flashing, and joints is key to preventing water infiltration and leaks in alfresco roofs. Ensuring these components are intact and well-maintained is essential for safeguarding your outdoor living space from potential water damage. Additionally, it's important to clear debris and maintain proper drainage to prevent water pooling, which can lead to leaks in alfresco roofing.
Using high-quality materials and opting for professional installation can greatly reduce the risk of leaks in your alfresco roof. By investing in these aspects, you can enhance the longevity and durability of your outdoor living area.
Addressing any signs of damage or wear promptly is crucial in preventing leaks and preserving the structural integrity of your alfresco roof. Timely repairs and maintenance can help mitigate potential issues before they escalate into more significant problems.
Proper ventilation in the roof space is another crucial aspect to consider. Adequate ventilation helps reduce moisture buildup, which in turn can help prevent leaks in alfresco structures.
Cost Considerations for Alfresco Roofs

Considering the cost of alfresco roofs involves factoring in elements such as size, materials used, and design intricacy. When budgeting for an alfresco roof, keep in mind the following:
- Size: The larger the roof area, the more materials will be required, impacting the overall cost.
- Materials: Standard options like Colorbond steel typically range from $50 to $80 per square meter, while insulated roofing can cost between $80 to $120 per square meter.
- Design Complexity: Intricate designs or custom features such as lighting and fans can add to the total expenses.
Investing in an alfresco roof isn't just about cost; it's about creating the perfect focal point for your outdoor space. Quality materials and professional installation can enhance both the usability and value of your alfresco area.
Alfresco Roof Vs. Traditional Roofing
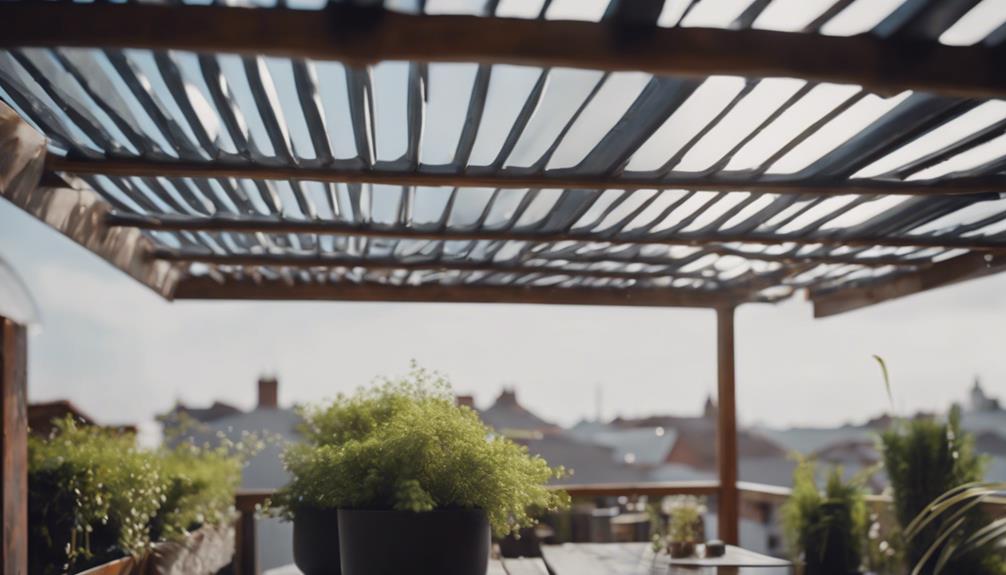
When comparing alfresco roofs to traditional roofing, one key distinction lies in their design and intended use. Alfresco roofs are specifically crafted to cover outdoor living spaces, offering protection from the elements like sun, rain, and wind.
In contrast, traditional roofing is primarily used for indoor spaces, focusing on sheltering the interior of a building. Alfresco roofs allow you to create a unique blend of indoor and outdoor living, unlike traditional roofs that are designed solely for indoor comfort.
The beauty of alfresco roofs lies in how they enhance the usability of outdoor areas, providing functional and stylish spaces for dining, entertaining, and relaxation. Traditional roofing, on the other hand, serves a more conventional purpose of protecting the interior of a building.
Alfresco roofs offer a modern twist to outdoor living, while traditional roofing maintains a classic approach to sheltering indoor spaces.
Frequently Asked Questions
What Is an Alfresco Roof?
An alfresco roof is a covering structure over an outdoor living area, providing protection from elements like sun, rain, and wind. It enhances usability, creating smooth indoor-outdoor connections, and adding value to the property.
What Is the Difference Between Patio and Alfresco?
When comparing patios and alfresco areas, patios are more basic ground-level outdoor spaces, while alfresco areas are designed to be stylish extensions of indoor living, offering integrated features like kitchens and seating for a complete outdoor experience.
What Is an Alfresco in a Home?
We love alfresco areas! They're outdoor living spaces in homes designed for dining, lounging, and entertaining. Covered to enjoy the outdoors while sheltered. Customizable with seating, dining, cooking setups, and decorative elements for comfort and style.
What Is Alfresco Terrace?
An alfresco terrace is an outdoor extension of a building, ideal for dining and entertainment. It seamlessly combines indoor and outdoor living, often featuring seating, dining areas, plants, and lighting. A well-designed terrace adds value and creates a stylish outdoor space.
Conclusion
To sum up, alfresco roofs offer both functionality and style, providing a practical solution for outdoor living spaces.
With a variety of materials and design options available, homeowners can create a stylish and comfortable outdoor area to enjoy year-round.
By incorporating lighting and following maintenance tips, alfresco roofs can enhance the overall appeal of a property.
Consider the cost and benefits of alfresco roofs compared to traditional roofing to make the best choice for your outdoor space.
- About the Author
- Latest Posts
Introducing Ron, the home decor aficionado at ByRetreat, whose passion for creating beautiful and inviting spaces is at the heart of his work. With his deep knowledge of home decor and his innate sense of style, Ron brings a wealth of expertise and a keen eye for detail to the ByRetreat team.
Ron’s love for home decor goes beyond aesthetics; he understands that our surroundings play a significant role in our overall well-being and productivity. With this in mind, Ron is dedicated to transforming remote workspaces into havens of comfort, functionality, and beauty.
Alfresco
What Is Alfresco Painting? Artistic Techniques Explained!
Take a journey through time with alfresco painting, exploring ancient techniques and vibrant colors in the great outdoors.

Alfresco painting, linked to 'in the fresh air', showcases artistic techniques outdoors with roots dating to the Minoans and Romans, thriving during the Italian Renaissance. Tools like portable easels and water-based pigments, along with techniques such as intonaco and fresco secco, are essential. Plaster prep guarantees vibrant artwork and detailed pieces rely on proper pressure and specialized brushes. Sinopia aids in large-scale murals, using red earth pigment for preliminary sketches. Immerse yourself in this rich art form to discover a world of creativity and history.
Key Takeaways
- Originating from Italian Renaissance, alfresco painting is done outdoors.
- Tools include portable easels, water-based pigments, and lightweight materials.
- Techniques like intonaco and fresco secco for plaster preparation and painting.
- Applying even pressure with specialized brushes crucial for detailed artwork.
- Sinopia, a red earth pigment, aids in preliminary sketches for large-scale murals.
Origins of Alfresco Painting
The origins of alfresco painting can be traced back to ancient civilizations such as the Minoans and Romans. The term 'alfresco' originates from the Italian word for 'in the fresh air,' reflecting the practice of painting outdoors on fresh plaster. During the Italian Renaissance, alfresco painting rose in popularity as a technique for creating enduring and monumental works of art. Artists like Giotto, Masaccio, and Michelangelo are celebrated for their exceptional use of this method in producing iconic frescoes.
One of the key aspects of alfresco painting is the application of water-based pigments on wet plaster. This process allows the colors to fuse with the plaster as they dry and set, ensuring a lasting bond between the artwork and the wall.
The careful manipulation of wet plaster and pigments during the painting process is crucial in achieving vibrant and long-lasting frescoes that continue to captivate audiences centuries later.
Tools and Materials Used

For alfresco painting, artists typically utilize water-based pigments, brushes, and a suitable painting surface. When engaging in fresco painting, it is important to use materials that can withstand outdoor conditions and allow for the proper adherence of pigment particles to the surface. Here is a breakdown of the tools and materials commonly used for alfresco painting:
| Tools | Materials | Accessories |
|---|---|---|
| Portable easels | Canvas panels | Umbrellas |
| Paint palettes | Boards | Stools |
| Containers | Paper | Other comfort accessories |
These tools and materials play a significant role in the technique of alfresco painting, enabling artists to capture the essence of outdoor scenes while working with the unique challenges and opportunities presented by natural lighting and outdoor settings. By using the right tools and materials, artists can enhance their plein air painting experience and create stunning works of art that reflect the beauty of the surroundings.
Step-by-Step Process Overview
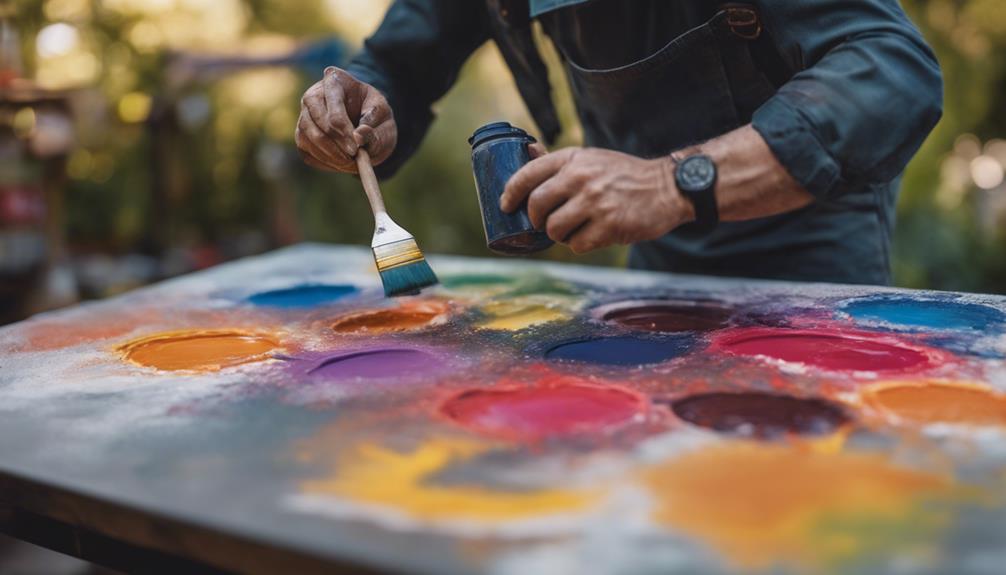
First, we gather our materials and tools, ensuring we have everything needed for the painting session.
Next, we set up outdoors in a suitable location that inspires creativity and offers a compelling subject to paint.
This process sets the foundation for our alfresco painting experience, allowing us to immerse ourselves in the natural surroundings and capture them on canvas.
Materials and Tools
Our alfresco painting sessions rely on lightweight, easily transportable materials and tools for an efficient outdoor creative experience. When practicing the fresco technique outdoors, artists typically opt for a portable easel, canvas, brushes, and paints.
This approach to painting has a rich history in art, dating back to the early 16th century. To guarantee convenience during plein air painting, artists often select compact paint kits and a limited color palette for on-the-go creativity.
Sturdy easels and collapsible chairs are essential for outdoor painting, along with weather-resistant supplies to withstand the elements. Additionally, crucial tools such as a palette knife, palette, water container, and a sun hat for comfort are commonly used during alfresco painting sessions.
Setting up Outdoors
Selecting a location with ample natural light and creating a comfortable working environment are essential steps in setting up outdoors for alfresco painting.
When preparing for an alfresco painting session, artists often opt for scenic landscapes or captivating urban scenes as their subjects. To facilitate their creative process, artists rely on tools like portable easels, a variety of brushes, a limited color palette, and a sturdy surface to work on.
Weather conditions play an important role in outdoor painting, prompting artists to be ready for changes such as wind, rain, or excessive sunlight. Plein air umbrellas, sunscreen, and portable seating can enhance comfort and productivity during alfresco painting.
Importance of Plaster Preparation

Why is proper plaster preparation essential for the success of alfresco painting?
Adequate plaster preparation is critical in alfresco painting as it sets the foundation for the artwork. The quality of the plaster directly impacts how well the pigments adhere to the surface and how long the painting will last.
By meticulously applying layers of specially formulated mixtures, artists create a durable canvas that supports their artistic vision. Techniques like intonaco and arriccio play an important role in achieving the desired texture and finish of the plaster, enhancing the final artwork.
Skilled plaster preparation not only ensures a smooth surface for painting but also allows artists to create vibrant and long-lasting alfresco paintings that can withstand the test of time. Essentially, the art of plaster preparation is a fundamental step in the alfresco painting process, contributing significantly to the overall quality and longevity of the finished piece.
Techniques for Detailed Artwork

Proper plaster preparation sets the stage for detailed artwork in alfresco painting, allowing artists to employ techniques like the fresco secco method for intricate designs and refined results. When working with the fresco secco technique, artists can achieve intricate details by painting on dry plaster. This method offers more precision and control, making it ideal for adding fine lines, intricate patterns, and delicate shading to the artwork. Utilizing specialized brushes is crucial in alfresco painting to achieve these intricate designs. These brushes are designed to help artists create detailed textures and refine their work with precision.
| Techniques for Detailed Artwork | |
|---|---|
| Fresco Secco Technique | Working on dry plaster allows for intricate details. |
| Intricate Details | Achieved through precise painting methods. |
| Specialized Brushes | Essential for creating refined and detailed artwork. |
Tips for Successful Transfers

To achieve successful transfers in alfresco painting, we must prioritize proper surface preparation, the selection of the appropriate transfer medium, and the application of even pressure during the process.
By applying a layer of colla and cleaning the surface diligently, we set the stage for a smooth transfer without any interference.
Additionally, mixing Colla Freddo with water and carefully securing the fresco during transfer are key steps for ensuring the artwork remains intact and undamaged.
Proper Surface Preparation
Ensuring a clean and smooth wall surface is vital for successful fresco transfers. Before beginning the transfer process, it's important to remove any dust, dirt, or contaminants that could interfere with the adhesion of the artwork.
Priming the wall with a suitable plaster mix helps create a strong foundation for the fresco transfer to adhere to securely. The choice of tools, such as trowels and brushes, plays a significant role in achieving an even and well-prepared surface.
Attention to detail during surface preparation is key to maintaining the integrity and quality of the transferred fresco artwork. By meticulously cleaning the wall surface, priming it correctly, and using the appropriate tools, artists can ensure that their fresco transfers are successful and visually appealing.
Proper surface preparation sets the stage for a seamless transfer process and contributes to the longevity of the artwork once completed.
Choosing Transfer Medium
For successful fresco transfers, the selection of transfer medium is vital in achieving desired outcomes and ensuring a smooth application process. When choosing a transfer medium, consider factors like the surface texture and the final look you aim to achieve. Acrylic medium is often a popular choice for fresco transfers due to its ability to create smooth and consistent results. Transparency and drying time are essential characteristics to evaluate when selecting a transfer medium to guarantee successful transfers onto various surfaces.
To help you better understand the differences between transfer mediums, here is a table outlining some key features:
| Transfer Medium | Surface Compatibility | Transparency | Drying Time |
|---|---|---|---|
| Acrylic Medium | Smooth surfaces | Transparent | Quick drying |
| Gel Medium | Textured surfaces | Semi-transparent | Longer drying time |
| Transfer Paper | Versatile | Transparent | Varies based on type |
| Wax Medium | Matte surfaces | Opaque | Slow drying |
Experimenting with different transfer mediums can lead to unique effects, so feel free to explore various options to find what works best for your artistic vision.
Applying Even Pressure
Let's emphasize the importance of maintaining consistent and gentle pressure throughout the fresco transfer process to guarantee a flawless outcome. Applying even pressure is essential in ensuring a smooth and successful transfer of the artwork.
Any uneven pressure can potentially distort or damage the transferred image, impacting the final result greatly. To preserve the integrity of the fresco, it's essential to apply consistent pressure evenly across its entire surface. Proper distribution of pressure is crucial for maintaining the details and quality of the original artwork during the transfer process.
One effective way to achieve this is by utilizing soft tools or rollers, which can help in applying even pressure for a precise and accurate transfer. By employing these techniques, artists can ensure that the transferred fresco retains its original beauty and intricacies without any distortions or imperfections caused by uneven pressure.
Sinopia in Alfresco Painting

In alfresco painting, sinopia serves as an essential preliminary sketch on the plaster before the final paint layers are applied. This technique, dating back to ancient times, involves outlining the composition in red earth pigment to guide the placement of figures and elements in the fresco.
The use of sinopia aids artists in executing large-scale murals by ensuring accuracy and cohesion in the design. By drawing the sinopia on the plaster, artists can visualize the final artwork and plan out details before applying subsequent layers of paint.
The red earth pigment of sinopia allows for clear outlines that remain visible through the final paint layers, acting as a roadmap for the artist during the painting process.
Frequently Asked Questions
What Is the Fresco Painting Technique?
Fresco painting technique involves applying water-based pigments on freshly laid plaster. Buon Fresco requires multiple plaster coats and painting on the final smooth layer. Fresco Secco uses wetted dry walls for detailed work.
What Does Al Fresco Mean in Painting?
Al fresco in painting means creating art outdoors, directly inspired by nature's beauty. Artists use oil paints or watercolors, capturing fleeting moments in the open air. This technique, rooted in tradition, allows us to embrace spontaneity and nature's essence.
How Does an Artist Create a True Fresco Painting?
To create a true fresco painting, we apply water-based pigments onto freshly laid wet plaster. The colors are made by grinding dry-powder pigments in pure water. The artist transfers the design outlines before painting.
Why Is Fresco Painting Significant?
Fresco painting is significant for its enduring colors that meld with the plaster, creating lasting artworks. Originating in ancient civilizations, this technique reached its pinnacle during the Italian Renaissance, showcasing grandeur and beauty.
Conclusion
To sum up, alfresco painting is a timeless artistic technique that requires skill, patience, and attention to detail.
The process of creating artwork on plastered walls or ceilings dates back to ancient times, showcasing the enduring beauty and craftsmanship of this method.
While it may seem challenging at first, with the right tools and techniques, anyone can master the art of alfresco painting.
So, don't hesitate to explore your creativity and let your imagination run wild on the canvas of plastered surfaces!
- About the Author
- Latest Posts
Introducing Ron, the home decor aficionado at ByRetreat, whose passion for creating beautiful and inviting spaces is at the heart of his work. With his deep knowledge of home decor and his innate sense of style, Ron brings a wealth of expertise and a keen eye for detail to the ByRetreat team.
Ron’s love for home decor goes beyond aesthetics; he understands that our surroundings play a significant role in our overall well-being and productivity. With this in mind, Ron is dedicated to transforming remote workspaces into havens of comfort, functionality, and beauty.
-

 Vetted2 weeks ago
15 Best Leather Restorer Products to Revive Your Furniture and Accessories
-

 Vetted2 weeks ago
15 Best Contact Paper for Kitchen Cabinets to Elevate Your Home Decor
-

 Vetted3 weeks ago
15 Best Leg Massagers to Relieve Tension and Improve Circulation – Ultimate Guide
-

 Vetted4 weeks ago
14 Best Lawn Tractors of 2024 – Ultimate Guide for Your Yard Maintenance
-

 Vetted1 week ago
15 Best Drain Snakes to Unclog Your Pipes Like a Pro
-

 Vetted4 weeks ago
15 Best Commercial Backpack Vacuums for Efficient Cleaning Tasks
-

 Vetted3 weeks ago
15 Best Lawn Games for Adults to Elevate Your Outdoor Gatherings
-

 Vetted4 weeks ago
15 Best Group Games for Adults to Spice Up Your Next Gathering


