Decor
How to Make Lighted Wine Bottle Decor
2025
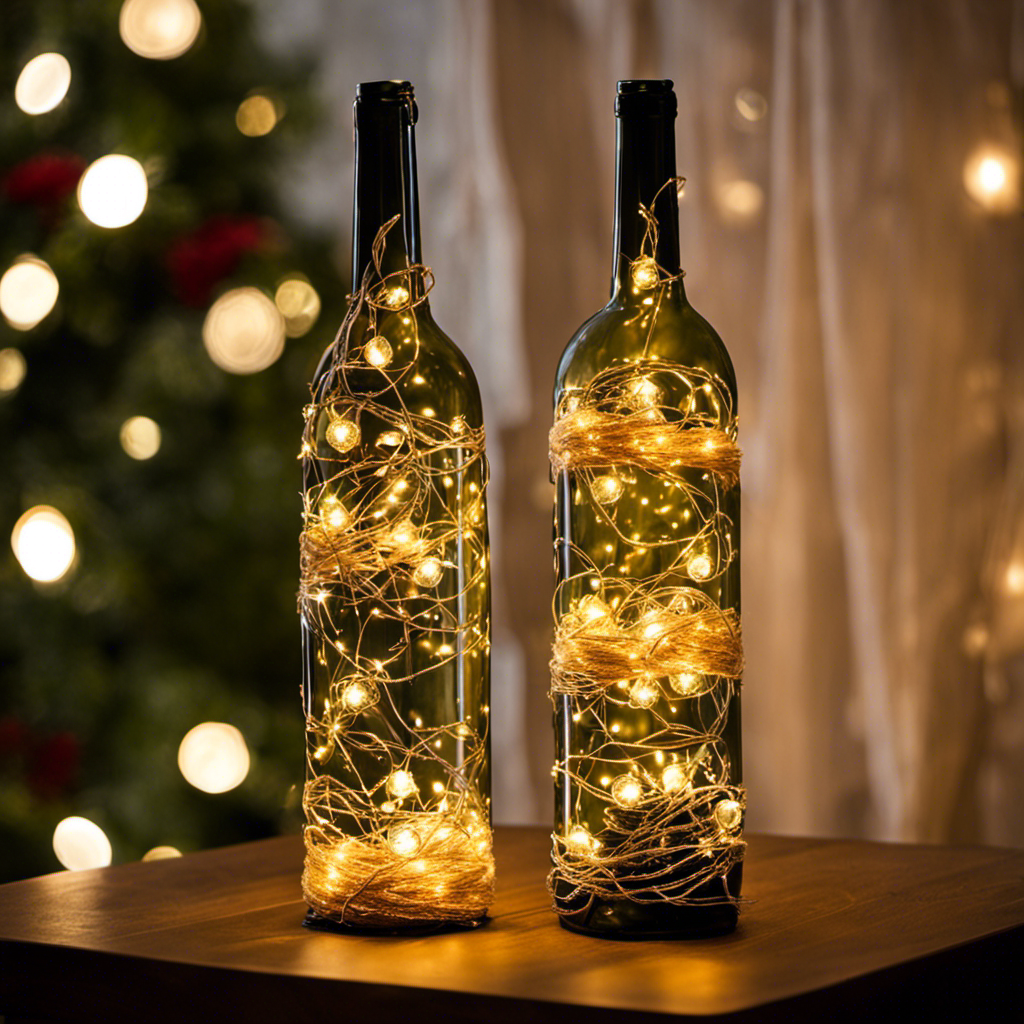
As a craft enthusiast, I have always been fascinated by the beauty and versatility of wine bottles. They can be transformed into stunning pieces of decor with just a little creativity and some twinkling lights.
In this article, I will guide you through the process of making your own lighted wine bottle decor. From choosing the perfect bottle to adding personalized touches, I will provide you with detailed instructions and expert tips to create a truly enchanting centerpiece for any occasion.
Get ready to let your creativity shine!
Key Takeaways
- Consider the shape, color, and size of the bottle to enhance the decor
- Thoroughly clean the bottle and remove any labels or adhesive residue
- Personalize the lighted wine bottle decor by choosing a design
- Explore different lighting options such as fairy lights or LED strip lights
Choosing the Right Wine Bottle
To start making your lighted wine bottle decor, you’ll want to choose the right wine bottle. Wine bottle selection is an important step in creating the perfect decoration. Not only does it determine the overall aesthetic of your project, but it also provides an opportunity for wine bottle recycling.
Look for bottles that have interesting shapes or colors that will enhance your decor. Consider the size of the bottle as well, as it will determine the amount of lights you can insert. When choosing a wine bottle, make sure it is clean and free from any labels or stickers. This will ensure a smooth surface for decorating.
Now that you have chosen the perfect wine bottle, let’s move on to preparing it for decoration.
Preparing the Wine Bottle for Decoration
Before starting, it’s important to clean the wine bottle thoroughly. Preparing the wine bottle for decoration is a crucial step in creating a stunning lighted wine bottle decor.
First, remove any labels or adhesive residue from the bottle by soaking it in warm, soapy water. Use a scrub brush or sponge to gently scrub away any stubborn residue. Rinse the bottle thoroughly and allow it to dry completely.
Next, consider applying a base coat of paint to the bottle to create a smooth and even surface for the decorative elements. Choose a color that complements your desired theme or aesthetic. Once the paint is dry, you can start decorating the bottle with lights, ribbons, or any other embellishments of your choice.
Get creative and let your imagination run wild to create a unique and eye-catching lighted wine bottle decor.
Selecting and Applying the Design
Once you have chosen a design, it’s time to apply it to the wine bottle. Design selection is an exciting part of the process, as it allows you to personalize your lighted wine bottle decor. Whether you opt for a delicate floral pattern or a bold geometric design, the possibilities are endless.
To apply the design, start by cleaning the surface of the bottle and ensuring it is dry. Then, carefully place the stencil or transfer paper onto the bottle, making sure it is centered and aligned properly. Next, use a brush or sponge to apply the paint or adhesive onto the stencil, filling in the design. Allow it to dry completely before removing the stencil.
Now that your design is applied, you are ready to move on to the next step: adding lights to the wine bottle.
Adding Lights to the Wine Bottle
Now that you’ve applied your design, it’s time to add the lights to your wine bottle. The lighting options for this project are endless, allowing you to create a beautiful and unique display. Here’s how to do it:
- Fairy lights: Wrap a string of fairy lights around the bottle, making sure to evenly distribute them for a magical effect.
- LED strip lights: Attach an LED strip light to the inside of the bottle, creating a stunning glow that illuminates the entire bottle.
By incorporating these lighting options, you can enhance the beauty of your wine bottle decor. Experiment with different bottle arrangements and lighting techniques to achieve the desired ambiance.
Once you’ve added the lights, it’s time to secure them in place, ensuring they stay put and provide a consistent glow.
Securing the Lights in Place
To keep the lights in place, you’ll simply need to use a small amount of adhesive or tape.
When it comes to fixing lights in your lighted wine bottle decor, securing the wires is essential. Start by positioning the lights inside the bottle, making sure the wires are neatly arranged. Then, use a clear adhesive or tape to secure the wires to the inside of the bottle. This will prevent them from moving around and tangling, ensuring a clean and polished look.
Additionally, you can use adhesive dots or double-sided tape to secure the battery pack or plug to the bottom of the bottle. This way, everything will stay in place and your lighted wine bottle decor will shine beautifully.
Now, let’s move on to enhancing the decorative features to make your creation even more stunning.
Enhancing the Decorative Features
When it comes to enhancing the decorative features of any space, creative lighting techniques and choosing complementary materials are two key points to consider.
With the right lighting techniques, you can create a captivating and inviting atmosphere that highlights the best features of your decor.
Additionally, selecting materials that complement each other can enhance the overall aesthetic and create a harmonious visual appeal.
In this discussion, I will delve into these two aspects in detail, providing you with valuable insights and tips to elevate your decorative game.
Creative Lighting Techniques
You’ll want to experiment with different lighting techniques to add a creative touch to your lighted wine bottle decor. Here are some innovative illumination techniques and unique lighting designs that you can try:
-
Fairy Lights: Wrap delicate strands of fairy lights around the bottle, creating a magical and ethereal glow.
-
LED Strips: Attach LED strips inside the bottle for a modern and futuristic look, allowing you to choose from a wide range of colors and effects.
-
Silhouette Shadows: Create captivating shadows by placing cut-out shapes, such as stars or flowers, in front of the light source.
By incorporating these lighting techniques, you can elevate your lighted wine bottle decor to new heights of visual appeal.
Now, let’s explore how to choose complementary materials to enhance the overall aesthetic of your creation.
Choosing Complementary Materials
For a visually pleasing result, consider incorporating complementary materials that enhance the overall aesthetic of your illuminated wine bottle creation.
When it comes to choosing unique materials, the possibilities are endless. You can opt for materials that add texture, such as burlap or lace, to give your wine bottle a rustic or vintage feel.
Incorporating natural elements like twigs, leaves, or dried flowers can bring a touch of nature into your design. These elements can be secured to the bottle using twine or adhesive.
Additionally, consider using colored glass pebbles or beads to add a pop of color and sparkle to your creation.
By carefully selecting materials that complement your design, you can create a truly stunning and personalized lighted wine bottle decor that will surely catch the eye of anyone who sees it.
Now, let’s move on to the next step of personalizing your lighted wine bottle.
Personalizing Your Lighted Wine Bottle
When it comes to personalizing your lighted wine bottle, there are a few key areas to focus on.
First, consider the design of the bottle itself. There are endless possibilities, from sleek and modern to rustic and vintage.
Next, think about the lighting options. You can choose from various colors, intensity levels, and even different effects such as flickering or fading.
Lastly, don’t forget about the label. You can create a custom label with your own design or message, adding a personal touch to your lighted wine bottle.
Decorative Bottle Designs
There’s a variety of decorative bottle designs that can transform a simple wine bottle into a stunning piece of decor. When it comes to decorative bottle crafts and repurposing glass bottles, the possibilities are endless.
Let me paint a picture for you:
-
Shapes: From sleek and slender to curvaceous and round, bottles come in all shapes and sizes. Choose a design that complements your style and the room you plan to place it in.
-
Colors: Glass bottles can be found in a multitude of colors, from clear and translucent to vibrant blues, greens, and even frosted finishes. Pick a color that matches your desired aesthetic.
-
Patterns and textures: Etched designs, frosted finishes, or even painted patterns can add an extra touch of elegance to your bottle. Consider incorporating intricate designs or textured surfaces for a truly unique look.
With these decorative bottle designs, you can easily elevate any space and create a stunning centerpiece for your home.
Customized Lighting Options
As I continue exploring the world of lighted wine bottle decor, I can’t help but be captivated by the endless possibilities of customized lighting styles. It’s incredible to see how different lighting techniques can transform a simple wine bottle into a stunning piece of art. From soft, warm fairy lights to bold, colorful LED strips, the options are truly limitless.
One of the most exciting aspects of creating lighted wine bottle decor is the opportunity to incorporate unique bottle embellishments. Whether it’s adding a touch of elegance with delicate lace or creating a rustic look with twine and burlap, these embellishments can truly elevate the overall design. I’ve also come across some extraordinary ideas, like using glass paints to create intricate designs or attaching small trinkets that reflect the light in mesmerizing ways.
With customized lighting styles and unique bottle embellishments, the world of lighted wine bottle decor is a treasure trove of creativity and personalization. It’s a delightful journey of transforming ordinary wine bottles into extraordinary works of art.
Personalized Label Ideas
You can unleash your creativity by designing personalized labels that add a unique touch to your lighted wine bottle creations. Here are some personalized label ideas that will elevate your wine bottle crafts and DIY home decor:
-
Customized Names: Personalize your wine bottle by adding the names of your loved ones. It could be a perfect gift for birthdays or anniversaries. Include special dates or memorable quotes to make it even more meaningful.
-
Themed Labels: Create labels that match the theme of your event or the season. From elegant floral designs for weddings to spooky Halloween themes, the possibilities are endless. Incorporate vibrant colors and patterns that reflect your personal style.
Adding personalized labels to your lighted wine bottle decor not only adds a personal touch but also makes them stand out. Now, let’s explore creative ways to display your beautiful creations.
Displaying Your Lighted Wine Bottle Decor
To showcase your lighted wine bottle decor, try placing it on a mantel or shelf for a cozy ambiance. However, if you’re looking for alternative options, there are various hanging options that can add a unique touch to your space. One option is to hang your lighted wine bottle decor from the ceiling using decorative hooks or chains. This creates a whimsical and eye-catching display that can instantly transform any room. Another option is to create a DIY wall-mounted display using a wooden board and hooks. This allows you to arrange multiple wine bottles in a creative pattern, adding depth and visual interest to your wall. Finally, consider using your lighted wine bottle decor as a centerpiece for your dining table or outdoor patio. This creates a warm and inviting atmosphere for gatherings and special occasions.
| Hanging Options | Alternative Uses |
|---|---|
| Ceiling Hooks or Chains | Wall-mounted Display |
| DIY Wooden Board and Hooks | Dining Table Centerpiece |
| Outdoor Patio Decor |
– Can Lighted Wine Bottle Decor be Used as a Studio Decor with Airfloat Gallery Frames?
Yes, lighted wine bottle decor can be used as studio decor with airfloat gallery frames. The weight of the studio decor airfloat gallery frames should be taken into consideration when choosing the appropriate display method for the lighted wine bottle decor.
Tips and Tricks for Maintaining and Troubleshooting
One important tip for maintaining your lighted wine bottle decor is to regularly check the batteries to ensure they are properly functioning.
Here are some additional tips and tricks for maintaining and troubleshooting your lighted wine bottle decor:
-
Maintaining lights:
-
Clean the bottles regularly to remove dust and dirt that can affect the brightness of the lights.
-
Replace the batteries as soon as they start to weaken to maintain optimal brightness.
-
Troubleshooting wiring:
-
If the lights flicker or don’t turn on, check for loose connections in the wiring and secure them properly.
-
If a section of lights goes out, use a voltage tester to identify the faulty bulb and replace it.
Frequently Asked Questions
What Are Some Safety Precautions to Consider When Working With Lighted Wine Bottle Decor?
When working with lighted wine bottle decor, it’s crucial to prioritize safety. Some important precautions include ensuring electrical components are properly insulated, avoiding overloading circuits, and keeping flammable materials away from the heat source. Safety first!
Can I Use Any Type of Lights for My Lighted Wine Bottle Decor?
Yes, you can use various types of lights for your lighted wine bottle decor. It’s important to consider factors such as the size of the bottle and the desired ambiance. Choose lights that complement your decor style and create a mesmerizing glow.
How Long Do the Lights Typically Last Before Needing to Be Replaced?
The lifespan of the lights in lighted wine bottle decor varies depending on usage, but typically they last for several months before needing to be replaced. To extend their lifespan, try troubleshooting common issues like loose connections or faulty wiring.
Can I Use a Different Type of Bottle Other Than a Wine Bottle for This Project?
Yes, you can use alternative bottles for this project. There are so many creative options available, such as liquor bottles or decorative glass bottles. Let your imagination run wild and choose a bottle that suits your style!
Are There Any Specific Cleaning Instructions for Maintaining the Decorative Features on the Lighted Wine Bottle Decor?
To keep the decorative features on the lighted wine bottle decor looking their best, follow these cleaning instructions and maintenance tips. Regularly dust the bottle with a soft cloth and avoid using harsh chemicals that could damage the design.
Conclusion
In conclusion, creating your own lighted wine bottle decor is a fun and rewarding DIY project. By following these steps, you can transform a simple wine bottle into a stunning decorative piece for your home or special event.
Remember to choose the right bottle, prepare it properly, and apply a design that suits your taste. Adding lights and securing them in place will bring your creation to life. Enhance the decorative features and personalize it to make it truly unique.
Finally, proudly display your lighted wine bottle decor and enjoy the beautiful ambiance it creates. Cheers to your creativity and craftsmanship!
- About the Author
- Latest Posts
Meet Bethia, the visionary designer at ByRetreat who brings a touch of magic to every remote workspace she creates. With a boundless imagination and an eye for beauty, Bethia is passionate about transforming ordinary spaces into extraordinary havens of creativity and comfort.
Bethia possesses a unique talent for envisioning the perfect combination of furniture, colors, and textures that harmonize seamlessly in a room. She understands that selecting furniture goes beyond mere functionality; it’s about curating pieces that evoke a sense of style and sophistication while enhancing the overall ambiance.
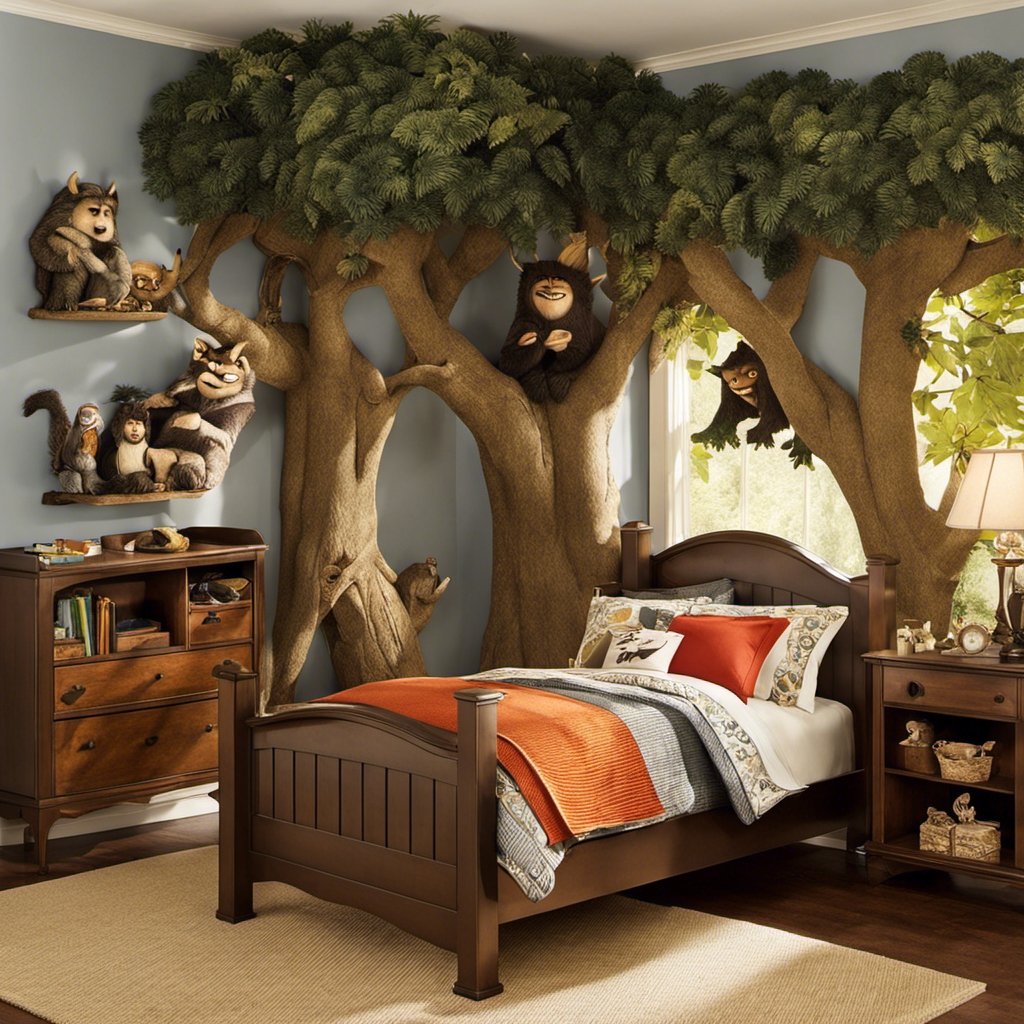
I find myself unable to resist exploring the depths of my imagination, where the wild things roam. This is a place where elements inspired by nature spring to life, infusing every corner with unbridled beauty.
With wild animal prints and patterns, jungle-themed wall art, and adventure-inspired furniture and accessories, I create a cozy wilderness retreat.
It’s a place where the untamed meets the domestic, where the wild things are brought into our homes, creating a captivating and enchanting space.
Key Takeaways
- Incorporate nature-inspired elements like potted plants and botanical artwork
- Use wild animal prints and patterns to add elegance and adventure
- Transform your walls with vibrant jungle-themed art
- Bring the spirit of the wild into your home with adventure-inspired furniture and accessories
Incorporating Nature-inspired Elements
You can easily bring the beauty of nature into your decor by adding elements like potted plants and botanical artwork. To create a nature-inspired ambiance, opt for a color palette that reflects the natural world. Think earthy tones, such as muted greens, warm browns, and soft blues. These colors will instantly evoke a sense of calm and serenity, bringing the outdoors in.
Additionally, incorporating natural textures can further enhance the nature-inspired theme. Consider using materials like rattan, jute, or bamboo for furniture and accessories. These textures not only add visual interest but also create a tactile experience that connects you to the natural world.
By infusing your space with a nature-inspired color palette and incorporating natural textures, you can effortlessly transform your home into a tranquil oasis.
Now, let’s explore how we can incorporate wild animal prints and patterns into the decor seamlessly.
Wild Animal Prints and Patterns
Add a touch of safari to your space with wild animal prints and patterns. Incorporating exotic animal-inspired fashion trends into home decor is a fun and stylish way to bring the wilderness indoors. Here are three ideas to inspire your wild side:
-
Leopard Print Pillows: These statement pillows add a touch of elegance while showcasing the beauty and grace of the leopard. They bring a sense of adventure and sophistication to any room, whether placed on a couch or bed.
-
Zebra Striped Rug: A zebra striped rug instantly adds a bold and exotic touch to your space. Its black and white pattern creates a striking visual contrast and adds a sense of movement and energy to the room.
-
Giraffe Print Wallpaper: Transform your walls with a stunning giraffe print wallpaper. This unique and eye-catching pattern adds height and creates a sense of drama and intrigue. It brings the exotic beauty of the African savannah right into your home.
By incorporating wild animal prints and patterns into your space, you can create an atmosphere that not only embraces fashion trends but also raises awareness for wild animal conservation efforts.
Now, let’s explore the next section on jungle-themed wall art.
Jungle-themed Wall Art
Transform your walls with vibrant jungle-themed wall art that brings the lush beauty of the rainforest into your home. Create a stunning jungle themed nursery or add a touch of tropical paradise to any room with these captivating pieces. From colorful tropical birds to majestic jungle animals, the options are endless.
| Jungle Animals | Tropical Birds | Rainforest Leaves |
|---|---|---|
| Lion | Parrot | Monstera |
| Tiger | Toucan | Palm |
| Elephant | Flamingo | Fern |
| Giraffe | Peacock | Banana Leaf |
| Monkey | Macaw | Philodendron |
These jungle-inspired artworks will transport you to a world of adventure and wonder. The intricate details and vibrant colors of the artwork will add depth and life to your walls, creating a truly immersive experience. Pair the wall art with tropical forest-inspired wallpaper for a cohesive and captivating look.
Now, let’s venture into the world of adventure-inspired furniture and accessories, where you can bring the spirit of the wild into every corner of your home.
Adventure-inspired Furniture and Accessories
Let’s explore adventure-inspired furniture and accessories that will bring the spirit of the wild into your home.
When it comes to safari inspired textiles, think animal prints, earthy tones, and textured fabrics. A zebra patterned rug or a leopard print throw pillow can instantly transport you to the untamed wilderness.
Nature inspired lighting fixtures are another great way to add a touch of adventure to your space. Imagine a pendant lamp shaped like a tree branch or a table lamp adorned with intricate leaf designs. These fixtures not only provide illumination but also serve as unique decorative pieces.
With safari textiles and nature-inspired lighting, you can create a home that embodies the thrill and wonder of the wild.
Now, let’s move on to creating a cozy wilderness retreat.
Creating a Cozy Wilderness Retreat
To create a cozy wilderness retreat, you can start by incorporating warm, rustic colors and natural textures into your space. Think about earthy tones like deep reds, browns, and greens that will evoke the feeling of being in a cozy cabin in the woods. Add in touches of natural textures such as wood, stone, and wool to bring the outdoors inside. A great way to achieve this is by using reclaimed wood for furniture or accent pieces. You can also incorporate faux fur throws and pillows for added comfort and warmth. To further enhance the rustic charm, consider adding vintage or distressed pieces to your decor. This will give your space a lived-in and well-loved feel.
| Rustic Colors | Natural Textures |
|---|---|
| Deep Reds | Reclaimed Wood |
| Browns | Stone |
| Greens | Wool |
Frequently Asked Questions
Where Can I Purchase Nature-Inspired Elements for My Home Decor?
I love incorporating nature-inspired elements into my home decor. It’s easy to find affordable options at local craft stores or online retailers. Adding natural textures like wood, stone, and plants can really elevate the overall design.
What Are Some Popular Wild Animal Prints and Patterns for Home Decor?
Popular wild animal prints for fashion include leopard, zebra, and snake prints. Incorporating nature-inspired elements into your wardrobe can be done by adding accessories like scarves or jewelry with animal motifs.
Where Can I Find Unique Jungle-Themed Wall Art?
I love finding unique jungle-themed wall art! It adds a touch of adventure to my home. I’ve discovered creative ways to incorporate nature-inspired elements into my decor, and the jungle prints really bring it to life.
What Are Some Adventure-Inspired Furniture and Accessories That Can Be Incorporated Into My Home Decor?
Adventure inspired lighting fixtures and nature inspired textiles are great additions to any home decor. They add a sense of wanderlust and bring the beauty of the outdoors inside.
How Can I Create a Cozy Wilderness Retreat in My Home?
To create a cozy wilderness retreat at home, I focus on creating a rustic cabin atmosphere by incorporating natural materials into my decor. Wood accents, earthy colors, and cozy textiles bring the outdoors inside.
Is “Where the Wild Things Are” Decor a Popular Choice for Home Decor?
“Where the Wild Things Are” decor is indeed a popular choice for home decor. The whimsical and imaginative theme of the book translates well into stylish and fun design elements. If you need help spelling decor correctly, a tutorial is a quick and helpful resource to guide you in the right direction.
Conclusion
As I step back and take in the finished space, I can’t help but feel a sense of enchantment. The wild things have truly come alive in this decor, transforming my home into a cozy wilderness retreat.
From the nature-inspired elements that bring the outdoors inside, to the wild animal prints and patterns that add a touch of untamed beauty, every detail tells a story.
And as I sit in my adventure-inspired furniture, surrounded by jungle-themed wall art, I can’t help but feel like I’ve been transported to a far-off land where the wild things roam free.
It’s a magical escape, right in the comfort of my own home.
- About the Author
- Latest Posts
Meet Katherine, the creative enthusiast at ByRetreat who infuses her boundless passion for design into every remote workspace she crafts. With an innate sense of creativity and an eye for unconventional beauty, Katherine brings a unique and inspiring perspective to the team.
Katherine’s love for design is infectious, and her ability to think outside the box sets her apart. She believes that true artistry lies in embracing a variety of styles and mixing them harmoniously to create captivating spaces. By combining different textures, colors, and patterns, Katherine weaves a tapestry of creativity that breathes life into each remote workspace.

I have always been curious about the closing time of Floor and Decor, especially when I have last-minute shopping to do. After conducting some research, I have all the information you need.
In this article, I’ll be sharing the store hours for weekdays, Saturdays, and Sundays, as well as the special holiday closing times at Floor and Decor. So, if you’re curious like me or just need to plan your visit, keep reading to find out when Floor and Decor closes.
Key Takeaways
- Floor and Decor closes at 8:00 PM on Mondays, Tuesdays, and Wednesdays on weekdays.
- The closing time on Saturdays may vary by location, so it’s important to check the specific operating hours for the store you plan to visit.
- Most Floor and Decor stores close at 7:00 PM on Sundays.
- Floor and Decor may have different opening and closing hours during holidays, but they still strive to offer a wide range of products and excellent service during those times.
Store Hours: Floor and Decor Closing Time
What time does Floor and Decor close?
As a customer, it is important to know the store hours to plan your visit accordingly.
Floor and Decor opens on weekdays at 7:00 AM, providing an early start for those who need to shop for their flooring and decor needs. This early opening time allows customers to have ample time to browse, seek assistance, and complete their purchases.
Additionally, customer service is available throughout the day to provide guidance and answer any questions you may have.
Now, let’s move on to the next section where we will discuss the weekday closing time at Floor and Decor.
Weekday Closing Time at Floor and Decor
You’ll want to check out the weekday closing time at Floor and Decor. As a customer, it’s important to be aware of the store’s closing policies to ensure a smooth shopping experience. To help you plan your visit, here is a table showing the weekday closing times at Floor and Decor:
| Day | Closing Time |
|---|---|
| Monday | 8:00 PM |
| Tuesday | 8:00 PM |
| Wednesday | 8:00 PM |
With these closing times, you have plenty of time during the weekdays to explore the wide range of flooring and decor options that Floor and Decor offers. It’s always a good idea to double-check the closing time before heading to the store, as it may be subject to change.
Now that you know the weekday closing times at Floor and Decor, let’s move on to the next section where we will discuss the Saturday closing time.
Saturday Closing Time: Floor and Decor
Make sure to check out the Saturday closing time at Floor and Decor so you can plan your visit accordingly. Floor and Decor operates on different hours on Saturdays compared to weekdays. On Saturdays, Floor and Decor typically closes earlier than on weekdays. The exact closing time may vary depending on the location, so it’s important to check the specific operating hours for the store you plan to visit. By knowing the Saturday closing time, you can ensure that you have enough time to browse and make your purchases before the store closes for the day.
Now, let’s move on to the next topic: Sunday hours.
Sunday Hours: When Does Floor and Decor Close
To plan your visit to Floor and Decor on Sundays, be sure to check out their operating hours. Knowing the floor and decor Sunday hours is essential to ensure you can shop for your home improvement needs at the right time.
Here are the details you need to know:
- Floor and Decor closing time on Sundays may vary by location, so it’s important to check the specific store near you.
- Most Floor and Decor stores close at 7:00 PM on Sundays, providing you with ample time to browse their wide selection of flooring, tile, and other home decor products.
By being aware of the floor and decor Sunday hours, you can plan your visit accordingly and make the most of your time at the store.
Now, let’s move on to the next section to learn about the special holiday closing time at Floor and Decor.
Special Holiday Closing Time at Floor and Decor
Don’t forget to check the special holiday closing hours at Floor and Decor, as they may differ from their regular operating hours.
During the holiday season, Floor and Decor often offers special promotions and sales to help customers make the most of their home improvement projects. These special promotions can be a great opportunity to save money on your flooring and decor needs.
While the store may have different opening and closing hours during holidays, they still strive to provide excellent service and a wide range of products.
Is “Floor & Decor” a Different Store or the Same as “Floor and Decor”?
Looking for “Floor & Decor” closing hours? “Floor & Decor” is the same as “Floor and Decor.” The store offers a wide range of flooring, tiles, and accessories for home improvement projects. Check their website or call the nearest location for accurate closing hours.
Frequently Asked Questions
Does Floor and Decor Offer Extended Holiday Hours?
Yes, Floor and Decor does offer extended holiday hours. They have late night hours and early morning hours during the holiday season to accommodate customers. It’s always best to check their website for specific hours.
What Is the Earliest Time That Floor and Decor Opens on Weekdays?
The earliest time Floor and Decor opens on weekdays is 7:00 am. According to customer reviews, their customer service satisfaction is high, making it a reliable option for all your flooring and decor needs.
Are There Any Days During the Week That Floor and Decor Has Extended Hours?
Yes, Floor and Decor has extended hours on weekends. They offer special discounts and promotions during these times. It’s a great opportunity to shop for your home improvement needs.
Is There a Specific Time That Floor and Decor Opens on Sundays?
On Sundays, Floor and Decor opens at a specific time. They also have set opening hours on weekdays. For more information, you can check their website or contact their customer service.
Are There Any Exceptions to the Regular Closing Time at Floor and Decor, Such as During Special Events or Promotions?
During special events or promotions, Floor and Decor may have exceptions to their regular closing time. It’s always a good idea to check with the store directly for any changes in their operating hours.
Conclusion
In conclusion, when it comes to closing time at Floor and Decor, it’s important to know the store’s schedule. Weekdays typically end at 9 PM, while Saturdays close at 8 PM. On Sundays, the store closes a bit earlier at 7 PM.
It’s crucial to note that during special holidays, Floor and Decor might have altered closing times, so it’s always best to check ahead.
Just like a well-oiled machine, Floor and Decor keeps its operations running smoothly, ensuring customers have ample time to shop.
- About the Author
- Latest Posts
Meet Katherine, the creative enthusiast at ByRetreat who infuses her boundless passion for design into every remote workspace she crafts. With an innate sense of creativity and an eye for unconventional beauty, Katherine brings a unique and inspiring perspective to the team.
Katherine’s love for design is infectious, and her ability to think outside the box sets her apart. She believes that true artistry lies in embracing a variety of styles and mixing them harmoniously to create captivating spaces. By combining different textures, colors, and patterns, Katherine weaves a tapestry of creativity that breathes life into each remote workspace.
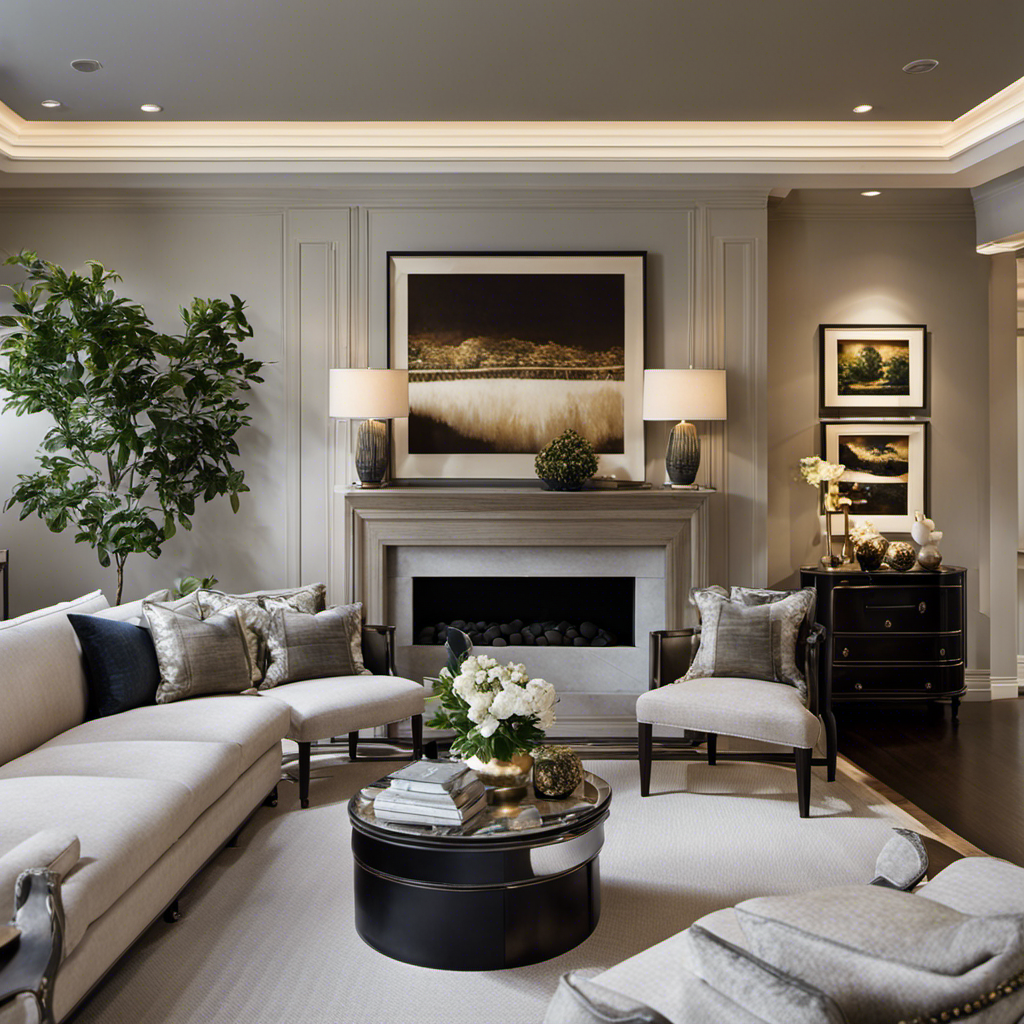
As I stand in my living room, looking at the bare walls around me, I can’t shake this feeling of emptiness. It’s like my space is missing a piece of its essence.
But fear not, dear reader, for I have discovered the secret to transforming these barren canvases into works of art. In this article, I will guide you through the enchanting world of wall decor, revealing the techniques and tips that will help you hang your treasures with ease and grace.
Get ready to unleash your inner artist!
Key Takeaways
- Consider the size, quantity, and style of wall decor based on available space and the overall theme of the room.
- Choose wall decor that complements the wall colors for a cohesive look, but also consider using neutral walls as a backdrop for bold and vibrant decor choices.
- Gather the necessary tools and materials such as a hammer, nails, picture hooks, wall anchors, level, and safety equipment to ensure proper hanging and stability.
- When hanging framed artwork, make sure to position the frames properly, align them with the center of the wall, use a level for straight hanging, and choose appropriate hardware based on the frame weight and wall material.
Assessing Your Wall Space
You’ll want to start by taking a look at your wall space and figuring out how much room you have to work with. Assessing your wall space is crucial in determining the size and quantity of wall decor you can hang.
Additionally, consider the wall color coordination to ensure that the decor complements the existing color scheme of your room. If you have a neutral wall color, you have more flexibility in choosing different types of decor. On the other hand, if your walls are already bold or vibrant, you may want to opt for more subtle pieces to avoid overwhelming the space.
Don’t worry if you’re on a budget, there are plenty of budget-friendly options available that can still add a touch of style to your walls.
Now that you’ve assessed your wall space and considered color coordination, let’s move on to choosing the right wall decor that suits your style and preferences.
Choosing the Right Wall Decor
When choosing the right decor for your walls, it’s important to consider the overall style and theme of your space. One key factor to consider is wall color coordination. You want your wall decor to complement the colors of your walls, creating a cohesive and visually appealing look.
If you have neutral-colored walls, you have the freedom to choose wall decor in bold and vibrant colors to add a pop of personality. On the other hand, if your walls are already painted in a bold color, opting for wall decor in more muted tones can help create balance.
Additionally, mixing and matching styles can add depth and interest to your walls. Consider combining different types of wall art, such as framed prints, canvases, and mirrors, to create a dynamic and eclectic look.
By carefully selecting wall decor that coordinates with your wall color and mixing different styles, you can create a stunning and personalized space that reflects your unique style.
Now that you have a vision for your wall decor, let’s move on to gathering the necessary tools and materials.
Gathering the Necessary Tools and Materials
Once you’ve decided on your vision for the wall decor, it’s time to gather the tools and materials needed to bring it to life. Here are the essential items you’ll need:
-
Hammer and nails: These are the classic tools for hanging wall decor. Make sure to choose the right size and type of nails for your specific project.
-
Picture hooks: These hooks are designed to hold heavier items like frames or mirrors. They provide extra stability and prevent damage to your walls.
-
Wall anchors: If you’re hanging something on a hollow wall, such as drywall, wall anchors are a must. They provide extra support and prevent the item from falling.
-
Level: Hanging your decor straight is crucial for a professional look. A level will help you ensure that everything is perfectly aligned.
When working with tools, always prioritize safety precautions. Wear protective goggles to shield your eyes from debris, and use a stud finder to locate the solid parts of the wall.
With the right tools and safety measures in place, you’re ready to move on to measuring and marking the wall for your wall decor installation.
Measuring and Marking the Wall
To ensure precise placement, start by measuring and marking the desired location on your chosen surface. Accurate measurements are crucial to ensure that your wall decor is in the perfect spot. Use a tape measure to determine the height and width of the area where you want to hang your artwork.
Mark the center point of the wall with a pencil, as this will serve as your starting point. Next, use a level to ensure that your markings are straight and even. Leveling techniques are essential to create a balanced and visually appealing display.
Once you have marked the wall, you are ready to move on to the next step of preparing and hanging framed artwork. By following these precise measurements and leveling techniques, your wall decor will look stunning in its designated space.
Preparing and Hanging Framed Artwork
When it comes to preparing and hanging framed artwork, there are two key points to consider: proper frame positioning and wall material considerations.
Proper frame positioning is essential for achieving the desired aesthetic and ensuring the artwork is displayed at its best. This involves determining the ideal height, spacing, and alignment of the frames on the wall.
Additionally, wall material considerations are crucial to ensure the frames are securely mounted and do not damage the wall surface. Different wall materials may require specific hanging techniques, such as using anchors for drywall or adhesive strips for smooth surfaces.
Proper Frame Positioning
Make sure the frame is aligned with the center of the wall for proper positioning. This is essential to create a visually appealing display. When it comes to hanging wall decor, frame leveling and choosing the right hanging hardware options are crucial.
Here are four tips to help you achieve the perfect frame positioning:
-
Use a level: Place a level on top of the frame to ensure it is straight. Adjust accordingly until the bubble is centered.
-
Measure the height: Measure the distance from the top of the frame to the hanging hardware. Transfer this measurement to the wall, marking the spot for the hanging hardware.
-
Select the right hardware: Depending on the weight and size of the frame, choose the appropriate hanging hardware such as hooks, nails, or wall anchors.
-
Consider wall material: Different wall materials require different hanging techniques. For example, plaster walls may require anchors while drywall may only need a simple nail.
By following these tips, you can ensure your frame is properly positioned and securely hung.
Now, let’s explore some important considerations when dealing with different wall materials.
Wall Material Considerations
Different wall materials may require specific hanging techniques, such as anchors for plaster walls and simple nails for drywall. When it comes to hanging decor on alternative materials like brick or concrete, the process can be slightly more challenging. For these surfaces, it’s essential to use masonry screws or anchors designed to hold a heavier load. These types of hanging hardware provide a secure hold and prevent damage to the wall.
Additionally, if you have a metal or glass wall, you may need specialized brackets or adhesive hooks that are designed to adhere to these surfaces without causing any damage. Understanding the specific hanging techniques for different wall materials will ensure that your decor stays securely in place and complements your space perfectly.
Transitioning into the subsequent section about hanging mirrors and shelves, it’s important to consider the weight and size of the items you are hanging.
Hanging Mirrors and Shelves
To hang mirrors and shelves, you’ll need to measure and mark the desired placement on the wall. Here’s how to do it:
-
Start by determining the height at which you want to hang the mirror or shelf. Consider factors like eye level and the height of nearby furniture.
-
Use a tape measure to measure the distance from the floor or nearby furniture to the desired height.
-
Mark the measurement on the wall using a pencil or painter’s tape. Make sure the mark is level by using a spirit level or laser level.
-
For shelves, use a stud finder to locate the studs in the wall. Mark the stud locations on the wall to ensure proper support for the shelf.
Now that you’ve mastered mirror placement and shelf installation, let’s move on to arranging and hanging gallery walls.
Arranging and Hanging Gallery Walls
When arranging and hanging gallery walls, you’ll want to consider the size and layout of your artwork. The key is to create a cohesive and visually appealing display. Start by selecting artwork that complements each other in terms of theme, color, and style. To help you visualize the arrangement, here’s a table showcasing different gallery wall layouts:
| Layout 1 | Layout 2 | Layout 3 |
|---|---|---|
| 🖼️ | 🖼️ | 🖼️ |
| 🖼️ | 🖼️ | 🖼️ |
| 🖼️ | 🖼️ | 🖼️ |
| 🖼️ | ||
Experiment with different combinations until you find the perfect arrangement. Once you’ve decided on the layout, it’s time to start hanging your artwork. But before I get into the details, let’s talk about adding finishing touches and maintenance tips for your gallery wall.
Adding Finishing Touches and Maintenance Tips
Now that you have successfully arranged and hung your gallery walls, it’s time to add those finishing touches and ensure your wall decor stays looking its best. Here are some maintenance tips to keep in mind:
-
Dust regularly: Dust can accumulate on your wall decor, dulling its appearance. Use a soft, dry cloth or a feather duster to gently remove any dust buildup.
-
Avoid direct sunlight: Sunlight can fade colors over time. If possible, avoid hanging your wall decor in direct sunlight or use UV-filtering window film to protect it.
-
Select complementary colors: When choosing additional pieces to complement your wall decor, consider selecting colors that harmonize or contrast with the existing colors. This will create a cohesive and visually appealing look.
-
Rotate your pieces: To keep your wall decor fresh, consider rotating pieces every few months. This will give your space a new look and prevent any one piece from becoming too worn or faded.
Frequently Asked Questions
What Are Some Tips for Hanging Wall Decor in a Bathroom or Kitchen?
In small spaces like a bathroom or kitchen, hanging wall decor can be tricky. However, with a few tips, it can be done! Especially for those in a rental property, there are creative solutions to make your walls come alive.
How Do I Hang a Heavy Piece of Wall Decor Securely?
To hang a heavy piece of wall decor securely, I recommend using wall anchors and screws designed for brick walls. If you’re in a rental home, consider using removable adhesive hooks or picture hanging strips for a damage-free solution.
Can I Hang Wall Decor on Wallpaper or Textured Walls?
Yes, you can hang wall decor on wallpaper or textured walls. Adhesive hooks and Command strips are great options. They provide a secure hold without damaging the surface. Just make sure to follow the instructions carefully for best results.
Are There Any Alternative Methods to Hanging Wall Decor Without Using Nails?
There are alternative methods to hanging wall decor without using nails. Adhesive hooks and wire hanging systems are great options. They offer convenience and flexibility, allowing you to easily rearrange or remove your decor without damaging your walls.
How Do I Create a Cohesive Look When Hanging Multiple Pieces of Wall Decor Together?
How can I create a cohesive look when hanging multiple pieces of wall decor? By carefully planning the arrangement, considering the size and style of each piece, and maintaining symmetry, I can achieve a stunning gallery wall.
Can I Use the Same Techniques for Hanging Wall Decor Without Nails as I Would with Nails?
Yes, you can use the same techniques for hanging wall decor without nails as you would with nails. Command strips, adhesive hooks, and removable putty are great alternatives. Just make sure the weight of the decor is compatible with the chosen method for hanging wall decor without nails.
Conclusion
In conclusion, hanging wall decor is like adding the final brushstrokes to a masterpiece. With careful planning and the right tools, anyone can transform their walls into a gallery of personal style and expression.
Remember to assess your wall space, choose the perfect decor, and gather the necessary tools and materials. Take precise measurements, prepare and hang your artwork with care, and don’t forget to arrange and hang gallery walls for a stunning display.
With a few finishing touches and regular maintenance, your walls will truly come alive with personality.
- About the Author
- Latest Posts
Meet Katherine, the creative enthusiast at ByRetreat who infuses her boundless passion for design into every remote workspace she crafts. With an innate sense of creativity and an eye for unconventional beauty, Katherine brings a unique and inspiring perspective to the team.
Katherine’s love for design is infectious, and her ability to think outside the box sets her apart. She believes that true artistry lies in embracing a variety of styles and mixing them harmoniously to create captivating spaces. By combining different textures, colors, and patterns, Katherine weaves a tapestry of creativity that breathes life into each remote workspace.
-

 Decor17 hours ago
Maximalist Decor Explained: Embrace More Style
-

 Vetted3 weeks ago
15 Best Drip Irrigation Systems to Keep Your Garden Thriving
-

 Vetted6 days ago
15 Best Foot Massagers for Neuropathy to Soothe Your Feet and Relieve Discomfort
-

 Vetted2 weeks ago
15 Best Sports Laundry Detergents for Keeping Your Activewear Fresh and Clean
-

 Vetted2 weeks ago
15 Best Tall Toilets for Seniors That Combine Comfort and Safety
-

 Vetted3 weeks ago
15 Best Dish Scrubbers to Keep Your Kitchen Sparkling Clean
-
 Beginners Guides4 weeks ago
Designing Your Retreat Center – Essential Tips
-

 Decor3 weeks ago
What Is Eclectic Home Decor


