Appliances
What Causes Ceiling Fans to Make Noise
2025
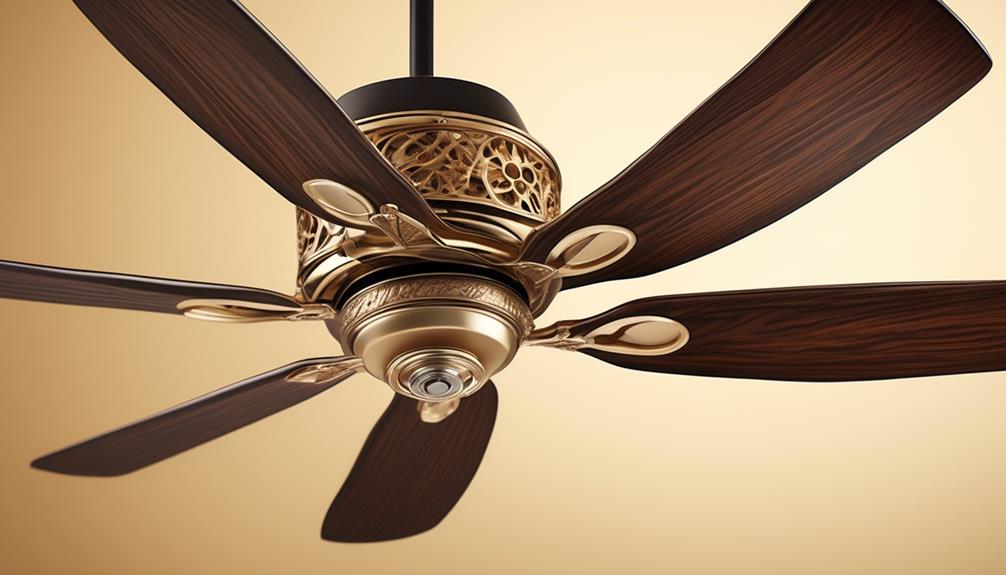
Have you ever been aware of the comforting buzz coming from a smoothly operating ceiling fan? It seamlessly moves air around, offering both ease and serenity within our living spaces. Nevertheless, there are times when these cherished appliances begin to emit annoying sounds, disturbing the serene atmosphere.
Understanding the reasons behind these noises is crucial in maintaining a serene living space. In this article, we will explore the various factors that can cause ceiling fans to make noise. From loose screws and misaligned blades to worn-out motor bearings and accumulated dust, there are several culprits that may be responsible for the unwelcome sounds.
By identifying and addressing these issues, we can restore our ceiling fans to their former, noiseless glory. So, let's delve into the world of ceiling fan noise and discover how to bring back the serenity to our living spaces.
Key Takeaways
- Loose or damaged parts and connections, such as loose screws or frayed wires, can cause noise in ceiling fans. Inspect and tighten any loose parts and ensure proper installation and alignment to reduce noise.
- Worn-out or damaged motor bearings can also lead to noise in ceiling fans. Promptly address motor bearing issues, lubricate bearings regularly, and prevent motor overheating to minimize noise.
- Misaligned fan blades can cause excessive noise and vibrations. Regularly tighten blade screws, check for damage, and use a level tool to ensure blades are straight and balanced. Consider using a blade balancing kit to correct misalignment.
- Incorrect installation and electrical issues can result in noise. Choose the appropriate fan size for the room, securely mount and balance the fan, and follow manufacturer's instructions for correct wiring and installation. Clean the fan regularly to prevent debris accumulation and maintain optimal performance.
Loose Screws or Connections
Sometimes, ceiling fans can make noise due to loose screws or connections. If you're experiencing fan noise, troubleshooting techniques can help identify and resolve the issue.
One common culprit for noisy ceiling fans is loose screws. Over time, the vibrations caused by the fan's movement can loosen the screws that hold its components together. To address this, turn off the fan and carefully inspect each screw. Use a screwdriver to tighten any loose screws you find, being careful not to overtighten and damage the fan.
Another possible cause of fan noise is loose connections. Check the wiring connections between the fan and the electrical supply. Ensure that all connections are secure and free from any loose or frayed wires. If you find any issues, it's essential to turn off the power before attempting to fix them.
Worn-Out or Damaged Motor Bearings
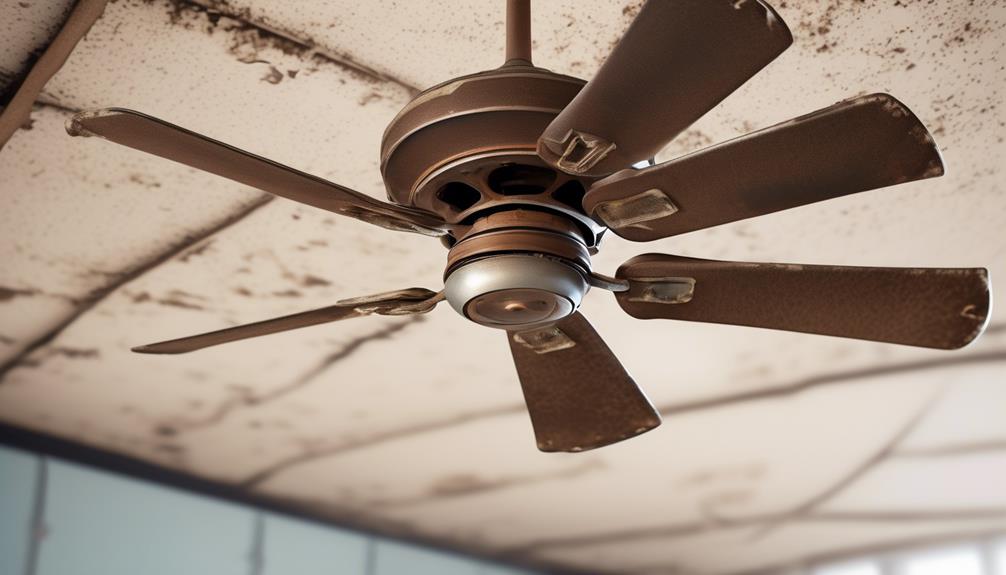
When it comes to ceiling fans making noise, worn-out or damaged motor bearings can be a common culprit.
Motor bearing deterioration can have a significant impact on fan performance, causing excessive noise and reduced efficiency.
It's important to address this issue promptly to ensure smooth operation and prevent further damage to the fan.
Motor Bearing Deterioration
Motor bearing deterioration can cause ceiling fans to make noise. When the motor bearings of a ceiling fan wear out or become damaged, they can create a variety of sounds, such as grinding, squeaking, or rattling noises. These noises are typically an indication that the motor bearings need to be replaced.
One of the most common signs of motor bearing deterioration is an increase in the noise level produced by the fan. This can occur gradually over time or suddenly, depending on the extent of the damage. Other signs may include excessive vibration, wobbling blades, or difficulty in starting the fan.
If you notice any of these signs, it's important to address the issue promptly by contacting a professional for motor bearing replacement.
Impact on Fan Performance
After noticing the signs of motor bearing deterioration, addressing the issue promptly is crucial as it can significantly impact the performance of the ceiling fan. Worn-out or damaged motor bearings can lead to excessive fan noise and reduced efficiency.
As the bearings wear down, they can cause the fan to wobble or vibrate, resulting in an annoying humming or buzzing sound. This noise can be distracting and disrupt the peaceful environment you desire.
Moreover, worn-out bearings can also affect the overall performance of the fan, causing it to operate at a slower speed or produce less airflow. This can be particularly problematic during hot summer days when you rely on your fan to provide adequate cooling.
Therefore, it's important to address motor bearing issues promptly to ensure optimal fan performance and minimize any performance impact.
Misaligned Fan Blades
Let's talk about misaligned fan blades and the problems they can cause.
When the blades of a ceiling fan aren't properly aligned, it can lead to excessive noise and vibrations. These issues can be quite bothersome and disrupt the comfort of a room.
Fortunately, there are ways to fix misaligned blades and restore the smooth and quiet operation of your ceiling fan.
Blade Misalignment Causes
Blade misalignment causes can lead to noisy ceiling fans. When the fan blades aren't properly aligned, it can disrupt the smooth flow of air and create vibrations, resulting in irritating noises. Here are some common causes of blade misalignment:
- Loose or worn-out blade screws: Over time, the screws that hold the blades in place can become loose or worn out, causing the blades to shift and become misaligned.
- Warped or bent blades: If the fan blades have been damaged or exposed to excessive heat or moisture, they may warp or bend, leading to misalignment.
- Improper installation: Incorrect installation of the fan blades can also cause misalignment, especially if the blades aren't securely attached to the motor.
To prevent blade misalignment and ensure a quiet operation, follow these blade alignment tips:
- Tighten the blade screws regularly.
- Inspect the blades for any signs of damage.
- Carefully follow the installation instructions provided by the manufacturer.
Fan Noise Problems
One of the main culprits behind the annoying noises coming from ceiling fans is when the blades become misaligned. When the fan blades aren't properly aligned, they can create a wobbling motion that results in noisy vibrations.
To troubleshoot this issue, it's important to ensure that all the blades are securely attached and aligned in the correct position. Using a level tool can help in determining whether the blades are straight and balanced. If misalignment is detected, gently adjust the blades until they're aligned properly.
Regular maintenance, such as tightening loose screws and lubricating the fan motor, can also contribute to fan noise reduction.
Fixing Misaligned Blades
To address the issue of misaligned fan blades and reduce the annoying noises coming from ceiling fans, ensuring proper alignment is crucial. Misaligned blades can cause a wobbling motion, resulting in vibrations and noise. Here are some steps you can take to fix misaligned blades:
- Check for loose screws or bolts and tighten them securely.
- Use a blade balancing kit to identify which blades are misaligned and adjust them accordingly.
- Gently bend any misaligned blades back into the correct position, being careful not to apply too much pressure.
Proper blade alignment and balancing won't only reduce noise but also improve the overall performance and efficiency of your ceiling fan.
Regular maintenance and inspection of your fan's blades will help prevent future misalignment issues.
Bent or Warped Fan Blades
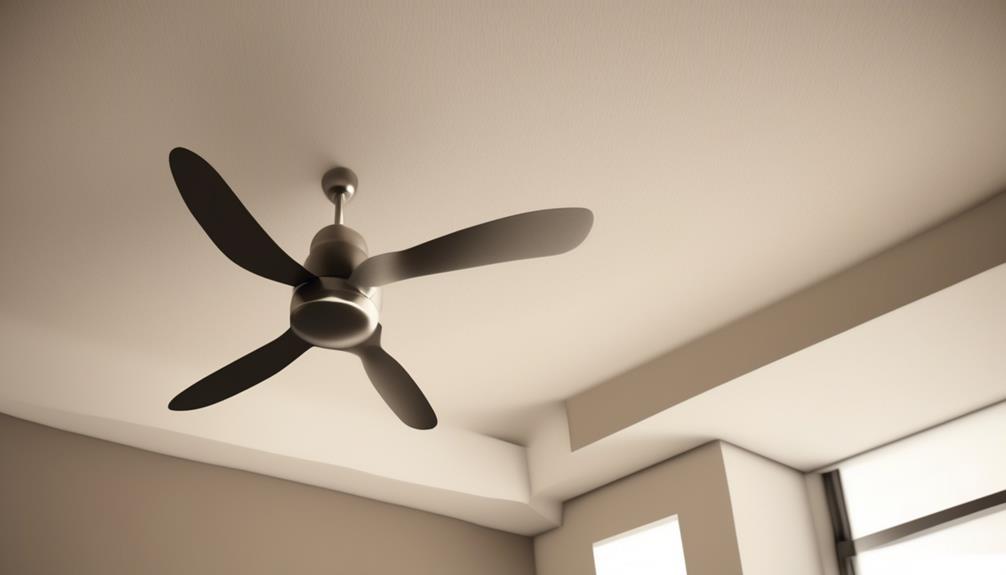
Our ceiling fan's blades may become bent or warped over time, causing them to produce noise while in operation. This issue can arise due to various reasons, such as accidental impact, improper storage, or even natural wear and tear. When the fan blades aren't perfectly straight, they can throw off the blade balance, leading to fan wobbling and generating irritating noises.
To identify if the fan blades are bent or warped, start by turning off the fan and inspecting each blade individually. Look for any visible signs of bending, warping, or unevenness. Additionally, you can use a ruler or straight edge to check if the blades are aligned properly. If you notice any irregularities, it's likely that your fan blades are indeed bent or warped.
To rectify this issue, you have a few options. Firstly, you can try using a blade balancing kit, which typically includes adhesive weights that can be applied to the blades. These weights can help restore the blade balance and minimize the noise caused by the bent or warped blades.
Alternatively, if the bending or warping isn't severe, you can try manually straightening the blades by applying gentle pressure. However, exercise caution while doing this, as excessive force can further damage the blades.
Dust and Debris Accumulation
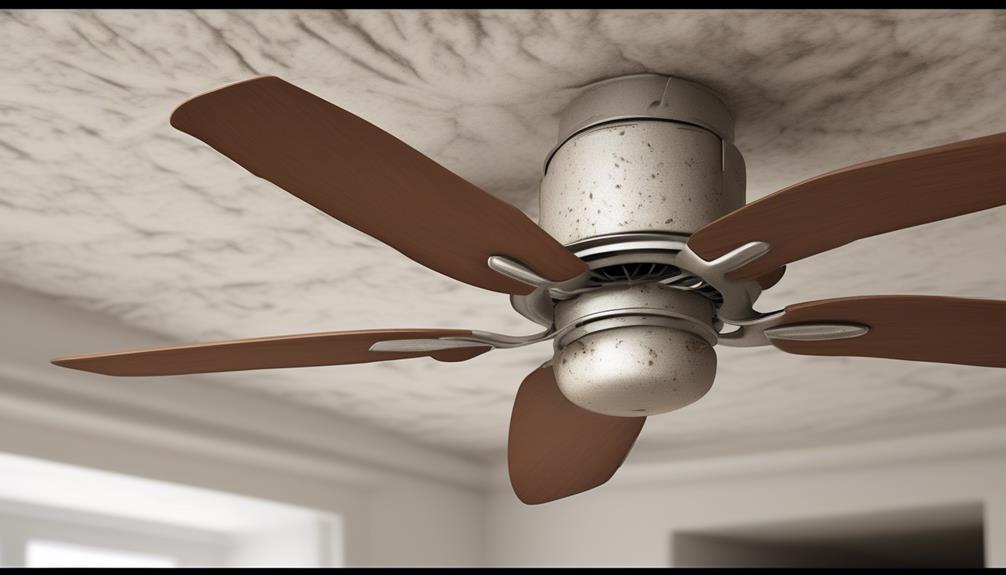
When it comes to ceiling fans making noise, one possible culprit could be dust and debris accumulation. Over time, dust can build up on the fan blades and other components, causing them to become unbalanced and create noise.
Additionally, debris such as loose screws or small objects can get caught in the fan mechanism, leading to rattling sounds.
Regular cleaning and maintenance can help prevent these issues and keep your ceiling fan running smoothly and quietly.
Dust Build-Up
A common cause of noise in ceiling fans is the accumulation of dust and debris. When dust and debris build up on the fan blades and motor, it can cause an imbalance and create a humming or rattling noise.
To troubleshoot this issue, follow these steps:
- Regularly clean your ceiling fan blades using a soft cloth or brush.
- Use a vacuum cleaner with a brush attachment to remove dust from the motor housing.
- Consider installing a ceiling fan duster or using an extendable duster to reach high ceilings.
Debris Accumulation
To address the issue of debris accumulation in ceiling fans, regular cleaning is essential to prevent noise caused by dust and debris build-up.
Fan maintenance plays a crucial role in ensuring the smooth operation of ceiling fans. Over time, dust and debris can collect on the fan blades, causing them to become unbalanced and produce irritating noises.
To avoid this, it's important to regularly remove any debris that has accumulated on the blades. This can be done by using a soft cloth or brush to gently wipe away the dust and dirt.
Additionally, it's recommended to clean the fan motor and housing to prevent any debris from interfering with its performance.
Cleaning and Maintenance
Regular cleaning is essential for preventing noise caused by debris accumulation in ceiling fans. To keep your fan running smoothly and quietly, here are some cleaning techniques and maintenance tips to follow:
- Dust the blades: Use a soft cloth or a duster to remove dust from the fan blades. Regular dusting prevents the buildup of debris that can cause noise.
- Vacuum the motor housing: Gently vacuum the motor housing to remove any dirt or debris that may have accumulated. Be careful not to damage any delicate parts.
- Check and clean the fan assembly: Inspect the fan assembly for any loose screws or parts. Tighten any loose components and clean the assembly using a damp cloth.
Loose or Damaged Light Fixture
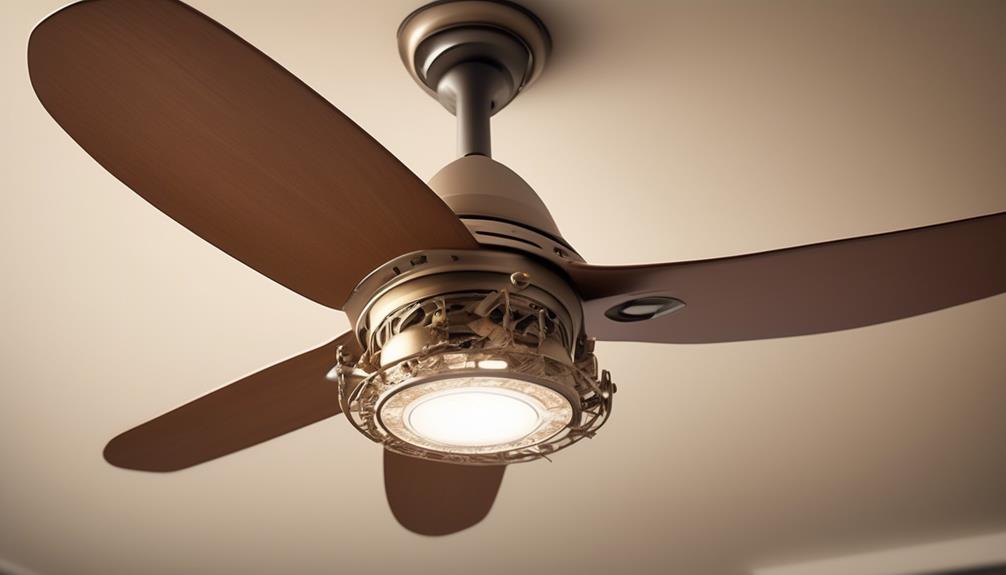
When the light fixture on a ceiling fan is loose or damaged, it can cause excessive noise during operation. This issue is often overlooked when troubleshooting ceiling fans, but it's important to address it promptly for a quieter and more enjoyable fan experience. A loose or damaged light fixture can create rattling or buzzing sounds that can be quite annoying, especially if the fan is used frequently or at high speeds.
To resolve this problem, light fixture repair may be necessary. Start by turning off the power to the fan at the circuit breaker or fuse box to ensure safety. Then, carefully remove the light fixture cover and inspect the fixture for any loose screws or mounting hardware. Tighten any loose screws or connections using a screwdriver or pliers. If the fixture is damaged, it may need to be replaced entirely.
Once the light fixture is secure and in good condition, reattach the cover and turn the power back on. Test the fan to ensure that the excessive noise has been eliminated. If the noise persists, it may be necessary to seek professional assistance or consider replacing the entire fan.
Faulty Capacitor
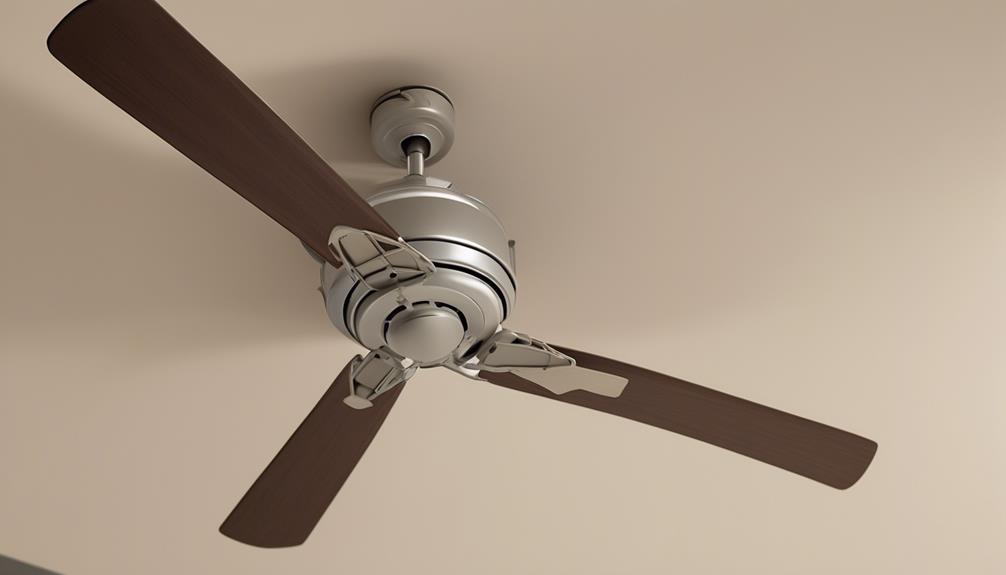
Our next issue to address is a faulty capacitor, which can contribute to the noise produced by the ceiling fan. A capacitor is an essential component that helps regulate the electrical flow to the fan motor. When the capacitor fails, it can result in various problems, including noise.
Here are some key reasons why capacitor failure may occur in ceiling fans:
- Age and wear: Over time, capacitors can deteriorate due to age and regular use, leading to malfunctions and noise.
- Voltage fluctuations: Sudden changes in voltage can strain capacitors and cause them to fail prematurely, resulting in noise issues.
- Incorrect installation: Improper installation of the capacitor can also contribute to its failure and subsequent noise production.
If you suspect that a faulty capacitor is causing the noise in your ceiling fan, it's essential to replace it promptly. To replace the capacitor, follow these steps:
- Turn off the power to the fan from the circuit breaker to ensure your safety.
- Locate the capacitor, which is typically found in the fan's switch housing or the motor housing.
- Remove the faulty capacitor carefully and install a new one following the manufacturer's instructions.
Loose or Damaged Pull Chain
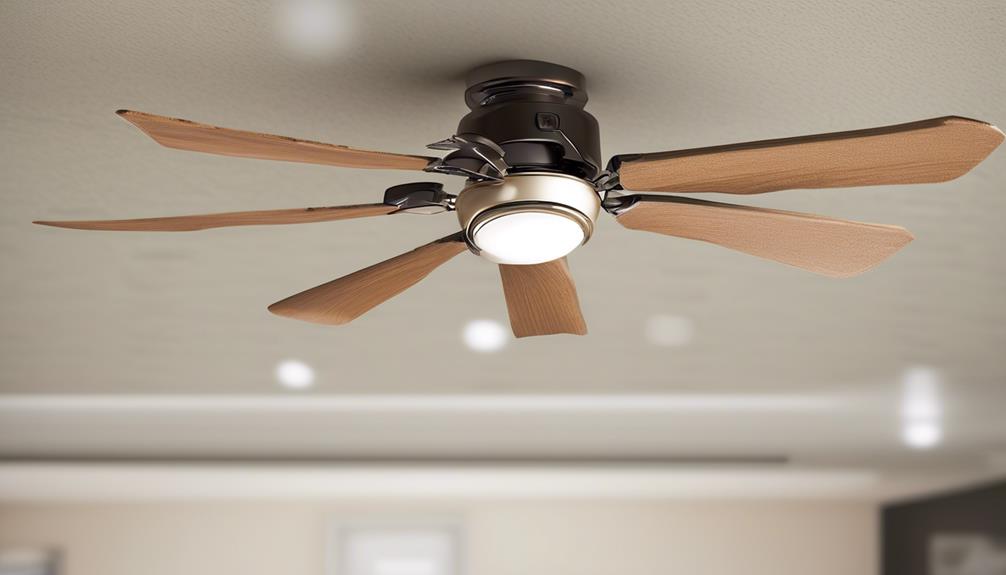
The pull chain on your ceiling fan may become loose or damaged, causing potential noise issues. When the pull chain is loose, it can rattle against the fan housing, creating an irritating noise. Additionally, if the pull chain is damaged or frayed, it can cause the fan to make a scraping or grinding sound.
To address these issues, pull chain replacement and troubleshooting techniques can be employed.
To replace a loose or damaged pull chain, you'll need to first turn off the power to the ceiling fan. Then, remove the fan's light kit or switch housing cover to access the pull chain mechanism. Carefully disconnect the old pull chain from the switch and replace it with a new one of the same length and style. Ensure that the new chain is securely attached to the switch before reassembling the fan.
If the noise persists after replacing the pull chain, further troubleshooting is necessary. Check for any obstructions or debris in the fan blades or housing that may be causing the noise. Tighten any loose screws or connections within the fan assembly. If the noise still persists, it may indicate a more serious issue, and it's recommended to consult a professional technician for further assistance.
Poor Quality or Unbalanced Fan

Now let's talk about another common cause of noisy ceiling fans: poor quality or unbalanced fans.
If your fan is making strange noises, it could be due to motor issues or loose and damaged parts. These problems can disrupt the smooth operation of the fan and result in irritating sounds.
Fan Motor Issues
When encountering noise from ceiling fans, one common issue can be attributed to poor quality or an unbalanced fan motor. A poor quality fan motor can produce excessive noise due to subpar construction and materials. Additionally, an unbalanced fan can cause vibrations, leading to noise.
To troubleshoot fan motor issues, here are some key factors to consider:
- Fan Motor Maintenance:
- Regularly clean and lubricate the motor to prevent dust buildup and ensure smooth operation.
- Check for loose connections and tighten any loose screws or bolts.
- Inspect the motor's bearings for wear and tear, replacing them if necessary.
To address these issues, it's recommended to invest in a high-quality fan motor and ensure proper installation. If the fan motor continues to make noise despite maintenance and balancing efforts, it may be necessary to seek professional assistance or consider replacing the motor altogether.
Loose or Damaged Parts
To address the issue of loose or damaged parts in a poor quality or unbalanced fan, it's crucial to identify and resolve any potential sources of noise.
One common cause of noise in ceiling fans is worn out bearings. Over time, the bearings can become worn or damaged, causing the fan to make a grinding or squeaking noise. These worn out bearings need to be replaced in order to eliminate the noise.
Additionally, loose or damaged parts such as blades, screws, or brackets can also contribute to the noise. It's important to regularly inspect and tighten any loose parts, and if any parts are damaged, they should be replaced promptly.
Incorrect Installation
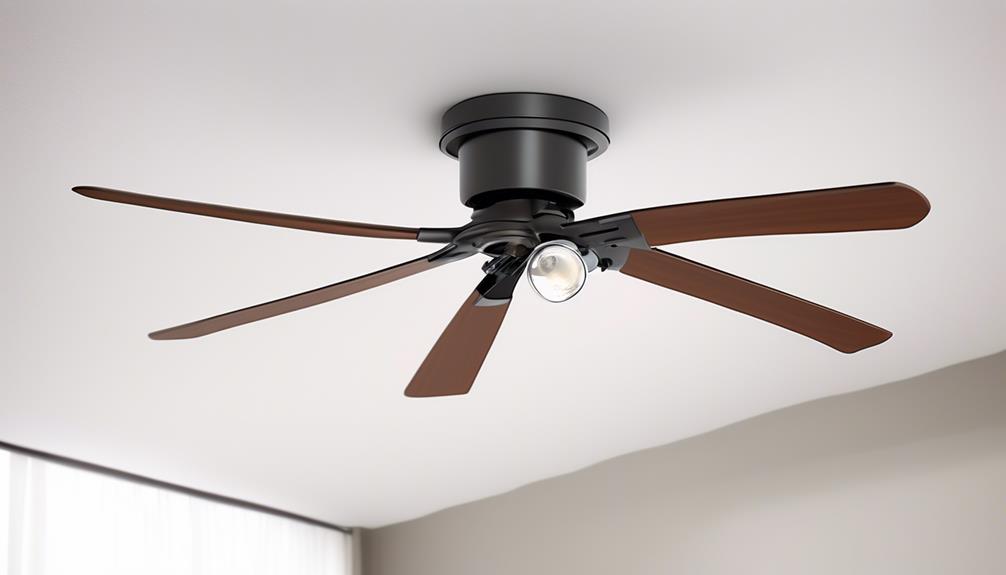
Improper installation of ceiling fans can result in excessive noise. When it comes to installing ceiling fans, there are a few common mistakes that can lead to noisy operation. Here are some key factors to consider:
- Incorrect wiring: One of the main causes of noise in a ceiling fan is incorrect wiring. If the fan isn't wired properly, it can create a humming or buzzing sound. It's important to follow the manufacturer's instructions carefully and ensure that the wiring is done correctly.
- Wrong fan size: Choosing the wrong size fan for your room can also contribute to noise issues. If the fan is too small for the space, it may have to work harder to circulate air, resulting in increased noise. On the other hand, if the fan is too large, it can create a turbulent airflow that produces noise. Make sure to select a fan that's appropriate for the size of your room.
- Inadequate mounting: Another factor to consider is the mounting of the fan. If the fan isn't securely mounted, it can wobble or shake, causing noise. Ensure that the fan is properly installed and balanced to minimize any potential noise.
Overheating Motor
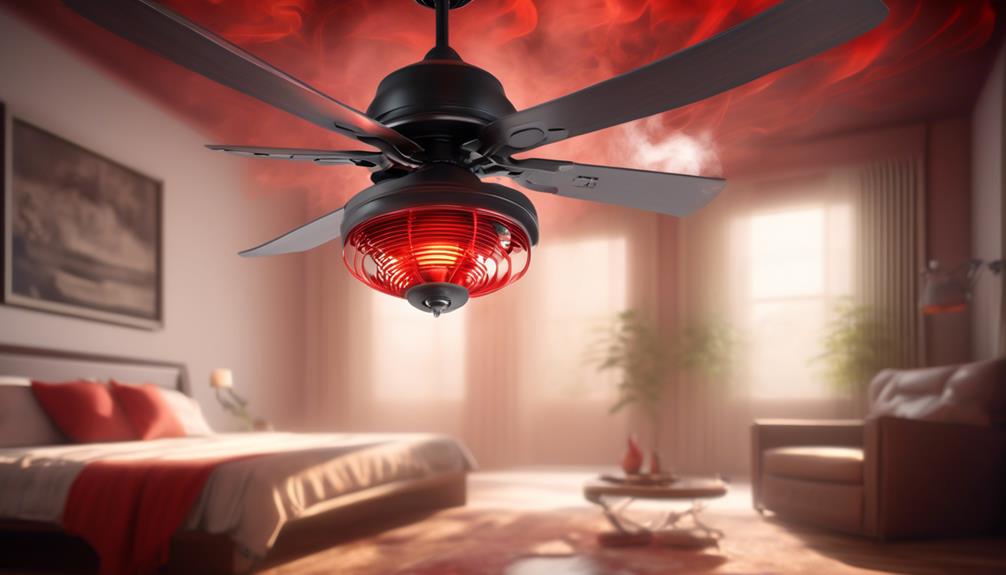
After addressing the issues related to incorrect installation, it's important to now focus on the potential problem of an overheating motor in ceiling fans. Motor overheating can be a common cause of noise in ceiling fans and should be addressed promptly to prevent further damage. When a motor overheats, it can produce a variety of noises, such as buzzing, humming, or grinding sounds. These noises can be an indication that the motor is working harder than it should, which can lead to overheating.
To troubleshoot motor overheating, there are a few steps you can take. First, make sure that the fan isn't obstructed by any objects or debris. A blocked airflow can cause the motor to work harder, resulting in overheating. Additionally, check if the fan is running at the correct speed. If the fan is set to a higher speed than it's designed for, it can put excessive strain on the motor and cause overheating.
Another potential cause of motor overheating is a lack of lubrication. Over time, the motor's bearings may dry out, leading to increased friction and heat. Regularly lubricating the motor can help prevent overheating and reduce noise.
Vibrating Down Rod
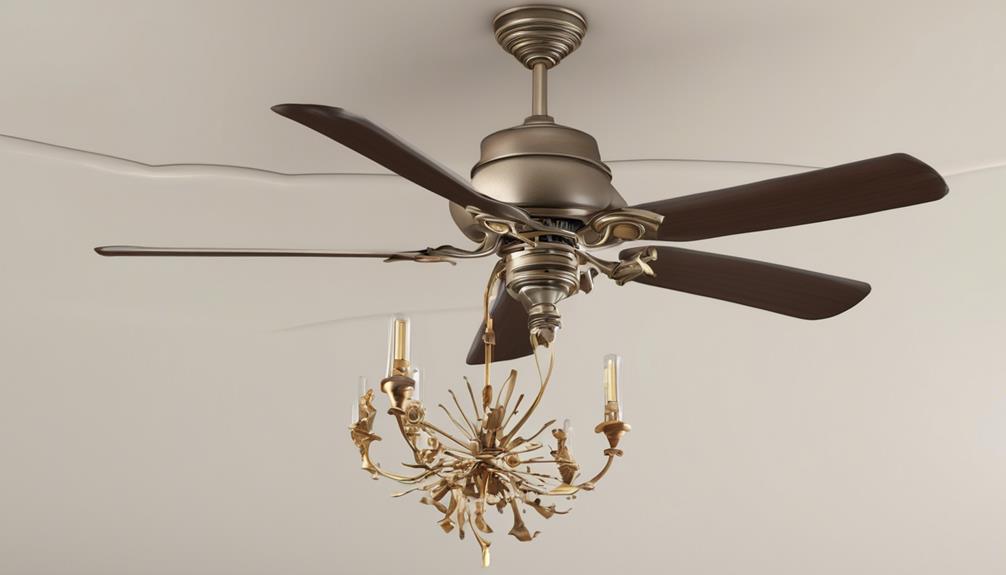
One common issue that can cause noise in ceiling fans is a vibrating down rod. The down rod is the metal rod that connects the motor housing to the fan blades. When it becomes loose or out of balance, it can create vibrations that result in an annoying noise.
To fix a vibrating down rod and troubleshoot noisy ceiling fans, consider the following:
- Tighten the down rod: Check if the down rod is securely fastened to both the motor housing and the fan blades. Use a wrench to tighten any loose screws or bolts.
- Balance the down rod: Sometimes, the down rod may become unbalanced, causing vibrations. To fix this, use a balancing kit or a set of weights. Attach these weights to the down rod until the fan operates smoothly without any noise.
- Use rubber spacers: Another solution is to place rubber spacers between the down rod and the motor housing. These spacers absorb vibrations and prevent them from transferring to the rest of the fan.
Inadequate Lubrication
To prevent noisy ceiling fans, it's important to ensure that the fan is adequately lubricated. Improper maintenance and inadequate lubrication can cause friction and wear within the fan, resulting in annoying noises. Lubrication is essential because it reduces friction and keeps the moving parts running smoothly. Without proper lubrication, the fan's motor, bearings, and other components can become worn and damaged, leading to excessive noise.
Regular maintenance is crucial to keep your ceiling fan operating quietly. Lubricating the fan should be done at least once a year or as recommended by the manufacturer. Start by turning off the fan and allowing it to come to a complete stop. Use a ladder to access the fan and locate the oil ports, typically found on the motor housing or near the down rod.
Apply a few drops of lubricating oil to each oil port, making sure not to over-lubricate. Wipe away any excess oil and then turn on the fan to distribute the lubricant evenly.
Electrical Interference
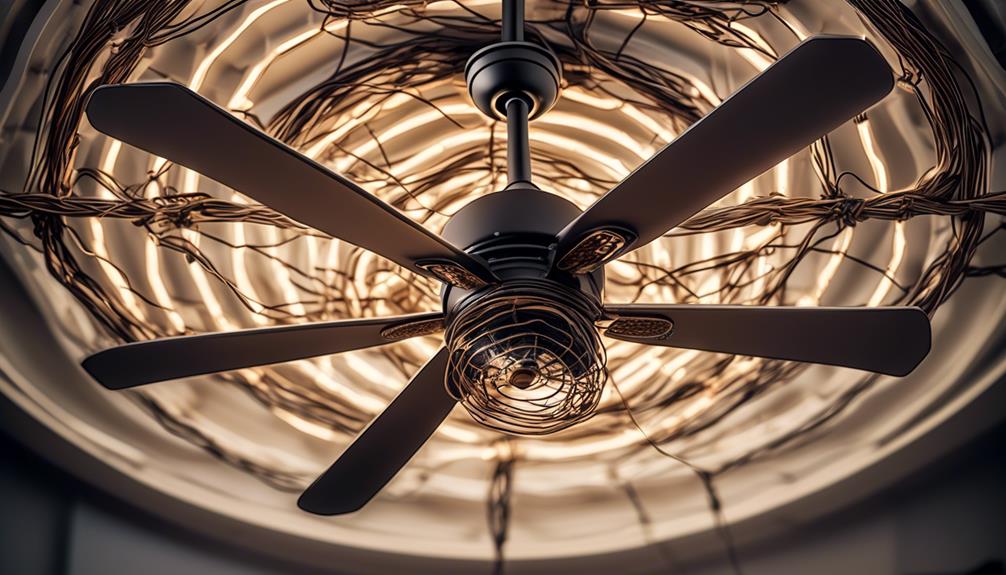
When addressing the issue of electrical interference in ceiling fans, it's important to understand how this problem relates to the maintenance and lubrication previously discussed. Electrical interference can cause the fan to make unpleasant noises, disrupting the overall tranquility of the room.
To troubleshoot this issue, the following techniques can be employed:
- Check the wiring connections: Ensure that all the wires are properly connected and securely fastened. Loose connections can lead to electrical interference, resulting in noise generation.
- Inspect the electrical components: Thoroughly examine the capacitors, switches, and other electrical components for any signs of damage or wear. Faulty components can contribute to electrical interference.
- Eliminate nearby sources of electromagnetic interference: Identify and remove any devices or appliances that generate electromagnetic fields close to the fan. These fields can interfere with the fan's electrical system.
Aging or Worn-Out Parts
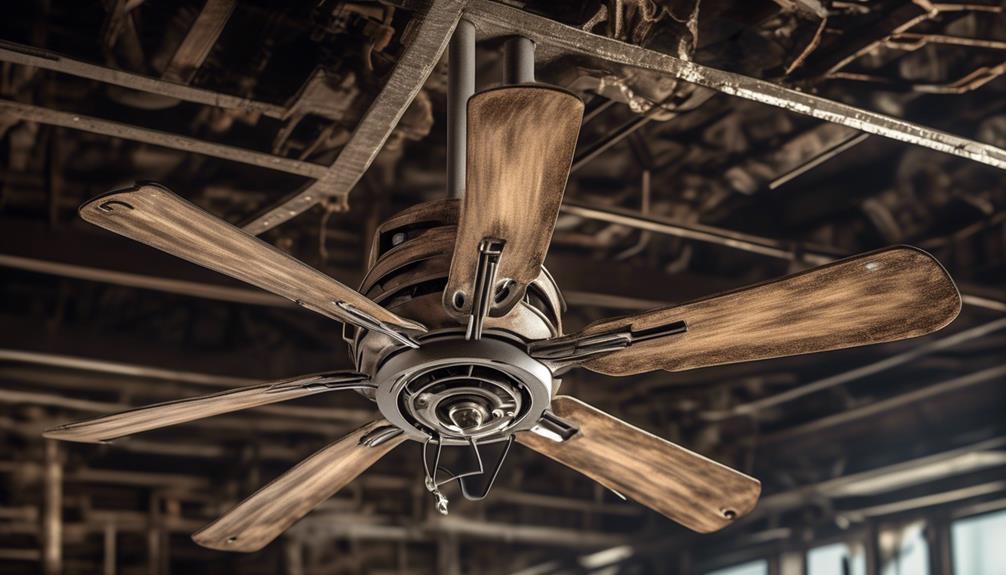
Over time, the parts of a ceiling fan can deteriorate and become worn-out, leading to increased noise levels. This is a common issue faced by many homeowners as their ceiling fans age. As the fan components such as the motor, bearings, blades, and mounting hardware start to wear out, they can no longer function smoothly, causing vibrations and rattling noises.
One of the main culprits of noise in an aging fan is the motor. The motor's internal components can become worn out or lose lubrication, resulting in a grinding or buzzing sound. Similarly, the bearings that support the fan's rotating shaft can wear down over time, causing squeaking or scraping noises.
Another part that often contributes to noise is the blades. As they age, they may develop cracks or become imbalanced, leading to a wobbling motion that generates noise when the fan is in operation. Additionally, loose or deteriorating mounting hardware can cause the fan to vibrate and produce rattling sounds.
To address the issue of aging or worn-out parts, it's crucial to regularly inspect and maintain your ceiling fan. This includes lubricating the motor, tightening loose screws and fittings, and replacing any damaged or imbalanced blades. By taking these proactive measures, you can extend the lifespan of your ceiling fan and enjoy a quieter and more efficient cooling experience.
Frequently Asked Questions
How Can I Tell if the Screws or Connections on My Ceiling Fan Are Loose or Damaged?
When it comes to ceiling fan maintenance and troubleshooting, checking for loose or damaged screws and connections is essential.
To determine if this is the cause of any noise, we can conduct a thorough inspection.
Start by turning off the fan and examining the screws and connections for any signs of looseness, rust, or damage.
A wobbly or noisy fan can often be fixed by tightening or replacing these components.
Are There Any Signs That the Motor Bearings on My Ceiling Fan Are Worn Out or Damaged?
There are several signs that indicate worn out or damaged motor bearings in a ceiling fan.
These signs include excessive noise, such as grinding or squeaking sounds, as well as vibrations coming from the fan.
Additionally, if the fan starts to wobble or shake, it could be a sign of damaged motor bearings.
It's important to address these issues promptly to prevent further damage and ensure the smooth operation of your ceiling fan.
What Should I Do if the Fan Blades on My Ceiling Fan Are Misaligned?
When the fan blades on our ceiling fan become misaligned, it can cause noisy operation and decreased efficiency.
To troubleshoot this issue, we should first turn off the fan and inspect the alignment of the blades. If they're misaligned, we can gently bend them back into place using our hands or a blade balancing kit.
Regular ceiling fan maintenance, including checking and adjusting blade alignment, can help prevent noise and ensure optimal performance.
How Can I Determine if the Fan Blades on My Ceiling Fan Are Bent or Warped?
Determining fan balance is crucial for maintaining the optimal performance of your ceiling fan. Regular maintenance is essential in identifying if the fan blades are bent or warped.
Inspecting the blades for any signs of damage, such as visible cracks or irregularities, can help you determine their condition. Bent or warped blades can cause imbalance and result in noise during operation.
What Steps Should I Take to Prevent Dust and Debris Accumulation on My Ceiling Fan?
To prevent dust and debris accumulation on our ceiling fan, we should regularly clean and maintain it.
Some cleaning techniques we can employ include using a soft cloth or duster to wipe the blades, vacuuming the fan to remove any loose dirt, and using a mild detergent solution to clean stubborn stains.
Is a Slow Ceiling Fan Causing It to Make Noise?
A slow ceiling fan can produce noise for various reasons. One of the common reasons for slow fan noise is the accumulation of dust and dirt on the blades or in the motor. Another reason for slow fan noise can be loose screws or faulty installation. Regular maintenance can help mitigate these issues.
Conclusion
In conclusion, the mystery of the noisy ceiling fan has been unraveled.
From loose screws and worn-out motor bearings to misaligned or warped blades, various factors can contribute to the annoying noise.
Dust and debris accumulation, vibrating down rods, inadequate lubrication, and electrical interference can also play a part.
So, if your ceiling fan is making strange noises, it's time to investigate and address these issues.
Enjoy a peaceful and quiet breeze once again!
- About the Author
- Latest Posts
Introducing Ron, the home decor aficionado at ByRetreat, whose passion for creating beautiful and inviting spaces is at the heart of his work. With his deep knowledge of home decor and his innate sense of style, Ron brings a wealth of expertise and a keen eye for detail to the ByRetreat team.
Ron’s love for home decor goes beyond aesthetics; he understands that our surroundings play a significant role in our overall well-being and productivity. With this in mind, Ron is dedicated to transforming remote workspaces into havens of comfort, functionality, and beauty.
Garage Door Opener
Finding the Ideal Garage Door Opener Outlet Location
Get ready to discover the crucial factors determining the perfect placement for your garage door opener outlet.

When determining the best spot for a garage door opener socket, think of it as finding the missing piece to make your garage convenient and functional.
The placement of this outlet can significantly impact the ease of use and safety of your garage door opener system. So, where should it be positioned for optimal performance?
Let's explore the key factors that come into play to ensure a seamless experience with your garage door opener.
Key Takeaways
- Place the outlet around 9 feet above the door for optimal accessibility and functionality.
- Position the outlet slightly off-center to avoid interference with future insulation and maintenance.
- Ensure safety by locating the receptacle 3 feet back and 10 feet from the outside wall.
- Consult with professionals to guarantee proper placement and enhance usability.
Importance of Outlet Placement
Why is the placement of the outlet for your garage door opener crucial for optimal functionality and safety?
When it comes to the garage door opener, the electrical outlet placement plays a significant role in ensuring smooth operation and safety. By strategically locating the outlet around 9 feet above the door, slightly off-center, accessibility is enhanced without impeding future insulation or drywall modifications. This positioning also minimizes the risk of interference with the garage door opener's mechanisms, promoting seamless functionality.
Moreover, considering factors like ease of access, safety, and compliance with electrical regulations is essential for a secure and efficient garage door opener setup. Therefore, choosing the right spot for the outlet is paramount to guaranteeing the proper functioning and safety of your garage door opener.
It's not just about convenience; it's about ensuring that your garage door opener operates optimally while meeting essential safety standards and regulatory requirements.
Factors Affecting Outlet Location

Considering the layout and structure of your garage, several key factors influence the optimal placement of the outlet for your garage door opener. The door height plays a crucial role, with the ideal outlet location typically around 9 feet above the door for convenient access.
It's essential to position the outlet slightly to the side to avoid interference with future insulation and drywall work. Communicating with builders before installation can ensure the proper placement and prevent common mistakes that might arise.
Be cautious not to place the receptacle too far from the door as this could lead to issues with the opener cord reaching comfortably. Ensuring that the outlet location allows for smooth operation and easy maintenance is crucial for long-term convenience.
Safety Considerations for Outlet Placement
For optimal safety and convenience in outlet placement for your garage door opener, it's essential to position the receptacle 3 feet back from the end of the open garage door and approximately 10 feet from the outside wall. Placing the outlet in this specific location helps prevent any potential hazards that could arise from the door mechanisms or the opener's cord. By ensuring the receptacle is behind the opener, you maintain a clear pathway when the door is fully open, decreasing the risk of tripping or entanglement.
To further enhance safety, it's crucial to confirm that the cord length of the opener, typically between 3 to 4 feet, comfortably reaches the receptacle without any stretching or strain. If needed, use lumber to frame out a lower place to secure the cord of the opener to the receptacle adequately. Additionally, prioritize installing a Ground Fault Circuit Interrupter (GFCI) protected receptacle to add an extra layer of safety measures to your garage.
Convenience and Accessibility of Outlets

To ensure optimal convenience and accessibility for your garage door opener outlet, positioning it approximately 9 feet above the door allows for easy access during operation. This placement ensures that the outlet is within reach of the opener cord, reducing the risk of any operational issues. Additionally, consider situating the outlet slightly off-center to accommodate future insulation and drywall work, providing flexibility for any renovations.
When communicating with builders about the placement of the garage door opener outlet, make sure to convey the importance of having it positioned at the right height and distance from the door. Common mistakes, such as placing the receptacle too far from the door, can hinder optimal accessibility and convenience. By discussing the outlet location with builders beforehand, you can ensure that it is installed in a way that meets your needs and maximizes usability.
To illustrate further, here is a table outlining the key considerations for positioning your garage door opener outlet:
| Consideration | Description |
|---|---|
| Height Above Door | Approximately 9 feet for easy access during operation. |
| Distance from Opener Cord | Within reach to prevent operational issues. |
| Off-Center Placement | Slightly off-center to accommodate future insulation and drywall work. |
| Communication with Builders | Discuss with builders to determine the best outlet placement before installation. |
| Avoiding Common Mistakes | Ensure the receptacle is not placed too far from the door for optimal accessibility. |
Tips for Optimal Garage Door Opener Outlet Location
When determining the ideal location for your garage door opener outlet, prioritize accessibility and functionality by placing it at a height of around 9 feet above the door. This placement ensures easy reach and connection to the opener cord, facilitating seamless operation.
To optimize your garage door opener outlet location, consider the following tips:
- Positioning: Place the outlet slightly to the side to avoid interference with future insulation and drywall work.
- Consultation: Communicate with builders or professionals before installation to ensure proper placement and avoid common mistakes.
- Reachability: Avoid placing the receptacle too far from the door to prevent issues with the opener cord reaching the power source.
- Functionality: Ensure the outlet location allows for easy access and connection to maintain a smooth and efficient operation of your garage door opener.
Frequently Asked Questions
Where Should a Garage Door Opener Outlet Be Placed?
We recommend placing a garage door opener outlet near the ceiling, around 9 feet above the door for easy access. Positioning it slightly to the side can prevent interference and future issues with insulation or drywall.
Opt for a location a few feet above the door height and off-center for practical accessibility. Avoid surface mounting and ensure it's within reach of the opener cord.
Consult professionals for proper placement to avoid common mistakes.
Where Should Outlets Be Placed in a Garage?
When outfitting a garage with outlets, strategic placement is key. Consider functionality and convenience. Ensure outlets are accessible and comply with safety standards to avoid interference with garage door openers.
Optimal positioning is crucial for smooth operation. By placing outlets thoughtfully, we guarantee efficiency and ease of access. Properly spaced outlets contribute to a well-organized, functional workspace.
Take care in positioning outlets for a seamless garage experience.
Can the Garage Door Opener Be on Same Circuit as Garage Receptacles?
Yes, the garage door opener can be on the same circuit as the garage receptacles. This setup is convenient for installation and operation, simplifying wiring and electrical planning.
It's a common practice in residential settings to share the circuit between the garage door opener and receptacles. However, it's crucial to consult with an electrician to ensure the circuit can handle the combined load of both devices effectively.
How Do I Program My Garage Door Opener Outlet?
We've programmed many garage door opener outlets! Locate the 'Learn' button on the unit. Press and release it, then quickly hit the remote's button to program it.
Wait for the light to flash, showing successful programming. Test the remote for proper operation.
Always follow the manufacturer's instructions for specific steps. It's as easy as that to program your garage door opener outlet.
Conclusion
In conclusion, finding the ideal location for your garage door opener outlet is like finding the perfect key for a locked door – it unlocks convenience and safety.
By considering factors such as placement, safety measures, and accessibility, you can ensure smooth operation and peace of mind.
Remember, consulting with a professional and following best practices can guarantee a seamless experience every time you open your garage door.
- About the Author
- Latest Posts
Introducing Ron, the home decor aficionado at ByRetreat, whose passion for creating beautiful and inviting spaces is at the heart of his work. With his deep knowledge of home decor and his innate sense of style, Ron brings a wealth of expertise and a keen eye for detail to the ByRetreat team.
Ron’s love for home decor goes beyond aesthetics; he understands that our surroundings play a significant role in our overall well-being and productivity. With this in mind, Ron is dedicated to transforming remote workspaces into havens of comfort, functionality, and beauty.

Are you prepared to elevate your dental health? Check out our 12 tips for utilizing Bluetooth dental health gadgets!
These cutting-edge devices combine the power of technology with the importance of oral hygiene. We, as a team of experts, have compiled this comprehensive guide to help you master the world of Bluetooth dental tools.
From choosing the right gadget to maximizing its effectiveness, we’ve got you covered. Say goodbye to traditional dental care methods and embrace the future of oral health.
With our tips, you’ll be able to seamlessly integrate Bluetooth dental gadgets into your daily routine and enhance communication with your dentist. Get ready to achieve the smile of your dreams with the help of these innovative devices.
Key Takeaways
- Improved oral hygiene
- Real-time feedback and guidance
- Personalized recommendations for optimal brushing technique
- Enhanced portability for on-the-go use
Benefits of Bluetooth Dental Health Gadgets
The benefits of Bluetooth dental health gadgets include improved oral hygiene and enhanced monitoring of dental health. These gadgets are designed to help individuals in improving their brushing techniques and maintaining good oral health. By connecting to a smartphone or a tablet, Bluetooth dental health gadgets provide real-time feedback and guidance, ensuring that users are brushing their teeth effectively.
One of the main advantages of these gadgets is the ability to improve brushing techniques. Many people are unaware of the correct way to brush their teeth, leading to ineffective cleaning and potential oral health issues. Bluetooth dental health gadgets can track the movement and pressure applied during brushing, offering personalized recommendations for optimal brushing technique. This helps users to develop better brushing habits and achieve more thorough cleaning.
Another significant benefit is the remote dental monitoring feature offered by these gadgets. Dental health professionals can remotely monitor the brushing habits of their patients through a connected app. This allows for personalized advice and recommendations to be provided, ensuring that patients are maintaining good oral hygiene practices between dental visits.
How to Choose the Right Bluetooth Dental Tool
When choosing a Bluetooth dental tool, there are two important factors to consider: compatibility with your devices and ease of use.
It’s crucial to ensure that the tool you choose is compatible with your smartphone or other devices, so that you can easily connect and use it.
Additionally, opting for a tool that’s user-friendly and easy to navigate will help maximize its effectiveness and make your dental routine more efficient.
Compatibility With Devices
We found that researching the compatibility of Bluetooth dental tools with our devices was crucial in selecting the right tool for our dental health needs.
Bluetooth compatibility is an essential factor to consider when choosing a dental gadget, as it ensures seamless communication between the tool and our devices. It allows us to track our dental health progress, receive real-time feedback, and access personalized recommendations for improving our oral care routine.

However, it’s important to note that compatibility issues may arise, leading to troubleshooting problems. To avoid such issues, it’s recommended to check the compatibility requirements of the dental tool with our devices before making a purchase. This will help us ensure a smooth and hassle-free experience with our Bluetooth dental health gadget.
Moving forward, let’s explore the next important aspect of these tools – their ease of use.
Ease of Use
To ensure a user-friendly experience, it’s important to consider the ease of use when selecting the right Bluetooth dental tool for our needs.
When it comes to improving accessibility and usability, choosing a dental tool with a user-friendly design is crucial. Look for devices that have intuitive interfaces and easy-to-use controls. Consider tools that offer clear and concise instructions, making it easy for users to understand and operate them effectively.
Additionally, opt for devices with ergonomic designs that are comfortable to hold and use for extended periods. This will help minimize user fatigue and increase overall satisfaction with the tool.
Understanding the Importance of Bluetooth Connectivity
Understanding the importance of Bluetooth connectivity is crucial when it comes to dental health gadgets. By utilizing Bluetooth technology, these devices offer enhanced dental care by providing real-time data and personalized feedback.
This wireless convenience allows for easy usage and seamless integration with smartphones and other devices, making it a convenient and user-friendly option for monitoring and tracking oral health.
Enhanced Dental Care
Bluetooth connectivity is crucial for improving dental care through the use of innovative gadgets. By integrating wireless technology into dental health devices, we can enhance oral hygiene practices and ensure better dental care.
The benefits of wireless technology in dental gadgets are manifold. Firstly, it allows for real-time monitoring and tracking of oral health, providing accurate data that can be analyzed by dental professionals.
Secondly, Bluetooth connectivity enables seamless communication between devices, allowing for personalized feedback and guidance on oral hygiene routines. This promotes a more effective and targeted approach to dental care.
Additionally, wireless technology facilitates the integration of dental gadgets with smartphone applications, making it easier for users to track and manage their oral health.
Wireless Convenience Benefits
How can Bluetooth connectivity enhance our dental health gadgets?
Bluetooth connectivity offers a range of wireless connectivity advantages that greatly contribute to the convenience of Bluetooth gadgets. Here are five key benefits of Bluetooth connectivity for dental health gadgets:
- Seamless syncing: Bluetooth allows for effortless synchronization between your dental health gadget and your smartphone or other devices, ensuring that your data is always up to date.
- Hands-free operation: With Bluetooth connectivity, you can control your dental health gadget without the need for physical buttons or touchscreens, allowing for a more hygienic and convenient experience.
- Remote monitoring: Bluetooth-enabled dental health gadgets can transmit data in real-time to your smartphone or computer, allowing you to track your oral health progress even when you’re not near your gadget.
- Enhanced portability: Bluetooth gadgets are typically compact and lightweight, making them easy to carry and use on the go.
- Multi-device compatibility: Bluetooth connectivity enables your dental health gadget to connect with multiple devices simultaneously, providing flexibility and convenience for users with multiple devices.
With these wireless convenience benefits, Bluetooth connectivity significantly enhances the overall user experience of dental health gadgets.
Improved Data Tracking
We have seen a significant improvement in data tracking with the introduction of Bluetooth connectivity in dental health gadgets. This technology has revolutionized the way we monitor our oral health. With improved accuracy and real-time monitoring, Bluetooth dental gadgets allow us to track our dental hygiene habits more effectively.
By connecting these gadgets to our smartphones or other devices, we can easily access and analyze the data collected from our brushing habits, gum health, and more. This level of data tracking provides valuable insights into our oral health, helping us identify areas for improvement and track progress over time.
Now, let’s explore the top features to look for in Bluetooth dental gadgets to make the most of this advanced data tracking capability.
Top Features to Look for in Bluetooth Dental Gadgets
When choosing Bluetooth dental health gadgets, it’s important to consider the top features that will enhance our oral care routine. Here are some key features to look for:
- Bluetooth Connectivity: Bluetooth-enabled dental gadgets offer the benefits of wireless connectivity, allowing us to easily sync our device with our smartphones or tablets. This enables us to access real-time data and receive notifications for reminders and updates.
- Data Tracking: The importance of data tracking can’t be overstated. Look for gadgets that can track and store essential dental health information such as brushing time, pressure applied, and areas of the mouth that need more attention. This data can provide valuable insights into our brushing habits and help us make improvements.
- Interactive Apps: Choose gadgets that come with interactive mobile applications. These apps provide personalized guidance, oral care tips, and progress tracking, making our oral care routine more engaging and effective.
- Timers and Reminders: Look for gadgets that have built-in timers and reminders to ensure we brush for the recommended two minutes and replace our brush heads regularly. These features help us maintain good oral hygiene habits.
- Compatibility with Multiple Users: If sharing the gadget with family members, opt for devices that can track and store data for multiple users. This ensures that each user can have their own personalized oral care routine.
Considering these top features will help us choose Bluetooth dental health gadgets that optimize our oral care routine.
Now, let’s explore some tips for using these gadgets effectively.
Tips for Using Bluetooth Dental Health Gadgets Effectively
To effectively utilize Bluetooth dental health gadgets, it’s crucial to ensure proper syncing and calibration of the device. This ensures accurate and reliable data collection, allowing you to track and improve your dental habits effectively.
To maximize device performance, start by syncing your gadget with a compatible mobile app or software. Follow the manufacturer’s instructions carefully to ensure a successful connection.
Once synced, calibrate the device according to your specific dental needs. This may involve setting personalized targets for brushing time, pressure, or technique.
Regularly check for firmware updates to ensure your device is running the latest software, which can enhance its performance and functionality.
It’s also important to clean and maintain your gadget regularly to avoid any performance issues. Refer to the manufacturer’s guidelines for cleaning instructions and best practices.
Common Misconceptions About Bluetooth Dental Tools
There are several common misconceptions about Bluetooth dental tools that we need to address.
First, it’s important to understand that Bluetooth technology can actually improve oral hygiene by allowing for seamless communication between dental devices and smartphone apps.
Secondly, wireless technology enhances dental care by providing real-time data and personalized feedback to users.
Lastly, we’ll debunk some of the myths surrounding dental gadgets to ensure that users have accurate information about their benefits and limitations.
Bluetooth Improves Oral Hygiene
Although there are common misconceptions about Bluetooth dental tools, we’ve found that they significantly improve oral hygiene. Here are five reasons why Bluetooth dental tools are beneficial for your oral health:
- Improved brushing techniques: Bluetooth dental tools provide real-time feedback on your brushing technique, helping you achieve a more thorough clean.
- Oral health tracking: These tools can track your brushing habits and provide data on your oral health, allowing you to make informed decisions about your dental care routine.
- Timely reminders: Bluetooth dental tools can send reminders to brush, floss, and rinse, ensuring that you maintain a consistent oral hygiene routine.
- Personalized recommendations: Based on your brushing data, these tools can provide personalized recommendations for toothpaste, toothbrushes, and other oral care products.
- Motivation and accountability: Bluetooth dental tools can gamify oral hygiene, making it more enjoyable and encouraging you to maintain good oral health habits.
Wireless Technology Enhances Dental Care
We have encountered several misconceptions about Bluetooth dental tools that hinder their recognition as a valuable wireless technology for enhancing dental care.
One common misconception is that wireless toothbrushes are just a gimmick. However, these toothbrushes use Bluetooth technology to connect to a smartphone app, providing real-time feedback on brushing habits and helping users improve their oral hygiene.
Another misconception is that a Bluetooth toothpaste dispenser is unnecessary. In reality, this device ensures that the right amount of toothpaste is dispensed, reducing waste and promoting proper dental hygiene. It also helps users track their toothpaste usage, ensuring they never run out.
Myths About Dental Gadgets
Our experience with Bluetooth dental tools has revealed common misconceptions surrounding their effectiveness. Let’s debunk these myths and shed light on the benefits of using Bluetooth in dental care:
- Bluetooth dental gadgets aren’t just a fad; they provide real-time data and accurate measurements for better dental health monitoring.
- Contrary to popular belief, Bluetooth dental tools are easy to use and integrate seamlessly into your oral care routine.
- Some people think that Bluetooth dental gadgets are expensive, but they offer long-term cost savings by enabling early detection and prevention of dental issues.
- Another misconception is that Bluetooth dental tools are only for professionals. In reality, they empower individuals to take control of their oral health and make informed decisions.
- Lastly, some may worry about the security and privacy of Bluetooth dental gadgets. However, manufacturers prioritize data protection, ensuring that your information remains confidential.
Troubleshooting Common Issues With Bluetooth Dental Gadgets
Identifying and resolving common issues with Bluetooth dental gadgets can significantly improve their functionality and user experience. Troubleshooting connection issues and optimizing battery life are two key areas to focus on when encountering problems with these devices. Here are some tips to help you troubleshoot and overcome these issues:
| Common Issues | Possible Solutions |
|---|---|
| Connection drops frequently | Ensure that the Bluetooth device is within range and there are no obstructions interfering with the signal. Try reconnecting the device or resetting the Bluetooth settings. |
| Poor sound quality during calls | Check if the microphone and speaker are properly aligned. Adjust the volume settings on both the device and the dental gadget. If the problem persists, try restarting both devices. |
| Short battery life | Reduce the usage of power-intensive features such as continuous monitoring or high volume settings. Disconnect the Bluetooth connection when not in use. Consider replacing the battery if it is old or not holding a charge effectively. |
How Bluetooth Technology Enhances Dental Health Monitoring
When it comes to enhancing dental health monitoring, Bluetooth technology plays a crucial role. Bluetooth dental technology has revolutionized the way dentists and patients can monitor oral health. Here are five ways Bluetooth technology enhances dental health monitoring:
- Real-time data: Bluetooth dental devices can transmit real-time data to a connected smartphone or computer, allowing dentists to monitor patients’ oral health instantly.
- Remote monitoring: With Bluetooth dental monitoring, dentists can remotely monitor patients’ oral health without the need for in-person visits, making it more convenient for both parties.
- Continuous tracking: Bluetooth dental devices can continuously track various parameters such as brushing habits, pressure applied during brushing, and even the presence of harmful bacteria, providing a comprehensive picture of oral health.
- Personalized feedback: Bluetooth dental technology enables dentists to provide personalized feedback and recommendations based on the data gathered, helping patients improve their oral hygiene practices.
- Early detection: By monitoring oral health in real-time, Bluetooth dental monitoring devices can help dentists detect potential issues early on, allowing for prompt intervention and treatment.
Bluetooth dental technology has transformed the way we monitor dental health, providing dentists with valuable insights and patients with convenient and personalized care. With its ability to transmit real-time data, enable remote monitoring, and provide continuous tracking, Bluetooth technology is undoubtedly a game-changer in dental health monitoring.
The Future of Bluetooth-Enabled Dental Health Gadgets
As we look ahead to the future of Bluetooth-enabled dental health gadgets, it’s clear that these innovative devices will continue to revolutionize the way we monitor and maintain oral health. With ongoing advancements in technology, we can expect exciting developments in the field of dental health monitoring.
One potential future advancement is the integration of artificial intelligence (AI) into Bluetooth-enabled dental health gadgets. AI algorithms could analyze data collected by these devices and provide personalized recommendations for improving oral hygiene. This could help individuals optimize their dental care routines and prevent future oral health issues.
Another area of future advancement is the incorporation of augmented reality (AR) technology. AR could enhance the user experience by providing real-time visual feedback during brushing or flossing, ensuring that individuals are maintaining proper technique. This could be particularly beneficial for children or people with limited dexterity.
While the future of Bluetooth-enabled dental health gadgets appears promising, there are also potential drawbacks to consider. Privacy and security concerns may arise as these devices collect and transmit personal health data. It will be crucial for manufacturers to prioritize data protection and ensure robust security measures are in place.
Bluetooth Dental Gadgets for Children’s Oral Care
In our exploration of the future of Bluetooth-enabled dental health gadgets, we can now turn our attention to the specific application of these devices for children’s oral care. Bluetooth dental gadgets aren’t only designed for adults but also cater to the needs of children, ensuring their oral health is taken care of in a fun and engaging way.
Here are some key features of Bluetooth dental gadgets for children:
- Interactive brushing experience: These gadgets use Bluetooth toothbrush technology to connect to a mobile app, transforming brushing into a game or adventure, making it more enjoyable for children.
- Tracking and monitoring: Parents can track their child’s brushing habits and receive real-time updates on their progress through the app. This helps in ensuring that children brush for the recommended duration and reach all areas of their mouth.
- Rewards and incentives: Some Bluetooth dental gadgets have built-in reward systems, where children earn points or badges for brushing correctly. This motivates them to maintain good oral hygiene habits.
- Educational content: The mobile apps accompanying these gadgets often include educational videos and tips, teaching children about the importance of oral hygiene and proper brushing techniques.
- Parental control: Parents can have control over the settings and features of the Bluetooth dental gadgets, ensuring that the devices are safe and appropriate for their children’s age.
Bluetooth dental gadgets for children provide an innovative and effective way to instill good oral hygiene habits from a young age, making dental care a positive experience for children.
Integrating Bluetooth Dental Gadgets Into Your Daily Routine
To seamlessly incorporate Bluetooth dental gadgets into our daily routine, we can actively engage with their features and make oral care a priority for our whole family. Bluetooth toothbrushes, in particular, offer numerous benefits that can enhance our wellness routine.
These gadgets connect to our smartphones or other devices, allowing us to track our brushing habits and receive real-time feedback on our technique. By incorporating these gadgets into our daily routine, we can ensure that we’re brushing for the recommended two minutes and reaching all areas of our mouth effectively. Additionally, Bluetooth toothbrushes often come with built-in timers and reminders, making it easier for us to stay consistent with our oral care routine.
By involving our whole family in this process, we can create a positive and supportive environment that encourages good dental habits for everyone. Involving our children in the use of Bluetooth dental gadgets can make oral care more engaging and fun, helping them develop good oral hygiene habits from an early age.
Enhancing Communication With Your Dentist Using Bluetooth Tools
One important way to enhance communication with our dentist is by utilizing Bluetooth tools. These innovative devices can greatly improve dental appointments and facilitate remote dental consultations. Here are five ways Bluetooth tools can enhance communication with your dentist:
- Real-time communication: Bluetooth tools allow for seamless and instant communication between patients and dentists. Whether it’s sending images of your teeth or discussing concerns, Bluetooth tools enable quick and efficient communication.
- Remote consultations: With Bluetooth tools, you can have virtual consultations with your dentist without having to physically visit the dental clinic. This saves time and allows for more convenient appointments.
- Monitoring oral health: Bluetooth-enabled devices can monitor and track your oral health, providing valuable data to your dentist. This information helps them identify any potential issues and provide personalized advice during your appointments.
- Sharing dental records: Bluetooth tools make it easy to share dental records and X-rays with your dentist. This ensures that your dentist has access to accurate and up-to-date information, enabling them to provide better care.
- Treatment reminders: Bluetooth tools can send reminders for dental appointments and medication schedules. This helps ensure that you never miss an important dental visit or forget to take necessary medication.
Are Bluetooth Dental Health Gadgets Effective for Allergy Sufferers?
Bluetooth dental health gadgets may not directly impact allergy sufferers, but using a top HEPA vacuum can help eliminate allergens in the environment. Keeping the home clean with one of the top HEPA vacuums for allergy sufferers can reduce exposure to allergens and improve overall dental health.
Frequently Asked Questions
Can Bluetooth Dental Health Gadgets Be Used by Individuals With Braces or Other Orthodontic Appliances?
Bluetooth dental health gadgets can be used by individuals with braces or other orthodontic appliances, but their effectiveness may be limited. These gadgets can help monitor oral hygiene habits and provide feedback, but they may not be able to accurately track certain areas around the braces. Additionally, there’s a risk of damaging the gadgets or braces if they come into contact.
It’s important to consult with your orthodontist before using these gadgets to ensure they’re safe and appropriate for your specific situation.
Are There Any Specific Precautions or Guidelines to Follow When Using Bluetooth Dental Health Gadgets?
When using Bluetooth dental health gadgets, there are important precautions and guidelines to follow. To ensure optimal usage, it’s crucial to adhere to these recommendations.
By taking these precautions, you can maximize the benefits of these gadgets while minimizing any potential risks. Following the guidelines will help you maintain good oral hygiene and achieve better dental health.

Do Bluetooth Dental Health Gadgets Require a Separate App or Software to Function?
Bluetooth dental health gadgets don’t require a separate app or software to function. These devices utilize Bluetooth technology to connect directly to your smartphone or other compatible device.
Once connected, you can easily track and monitor your dental health using the dedicated app provided by the manufacturer. This app allows you to view real-time data, set reminders, and access personalized recommendations for improving your oral hygiene.
It’s a convenient and efficient way to take control of your dental health.
Can Bluetooth Dental Health Gadgets Be Used by Individuals With Dental Implants or Other Dental Prosthetics?
Bluetooth dental health gadgets can indeed be used by individuals with dental implants or other dental prosthetics. These gadgets have the potential to greatly improve oral hygiene by providing real-time feedback and personalized recommendations.
However, there are some advantages and disadvantages to consider. On one hand, Bluetooth dental health gadgets can help individuals with dental implants maintain proper oral care.
On the other hand, the gadgets may not be as effective in detecting plaque or other dental issues in hard-to-reach areas around the implants.
Are Bluetooth Dental Health Gadgets Compatible With All Types of Smartphones and Devices?
Bluetooth dental health gadgets are compatible with a wide range of smartphones and devices, making them versatile and convenient to use. They can also be used with non-smartphone devices, allowing more people to benefit from their features.
The benefits of using these gadgets include real-time feedback on brushing techniques, tracking of brushing habits, and reminders for regular dental check-ups. Incorporating Bluetooth technology into dental health gadgets enhances their functionality and improves oral hygiene practices.
Conclusion
In conclusion, with the help of Bluetooth dental health gadgets, achieving a dazzling smile has never been easier. These innovative tools not only provide numerous benefits and features but also enhance communication with your dentist.
So, why not dive into the world of Bluetooth dental gadgets and let them take your oral care routine to new heights? It’s like having a personal dental assistant right at your fingertips, guiding you towards a healthier, happier mouth.
Say goodbye to dental woes and hello to a brighter future!
- About the Author
- Latest Posts
Introducing Charles, the Editor in Chief at ByRetreat, whose passion for interior design and editorial excellence elevates every remote workspace to new heights. With his keen eye for detail, impeccable taste, and expertise in design, Charles brings a wealth of knowledge and creativity to the ByRetreat team.
As the Editor in Chief of a renowned lifestyle blog, Charles has honed his skills in curating captivating content and staying up-to-date with the latest trends in interior design. His deep understanding of aesthetics and the power of storytelling through design enables him to create remote workspaces that are not only visually stunning but also rich in personality and meaning.
Garage Door Opener
Programming Your Precision Garage Door Opener Remote Easily
Breeze through programming your Precision Garage Door Opener remote with a crucial tip for effortless operation – find out what it is!

Setting up your Precision Garage Door Opener remote is generally considered user-friendly. However, it is important not to overlook a crucial step that could cause problems in the future.
Understanding this key detail will not only simplify the programming process but also ensure smooth operation of your garage door.
Stay tuned to discover the essential tip that will make programming your remote a breeze.
Key Takeaways
- Clear previous opener codes by holding the Learn button for 6 seconds.
- Set a new code by pressing a random sequence of switches for enhanced security.
- Sync remotes and keypads by entering new codes within 30 seconds of pressing the Learn button.
- Test functionality of each device to ensure proper operation and troubleshoot if needed.
Clear Previous Opener Code
To reset the garage door opener code, locate and press the Learn button on the overhead motor unit for 6 seconds. This action initiates the clearing process, allowing you to remove the previous opener code from the system. If necessary, remove the lens cover to access the Learn button easily. By pressing and holding the Learn button, you ensure that the previous opener code is completely cleared. This step is crucial before proceeding to input a new code for your garage door opener remote.
Make sure to press and hold the Enter button as well, until you observe lights flashing or listen for clicks if lights aren't visible. Confirm that the previous opener code has been successfully removed before attempting to program the new remote control. By following these simple steps, you can effectively clear the previous opener code from your garage door opener system and prepare it for the setup of a new remote.
Input New Opener Code

After successfully clearing the previous opener code from your garage door opener system, the next step is to input a new code by locating the numbered switches on the back of the motor unit.
These switches are essential for setting up a secure code for your Precision Garage Door opener. To ensure optimal security, it's recommended to press a mix of switches in a random sequence.
When inputting the new code, make sure to include a combination of both top and bottom switches. Avoid using only top or bottom switches to prevent code duplication and enhance the security of your garage door opener.
Program Remote and Keypad
When programming your garage door opener remote and keypad, press the 'Learn' button on the garage door opener motor to begin the setup process efficiently.
With the remote in hand, locate the 'Learn' button on the motor unit, typically found near the hanging antenna wire. Once you press the 'Learn' button, an indicator light will illuminate, signaling that the motor is ready to learn new devices.
Quickly enter a new code on the keypad within 30 seconds to sync it with the opener. Repeat this process for each additional remote or keypad you wish to program, ensuring that each one flashes or beeps to confirm successful programming.
It's essential to test the functionality of each programmed device to guarantee they're operating correctly. If you encounter any issues during programming, consider consulting certified technicians for assistance in troubleshooting and completing the setup process seamlessly.
Test Remote Functionality

Check the garage door's response by pressing the button on the remote to verify its functionality. It's essential to ensure that the remote is working correctly to operate your garage door efficiently. Here are some steps to test the remote:
- Look for a flashing light on the motor unit to confirm the signal reception.
- Operate the garage door using the remote and check for any delays or issues in its functioning.
- Test the remote from various distances to evaluate the range of operation it provides.
- If the remote fails to work, troubleshoot by checking the battery levels and consider reprogramming if necessary.
Testing the remote's functionality is crucial to maintaining seamless access to your garage. By following these steps and troubleshooting any issues promptly, you can ensure that your garage door opener remote operates smoothly and reliably.
Contact Precision Door Support
For prompt assistance with your garage door needs, reach out to Precision Door Support at 800-DOOR-REPAIR. As a subsidiary of Foris Solutions, LLC, Precision Garage Door of Southeast Michigan offers expert help for all your garage door requirements.
Easily schedule services through the provided link to ensure prompt support for your garage door and opener issues. With certified technicians on hand, you can rely on Precision Door Support for setting changes, programming support, and any repair services you may need.
Whether you're facing difficulties with programming your garage door opener remote or require maintenance services, contacting Precision Door Support at 800-DOOR-REPAIR is the first step towards resolving your garage door concerns efficiently. Trust in the expertise of Precision Garage Door to provide you with the assistance and guidance necessary to keep your garage door functioning optimally.
Frequently Asked Questions
How Do I Program My Precision Garage Door Remote?
To program your Precision garage door remote, follow these steps:
- Locate the 'Learn' button on the opener motor.
- Press and release the 'Learn' button to enter programming mode.
- Press the desired button on your remote within 30 seconds.
- Wait for the opener's lights to flash or hear a click to confirm success.
- Test the remote to ensure it works.
This simple process ensures your remote is synced and ready to use with your garage door opener.
Why Is My Precision Garage Door Opener Remote Not Working?
We should first check the battery life and ensure there's no electronic interference affecting the signal of the Precision garage door opener remote.
If the issue persists, we must verify the correct programming by syncing it with the opener according to the manufacturer's instructions.
Inspect for physical damage that could be causing malfunctions.
If problems persist, contacting Precision Door for troubleshooting assistance is recommended to address the remote not working properly.
How Do I Reprogram My Garage Door Opener Remote?
We've got this covered!
To reprogram your garage door opener remote, simply press the 'Learn' button on the motor unit. Hold down the remote button within 30 seconds to sync it with the opener. Watch for confirmation lights or listen for clicks to confirm success. Repeat this process for any additional remotes to keep them all in sync.
Don't forget to reset keypad codes by entering a new 4-digit PIN and hitting enter.
Can You Program a Garage Remote Yourself?
Yes, we can program a garage remote ourselves.
It's a simple process that empowers us to control our garage door opener conveniently. By locating the Learn button on the motor unit and following easy steps, we can add or remove remotes as needed. DIY programming saves time and money, offering flexibility and convenience.
Conclusion
So there you have it, programming your Precision Garage Door Opener remote is as easy as pie. Just follow the simple steps, and you'll be opening and closing your garage door with ease.
It's almost too easy, you might even start to miss the days of struggling with a manual door. But hey, at least now you can impress your friends with your high-tech garage door skills.
- About the Author
- Latest Posts
Introducing Ron, the home decor aficionado at ByRetreat, whose passion for creating beautiful and inviting spaces is at the heart of his work. With his deep knowledge of home decor and his innate sense of style, Ron brings a wealth of expertise and a keen eye for detail to the ByRetreat team.
Ron’s love for home decor goes beyond aesthetics; he understands that our surroundings play a significant role in our overall well-being and productivity. With this in mind, Ron is dedicated to transforming remote workspaces into havens of comfort, functionality, and beauty.
-

 Decor1 week ago
Maximalist Decor Explained: Embrace More Style
-

 Vetted4 weeks ago
15 Best Drip Irrigation Systems to Keep Your Garden Thriving
-

 Vetted2 weeks ago
15 Best Foot Massagers for Neuropathy to Soothe Your Feet and Relieve Discomfort
-

 Vetted3 weeks ago
15 Best Sports Laundry Detergents for Keeping Your Activewear Fresh and Clean
-

 Vetted3 weeks ago
15 Best Tall Toilets for Seniors That Combine Comfort and Safety
-

 Vetted4 weeks ago
15 Best Dish Scrubbers to Keep Your Kitchen Sparkling Clean
-
 Vetted17 hours ago
15 Best Cleaners for Fiberglass Showers to Keep Your Bathroom Sparkling Clean
-

 Decor4 weeks ago
What Is Eclectic Home Decor


