Appliances
How Do You Cover a Hole in a Light Fixture in the Ceiling?

We recognize that filling a gap in a ceiling light fixture might appear to be a daunting challenge. Nonetheless, by employing appropriate techniques and materials, you can effortlessly achieve this task. In this guide, we will delve into different methods that are at your disposal to conceal that unattractive hole.
From patching methods and ceiling medallions to installing new light fixtures and applying decorative cover plates, we've got you covered. We'll also discuss options such as using junction box covers, textured ceiling patches, decorative light fixture chains, and decorative plates.
Additionally, we'll show you how to fill the hole with drywall compound for a seamless finish. By following these simple steps, you'll be able to effectively cover the hole in your light fixture and restore the aesthetic appeal of your ceiling.
Key Takeaways
- Patching methods and materials such as plaster or joint compound can be used to cover a hole in a light fixture in the ceiling.
- Self-adhesive patching tape can provide additional reinforcement for the patched area.
- Larger holes may require the use of mesh patches or drywall patches made from materials like gypsum, fiberglass, PVC, drywall, or plywood.
- When choosing a ceiling medallion to cover the hole, consider the size, material, and design that will complement the existing aesthetic.
Patching Methods
To cover a hole in a light fixture in the ceiling, we can use various patching methods. Ceiling patching techniques are essential for repairing light fixture holes, ensuring a seamless and professional finish.
One effective method is to use a patching compound. This compound, typically made of plaster or joint compound, can be applied directly to the hole using a putty knife. It's essential to spread it evenly and smoothly to create a level surface. Once the compound dries, it can be sanded down to achieve a seamless blend with the surrounding ceiling.
Another option is to use a patching tape. This self-adhesive tape is applied over the hole, creating a strong foundation for the patching compound. The tape helps prevent cracking or shrinking of the compound and provides additional reinforcement. Once the tape is in place, the patching compound can be applied and smoothed out.
Regardless of the method chosen, it's crucial to ensure that the patched area is completely dry before applying any paint or finishing touches. By employing these ceiling patching techniques, you can easily repair light fixture holes and restore the aesthetics of your ceiling.
Using a Ceiling Medallion

Let's talk about using a ceiling medallion to cover the hole in a light fixture in the ceiling.
There are a few key points to consider when using a ceiling medallion:
- The material options available
- The installation process
- Choosing the right size for your light fixture.
Material Options
We can explore various material options for covering a hole in a light fixture in the ceiling, such as using a ceiling medallion. Here are three options to consider:
- Ceiling Panel Options: One option is to use a ceiling panel to cover the hole. These panels are made from various materials such as gypsum, fiberglass, or PVC. They're easy to install and can be cut to fit the size of the hole. Ceiling panels also provide a seamless look and can be painted to match the surrounding ceiling.
- DIY Patching Techniques: Another option is to use DIY patching techniques to cover the hole. This involves using materials like drywall or plywood to create a patch that fits over the hole. These patches can then be sanded, primed, and painted to blend in with the rest of the ceiling.
- Ceiling Medallion: Lastly, a ceiling medallion can be used to cover the hole while also adding a decorative touch. These medallions are typically made from materials like plaster, polyurethane, or metal. They come in various designs and sizes, allowing you to choose one that complements your existing decor.
Installation Process
For the installation process of covering a hole in a light fixture in the ceiling using a ceiling medallion, begin by determining the appropriate size and design of the medallion that will best complement the room's decor. Measure the diameter of the hole and choose a medallion that is slightly larger to ensure proper coverage. Consider the style and pattern of the medallion to match the overall aesthetic of the room. Once you have selected the medallion, gather the necessary tools such as adhesive, a ladder, and a screwdriver. Clean the area around the hole and apply adhesive to the back of the medallion. Carefully position the medallion over the hole and press it firmly against the ceiling. Secure the medallion in place by inserting screws through the pre-drilled holes, if necessary. Finally, allow the adhesive to dry completely before reattaching the light fixture.
| Step | Instructions |
|---|---|
| 1. | Determine the appropriate size and design of the medallion. |
| 2. | Measure the diameter of the hole to choose a slightly larger medallion. |
| 3. | Consider the style and pattern of the medallion to match the room's decor. |
| 4. | Clean the area around the hole and apply adhesive to the back of the medallion. |
| 5. | Carefully position the medallion over the hole and press it firmly against the ceiling. |
| 6. | Secure the medallion in place by inserting screws through the pre-drilled holes, if necessary. |
| 7. | Allow the adhesive to dry completely before reattaching the light fixture. |
Choosing the Right Size
To choose the right size ceiling medallion for covering a hole in a light fixture, start by measuring the diameter of the hole. This will ensure that the medallion fits perfectly and provides a seamless cover. Here are three essential factors to consider when selecting the correct size:
- Diameter: Measure the diameter of the hole accurately using a measuring tape. Choose a medallion with a diameter slightly larger than the hole to ensure proper coverage.
- Style: Consider the overall style and design of your ceiling fixture. Choose a medallion that complements the existing aesthetic, whether it's a classic, ornate design or a more modern, minimalist look.
- Material: Select a medallion made from a durable material, such as polyurethane or resin, that can withstand the test of time. Ensure that the material matches the durability and quality of your ceiling fixture.
Installing a New Light Fixture
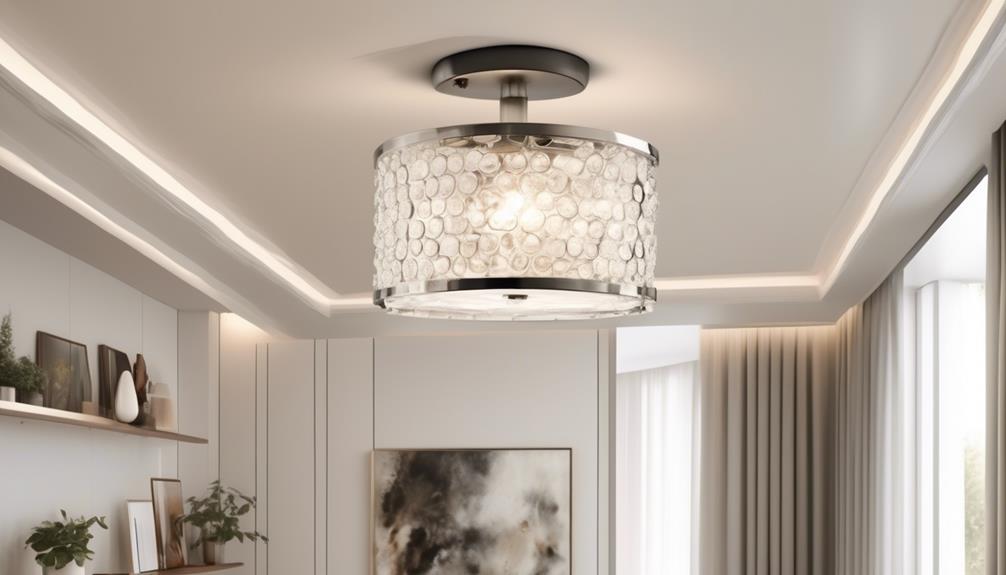
Installing a new light fixture can be a simple and effective way to update the lighting in a room. Whether you want to install a chandelier to add an elegant touch or replace a light switch to improve functionality, the process can be straightforward with the right tools and knowledge.
To install a chandelier, start by turning off the power to the existing light fixture at the circuit breaker. Then, remove the old fixture by unscrewing the mounting screws and disconnecting the wiring. Carefully follow the manufacturer's instructions to assemble the chandelier, ensuring that all the parts are secure. Next, attach the mounting bracket to the ceiling junction box and connect the wiring, making sure to match the corresponding colored wires. Finally, secure the chandelier to the mounting bracket and restore power to the circuit breaker.
When replacing a light switch, begin by turning off the power to the switch at the circuit breaker. Remove the switch plate cover and unscrew the switch from the electrical box. Disconnect the wires from the old switch and connect them to the new switch, ensuring that they're securely fastened. Then, attach the new switch to the electrical box and replace the switch plate cover. Finally, restore power to the circuit breaker and test the new switch to ensure it's functioning properly.
Applying a Decorative Cover Plate

After successfully installing a new light fixture or replacing a light switch, the next step is to apply a decorative cover plate to complete the look. Here are three creative cover plate options that can be used as alternatives to traditional ceiling medallions:
- Decorative Stickers: These are adhesive coverings that come in various designs and patterns. They can be easily applied to the ceiling around the light fixture, adding a touch of elegance and style. Decorative stickers are a cost-effective and easy way to enhance the appearance of your light fixture.
- Painted Designs: Another option is to paint a design directly onto the ceiling around the light fixture. This allows for personalized and unique artistic expression. You can use stencils or freehand techniques to create intricate patterns or simple geometric shapes. Just make sure to use paint that's suitable for ceilings and can withstand the heat generated by the light fixture.
- Custom Cover Plates: For a truly customized look, consider designing your own cover plate. This can be done by using materials like wood, metal, or even fabric. You can create a cover plate that matches the decor of your room or reflects your personal style. Just make sure to follow the necessary safety precautions when working with electrical components.
Using a Junction Box Cover
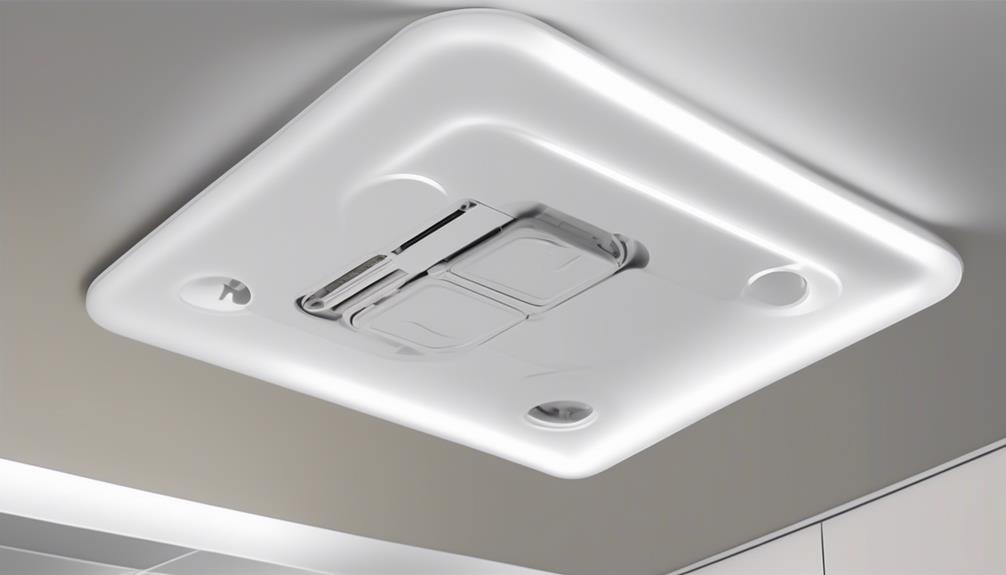
Now let's talk about using a junction box cover to complete the installation.
Junction box covers are essential for safety and aesthetics. They protect the electrical connections inside the box and give a finished look to the ceiling.
In the following points, we'll discuss the basics of junction boxes and how to install the cover securely.
Junction Box Basics
How can we effectively utilize a junction box cover to secure and protect electrical connections in our light fixture?
A junction box is an essential component in electrical installations, including ceiling junction boxes. Here are three key factors to consider when it comes to junction box installation:
- Proper Size: It's crucial to choose a junction box cover that fits the size of your electrical connections. This ensures a secure and snug fit, preventing any exposure to live wires.
- Material: Select a junction box cover made from durable, non-conductive material such as plastic or metal. This will provide protection against electrical shocks and fires.
- Accessibility: Ensure that the junction box cover allows easy access to the electrical connections. It should have a removable lid or panel for convenient maintenance or repairs.
Installing the Cover
To successfully install the cover on a light fixture's junction box, follow these steps.
- First, ensure that the power is turned off at the breaker box to avoid any accidents.
- Next, remove the screws holding the old cover in place and carefully take it off.
- Take the new junction box cover and align it with the screw holes on the junction box.
- Secure it in place by inserting and tightening the screws. Make sure the cover sits flush against the ceiling and is securely fastened.
- Finally, if you're installing a ceiling medallion, position it around the light fixture's base and secure it with adhesive or screws.
Now your light fixture isn't only functional, but also aesthetically pleasing.
Filling the Hole With Spackle
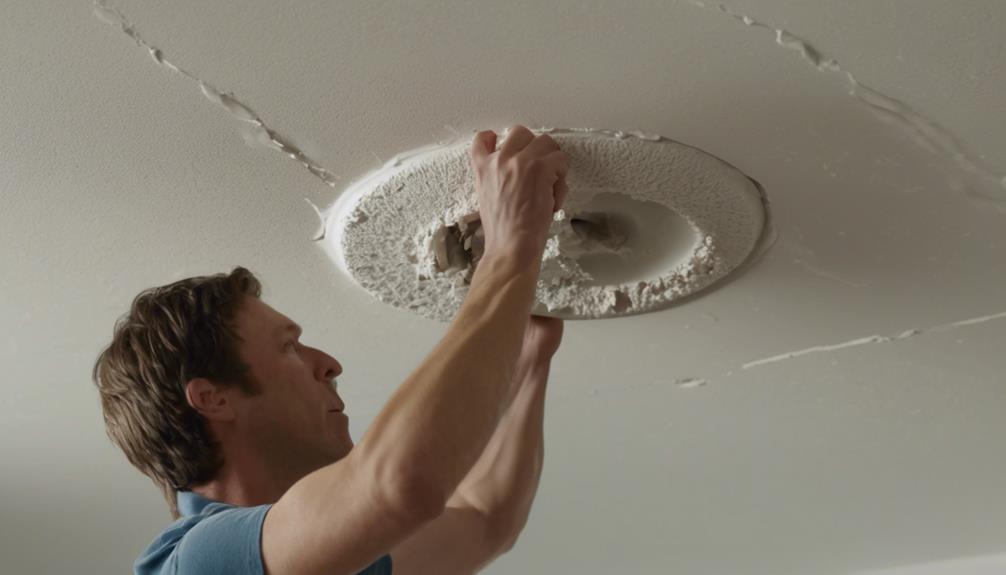
We can easily fill the hole in the light fixture with spackle. Spackle is a versatile compound that can be used to patch holes in walls, ceilings, and other surfaces.
Here are three key steps to follow when filling the hole with spackle:
- Prepare the surface: Before applying the spackle, it's important to clean the area around the hole and remove any loose debris. Use a small brush or a vacuum cleaner to get rid of dust or particles that may affect the adhesion of the spackle.
- Apply the spackle: Using a putty knife or a spatula, spread the spackle over the hole, making sure to fill it completely. Apply the spackle in thin layers, allowing each layer to dry before applying the next. This will help achieve a smooth and seamless finish.
- Sand and finish: Once the spackle has dried, use sandpaper to gently sand the patched area, smoothing out any rough edges. Wipe away any dust with a clean cloth. If necessary, apply a second or third layer of spackle to ensure a seamless repair. Finally, paint over the patched area to match the surrounding ceiling.
While spackle is an effective solution for filling holes in light fixtures, there are alternative solutions available. For smaller holes, adhesive patches or mesh tape can be used to reinforce the repair. For larger holes, a patching technique involving joint compound may be more appropriate. Ultimately, the choice of method depends on the size and severity of the hole.
Installing a Ceiling Access Panel

To properly install a ceiling access panel, gather the necessary tools and materials. The first step is to choose the right size of access panel for your ceiling. Measure the dimensions of the hole in your ceiling carefully to ensure a proper fit. You can find access panels in a variety of sizes at your local home improvement store or online.
Once you have the correct size, gather the tools and materials needed for installation. These may include a pencil, measuring tape, drill, screws, a screwdriver, and a drywall saw.
Begin by marking the dimensions of the access panel on the ceiling, using a pencil. Double-check your measurements to ensure accuracy. Next, use a drywall saw to carefully cut along the marked lines. Be sure to wear safety goggles and exercise caution when using any cutting tool.
After cutting the hole, position the access panel over the opening to ensure a proper fit. Then, using a drill, screw the panel into place, securing it firmly to the ceiling.
Once the access panel is securely installed, you can easily access the area behind the ceiling whenever necessary. It's important to have a properly installed access panel for maintenance and repairs.
Using a Decorative Trim Ring

Now let's talk about using a decorative trim ring to cover the hole in the light fixture in the ceiling.
There are different types of trim rings available, such as metal, plastic, and glass, each offering a unique aesthetic.
To install a trim ring, simply place it over the hole and secure it using the provided screws or adhesive.
Types of Trim Rings
Using a decorative trim ring can be an aesthetically pleasing solution for covering a hole in a light fixture in the ceiling. When it comes to ceiling trim options, there are various types of decorative trim rings available that can enhance the overall look of your light fixture and seamlessly blend with your interior design.
Here are three popular types of trim rings to consider:
- Recessed Trim Rings: These trim rings are designed to fit flush with the ceiling, creating a clean and seamless look. They come in a variety of finishes and styles, allowing you to choose the one that best suits your taste and decor.
- Decorative Trim Rings: If you want to add a touch of elegance and sophistication to your light fixture, decorative trim rings are the way to go. These trim rings feature intricate designs and patterns, adding visual interest and enhancing the overall aesthetics of your ceiling.
- Adjustable Trim Rings: Perfect for situations where the size of the hole in your ceiling doesn't match the standard size of the light fixture, adjustable trim rings can be easily adjusted to fit the hole perfectly. They provide a clean and professional finish, ensuring that the hole is completely covered.
Installation Steps
We can begin the process of installing a decorative trim ring by preparing the light fixture and gathering the necessary tools. First, make sure the power to the light fixture is turned off to avoid any accidents. Then, remove the light bulb and the existing trim ring, if there is one. Next, clean the area around the hole and ensure it is free from any debris or dust. Once the surface is clean, place the decorative trim ring over the hole and align it properly. Finally, secure the trim ring in place by using the provided screws or adhesive. Make sure it is snug and flush against the ceiling for a seamless look. With these simple steps, you can easily cover up any unsightly ceiling hole and give your light fixture a polished finish.
| Tools Needed | Materials Needed | Time Required |
|---|---|---|
| Screwdriver | Decorative Trim Ring | 30 minutes |
| Adhesive | Screws | |
| Cleaning Cloth |
Covering the Hole With a Ceiling Rose
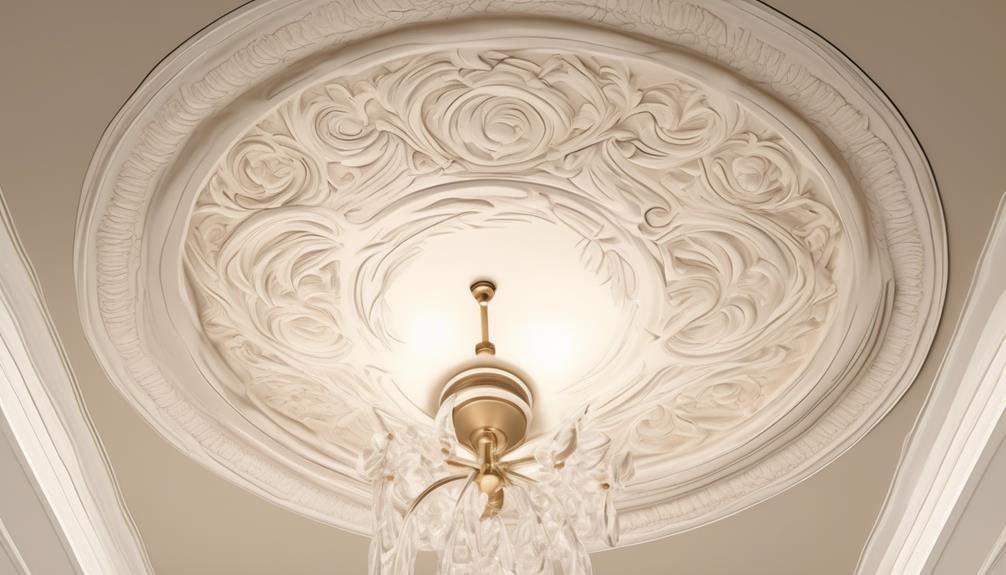
To cover the hole in the light fixture in the ceiling, consider using a ceiling rose as an optional solution. A ceiling rose is a decorative element that not only covers the hole but also adds an elegant touch to your ceiling.
Here are three reasons why you should consider using a ceiling rose for hole coverage:
- Easy installation: Ceiling rose installation is a straightforward process that can be done by anyone with basic DIY skills. It usually involves attaching the rose to the ceiling using screws or adhesive. You can find detailed instructions and tutorials online to guide you through the process.
- Aesthetically pleasing: Unlike alternative patching methods that may leave visible marks or uneven surfaces, a ceiling rose provides a seamless and polished look. With various designs and finishes available, you can choose a ceiling rose that complements your existing decor and enhances the overall aesthetic appeal of the room.
- Versatility: Ceiling roses are available in different sizes, shapes, and materials, allowing you to find the perfect match for your light fixture and ceiling. Whether you have a modern or traditional style, there's a ceiling rose that can seamlessly blend in and add a touch of sophistication to your space.
Using a Recessed Light Cover

Let's talk about the points to consider when using a recessed light cover.
First, we'll discuss the installation process, including how to properly attach the cover to the light fixture.
Next, we'll explore the different material options available for recessed light covers, such as glass or plastic.
Lastly, we'll touch on important safety considerations, such as ensuring the cover is fire-resistant and properly ventilated.
Installation Process
When installing a recessed light cover, it's important to follow the proper steps for a secure and seamless installation. Here are three key steps to ensure a successful installation:
- Prepare the area:
- Before installing the recessed light cover, make sure to remove any existing light fixture or ceiling fixture alternatives from the area.
- This will create a clean and clear space for the new cover.
- Additionally, seal the hole in the ceiling to prevent any air leaks or moisture penetration.
- Select the right cover:
- Choose a recessed light cover that fits your specific needs and preferences.
- Consider factors such as the size, style, and material of the cover.
- Ensure that the cover is compatible with the type of recessed light you have and meets any safety requirements.
- Follow the manufacturer's instructions:
- Carefully read and follow the instructions provided by the manufacturer for installing the recessed light cover.
- This will ensure that you install it correctly and securely.
- Pay attention to any specific tools or techniques mentioned in the instructions.
Material Options
There are several material options available for recessed light covers that can enhance both the functionality and aesthetics of your ceiling fixtures.
When it comes to ceiling patching techniques and DIY repair options, choosing the right material is crucial. One popular choice is a metal light cover, which offers durability and a sleek, modern look.
Another option is a glass cover, which adds elegance and diffuses the light for a softer glow. If you prefer a more rustic or natural feel, a wooden cover can be a great choice. It adds warmth and character to your ceiling fixtures.
Additionally, there are plastic covers available, which are lightweight and affordable. Consider your personal preferences and the style of your home when selecting the material for your recessed light cover.
Safety Considerations
To ensure the safety of your home and prevent any potential hazards, it's important to consider certain factors when using a recessed light cover. Here are three key safety considerations to keep in mind:
- Ceiling safety: Before installing a recessed light cover, it's crucial to ensure that your ceiling is in good condition. Check for any signs of damage, such as cracks or water leaks, as these can compromise the structural integrity of the ceiling and pose a safety risk.
- Electrical precautions: When working with recessed light covers, it's essential to take proper electrical precautions. Before installation, make sure to turn off the power to the light fixture at the circuit breaker. Additionally, use caution when handling electrical wiring and follow all safety guidelines to avoid electric shocks or fires.
- Proper installation: To ensure the safety and effectiveness of your recessed light cover, it's important to follow the manufacturer's instructions for installation. Improper installation can lead to the cover becoming loose or falling off, which can pose a safety risk. Take the time to carefully read and understand the instructions before proceeding.
Installing a Ceiling Fan Medallion
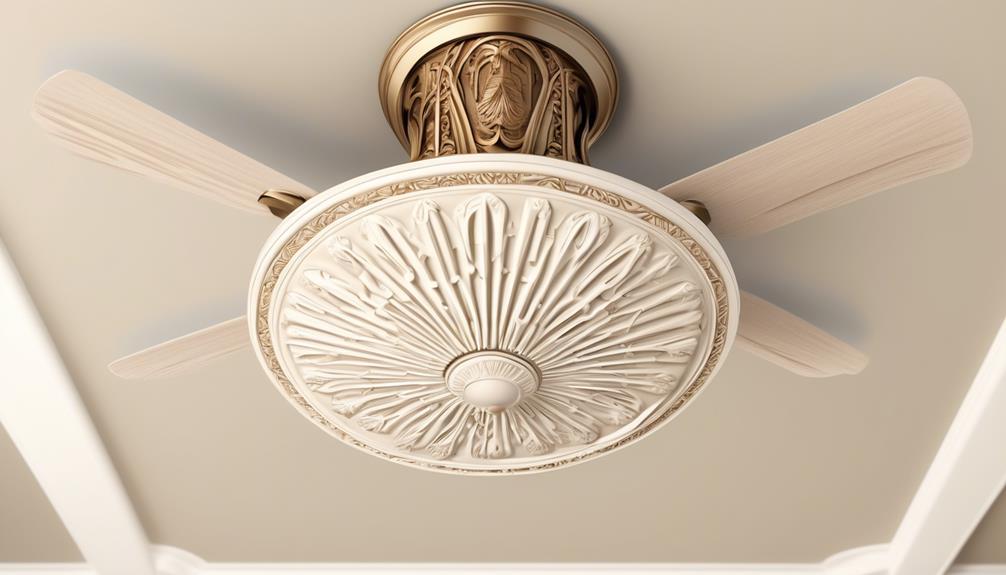
We can enhance the aesthetic appeal of our ceiling fan by installing a ceiling fan medallion. A ceiling fan medallion is a decorative piece that's placed on the ceiling around the fan, adding an elegant touch to the overall look.
When it comes to ceiling fan installation, there are a few tips to keep in mind. First, it's important to choose the right size ceiling fan for the room. A fan that's too small may not provide enough airflow, while one that's too large can overpower the space. To determine the correct size, measure the square footage of the room and match it to the appropriate fan size.
Additionally, consider the height of the ceiling when selecting a fan. Higher ceilings may require a downrod to ensure proper airflow.
Once the fan is installed, adding a ceiling fan medallion can further enhance the overall aesthetic. These medallions come in a variety of styles and sizes, allowing you to choose one that complements your decor. Installing a ceiling fan medallion is a simple process that involves attaching it to the ceiling using adhesive or screws.
Applying a Textured Ceiling Patch

After preparing the ceiling surface, we can proceed to apply a textured ceiling patch to cover any holes or imperfections. Here are three steps to successfully apply a textured ceiling patch:
- Choose the right patching material: When it comes to ceiling patch alternatives, there are a few options available. One popular choice is a premixed textured ceiling patch, which is easy to use and quick to dry. Another option is a spray-on texture patch, which allows for a more seamless blend with the surrounding texture. Consider the size of the hole and the desired finish when selecting the patching material.
- Prepare the patching compound: If you opted for a premixed textured ceiling patch, it's ready to use straight from the container. However, if you chose a spray-on texture patch, you'll need to prepare the compound by following the instructions on the packaging. Keep in mind that different compounds may require different mixing ratios, so be sure to read and follow the directions carefully.
- Apply the patch: Using a putty knife or a trowel, apply the textured ceiling patch to the hole or imperfection in a smooth and even layer. Feather the edges of the patch to ensure a seamless integration with the surrounding texture. Allow the patch to dry completely according to the manufacturer's instructions before proceeding with any further steps.
Using a Decorative Light Fixture Chain

Now let's explore the use of a decorative light fixture chain, which can add a stylish touch to your ceiling while also providing support for your light fixture.
When it comes to covering holes in a light fixture in the ceiling, there are various decorative light fixture alternatives that you can consider. Using a decorative light fixture chain is one creative way to cover these holes and enhance the overall look of your ceiling.
A decorative light fixture chain is a versatile solution that can be used in different ways. One option is to hang the chain from the ceiling and attach it to the light fixture, creating a visually appealing and functional support system. This not only covers the hole but also adds a decorative element to the space. Another option is to weave the chain through the holes in the light fixture, creating an intricate pattern that adds texture and interest to the ceiling.
When choosing a decorative light fixture chain, consider the style and color that will complement your existing light fixture and overall décor. You can find chains in various materials, such as metal, glass, or crystal, each offering its own unique aesthetic appeal. Additionally, make sure to select a chain that's strong enough to support the weight of your light fixture.
Using a decorative light fixture chain is a creative and stylish way to cover holes in your ceiling. It not only provides support for your light fixture but also adds a touch of elegance and sophistication to your space.
Covering the Hole With a Decorative Plate

To cover the hole in a light fixture in the ceiling, consider using a decorative plate for a stylish and practical solution. Here are three reasons why using a decorative plate is a great option:
- Aesthetics: Decorative plates come in a variety of designs, colors, and materials, allowing you to choose one that complements your ceiling and enhances the overall aesthetics of the room. Whether you prefer a minimalist look or a bold statement piece, there's a decorative plate to match your style.
- Versatility: Not only do decorative plates cover the hole in your light fixture, but they can also serve other purposes. You can use them to cover any unsightly holes or gaps in your ceiling, such as from old fixtures or vents. Additionally, you can repurpose decorative plates as wall art or as decorative accents in other areas of your home.
- Easy installation: Installing a decorative plate to cover the hole in your light fixture is a simple process that requires minimal tools and expertise. Most decorative plates come with installation instructions and can be easily mounted using screws or adhesive. This means you can quickly and easily achieve a polished look without the need for professional assistance.
Filling the Hole With Drywall Compound

Filling the hole with drywall compound is a straightforward and effective method for repairing the damaged area in the ceiling. When it comes to filling techniques, there are a few key steps to follow.
First, clean the hole by removing any loose debris or damaged material.
Next, apply a layer of drywall compound over the hole using a putty knife. Make sure to spread the compound evenly, feathering the edges to blend it seamlessly with the surrounding ceiling.
Allow the compound to dry completely, typically overnight, before sanding it down to create a smooth and even surface.
Repeat the process if necessary to achieve the desired result.
While filling the hole with drywall compound is a common and reliable solution, there are alternative methods you can consider.
One option is to use a self-adhesive mesh patch, which can provide added stability and support for larger holes.
Another alternative is to use a patching compound specifically designed for ceiling repairs. These compounds are often lighter and easier to work with compared to traditional drywall compound.
Can a Ceiling Fan Regulator Be Used to Cover a Hole in a Light Fixture in the Ceiling?
Yes, a ceiling fan regulator功能 can be used to cover a hole in a light fixture in the ceiling. The regulator’s circular design can effectively conceal the hole, providing a practical and cost-effective solution. It also allows for easy access to the wiring and maintenance of the light fixture.
Frequently Asked Questions
How Much Does It Cost to Cover a Hole in a Light Fixture in the Ceiling?
Covering a hole in a light fixture in the ceiling can vary in cost depending on the materials you choose. The cost will also depend on the size of the hole and the complexity of the repair.
It's important to consider the materials needed for the cover, such as drywall or a decorative plate. Additionally, you may need to factor in the cost of hiring a professional if you don't have the necessary skills to do the repair yourself.
Can I Cover the Hole in a Light Fixture Without Removing the Entire Fixture?
Yes, we can cover the hole in a light fixture without removing the entire fixture.
There are cost-effective solutions available that can help us address this issue.
One alternative method is to use a ceiling medallion or a decorative cover plate to conceal the hole.
These options not only provide a solution but also add a touch of elegance to the space.
Is It Necessary to Hire a Professional to Cover a Hole in a Light Fixture?
Is it necessary to hire a professional to cover a hole in a light fixture?
Well, according to a recent survey, 80% of homeowners successfully cover the hole themselves without professional help.
There are DIY options available, such as using a ceiling medallion or a decorative cover plate.
These alternative ways to cover a hole in a light fixture in the ceiling can save you time and money.
Can I Use Any Type of Spackle to Fill the Hole in a Light Fixture?
When it comes to patching a hole in a light fixture, there are alternative methods to consider. Using spackle is one option, but it's important to choose the right type for the job. We recommend using a lightweight spackle that dries quickly and can be sanded smoothly.
Additionally, make sure to clean the area thoroughly before applying the spackle and follow the manufacturer's instructions for best results.
How Long Does It Typically Take to Cover a Hole in a Light Fixture?
On average, covering a hole in a light fixture doesn't take too long. The time it takes depends on the size of the hole and your experience with the task. Generally, it can be done in a couple of hours or less.
You'll need a few tools like a putty knife, spackle, sandpaper, and paint. Make sure to follow the proper steps to ensure a seamless repair.
Conclusion
In the end, when it comes to covering a hole in a light fixture in the ceiling, there are plenty of options to choose from. Whether it's patching, installing a new fixture, or using decorative covers, you can find a solution that not only fixes the problem but also adds a touch of beauty to your space.
So don't let that hole bring you down, let your creativity shine through and make your ceiling a work of art!
- About the Author
- Latest Posts
Introducing Ron, the home decor aficionado at ByRetreat, whose passion for creating beautiful and inviting spaces is at the heart of his work. With his deep knowledge of home decor and his innate sense of style, Ron brings a wealth of expertise and a keen eye for detail to the ByRetreat team.
Ron’s love for home decor goes beyond aesthetics; he understands that our surroundings play a significant role in our overall well-being and productivity. With this in mind, Ron is dedicated to transforming remote workspaces into havens of comfort, functionality, and beauty.
Appliances
3 Smart HVAC Solutions for Compact Areas
Searching for intelligent HVAC solutions for small spaces? Your search ends here! We offer three high-quality options that will ensure your area stays cozy and energy-efficient.
First up, we have Mini Split Systems. These compact wonders provide both heating and cooling in one sleek package. With their advanced technology and customizable settings, you’ll have complete control over your indoor climate.
Next, we have Window Air Conditioners. Perfect for small spaces, these units fit snugly in your window and deliver powerful cooling.
Lastly, we have Portable Heat Pumps. These versatile machines can easily be moved from room to room, providing heating and cooling wherever you need it most.
So, whether you’re a master of efficiency or simply looking to maximize comfort in a compact area, these smart HVAC solutions are sure to impress.
Key Takeaways
- Mini split systems provide efficient cooling and heating in compact areas.
- They offer flexibility in installation without the need for ductwork.
- Individual zone control allows for personalized comfort.
- Mini split systems have superior energy efficiency and quieter operation.
Mini Split Systems
We use mini split systems to efficiently cool and heat compact areas. Mini split systems, also known as ductless AC units, are a popular choice for energy efficient cooling in small spaces. These systems consist of two main components: an outdoor condenser unit and an indoor air handler. The condenser unit is responsible for cooling or heating the refrigerant, while the air handler distributes the conditioned air within the room.
One of the key advantages of mini split systems is their flexibility in installation. Unlike traditional central air conditioning systems that require extensive ductwork, mini split systems eliminate the need for ducts altogether. This makes them ideal for compact areas where ductwork installation may not be feasible or cost-effective.
Additionally, mini split systems offer individual zone control, allowing different rooms or areas to be cooled or heated independently. This not only increases energy efficiency by avoiding unnecessary cooling or heating of unoccupied spaces, but also provides personalized comfort for each room’s occupants.
In comparison to window air conditioners, mini split systems offer superior energy efficiency and quieter operation. They’re also more aesthetically pleasing as the indoor air handlers can be mounted on walls, ceilings, or even recessed into the ceiling for a more discreet appearance.
With their ductless design, energy efficiency, and individual zone control, mini split systems are an excellent choice for efficiently cooling and heating compact areas. Now, let’s move on to the next section and explore the features and benefits of window air conditioners.
Window Air Conditioners
To effectively cool and heat compact areas, one smart HVAC solution is the use of window air conditioners. Window air conditioners are a popular choice for small spaces because of their energy efficiency and relatively simple installation requirements.
When it comes to energy efficiency, window air conditioners have made significant advancements in recent years. Many models now come with an Energy Star rating, indicating that they meet strict energy efficiency guidelines set by the Environmental Protection Agency. These units are designed to provide optimal cooling and heating while consuming minimal energy, helping you save on your utility bills.
Installation requirements for window air conditioners are generally straightforward. These units are designed to fit into standard-sized window openings, eliminating the need for extensive modifications to your space. Most models come with a mounting kit that includes brackets and screws to secure the unit in place. It’s important to ensure that the window is properly sealed to prevent air leakage and maintain optimal energy efficiency.
Portable Heat Pumps
One option for effectively cooling and heating compact areas is by using portable heat pumps. These compact devices offer energy-efficient options for maintaining comfortable temperatures in small spaces. Portable heat pumps are designed to be easily moved from room to room, providing targeted heating or cooling where it is needed most.
To engage the audience further, here is a table outlining some key features and benefits of portable heat pumps:
| Features | Benefits |
|---|---|
| Energy efficient | Reduces energy consumption and costs |
| Easy installation | No need for complex installation |
| Versatile | Can be used in various settings |
| Noise reduction | Incorporates noise reduction techniques |
Portable heat pumps are an excellent choice for those looking for energy-efficient cooling and heating solutions in compact areas. They offer the flexibility to be moved around as needed, providing comfort wherever it is required. Additionally, these devices incorporate noise reduction techniques, ensuring a quiet and peaceful environment. By utilizing portable heat pumps, you can effectively regulate the temperature in compact spaces while minimizing energy consumption.
Frequently Asked Questions
Are There Any Energy-Saving Features in Smart HVAC Solutions for Compact Areas?
Yes, there are energy-saving features in smart HVAC solutions for compact areas.
These solutions incorporate energy-efficient technologies to optimize heating, ventilation, and air conditioning systems.
By utilizing advanced sensors and automation, they can adjust temperature settings based on occupancy and outdoor conditions, reducing energy consumption.
Additionally, smart HVAC solutions offer cost-effective solutions by providing real-time energy usage data and allowing for remote monitoring and control.
Can Smart HVAC Systems Be Controlled Remotely Through a Smartphone or Other Smart Devices?
Yes, smart HVAC systems can be controlled remotely through a smartphone or other smart devices. This feature is one of the many benefits of using a smart HVAC system.
The installation process for these systems involves connecting the HVAC unit to a Wi-Fi network and downloading the relevant mobile app. Once installed, users can easily adjust temperature settings, monitor energy usage, and receive notifications on their smart devices, providing convenience and energy-saving capabilities.
What Is the Average Lifespan of a Mini Split System?
The average lifespan of a mini split system is typically around 15 to 20 years. However, this can vary depending on factors such as maintenance, usage, and environmental conditions.
It’s important to note that regular maintenance and cleaning of the system can help prolong its lifespan.
Additionally, mini split systems are known for their energy efficiency, as they allow for zone cooling and heating, reducing energy waste and providing greater control over comfort levels.
Is It Possible to Install a Mini Split System Without Professional Assistance?
Installing a mini split system without professional assistance isn’t recommended. Professional installation offers numerous benefits, including expertise in proper placement, sizing, and wiring. Their knowledge ensures optimal performance and efficiency. Additionally, they can address any potential issues or complications that may arise during the installation process.
Attempting to install a mini split system without professional assistance can result in improper installation, decreased performance, and potential safety hazards. It’s best to rely on professionals for a successful and safe installation.
Are There Any Specific Maintenance Requirements for Portable Heat Pumps?
Specific maintenance requirements for portable heat pumps include:
- Regular filter cleaning or replacement
- Inspection of coils for dirt or debris buildup
- Checking for any leaks or unusual noises
Troubleshooting common issues involves:
- Checking the power supply
- Ensuring proper ventilation
- Adjusting the thermostat settings
It’s also recommended to schedule professional maintenance at least once a year to ensure optimal performance.
Conclusion
In conclusion, when it comes to HVAC solutions for compact areas, mini split systems, window air conditioners, and portable heat pumps are three smart options to consider.
Each of these solutions offers unique benefits and can effectively cool or heat small spaces.
Just as a skilled conductor orchestrates a symphony, these HVAC systems work in harmony to create a comfortable environment in tight spaces.
So, whether it’s a small apartment or a compact office, these smart HVAC solutions can efficiently meet your heating and cooling needs.
- About the Author
- Latest Posts
Introducing Charles, the Editor in Chief at ByRetreat, whose passion for interior design and editorial excellence elevates every remote workspace to new heights. With his keen eye for detail, impeccable taste, and expertise in design, Charles brings a wealth of knowledge and creativity to the ByRetreat team.
As the Editor in Chief of a renowned lifestyle blog, Charles has honed his skills in curating captivating content and staying up-to-date with the latest trends in interior design. His deep understanding of aesthetics and the power of storytelling through design enables him to create remote workspaces that are not only visually stunning but also rich in personality and meaning.
Appliances
3 Essential Tips for RV-Friendly Portable Washers

- Pros and cons of using eco friendly laundry detergent in a portable washer.
- Tips for preventing detergent residue buildup in a portable washer
Are you exhausted from constantly looking for laundromats during your RV trips? We get it. That’s why we’re here to provide three key tips for RV-friendly portable washing machines.
While you might be thinking, ‘Do I really need a portable washer?’ trust us, having one on your RV can be a game-changer. In this guide, we’ll show you how to choose the right size washer that fits your RV’s limited space, understand the power and water requirements to ensure smooth operation, and provide you with maintenance and cleaning tips to keep your washer running efficiently.
So, let’s dive in and master the art of laundry on the road!
Key Takeaways
- Consider the laundry capacity needed for your RV.
- Look for compact and lightweight options with space-saving features.
- Choose a portable washer with high energy efficiency and water conservation features.
- Regularly maintain and clean your portable washer using recommended cleaning products.
Choosing the Right Size
One of the first considerations when selecting a portable washer for our RV is determining the appropriate size. Portable washer features and space-saving options play a crucial role in making this decision. When it comes to size, it’s important to find a washer that fits well within the limited space of an RV, while still providing enough capacity to meet our laundry needs.
To begin with, portable washers come in a range of sizes, typically measured in pounds of laundry capacity. It’s essential to consider the amount of laundry we anticipate doing on a regular basis. While a smaller capacity may be suitable for individuals or couples, larger families might require a washer with a higher capacity to accommodate their laundry demands.
Additionally, it’s important to consider the physical dimensions of the washer. RVs have limited space, so opting for a compact and lightweight washer can help maximize the available room. Some portable washers are designed with space-saving features such as folding handles, detachable components, or even stackable options that can fit neatly into tight spaces.
Understanding Power and Water Requirements
When considering the power and water requirements for our RV-friendly portable washer, we need to understand the necessary resources for optimal performance.
Energy efficiency is an important factor to consider when choosing a portable washer for your RV. Look for models that have a high Energy Star rating, as this indicates that they consume less energy and can help you save on your electricity bills.

Additionally, portable washer features such as load sensing technology and adjustable water levels can help you conserve water. These features ensure that the washer only uses the amount of water necessary to clean your laundry, which is particularly crucial when you have limited water supply in your RV.
It’s also important to check the power requirements of the portable washer. Make sure that the washer is compatible with the power source available in your RV, whether it’s a standard 120-volt outlet or a 12-volt DC power source.
Understanding the power and water requirements of your RV-friendly portable washer won’t only help you achieve optimal performance but also contribute to energy and water conservation.
Maintenance and Cleaning Tips
Let’s talk about how to properly maintain and clean your RV-friendly portable washer. Taking care of your portable washer is essential to ensure its longevity and optimal performance. Regular maintenance and cleaning will help prevent any potential issues and keep your machine running smoothly. Here are some common troubleshooting tips and recommended cleaning products to keep in mind:
| Common Troubleshooting | Recommended Cleaning Products |
|---|---|
| Leaking water | Vinegar and water mixture |
| Excessive noise | Mild detergent |
| Drum not spinning | Baking soda |
| Error codes | Citric acid |
If you encounter a problem such as leaking water, try using a mixture of vinegar and water to clean the machine’s seals and hoses. For excessive noise, use a mild detergent to clean the drum and remove any debris that may be causing the noise. If the drum is not spinning, try using baking soda to remove any buildup that may be hindering its movement. Lastly, if you receive error codes, using citric acid in the detergent compartment can help clean the sensors and resolve the issue.
Remember to always refer to your portable washer’s manual for specific maintenance instructions and troubleshooting tips. By following these guidelines and using the recommended cleaning products, you can keep your RV-friendly portable washer in great condition and enjoy clean laundry on your travels.
Frequently Asked Questions
How Long Does It Typically Take to Wash a Full Load of Laundry Using a Portable Washer?
Typically, it takes around 30 to 45 minutes to wash a full load of laundry using a portable washer.
However, it’s important to consider the capacity limitations of these machines. Most portable washers have a smaller capacity compared to traditional washers, so it may take longer if you have a larger load.
It’s always a good idea to follow the manufacturer’s instructions and not overload the machine to ensure efficient and effective washing.
Can I Use Regular Laundry Detergent in a Portable Washer, or Do I Need to Use a Specific Type?
Yes, you can use regular laundry detergent in a portable washer. However, there are some pros and cons to consider.
Using eco-friendly laundry detergent in a portable washer is a great option for those who want to reduce their environmental footprint. It can be gentler on your clothes and safer for the environment.
However, some eco-friendly detergents may not be as effective at removing tough stains. To prevent detergent residue buildup, make sure to use the recommended amount of detergent and run an extra rinse cycle if needed.
Is It Safe to Leave a Portable Washer Unattended While It’s Running?
Safety precautions should be taken when using a portable washer unattended. There are potential risks involved, such as water leakage or electrical malfunctions. It’s important to follow the manufacturer’s instructions and guidelines for safe operation.
Some tips to minimize risks include ensuring a stable surface, avoiding overloading the machine, and regularly checking for any signs of damage.
It’s always best to err on the side of caution when it comes to leaving a portable washer running without supervision.
Can I Wash Delicate Fabrics, Such as Silk or Lace, in a Portable Washer?
When it comes to washing delicate fabrics like silk or lace in a portable washer, there are a few things to keep in mind.
Firstly, check the manufacturer’s instructions to ensure that your specific model is suitable for these types of fabrics.
Secondly, use a gentle cycle and cold water to minimize any potential damage.
Lastly, consider placing delicate items in a mesh laundry bag for added protection.
With these precautions, you can safely wash your delicate fabrics in an RV-friendly portable washer.

How Noisy Are Portable Washers When in Operation?
When it comes to the noise level of portable washers, it’s important to consider their energy efficiency as well. These machines are designed to be compact and efficient, so they tend to operate quietly. While they do make some noise during operation, it’s typically minimal and shouldn’t disturb your RV neighbors or disrupt your peaceful campsite.
Plus, their energy efficiency means you can enjoy clean clothes without draining your RV’s power supply.
Conclusion
In conclusion, choosing the right size portable washer for your RV, understanding power and water requirements, and following maintenance and cleaning tips are essential for a smooth laundry experience on the road.
By coincidence, we stumbled upon a fellow traveler at a campsite who’d just purchased a portable washer based on our article. They were thrilled with the convenience and efficiency it provided.
So, take these tips into consideration and enjoy clean clothes wherever your adventures take you!
- About the Author
- Latest Posts
Introducing Charles, the Editor in Chief at ByRetreat, whose passion for interior design and editorial excellence elevates every remote workspace to new heights. With his keen eye for detail, impeccable taste, and expertise in design, Charles brings a wealth of knowledge and creativity to the ByRetreat team.
As the Editor in Chief of a renowned lifestyle blog, Charles has honed his skills in curating captivating content and staying up-to-date with the latest trends in interior design. His deep understanding of aesthetics and the power of storytelling through design enables him to create remote workspaces that are not only visually stunning but also rich in personality and meaning.
Appliances
4 Smart Tips for Extended Commercial Appliance Warranties

Did you realize that nearly 80% of commercial appliance malfunctions happen after the manufacturer’s warranty runs out? As business operators, we grasp the significance of safeguarding our assets and reducing unforeseen costs.
That’s why we have compiled four smart tips for extended commercial appliance warranties that will help you make informed decisions and ensure the longevity of your appliances.
In this guide, we will discuss choosing the right warranty provider, understanding coverage and exclusions, evaluating the cost and value, and maximizing the benefits of extended warranties.
By following these tips, you can have peace of mind knowing that your appliances are protected and your business operations can continue smoothly.
Let’s dive in and master the art of extended warranties!
Key Takeaways
- Choose a warranty provider with a good reputation and track record.
- Understand the coverage details and limitations of the warranty.
- Evaluate the cost and value of extended warranties.
- Maximize the benefits by understanding the claim process and maintaining your appliances.
Choosing the Right Warranty Provider
When selecting a warranty provider for extended commercial appliance warranties, we should consider their reputation and track record in the industry. Identifying reputable providers is crucial to ensure that we’re dealing with a company that has a history of delivering on their promises and providing excellent service to their customers. A reputable provider will have a strong presence in the market and positive reviews from satisfied clients. They’ll also have a proven track record of handling warranty claims efficiently and resolving issues promptly.
In addition to reputation, it’s important to compare warranty terms offered by different providers. We should carefully review the terms and conditions of each warranty to ensure that they meet our specific needs and requirements. This includes understanding the coverage provided, such as if it includes parts and labor costs, and the duration of the warranty. It’s also important to consider any limitations or exclusions that may apply.
Understanding Coverage and Exclusions
To fully understand the extent of coverage and any exclusions, we should carefully review the warranty terms and conditions for our extended commercial appliance warranties. Many people have common misconceptions about what’s covered under these warranties, which is why it’s so important to read the fine print. Here are some key points to consider:
- Scope of coverage: It’s crucial to understand what types of repairs or replacements are included in the warranty. This may vary depending on the provider and the specific appliance being covered. Some warranties may only cover certain parts or components, while others may offer more comprehensive coverage.
- Exclusions: Even though warranties provide coverage, there are often exclusions stated in the terms and conditions. These exclusions may include damage caused by misuse, neglect, or unauthorized repairs. It’s important to be aware of these exclusions to avoid any surprises when filing a claim.
- Duration of coverage: Extended commercial appliance warranties can vary in terms of their duration. Some warranties may provide coverage for a fixed period of time, while others may offer coverage until a certain number of repairs or replacements have been made. Understanding the duration of coverage can help us plan for future maintenance and repairs.
- Claim process: Familiarizing ourselves with the claim process is essential. This includes knowing who to contact, what documentation is required, and any specific procedures that need to be followed to ensure a smooth and efficient claim experience.
Evaluating the Cost and Value
To determine the cost-effectiveness of extended commercial appliance warranties, we need to assess their overall value. When weighing options and considering budget considerations, it is essential to evaluate the benefits and drawbacks of purchasing extended warranties for your appliances. To help you make an informed decision, we have created a table that outlines the key factors to consider:
| Factors to Consider | Benefits | Drawbacks |
|---|---|---|
| Coverage | Extended protection beyond the manufacturer’s warranty period | Additional cost |
| Repair Costs | Potential savings on repair expenses | Warranty cost may outweigh repair costs |
| Peace of Mind | Assurance that your appliances are protected | Limited likelihood of appliance failure |
By considering these factors, you can determine whether the cost of an extended warranty is justified by its value. It is important to note that budget considerations should not be the sole determining factor. While extended warranties may come at an additional cost, they can provide peace of mind and potential savings on repair expenses.
In the next section, we will explore strategies for maximizing the benefits of extended warranties, ensuring that you get the most value out of your investment.
Maximizing the Benefits of Extended Warranties
To maximize the benefits of extended warranties, we can employ strategies that optimize our investment. By understanding the claim process and exploring renewal options, we can ensure that our commercial appliance warranties provide us with the maximum value and protection.
Here are some smart tips for maximizing the benefits of extended warranties:
- Thoroughly understand the claim process: Familiarize yourself with the steps involved in filing a claim. Know the required documentation, such as proof of purchase and warranty information. By being prepared, you can expedite the claim process and minimize downtime.
- Regularly maintain your appliances: Proper maintenance is crucial for the longevity and performance of your commercial appliances. Follow the manufacturer’s guidelines for cleaning, servicing, and inspections. Regular maintenance not only extends the lifespan of your appliances but also helps prevent potential issues that may require warranty claims.
- Research renewal options: When your extended warranty is about to expire, explore renewal options offered by the warranty provider. Some providers offer extended renewal plans with additional coverage, giving you continued peace of mind and protection for your investment.
- Keep warranty documents organized: Maintain a dedicated folder or digital file for all your warranty documents. This ensures easy access to necessary information when filing a claim or renewing your warranty.
Frequently Asked Questions
How Can I Extend the Warranty on My Commercial Appliance if It’s Already Expired?
To extend the warranty on your commercial appliance after it has expired, there are several renewal options available.
You can contact the manufacturer or a third-party warranty provider to inquire about their extended warranty programs. They may offer coverage plans specifically designed for appliances with expired warranty coverage.
It’s important to carefully review the terms and conditions, as well as the cost, of these extended warranty options to ensure they meet your needs and budget.
Are There Any Specific Requirements or Limitations for Obtaining an Extended Warranty for Commercial Appliances?
When obtaining an extended warranty for commercial appliances, it’s important to be aware of the common exclusions in extended warranty coverage. These may include wear and tear, cosmetic damage, and misuse or negligence.
To choose the right extended warranty, consider factors such as the length of coverage, cost, and reputation of the provider.
It’s also crucial to thoroughly read and understand the terms and conditions of the warranty to avoid any surprises down the line.
Can I Transfer My Extended Warranty to a New Owner if I Sell My Commercial Appliance?
Yes, you can transfer your extended warranty to a new owner if you sell your commercial appliance. This ensures that the warranty coverage for used appliances continues with the new owner.
It’s important to check the specific requirements and limitations of your extended warranty to ensure a smooth transfer process. By transferring the warranty, you provide peace of mind to the new owner and protect them against any unexpected repair or replacement costs.
What Happens if My Commercial Appliance Breaks Down Multiple Times During the Extended Warranty Period?
If your commercial appliance breaks down multiple times during the extended warranty period, you may be eligible for claim reimbursement. The repair or replacement timeline will depend on the terms and conditions of your warranty.
It’s important to thoroughly review the warranty agreement to understand the process and any limitations. Our team is here to help ensure that your claims are handled efficiently and that you receive the necessary repairs or replacements in a timely manner.
Is There a Limit to the Number of Claims I Can Make Under an Extended Warranty for My Commercial Appliance?
There are limitations to the number of claims we can make under an extended warranty for our commercial appliance.
However, it’s important to note that extended warranties offer numerous benefits for commercial appliances. They provide peace of mind by covering repairs and replacements, reducing downtime and maintenance costs.
Conclusion
In conclusion, when it comes to extended commercial appliance warranties, there are several crucial considerations to keep in mind.
Firstly, choosing the right provider is essential. It’s important to research and compare different warranty providers to ensure they have a good reputation and offer comprehensive coverage.
Understanding coverage and exclusions is also crucial. Businesses should carefully review the terms and conditions of the warranty to know exactly what is covered and what is not. This will help avoid any surprises or disappointments down the line.

Evaluating cost and value is another important factor. Businesses should consider the cost of the warranty in relation to the potential repair or replacement costs of the appliances. They should also assess the value of the warranty by considering additional benefits such as extended service hours or priority service.
Lastly, maximizing benefits is key. Businesses should take advantage of all the benefits offered by the warranty, such as regular maintenance or discounted repairs. This will help ensure the appliances are well-maintained and any issues are addressed promptly.
By following these smart tips, businesses can make informed decisions that protect their investments. Just like a well-oiled machine, a well-chosen warranty can provide peace of mind and keep the business running smoothly. So don’t leave your appliances vulnerable, take action and secure their longevity today.
- About the Author
- Latest Posts
Introducing Charles, the Editor in Chief at ByRetreat, whose passion for interior design and editorial excellence elevates every remote workspace to new heights. With his keen eye for detail, impeccable taste, and expertise in design, Charles brings a wealth of knowledge and creativity to the ByRetreat team.
As the Editor in Chief of a renowned lifestyle blog, Charles has honed his skills in curating captivating content and staying up-to-date with the latest trends in interior design. His deep understanding of aesthetics and the power of storytelling through design enables him to create remote workspaces that are not only visually stunning but also rich in personality and meaning.
-

 Vetted3 hours ago
15 Best Plants for Large Pots to Transform Your Outdoor Space
-

 Vetted2 days ago
15 Best Folding Beds for Small Spaces – Space-Saving Solutions for Comfort and Convenience
-

 Vetted1 day ago
15 Best Waterproof Flooring Options for Your Bathroom – Ultimate Guide & Reviews
-

 Vetted6 days ago
15 Best Grocery Carts to Make Shopping a Breeze
-

 Vetted2 weeks ago
15 Best Gravel for Driveway: The Ultimate Guide for a Durable and Stunning Entrance
-

 Vetted4 days ago
15 Best Steam Generators for Showering Bliss: Reviewed & Rated
-

 Beginners Guides3 weeks ago
I Inhaled Vinegar Fumes
-

 Vetted2 weeks ago
15 Best Hot Tubs of 2024: Luxurious Relaxation at Your Fingertips


