Appliances
How to Connect Ceiling Fan Regulator
2025
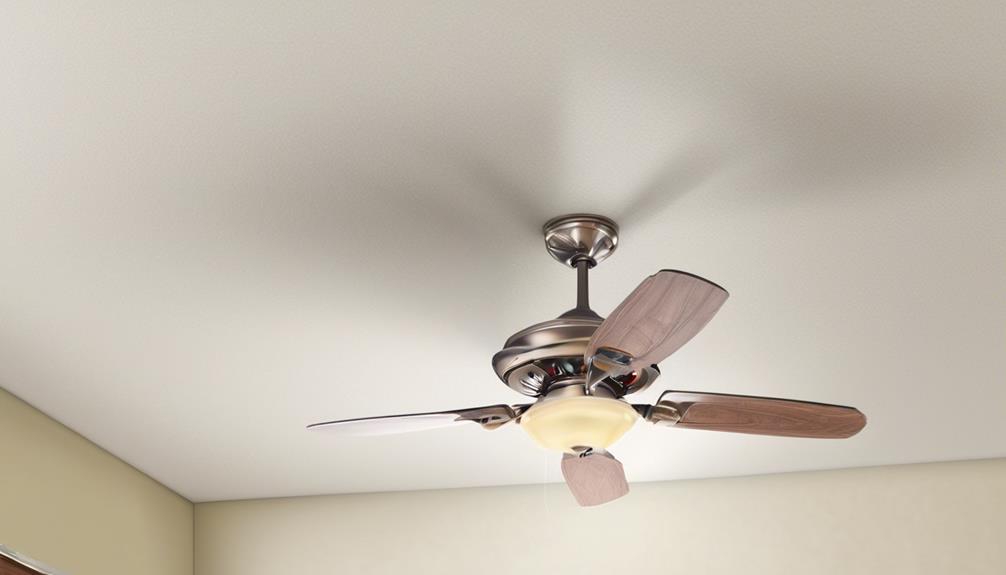
As seasoned electricians, we recognize the crucial role that a properly working ceiling fan regulator plays in ensuring your area maintains a comfortable and even distribution of air.
Connecting a ceiling fan regulator may seem like a daunting task, but with the right guidance and precautions, it can be a straightforward process.
In this guide, we will walk you through the necessary steps to successfully connect your ceiling fan regulator. By following our step-by-step instructions and taking the time to understand the wiring of your ceiling fan, you can ensure a safe and efficient connection.
So, let's delve into the world of ceiling fan regulators and get started on this essential electrical task.
Key Takeaways
- Safety precautions are essential when working with electrical wiring and tools.
- Understanding the wiring of your ceiling fan and the different types of regulators is important for a successful installation.
- Following the manufacturer's instructions and using appropriate wire connectors are crucial for a secure and reliable connection.
- Double-checking connections, testing the regulator, and regular maintenance are important for optimal performance and safety.
Tools and Materials Needed
To successfully connect a ceiling fan regulator, we'll need specific tools and materials for the task at hand. Proper installation requires the use of the following items:
- Wire strippers: Wire strippers are essential for preparing the connecting wires. They enable us to remove the insulation from the ends of the wires, allowing for a secure connection. It's important to strip the wires to the appropriate length, ensuring a clean and efficient installation.
- Electrical tape: Electrical tape is crucial for insulating the exposed wires. After the wires are connected, it's necessary to cover the connections with electrical tape to protect against any potential electrical hazards. This step guarantees a safe and reliable connection.
- Wire connectors: Wire connectors are also indispensable for joining the wires together. These connectors securely hold the wires in place, preventing any accidental disconnection. They come in various sizes to accommodate different wire gauges, ensuring a proper and secure fit.
- Screwdriver: Additionally, a screwdriver is required for securing the regulator to the ceiling fan. It allows us to tighten the screws and ensure a stable installation.
- Voltage tester: Lastly, a voltage tester is necessary to verify that the power is turned off before beginning the installation. This tool ensures our safety by alerting us to any live electrical wires.
Safety Precautions to Consider

What are the essential safety precautions to consider when connecting a ceiling fan regulator? When working with electrical connections, it's crucial to prioritize safety measures to prevent accidents and ensure a successful installation. Here are some key precautions to keep in mind:
- Turn off the power: Before starting any electrical work, always switch off the power supply at the circuit breaker panel to avoid the risk of electric shock.
- Ensure the power is completely disconnected by using a voltage tester to test the wires for any live current.
- Use a lockout/tagout device to securely lock and tag the circuit breaker to prevent accidental power restoration.
- Wear protective gear: Protect yourself from potential hazards by wearing safety goggles, insulated gloves, and non-slip footwear.
- Safety goggles shield your eyes from debris and prevent eye injuries.
- Insulated gloves provide protection against electric shocks.
- Non-slip footwear ensures a firm grip and reduces the risk of accidents caused by slipping.
Understanding the Wiring of Your Ceiling Fan
After ensuring the necessary safety precautions have been taken, understanding the wiring of your ceiling fan is the next step in successfully connecting the ceiling fan regulator. Proper grounding is of utmost importance when dealing with electrical appliances like ceiling fans. It ensures the safety of both the fan and the individuals using it. Grounding provides a pathway for electrical current to flow safely into the ground, preventing the risk of electric shock or fire hazards.
When it comes to ceiling fan regulators, there are different types available in the market. The most common ones include wall-mounted regulators, remote control regulators, and pull chain regulators. Wall-mounted regulators are fixed on the wall and usually come with a switch to control the fan's speed and lighting. Remote control regulators, as the name suggests, allow you to control the fan's operation from a distance using a handheld remote. Pull chain regulators have chains that hang down from the fan, and you can pull them to adjust the speed or turn the fan on or off.
Understanding the wiring of your ceiling fan is crucial in order to connect the regulator correctly. It involves identifying the different wires, such as the live wire, neutral wire, and ground wire, and connecting them to their respective terminals on the regulator. It's essential to follow the manufacturer's instructions and use the appropriate wire connectors to ensure a secure and reliable connection.
Step-By-Step Guide to Connecting the Regulator
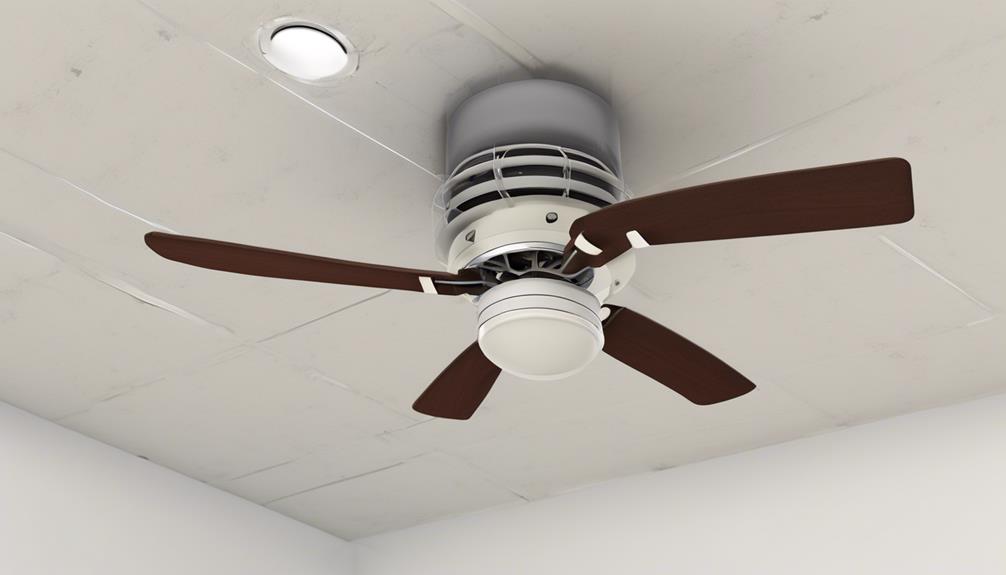
We will now proceed with a step-by-step guide on how to connect the regulator for your ceiling fan.
To ensure a successful installation, it's important to choose the right type of regulator for your ceiling fan. Consider factors such as the fan's motor power and the desired speed control options. It's recommended to consult the manufacturer's instructions or seek professional advice if you're unsure.
Once you have the appropriate regulator, follow these steps to connect it to your ceiling fan:
- Turn off the power: Before starting any electrical work, turn off the power to the fan at the circuit breaker. This will prevent any accidental electrical shocks.
- Locate the wiring: Remove the fan canopy to access the wiring. Identify the wires coming from the ceiling and those coming from the fan. Usually, the wires will be color-coded, with black for the live wire, white for neutral, and green or bare copper for the ground.
- Connect the wires: Connect the corresponding wires from the regulator to the fan and ceiling wires. Use wire nuts to secure the connections. Ensure that the live wire is connected to the appropriate terminal on the regulator.
- Secure the regulator: Mount the regulator to a suitable location on the fan canopy or electrical box. Follow the manufacturer's instructions for proper installation.
- Double-check the connections: Before turning the power back on, double-check all the wire connections to ensure they're secure and properly insulated. This step is crucial for safety and to avoid common installation mistakes.
Testing and Troubleshooting Your Newly Connected Ceiling Fan Regulator
To ensure proper functionality and address any potential issues, it is important to thoroughly test and troubleshoot your newly connected ceiling fan regulator. Testing your ceiling fan regulator will help identify any common issues that may arise during the installation process. Additionally, regular maintenance tips can help prolong the lifespan of your ceiling fan regulator.
One common issue that may occur is the fan not turning on. This could be due to a faulty connection or a problem with the regulator itself. To troubleshoot this, check the wiring connections and ensure they are secure. If the connections are correct, you may need to replace the regulator.
Another issue you may encounter is the fan not running at the desired speed. This could be caused by a problem with the regulator's speed control settings. To fix this, refer to the regulator's manual and adjust the speed settings accordingly.
Table: Troubleshooting Tips
| Common Issues | Maintenance Tips |
|---|---|
| Fan not turning on | Check wiring connections |
| Replace faulty regulator, if necessary | |
| Fan running at wrong | Refer to the regulator's manual |
| speed | Adjust speed control settings accordingly |
What is the Proper Way to Connect a Regulator to a Ceiling Fan?
To properly connect a regulator to a ceiling fan, start by turning off the power supply. Remove the fan cover and locate the regulator. Match the wire colors between the regulator and the fan, and securely connect them using wire nuts. Finally, reassemble the fan and turn the power back on. Connecting regulator to fan requires precision and caution.
Frequently Asked Questions
How Do I Choose the Right Ceiling Fan Regulator for My Ceiling Fan?
When choosing a ceiling fan regulator, it's important to consider its compatibility with your ceiling fan. To ensure a successful installation, refer to the ceiling fan regulator installation guide provided by the manufacturer.
A ceiling fan regulator offers various benefits, such as the ability to control the fan's speed and save energy. It's a crucial component in achieving optimal comfort and efficiency in your space.
Can I Install a Ceiling Fan Regulator on a Ceiling Fan That Already Has a Built-In Speed Control?
Installing a ceiling fan regulator on a ceiling fan that already has a built-in speed control can be a bit tricky. It's important to carefully follow the instructions provided by the manufacturer of the regulator.
Some common issues that may arise during installation include improper wiring connections, compatibility issues, or a faulty regulator. Troubleshooting these issues requires a thorough understanding of electrical systems and the specific components involved.
It's recommended to consult a professional electrician for assistance if you're unsure.
What Is the Purpose of a Capacitor in a Ceiling Fan Regulator?
The purpose of a capacitor in a ceiling fan regulator is to provide an additional power source for the motor. It helps in starting and running the fan smoothly by storing electrical energy and releasing it as needed.
There are two main types of capacitors used in ceiling fan regulators: start capacitors and run capacitors. Start capacitors provide the initial boost of power to start the fan, while run capacitors help maintain a steady and efficient operation.
Can I Use a Different Brand of Regulator for My Ceiling Fan?
When it comes to different regulator brands for ceiling fans, compatibility issues can arise. Our experience taught us that using a different brand of regulator may not always be straightforward.
Each brand has its own specifications and wiring arrangements, which may not align with your ceiling fan. It's crucial to ensure that the regulator you choose is compatible with your fan's specific model and wiring requirements.
Consulting the manufacturer's guidelines or seeking professional advice can help avoid any potential complications.
Is It Necessary to Hire an Electrician to Install a Ceiling Fan Regulator, or Can I Do It Myself?
Installing a ceiling fan regulator: DIY or hire an electrician?
It's important to consider the complexity and safety implications of the task.
While some individuals may feel confident in their ability to handle electrical work, it's strongly recommended to hire a licensed electrician. They possess the necessary expertise, tools, and knowledge to ensure a proper and safe installation.
Additionally, they can provide guidance on any specific requirements or regulations that need to be followed.
Safety should always be the top priority in any electrical installation.
Conclusion
In conclusion, connecting a ceiling fan regulator is a straightforward process that can enhance the functionality and convenience of your ceiling fan. By following the step-by-step guide and considering safety precautions, you can ensure a successful installation.
Just like a conductor guiding the symphony, the regulator controls the speed and airflow of your fan, creating a harmonious and comfortable environment in your space.
So, take charge of your comfort and enjoy the soothing breeze with your newly connected ceiling fan regulator.
- About the Author
- Latest Posts
Introducing Ron, the home decor aficionado at ByRetreat, whose passion for creating beautiful and inviting spaces is at the heart of his work. With his deep knowledge of home decor and his innate sense of style, Ron brings a wealth of expertise and a keen eye for detail to the ByRetreat team.
Ron’s love for home decor goes beyond aesthetics; he understands that our surroundings play a significant role in our overall well-being and productivity. With this in mind, Ron is dedicated to transforming remote workspaces into havens of comfort, functionality, and beauty.
Garage Door Opener
Clearance Garage Door Opener Installation Guide
Navigate the complexities of installing a garage door opener with ample overhead clearance, uncovering the key steps for a seamless setup.
Have you ever thought about the details involved in installing a garage door opener with enough overhead clearance? How difficult is it to make sure the installation is smooth and guarantees the best performance? Well, don’t worry, as we will walk you through the necessary steps for getting your garage door opener set up.
From measuring overhead space to selecting the right opener and testing its functionality, our discussion will equip you with the necessary knowledge to tackle this task effectively. Let's unravel the secrets to a successful garage door opener installation together.
Key Takeaways
- Accurate measurement and ample clearance space are crucial for smooth installation.
- Choose a low-profile opener for limited headroom, featuring modern connectivity and quiet operation.
- Prepare a clutter-free workspace with proper lighting for efficient installation.
- Test functionality thoroughly, adjusting as needed for safe and optimal garage door operation.
Measure Overhead Clearance Space
To ensure proper installation of the garage door opener, it's crucial to accurately measure the overhead clearance space between the top of the garage door and the ceiling. The vertical space is essential for the garage door opener and its components to operate smoothly and without any hindrances.
When measuring the overhead clearance, take into account the drive garage door opener's specifications provided by the manufacturer. These specifications will outline the required vertical space needed for the specific model being installed. Additionally, consider any extra accessories or modifications that may impact the overhead clearance space, ensuring that there's ample room for safe and efficient operation.
Select Low-Profile Garage Door Opener
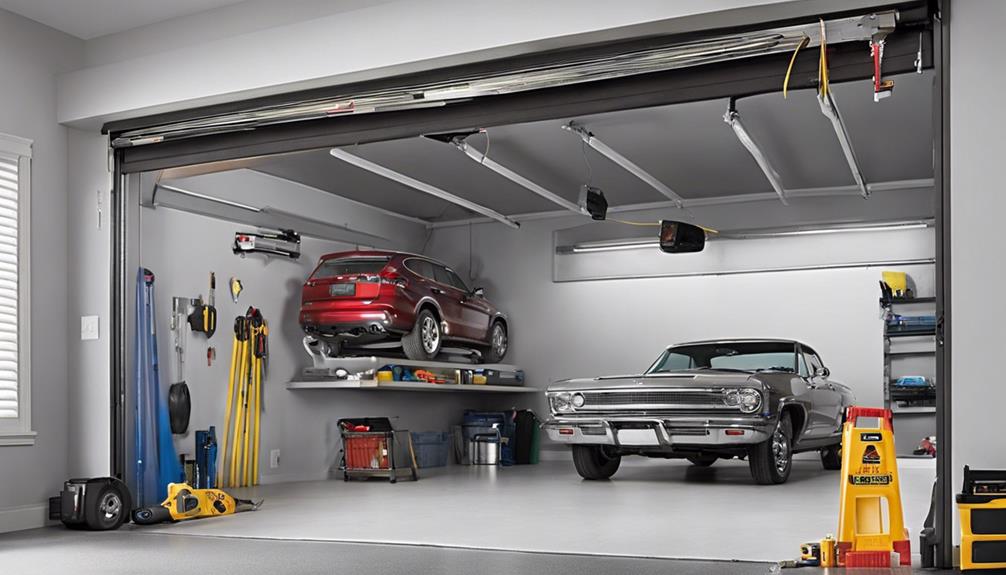
Having ensured the adequate overhead clearance space for the garage door opener installation, the next step is to carefully select a low-profile garage door opener that fits snugly in tight spaces while offering advanced features and compatibility with various door types.
Low-profile garage door openers are specifically designed to accommodate limited headroom situations, making them perfect for garages with space constraints. Their compact and sleek design allows for discreet installation without occupying much room. These openers often come equipped with modern conveniences like smartphone connectivity, battery backup, and quiet belt drive operation for a seamless user experience. Additionally, their compatibility with a range of garage door sizes and types provides installation flexibility.
Energy efficiency is another advantage, as low-profile garage door openers can help reduce electricity consumption, leading to potential long-term cost savings. When choosing a low-profile garage door opener, consider factors such as the size of your garage door and the desired features for optimal performance.
Prepare Workspace for Installation
Clearing the area around the garage door opener is essential to provide ample space for a smooth installation process. Before beginning the installation of the garage door opener, it's crucial to ensure that there are no obstructions or clutter that may hinder the process.
By creating a clean and organized workspace, you can work efficiently and safely. Remove any tools or items that may interfere with the installation of the garage door opener to streamline the process. Keeping the workspace well-lit and free from distractions will allow you to focus on the installation tasks at hand.
Install Opener According to Manual
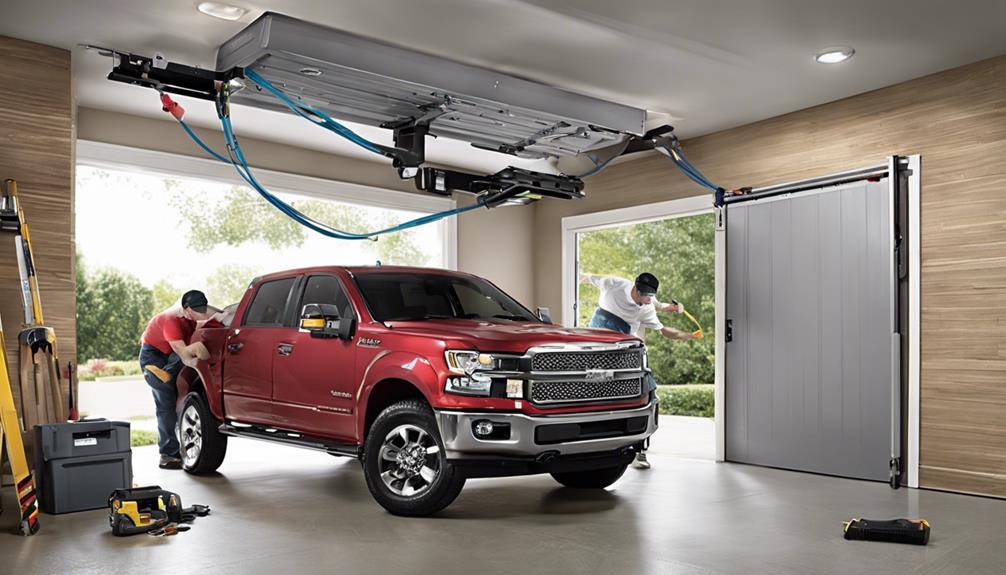
Following the manufacturer's manual meticulously is crucial for the precise installation of the garage door opener. To ensure a successful installation, our team recommends the following steps:
- Positioning Components: Properly position and secure all garage door opener components as instructed in the manual. This ensures the safe and efficient operation of the opener.
- Connecting Wiring: Connect all wiring and mechanisms according to the manual's specifications. Proper connection is vital to prevent malfunctions and ensure smooth functioning of the garage door.
- Adhering to Guidelines: Adhere strictly to the manual's guidelines for installing the opener. These guidelines are designed by professional garage door experts to guarantee a correct and secure installation.
Test Functionality and Adjust if Needed
To ensure the garage door opener functions smoothly and safely, thorough testing and potential adjustments are essential. Begin by testing the garage door's opening and closing functionality multiple times to guarantee a seamless operation.
Listen for any unusual sounds and watch out for jerky movements or obstructions that may impede the door's movement. If any issues arise, consider adjusting the opener's settings to enhance the door's operation and clearance within the garage space.
It's crucial to verify that the door clears the opening without any problems or interference. Additionally, confirm that the safety sensors are operational and don't hinder the door's movement in any way, ensuring a safe and efficient garage door operation.
Frequently Asked Questions
How Much Clearance Do You Need to Install a Garage Door Opener?
We need a minimum of 2 inches of clearance above the garage door for installing most openers. It's crucial to check the manufacturer's specifications for the exact clearance required by your specific opener model.
Taller doors or special opener features may demand more clearance. The needed space can vary depending on the opener type, like chain-drive, belt-drive, or screw-drive.
Adequate clearance ensures smooth opener operation and prevents door movement interference.
What Is the Minimum Clearance Above a Garage Door for an Opener?
We need at least 2 inches of clearance above a garage door for an opener to work effectively. Some models might require up to 3 inches, depending on their design. Too little space can lead to operational issues and potential damage.
It's crucial to measure accurately before installing to avoid problems. Always refer to the manufacturer's guidelines for the specific opener model to ensure the right clearance.
How Much Does Lowes Charge to Install a Garage Door Opener?
We love the convenience of Lowe's garage door opener installation services, starting at $127, with pricing varying based on installation complexity.
Extra charges may apply for services like removing old openers or installing new electrical outlets. Remember, the installation cost doesn't include the price of the garage door opener itself, which must be purchased separately.
Rest assured, Lowe's provides professional installation by licensed and insured contractors for peace of mind.
How Close Do You Have to Be for Garage Door Opener?
We need to be within 25-35 feet for the garage door opener to work.
Sensors should be placed 4-6 inches above the floor to detect obstacles.
Some models offer Wi-Fi connectivity, enabling remote access.
Advanced features like battery backup ensure operation during power outages.
These key factors influence how close we must be for the garage door opener to function effectively.
Conclusion
In conclusion, installing a low-profile garage door opener is like fitting a key into a lock – precise, smooth, and essential for seamless operation.
By following the detailed steps in the clearance garage door opener installation guide, you can ensure your opener functions flawlessly and efficiently.
Remember to test the functionality and make any necessary adjustments for optimal performance.
With proper installation and maintenance, your garage door opener will open up a world of convenience for you.
- About the Author
- Latest Posts
Introducing Ron, the home decor aficionado at ByRetreat, whose passion for creating beautiful and inviting spaces is at the heart of his work. With his deep knowledge of home decor and his innate sense of style, Ron brings a wealth of expertise and a keen eye for detail to the ByRetreat team.
Ron’s love for home decor goes beyond aesthetics; he understands that our surroundings play a significant role in our overall well-being and productivity. With this in mind, Ron is dedicated to transforming remote workspaces into havens of comfort, functionality, and beauty.
Garage Door Opener
What Makes the Glink Garage Door Opener Stand Out?
Outstanding safety features and user-friendly functionalities distinguish the Glink Garage Door Opener – but what else makes it a game-changer?
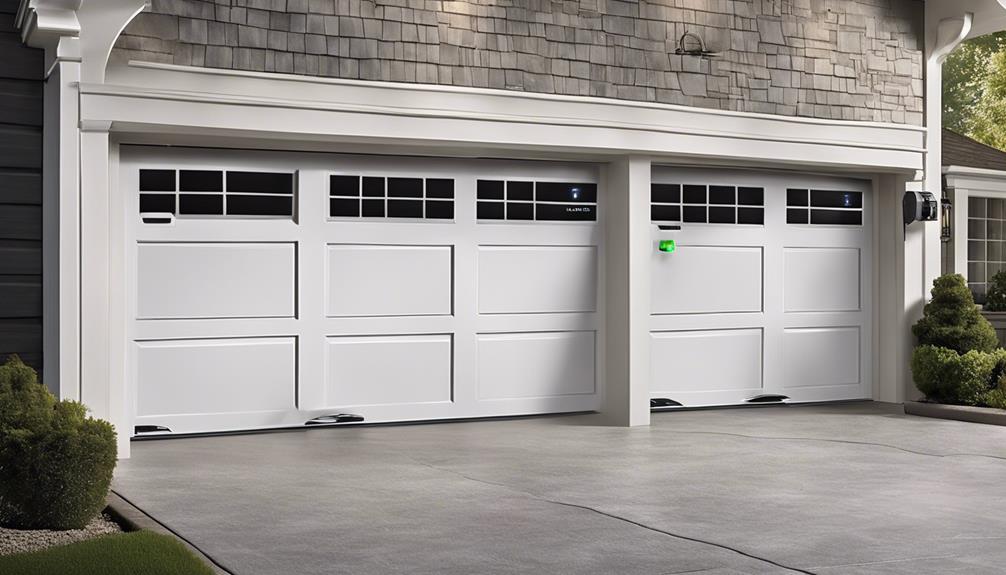
When it comes to garage door openers, the Glink Garage Door Opener really stands out. Its unparalleled level of innovation and attention to detail in features sets it apart in the market.
From cutting-edge safety measures to user-friendly functionalities, the Glink Garage Door Opener has redefined what we expect from this essential home device.
But what exactly makes it stand out from the rest? Let's explore further.
Key Takeaways
- Built-in camera for live monitoring adds security and convenience.
- Belt-driven openers ensure quiet performance for a peaceful environment.
- Advanced Wi-Fi connectivity allows for remote access and smart home integration.
- High-grade steel construction and advanced motor technology ensure durability and reliability.
Innovative Features of Glink Garage Door Opener
The Glink Garage Door Opener revolutionizes home security with its cutting-edge built-in camera for live monitoring capabilities, setting a new standard in garage door technology. When it comes to garage door maintenance, one crucial aspect is the proper lubrication of moving parts to ensure smooth operation. The Glink opener excels in this area by incorporating a sophisticated spring system that enhances the overall functionality and longevity of the garage door.
Furthermore, the Glink Garage Door Opener is designed with belt-driven openers that not only reduce the noise during operation but also provide a more reliable performance compared to chain-driven systems. This innovative feature enhances the user experience by offering a quieter and more efficient operation that's essential for modern homeowners seeking convenience and peace of mind.
User-Friendly Design Highlights

Featuring intuitive controls and seamless integration with smart home systems, the user-friendly design of the Glink Garage Door Opener offers unparalleled convenience and security for homeowners. Here are some highlights that make it stand out:
- Easy-to-Use Controls: The Glink Garage Door Opener provides straightforward controls, allowing users to operate their garage doors with ease.
- Smart Home Integration: With compatibility for smart home systems, users can conveniently monitor and control their garage doors remotely using their smartphones or voice commands.
- Safety Sensors: Equipped with advanced safety sensors, the opener detects obstacles in the door's path, ensuring the safety of both people and property.
- Quiet Operation: The Glink Garage Door Opener operates quietly, making it ideal for garages attached to living spaces where noise reduction is essential.
The straightforward installation and setup process further enhance the user-friendly experience, making the Glink Garage Door Opener a hassle-free addition to any home.
Reliable Performance Factors
Among the standout features of the Glink Garage Door Opener, its reliable performance factors set a high standard in the realm of garage door operation and security.
The Glink Garage Door Opener utilizes DC motors, which provide efficient and smooth operation, especially when paired with a belt-driven garage door mechanism. This combination not only ensures a reliable performance but also contributes to reducing the noise level during door operation, making it ideal for homes where noise pollution is a concern.
Additionally, the inclusion of a safety sensor system enhances the overall reliability of the opener by detecting any obstructions and prompting the door to stop and reverse its motion, prioritizing user safety.
Moreover, the smart technology integration allows for convenient control and monitoring of the garage door opener remotely, adding an extra layer of security and accessibility.
The Glink Garage Door Opener's reliable performance factors make it a top choice for those seeking a dependable and efficient garage door solution.
Glink Garage Door Opener Durability
How does the durability of the Glink Garage Door Opener compare to other models on the market? When it comes to lasting strength and reliability, the Glink Garage Door Opener stands out from the competition. Here's why:
- Durable Materials: Crafted from high-grade steel and reinforced components, the Glink Garage Door Opener is built to withstand the test of time, ensuring longevity and robust performance.
- Advanced Motor Technology: Equipped with cutting-edge motor technology, this opener delivers powerful and efficient operation, enhancing its durability and overall functionality.
- Residential Garage Door Operation: Designed specifically for residential use, the Glink Garage Door Opener is tailored to meet the demands of daily home access, supporting consistent and reliable performance.
- Minimal Maintenance Requirements: With a focus on user convenience, this opener requires minimal maintenance, allowing homeowners to enjoy hassle-free operation without frequent upkeep tasks.
Standout Technology in Glink Opener
The advanced Wi-Fi connectivity of the Glink Garage Door Opener sets it apart in the realm of smart home technology, offering users convenient remote access to their garage door from any location. This feature enables seamless control through the Glink mobile app, empowering users to monitor and manage their garage door with just a few taps on their smartphone. Moreover, the Glink Opener's compatibility with voice assistants such as Amazon Alexa and Google Assistant adds a layer of hands-free convenience, allowing users to operate their garage door effortlessly using voice commands.
The integration of smart technology in the Glink Garage Door Opener further enhances its standout features. Through real-time alerts and notifications, users are kept informed about the status of their garage door, enhancing both security and peace of mind. Additionally, the ability to schedule automatic opening and closing times streamlines daily routines, making the overall user experience more efficient and tailored to individual preferences. The Glink Opener truly represents a modern approach to garage door operation, combining innovation with practicality for a liberating user experience.
Frequently Asked Questions
How Can I Boost My Garage Door Opener Signal?
To boost our garage door opener signal, we can take several steps.
Reposition the antenna for better reception and remove any obstructions blocking the signal.
Upgrading to a dual-frequency remote control can enhance signal strength.
Installing a repeater or range extender can amplify the signal.
Checking for interference from nearby electronics is crucial to ensure a smooth signal transmission.
These steps can help improve the overall performance of our garage door opener system.
Which Is Better a Chain or Belt Garage Door Opener?
When comparing a chain and belt garage door opener, it's crucial to consider factors like noise level, cost, reliability, and durability based on personal needs.
Chain openers are cost-effective and robust, ideal for heavy doors or high-traffic areas.
On the other hand, belt openers offer quieter operation and require less maintenance.
Ultimately, the choice depends on individual preferences, budget constraints, and specific garage door requirements.
What Is the Best Residential Garage Door Opener?
When it comes to choosing the best residential garage door opener, safety features like automatic reversing and rolling code technology are crucial. Battery backups ensure operation during power outages, while security lights provide added safety. Consider different types such as chain-driven, belt-driven, screw-driven, direct drive, and jackshaft models.
LiftMaster series like 8365, Elite Series 8550 DC, and 8500 offer excellent features for residential use, catering to various needs.
How Much Horsepower Do I Need for a 2 Car Garage Door?
We've got the know-how on garage door openers! A 1/2 horsepower opener is typically enough for a standard 2 car garage door.
If you've got a heavier or insulated door, consider bumping up to a 3/4 or 1 horsepower for optimal performance. The right horsepower ensures smooth operation and longevity for your opener.
Consult a pro to determine the best fit for your specific garage door setup.
Conclusion
In conclusion, the Glink Garage Door Opener truly shines with its innovative features, user-friendly design, reliable performance, and durability.
It stands out in the market for its advanced safety technology and standout features like automatic reversing and rolling code encryption.
With the Glink Garage Door Opener, you can rest assured that your garage door will operate smoothly and securely.
It's like having a guardian angel watching over your home's entrance.
- About the Author
- Latest Posts
Introducing Ron, the home decor aficionado at ByRetreat, whose passion for creating beautiful and inviting spaces is at the heart of his work. With his deep knowledge of home decor and his innate sense of style, Ron brings a wealth of expertise and a keen eye for detail to the ByRetreat team.
Ron’s love for home decor goes beyond aesthetics; he understands that our surroundings play a significant role in our overall well-being and productivity. With this in mind, Ron is dedicated to transforming remote workspaces into havens of comfort, functionality, and beauty.
Garage Door Opener
Silencing Your Garage Door Opener Humming: A Step-by-Step Guide
Discover how to silence your garage door opener humming with expert tips and tricks, transforming your space into a noise-free haven.

We’ve got you covered with practical steps to tackle the noise when it comes to silencing your garage door opener humming.
From pinpointing the source of the hum to exploring maintenance techniques, our guide offers a comprehensive approach to quieting your garage door opener.
By implementing these methods, you can create a peaceful environment without the constant background hum.
So, are you ready to transform your garage into a serene space?
Key Takeaways
- Inspect transformer for issues in Legacy 850/Standard Drive 650 models.
- Tighten all hardware components to minimize vibrations and humming.
- Regularly lubricate moving parts to reduce friction and noise.
- Adjust opener settings for optimized force and smooth operation.
Identifying the Source of Humming
To pinpoint the source of the humming noise in your garage door opener, start by examining the transformer located in the motor head for any signs of malfunction. The transformer is crucial for converting incoming power to the appropriate voltage needed to operate the DC motors in garage door openers like the Legacy 850 or Standard Drive 650.
If you own one of these models and notice a persistent humming sound, the transformer may be the culprit. For Legacy 850 or Standard Drive 650 units with a date code before 15198, replacing the transformer (part #39342RS) is often the solution. These replacement transformers for Overhead Door model openers can be easily sourced from www.OverheadDoorPartsOnline.com.
If you encounter any challenges during the replacement process or need further assistance, don't hesitate to reach out to your local Overhead Door distributor at 1-800-929-3667 for expert technical support. Identifying and addressing issues with the transformer can help silence the humming and ensure smooth operation of your garage door opener.
Inspecting and Tightening Hardware

Inspecting and tightening the hardware components of your garage door opener is crucial to identifying and addressing potential sources of humming noise. Begin by checking for loose nuts, bolts, and screws on the opener. Using a wrench, tighten all hardware components securely to reduce vibrations and minimize humming. Ensure that the mounting brackets, chains, and railings are properly fastened to prevent unnecessary movement and humming. It's also essential to inspect the motor head and drive system for any loose parts that could be causing the humming sound.
Regularly tightening and securing the hardware of your garage door opener is key to maintaining a quiet and efficient operation. Loose components can lead to increased vibrations and noise levels. By keeping all nuts, bolts, screws, mounting brackets, chains, railings, and motor head properly tightened, you can significantly reduce the humming noise coming from your garage door opener. This simple maintenance task can make a big difference in the overall performance of your garage door system.
Lubricating Moving Parts
When lubricating the moving parts of your garage door opener to reduce humming noise, ensure thorough coverage using a garage door lubricant or silicone-based option. Regular maintenance of your garage door opener includes proper lubrication of its moving parts such as the chain, belt, or screw drive. This lubrication helps reduce noise by preventing excess friction between the components. To assist you in understanding which lubricant to use and where to apply it, refer to the table below:
| Moving Parts | Recommended Lubricant |
|---|---|
| Chain Drive | Garage Door Lubricant |
| Belt Drive | Silicone-Based Lubricant |
| Screw Drive | Garage Door Lubricant |
Adjusting Garage Door Opener Settings

Adjust garage door opener settings to minimize humming noise by accessing the control panel and fine-tuning force and travel limits. Here's how to do it:
- Access the Control Panel:
- Locate the control panel on your garage door opener, usually found near the motor unit.
- Open the panel cover to reveal the adjustment settings.
- Adjust Force Settings:
- Use a flathead screwdriver to adjust the force settings on the opener.
- Increase or decrease the force to find the optimal setting that reduces resistance and noise.
- Fine-Tune Travel Limits:
- Locate the travel limit adjustment screws on the control panel.
- Gradually adjust the travel limits for both opening and closing directions.
- Test the door after each adjustment to ensure it opens and closes smoothly without excessive noise.
Seeking Professional Help
For addressing unusual humming sounds in your garage door opener, it is advisable to seek professional assistance from a certified technician. When dealing with a persistent humming noise coming from your garage door opener, it is crucial to involve experts who can accurately diagnose and resolve the issue. Certified technicians have the knowledge and experience to identify the source of the unusual sound and provide appropriate solutions to eliminate it effectively.
To guide you in understanding the benefits of seeking professional help, refer to the table below:
| Benefits of Seeking Professional Help | |
|---|---|
| 1. Expert Diagnosis | Certified technicians can pinpoint the exact cause of the humming noise. |
| 2. Precise Resolution | Professionals offer targeted solutions to resolve the issue efficiently. |
| 3. Technical Support | Get access to specialized assistance for your garage door opener complications. |
| 4. Prevent Further Damage | Avoid potential harm by allowing trained professionals to handle the motor head. |
When faced with a garage door opener humming problem, don't hesitate to reach out to a certified technician for technical support and expert troubleshooting.
Frequently Asked Questions
How Do I Silence My Garage Door Opener?
To silence your garage door opener, locate the source of the noise, which may be the motor head. Check the transformer for any issues causing the humming sound.
If you have a Legacy 850 or similar model, consider replacing the transformer part. For specific parts and guidance, visit OverheadDoorPartsOnline.com or reach out to a local distributor for assistance.
This process will help eliminate the unwanted noise from your garage door opener.
Why Is My Garage Door Opener Making a Humming Noise?
We discovered why our garage door opener is humming. It seems the culprit might be a faulty transformer in the motor head.
This issue is common in garage door openers with DC motors like the Overhead Door Phantom (777CD) and Legacy 850 (2029). If you have a Legacy 850 with a date code before 15198, replacing the transformer (part #39342RS) could be the fix.
Look for replacement transformers at www.OverheadDoorPartsOnline.com or call 1-800-929-3667 for help.
How Do I Make My Garage Door Not Loud?
To make our garage door not loud, we can start by lubricating the moving parts to reduce noise from friction. Check for loose chains or belts that might be causing the loudness.
Upgrading to a belt-driven opener can also help for quieter operation. Inspect the motor head for loose components.
If the noise persists, it's best to seek help from a professional technician for an effective solution.
How Do I Stop My Electric Buzzing?
If you're looking to halt that electric buzzing, we've got you covered.
First, pinpoint the source of the sound, often linked to a malfunctioning transformer in the motor head. Models like the Overhead Door Phantom (777CD) and Legacy 850 (2029) with DC motors commonly face this issue.
For specific models like the Legacy 850 or Standard Drive 650 predating 15198, think about replacing the transformer (part #39342RS).
Need replacement transformers? Check out www.OverheadDoorPartsOnline.com.
Conclusion
In conclusion, by following the steps outlined in this guide, we can effectively address the issue of garage door opener humming and ensure a more peaceful and efficient operation.
Remember, with regular maintenance and proper care, we can achieve a quieter and smoother functioning garage door opener.
Don't hesitate to seek professional assistance if needed, as it can further enhance the performance of your garage door system.
- About the Author
- Latest Posts
Introducing Ron, the home decor aficionado at ByRetreat, whose passion for creating beautiful and inviting spaces is at the heart of his work. With his deep knowledge of home decor and his innate sense of style, Ron brings a wealth of expertise and a keen eye for detail to the ByRetreat team.
Ron’s love for home decor goes beyond aesthetics; he understands that our surroundings play a significant role in our overall well-being and productivity. With this in mind, Ron is dedicated to transforming remote workspaces into havens of comfort, functionality, and beauty.
-

 Decor1 week ago
Maximalist Decor Explained: Embrace More Style
-

 Vetted2 weeks ago
15 Best Foot Massagers for Neuropathy to Soothe Your Feet and Relieve Discomfort
-

 Vetted3 weeks ago
15 Best Sports Laundry Detergents for Keeping Your Activewear Fresh and Clean
-

 Vetted3 weeks ago
15 Best Tall Toilets for Seniors That Combine Comfort and Safety
-

 Vetted4 weeks ago
15 Best Dish Scrubbers to Keep Your Kitchen Sparkling Clean
-
 Vetted2 days ago
15 Best Cleaners for Fiberglass Showers to Keep Your Bathroom Sparkling Clean
-

 Decor4 weeks ago
What Is Eclectic Home Decor
-

 Vetted1 week ago
15 Best Organic Pest Control Solutions for a Naturally Pest-Free Home


