Decor
How to Make Homemade Halloween Decor
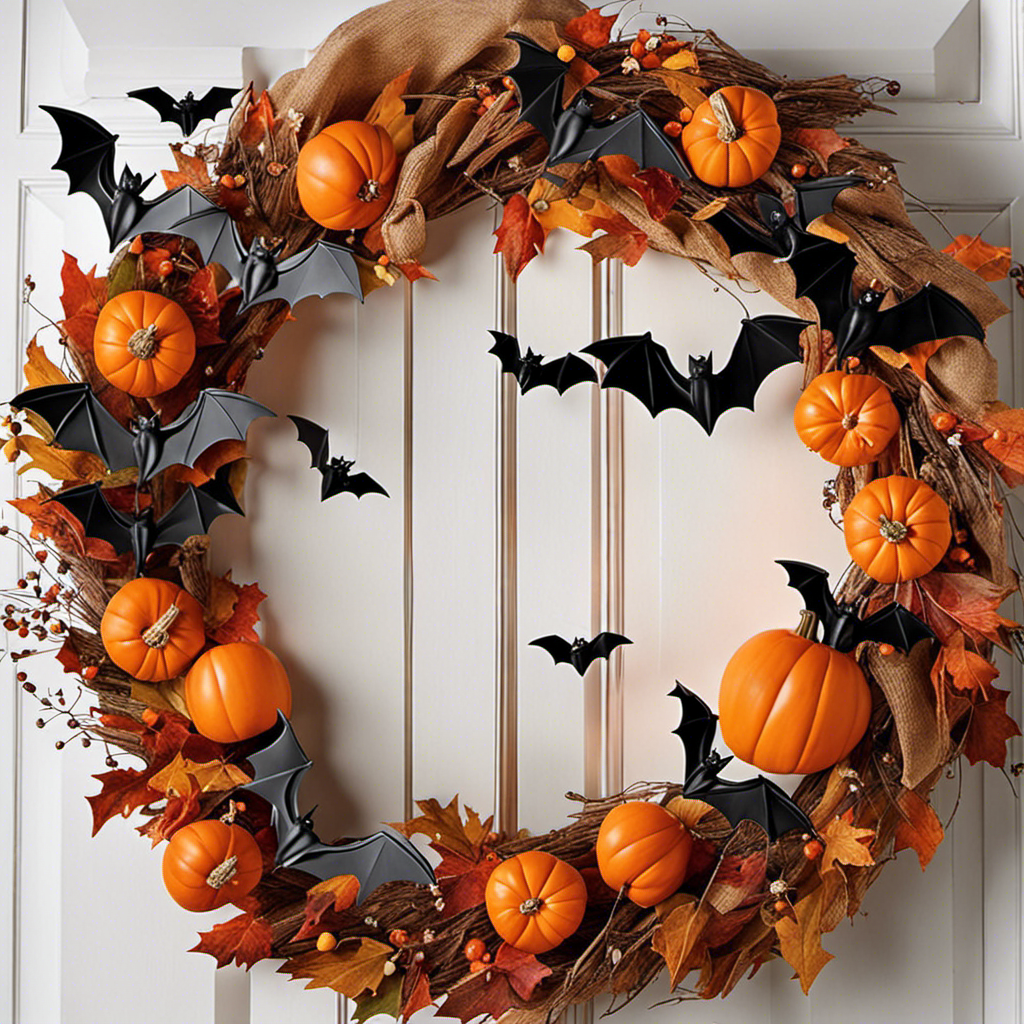
As Halloween approaches, I can’t help but feel a tingling excitement in the air. The time has come to transform my humble abode into a frightful spectacle that will leave my guests trembling with fear.
Join me on this ghastly journey as I reveal the secrets to creating homemade Halloween decor that will send shivers down your spine. From pumpkin carving to eerie lighting techniques, we’ll explore everything you need to bring a touch of spookiness to your home.
So grab your cauldron and let’s get started!
Key Takeaways
- Try different carving techniques and create intricate patterns or 3D sculptures for your homemade Halloween decor.
- Incorporate spooky lighting techniques such as ghostly projections and haunted lanterns to set an eerie ambiance.
- Add a festive touch to your front door with DIY Halloween wreaths like Sinister Spider Web wreath or Wicked Witch hat wreath.
- Create a truly haunting atmosphere with creepy centerpieces like spooky candle arrangements and eerie floral displays with twisted branches and black roses.
Materials and Supplies
You’ll need a variety of materials and supplies to create your own homemade Halloween decorations. For Halloween garland, gather colorful paper, string, scissors, and a hole punch. Cut the paper into spooky shapes like bats, ghosts, and pumpkins, then punch holes in them and thread them onto the string. Hang the garland around your house or on your porch for a festive touch.
As for homemade costumes, you’ll need fabric, a sewing machine or needle and thread, and some creativity. Choose a character or theme, then get to work designing and sewing your costume. Don’t forget to add accessories and makeup to complete the look.
Now that you have your decorations and costumes ready, let’s move on to pumpkin carving ideas.
Pumpkin Carving Ideas
To create unique and spooky decorations for October 31st, consider trying out different pumpkin carving ideas. Pumpkin carving techniques have come a long way from the traditional triangle eyes and toothy grin. Nowadays, there are endless possibilities for creating unique pumpkin designs that will impress all your Halloween guests.
From intricate patterns to 3D sculptures, the options are limitless. You can try carving a spooky scene, like a haunted house or a graveyard, or go for a more whimsical design, like a cat or a witch. Whatever you choose, make sure to have the right tools on hand, such as a sharp knife or a pumpkin carving kit. With a little creativity and patience, you can transform an ordinary pumpkin into a masterpiece.
Speaking of transformations, let’s now move on to spooky lighting techniques that will enhance the eerie atmosphere of your Halloween decor.
Spooky Lighting Techniques
The key to creating a spooky atmosphere is using eerie lighting techniques. When it comes to Halloween decor, lighting is everything. To truly set the mood, I love incorporating ghostly projections and haunted lanterns.
Ghostly projections are a fantastic way to add an ethereal and otherworldly element to your haunted house. Using a projector, you can display creepy images of ghosts and ghouls that will send shivers down your guests’ spines.
Haunted lanterns, on the other hand, provide a flickering and eerie glow that adds an old-world charm to your Halloween display. The combination of these lighting techniques will create a chilling ambiance that is perfect for any haunted gathering.
Now, let’s move on to another DIY Halloween decor idea – DIY Halloween wreaths.
DIY Halloween Wreaths
For a festive touch, try adding a spooky wreath to your front door. Halloween wreaths are a fun and creative way to decorate for the season. Here are some DIY Halloween wreath tutorials to inspire you:
-
Sinister Spider Web: Start with a black twig wreath and wrap it with black yarn to create a spider web pattern. Attach plastic spiders to complete the creepy look.
-
Ghoulish Ghosts: Use a foam wreath form and cover it with white cheesecloth. Attach googly eyes and hang small ghost decorations for a hauntingly cute wreath.
-
Wicked Witch: Create a witch hat wreath by attaching a black witch hat to a wreath form. Add a bow, some glittery spider webs, and a broomstick for an enchanting touch.
-
Pumpkin Patch: Make a pumpkin wreath using small foam pumpkins. Paint them in different colors and attach them to a wreath form. Add faux leaves and berries for a festive autumn look.
With your front door adorned with a spooky wreath, it’s time to move on to creepy centerpiece ideas.
Creepy Centerpiece Ideas
When it comes to creating a spine-chilling ambiance for Halloween, nothing sets the mood quite like a creepy centerpiece.
Spooky candle arrangements can cast eerie shadows and give off a haunting glow, while eerie floral displays can incorporate dark, twisted branches and black roses.
And for those who really want to up the scare factor, sinister table decorations like blood-spattered tablecloths and skeletal figures can send a shiver down anyone’s spine.
Let’s dive into the world of spine-chilling centerpieces and explore the endless possibilities for creating a truly haunting atmosphere this Halloween season.
Spooky Candle Arrangements
To create spooky candle arrangements, you’ll need to gather some black pillar candles and creepy embellishments like fake spiders or skulls. Here’s how to make your own eerie candle display:
-
Place a black cat candle in the center of a table, its glowing eyes casting an ominous shadow.
-
Surround the cat candle with black pillar candles of varying heights, resembling a haunting forest of darkness.
-
Add a touch of macabre by placing a skull candle holder among the candles, the flickering flames dancing upon its eerie features.
-
Complete the arrangement by scattering fake spiders or skulls around the candles, creating a chilling atmosphere.
Now, let’s move on to the next section about eerie floral displays, where we’ll explore how to incorporate haunting flowers into your Halloween decor seamlessly.
Eerie Floral Displays
Now you can effortlessly add an eerie touch to your Halloween floral arrangements by incorporating haunting flowers into your decor.
Imagine a garden filled with mysterious blooms that seem to have come straight from a haunted forest. Dark purple roses, their petals velvety and almost black, add a touch of gothic elegance. Spidery black calla lilies create an otherworldly vibe, while blood-red dahlias bring a sense of danger to the arrangement.
To complete the haunted garden decorations, intertwine some twisted branches and dried moss among the flowers, giving them an untamed and haunted look. These eerie flower arrangements will be the perfect addition to your Halloween festivities, setting the mood for a night of spine-chilling fun.
Speaking of fun, let’s move on to sinister table decorations that will leave your guests trembling with fear.
Sinister Table Decorations
Intertwine some twisted branches and dried moss among the flowers, giving the table decorations an untamed and haunted look. To create a truly sinister atmosphere for your Halloween table, consider these eerie additions:
-
Sinister Tablecloth Designs: Choose a tablecloth with a pattern that evokes a sense of mystery and darkness. Opt for deep, rich colors like black or deep purple, and select designs that feature cobwebs, bats, or skulls to add an extra touch of spookiness.
-
Haunted Dinnerware Ideas: Set the table with plates that have ghostly or skeletal designs. Consider using silverware with ornate handles resembling twisted branches or gnarled bones. And don’t forget to tuck in a blood-red napkin, secured with a creepy spider ring.
-
Candelabra Centerpiece: Place a candelabra in the middle of the table, adorned with black taper candles. As they flicker and cast eerie shadows, they will create an atmosphere of enchantment and mystery.
-
Poisoned Apple Place Card Holders: For a wicked touch, use mini faux apples as place card holders. Paint them black and attach a small card with each guest’s name. It adds a sinister and playful element to the table setting.
With these sinister table decorations in place, it’s time to move on to homemade outdoor decorations that will truly transform your space.
Homemade Outdoor Decorations
You’ll need some basic supplies to create your own homemade outdoor Halloween decorations. Transforming your outdoor yard into a spooky spectacle is easier than you think.
Start by gathering materials like black garbage bags, old clothes, and string lights. Use the black garbage bags to create eerie ghosts that sway in the wind. Stuff them with crumpled newspaper and tie them off with string or twist ties. Hang them from tree branches or porch railings for a bone-chilling effect.
Don’t forget to incorporate homemade costumes into your outdoor décor. Dress up mannequins or scarecrows in creepy outfits and pose them strategically throughout your yard. These decorations will set the tone for the rest of your haunted house.
Now, let’s move on to creating some scary silhouette designs.
Scary Silhouette Designs
To create scary silhouette designs, try cutting spooky shapes out of black construction paper and placing them in front of a light source. It’s a simple yet effective way to add an eerie ambiance to your Halloween decor. Here are four ideas to get you started:
-
Ghostly figures: Cut out the outline of a ghost with a pointed head and flowing robes. When the light shines through, it will cast a haunting shadow on the wall.
-
Creepy creatures: Make a spider, bat, or owl shape and watch as their silhouettes come alive with every flicker of the light, creating a sense of mystery and fear.
-
Scary shadow puppets: Cut out the shapes of classic horror characters like a vampire or werewolf, and have fun creating spooky scenes by moving the puppets behind a white sheet.
-
Haunted house silhouettes: Design a haunted house with windows, doors, and a crooked roof. The intricate details will make your silhouette truly impressive.
Haunted House Props
If you’re looking to add some spooky charm to your haunted house this Halloween, I’ve got you covered with three key prop ideas: DIY Ghost Decorations, Spooky Spider Webs, and Creepy Tombstone Crafts.
First up, let’s talk about DIY Ghost Decorations – these are a fun and easy way to add an eerie element to your decor. You can make them out of simple materials like cheesecloth or tissue paper and hang them from trees or doorways for a ghostly effect.
Next, we have Spooky Spider Webs – these can be created using white yarn or string and are perfect for adding a touch of creepiness to corners and ceilings.
Finally, we have Creepy Tombstone Crafts – these can be made using foam board or cardboard and can be painted and decorated to resemble old, weathered tombstones.
These props are sure to give your haunted house a chilling atmosphere that will have everyone trembling with fear.
DIY Ghost Decorations
Creating DIY ghost decorations is a fun and spooky way to add a festive touch to your Halloween decor. Here are four ideas to get you started:
-
Hanging Ghosts: Attach white sheets to balloons and hang them from the ceiling. The ghosts will appear to float in mid-air, giving your space an eerie atmosphere.
-
Ghostly Garlands: Cut ghost shapes out of white construction paper and string them together to create a haunting garland. Hang it across doorways or along the walls for a ghostly touch.
-
Ghost Lanterns: Take empty jars and paint them white. Add ghostly faces with black paint or markers. Place tea lights inside the jars to create a spooky glow.
-
Ghostly Window Silhouettes: Cut ghost shapes out of black paper and tape them to your windows. When the lights are on inside, the ghosts will cast eerie shadows on the outside.
Now that your space is filled with ghostly decorations, let’s move on to the next spooky element: spooky spider webs.
Spooky Spider Webs
Now that you have your ghostly decorations in place, it’s time to add some spooky spider webs to complete the Halloween atmosphere.
Spider webs are the perfect way to give your home that haunted look. You can easily create them using materials you already have at home. Start by stretching cotton balls or white yarn across corners and furniture, creating a spider web-like pattern. For an extra creepy touch, add some plastic spiders.
To really get into the spirit, consider making some spooky spider treats like chocolate spider cookies or gummy spider pops. And if you’re feeling extra crafty, why not try making a DIY spider web costume? Just grab some black fabric and cut out a web pattern, then attach it to a black outfit.
With these spooky spider webs and treats, your Halloween decorations will be the talk of the neighborhood.
Now, let’s move on to creepy tombstone crafts to really amp up the scare factor.
Creepy Tombstone Crafts
To add a chilling touch to your haunted house, try crafting some creepy tombstones using styrofoam and gray paint. Here’s how to create a graveyard scene that will send shivers down your spine:
-
Start by cutting out tombstone shapes from styrofoam sheets. Make them different sizes and shapes for a more realistic effect.
-
Use a sharp knife to carve intricate details into the foam, such as cracks, weathering, and epitaphs.
-
Paint the tombstones with a base coat of gray paint, making sure to add darker shades in the crevices to create depth.
-
For an extra eerie touch, you can splatter some black paint on the tombstones to simulate moss or dirt.
With these tombstone painting techniques, you can create a spooky graveyard scene that will make your Halloween decor truly unforgettable.
Frequently Asked Questions
How Do I Clean and Preserve My Pumpkin Carving After Halloween?
After Halloween, I clean and preserve my pumpkin carving using simple cleaning techniques. I remove any leftover debris and gently wash the pumpkin with mild soap and water. Then, I apply a thin layer of petroleum jelly to keep it fresh longer.
What Are Some Alternative Materials I Can Use for DIY Halloween Wreaths?
For DIY Halloween wreaths, there are plenty of alternative materials to get creative with. From black feathers and plastic spiders to mini tombstones and fake cobwebs, the options are endless for spooky and unique wreath ideas.
Are There Any Safety Tips I Should Follow When Using Spooky Lighting Techniques?
When it comes to Halloween lighting safety, it’s important to take spooky lighting precautions. Remember to always use LED lights instead of candles, secure electrical cords properly, and keep flammable materials away from the lights.
How Can I Make My Homemade Outdoor Decorations Withstand Different Weather Conditions?
To make my homemade outdoor decorations withstand different weather conditions, I use weatherproofing techniques and select durable materials. This ensures they can withstand rain, wind, and other elements, keeping them intact and looking spooky all season long.
Where Can I Find Affordable Haunted House Props for My Halloween Decorations?
When it comes to finding affordable haunted house props for my Halloween decorations, I always start by looking for cheap alternatives. I search online and check out local thrift stores for great deals.
Conclusion
As I put the finishing touches on my homemade Halloween decor, I couldn’t help but feel a sense of accomplishment. The materials and supplies I gathered were transformed into eerie wreaths, spooky centerpieces, and haunting outdoor decorations.
With my pumpkin carving skills and the use of clever lighting techniques, I was able to create an atmosphere that sent shivers down the spines of all who visited. My favorite addition was the scary silhouette designs that added a touch of mystery to the scene.
As I stepped back to admire my work, I couldn’t help but feel like a mad scientist, conjuring up a spellbinding creation.
- About the Author
- Latest Posts
Meet Katherine, the creative enthusiast at ByRetreat who infuses her boundless passion for design into every remote workspace she crafts. With an innate sense of creativity and an eye for unconventional beauty, Katherine brings a unique and inspiring perspective to the team.
Katherine’s love for design is infectious, and her ability to think outside the box sets her apart. She believes that true artistry lies in embracing a variety of styles and mixing them harmoniously to create captivating spaces. By combining different textures, colors, and patterns, Katherine weaves a tapestry of creativity that breathes life into each remote workspace.
Nautical Decor Trends
Explore Shark Duvet Covers for Oceanic Bedroom Makeovers

Enter the depths of our creative vision as we venture into the realm of shark-themed duvet covers for refreshing ocean-inspired bedroom transformations. Allow your imagination to be captivated by the diverse styles, trendy patterns, and aquatic color palettes that will turn your room into a tranquil underwater sanctuary.
Discover the materials used and find the perfect size to suit your needs. Join us on this journey to create a budget-friendly bedroom makeover that will leave you feeling like the master of the seas.
Key Takeaways
- Shark duvet covers come in a variety of materials, including cotton and microfiber, providing both comfort and protection for the comforter.
- The designs of shark duvet covers range from bold and vibrant to subtle and elegant, offering a wide range of options to suit different preferences.
- Shark duvet covers feature unique shark patterns and versatile color options, allowing for a coordinated look or the creation of a new oceanic theme in the bedroom.
- In addition to the duvet cover itself, incorporating shark-themed accessories such as wall art, pillows, and playful accessories can further enhance the oceanic atmosphere in the bedroom.
Types of Shark Duvet Covers
Now let’s dive into the various styles of shark duvet covers available for our oceanic bedroom makeovers.
When it comes to shark duvet cover materials, there are a few options to choose from. One popular choice is cotton, known for its softness and breathability. Cotton duvet covers are perfect for those who seek comfort and durability.
Another option is microfiber, a synthetic fabric that offers exceptional softness and resistance to wrinkles and fading. Microfiber duvet covers are easy to care for and maintain, making them ideal for busy individuals.
Now, let’s talk about the benefits of using shark duvet covers. Apart from their visually appealing design, these covers also provide an added layer of protection for your comforter. They can help keep your comforter clean and free from stains, extending its lifespan.
Additionally, shark duvet covers add a touch of excitement and adventure to your bedroom, creating a unique and playful atmosphere.
Popular Shark Duvet Cover Designs
Get ready to dive into the world of popular shark duvet cover designs that will transform your bedroom into an oceanic paradise.
From unique shark patterns that will make a statement, to versatile color options that will complement any decor, there’s something for everyone.
Whether you want a bold and vibrant design or a subtle and elegant one, these shark duvet covers are sure to make a splash in your bedroom.
Unique Shark Patterns
We have a variety of unique shark patterns that are popular designs for shark duvet covers. Our shark duvet cover styles are perfect for incorporating shark-themed elements into a modern bedroom. Whether you prefer a bold and realistic shark print or a more abstract and artistic interpretation, we’ve options to suit every taste. Our designers have carefully crafted these patterns to capture the essence and beauty of these majestic creatures. From intricate line drawings to vibrant watercolor illustrations, our shark duvet covers are sure to make a statement in any bedroom.
Versatile Color Options
As we continue exploring the world of shark duvet covers, there is a wide range of versatile color options available to suit every style and preference. These versatile color combinations allow you to create a coordinated look for your bedroom decor. Whether you prefer bold and vibrant hues or soft and calming tones, there is a shark duvet cover design for you. To give you an idea of the options available, here are some popular shark duvet cover designs:
| Design | Colors |
|---|---|
| Ocean Blue | Shades of blue and white |
| Shark Attack | Red, black, and white |
| Underwater Adventure | Green, blue, and yellow |
With these versatile color options, you can easily incorporate a shark duvet cover into your existing bedroom decor or create a completely new oceanic theme. Let your imagination run wild and transform your bedroom into a shark-infested underwater paradise.
Oceanic Color Schemes for Shark Duvet Covers
Our favorite oceanic color schemes for shark duvet covers include vibrant shades of blues and greens that create a refreshing and tranquil atmosphere.
When it comes to designing a shark-themed room decor, it’s important to consider the psychology behind oceanic colors. Blues and greens are known to evoke feelings of calmness, serenity, and relaxation. These colors mimic the soothing hues of the ocean, creating a sense of tranquility in your bedroom.
By incorporating these color schemes into your shark duvet covers, you can transform your bedroom into a peaceful oasis. Imagine drifting off to sleep surrounded by the calming colors of the ocean, feeling as though you’re swimming alongside the majestic sharks.
The vibrant blues and greens won’t only enhance the shark theme but also provide a visually appealing and harmonious environment that promotes restful sleep.
Materials Used in Shark Duvet Covers
When considering shark duvet covers, it’s important to pay attention to the materials used in their construction. The choice of materials can greatly impact the overall quality and comfort of the duvet cover. Here are two key points to consider:
- Soft and Breathable: Opt for shark duvet covers made from materials such as cotton or microfiber. These fabrics are known for their softness and breathability, ensuring a comfortable and cozy sleep experience. They also allow for better air circulation, preventing excessive heat buildup.
- Durable and Easy to Clean: Look for shark duvet covers that are made from durable materials like polyester or a blend of polyester and cotton. These fabrics are resistant to wear and tear, making them long-lasting. Additionally, they’re easy to clean, often requiring simple machine washing and drying.
Choosing the Right Size Shark Duvet Cover
We can ensure a perfect fit for your shark duvet cover by carefully choosing the right size.
When it comes to choosing the perfect shark duvet cover, size is key. You want to make sure that it fits your bed perfectly, creating a seamless and polished look for your oceanic bedroom makeover.
To find the right size, start by measuring your mattress. Consider the depth of your mattress as well, as this will affect the size of the duvet cover you need. Once you have your measurements, you can easily find the right size shark duvet cover that will fit snugly and comfortably on your bed.
By finding the right shark themed bedding accessories, you can create a cohesive and stylish look for your bedroom.
Now, let’s dive into adding shark-themed accessories to your bedroom.
Adding Shark-Themed Accessories to Your Bedroom
Let’s explore some shark-themed accessories to enhance the look of your bedroom. Adding shark-themed accessories is a great way to bring the oceanic vibe into your space. Here are a few ideas that will surely make a splash:
- Shark Themed Wall Art:
- Hang up a captivating piece of shark-themed wall art to create a focal point in your bedroom. It will transport you to the depths of the ocean every time you look at it.
- Choose artwork that showcases the beauty and power of these magnificent creatures, immersing you in their world.
- Shark Shaped Pillows:
- Dive into comfort with shark-shaped pillows. These cuddly companions will add a playful touch to your bedroom while providing a cozy spot to rest your head.
- With their detailed designs and soft textures, these pillows will make you feel like you’re floating on the waves, surrounded by the gentle presence of sharks.
Now that we’ve explored some shark-themed accessories, let’s dive deeper into how to incorporate shark duvet covers in a kids’ room.
How to Incorporate Shark Duvet Covers in a Kids’ Room
When it comes to incorporating shark duvet covers in a kids’ room, we’ve a few key points to consider.
First, think about using a shark-themed color scheme, such as shades of blue and gray, to create a cohesive and oceanic atmosphere.
Next, get creative with bedding arrangements by layering different textures and patterns, like a shark duvet cover paired with striped sheets or a fish-patterned blanket.

Lastly, don’t forget to add playful accessories like shark-shaped pillows or wall decals to complete the underwater theme and make the room truly come alive.
Shark-Themed Color Schemes
As we delve into shark-themed color schemes, we can discover creative ways to incorporate shark duvet covers in a kids’ room. By using the right color palette, we can create an oceanic atmosphere that’s both exciting and calming for children.
Here are two shark-themed color schemes that will surely evoke an emotional response in both kids and parents:
- Deep Blue Sea: This color scheme features shades of deep blue, reminiscent of the vast ocean. Combine the shark-themed bedding sets with navy blue walls, white furniture, and accents of light blue to create a serene underwater feel.
- Tropical Paradise: Bring the vibrant colors of a coral reef into the room with this color scheme. Pair the shark duvet covers with walls painted in coral or tropical green. Add pops of bright orange, yellow, and turquoise through accessories like pillows, rugs, and curtains to create a lively and playful ambiance.
These shark-themed color schemes will transform any kids’ room into an ocean-inspired haven that sparks their imagination and love for marine life.
Creative Bedding Arrangements
To continue our exploration of shark-themed color schemes, let’s now dive into creative bedding arrangements that incorporate shark duvet covers in a kids’ room. Bedding arrangements play a crucial role in transforming a room into a captivating oceanic paradise. By incorporating shark duvet covers, we can create a visually appealing and exciting sanctuary for children who love these majestic creatures. Let’s take a look at some creative ideas for incorporating shark duvet covers:
| Column 1 | Column 2 |
|---|---|
| 1. Shark-infested sea | 2. Underwater adventure |
| 3. Shark feeding frenzy | 4. Shark research station |
| 5. Shark sleepover party |
Adding Playful Accessories
Now let’s explore how we can incorporate shark duvet covers into a kids’ room by adding playful accessories. Here are some ideas to create a truly immersive and captivating shark-themed bedroom:
- Shark Wall Decals: Transform plain walls into an underwater adventure with realistic shark decals. These decals can be easily applied and removed, allowing for flexibility and creativity in the room design.
- Shark Plush Toys: Fill the room with adorable and huggable shark plush toys. These soft companions will bring a sense of comfort and playfulness to the space.
- Shark Fin Bookends: Keep your little one’s favorite books organized and within reach with shark fin bookends. These decorative and functional accessories will add a touch of whimsy to any bookshelf.
- Shark Bedside Lamp: Illuminate the room with a shark-themed bedside lamp. The soft glow will create a cozy ambiance and make bedtime a delightful experience.
Shark Duvet Covers for a Beach-Inspired Bedroom
Let’s dive into how shark duvet covers can transform your bedroom into a beach-inspired oasis.
Shark duvet covers offer a multitude of benefits that make them a popular choice for those looking to create a shark-inspired bedroom decor. These covers not only add a playful touch to your space but also provide a cozy and comfortable sleeping experience.
The vibrant and realistic shark designs bring the beauty of the ocean right into your bedroom, giving you a sense of tranquility and relaxation. With their soft and durable fabric, shark duvet covers aren’t only aesthetically pleasing but also practical and easy to care for.
By incorporating these covers into your bedroom decor, you can create a serene oceanic atmosphere that will transport you to the beach every time you enter your room.
Creating a Serene Oceanic Atmosphere With Shark Duvet Covers
Let’s dive into the world of shark-themed bedroom inspiration and explore how shark duvet covers can transform your sleep space into a serene oceanic atmosphere. With their sleek designs and captivating imagery, these duvet covers bring the beauty and tranquility of the ocean right into your bedroom.
Imagine drifting off to sleep surrounded by the calming presence of these magnificent creatures, creating a peaceful retreat that will leave you feeling refreshed and rejuvenated.
Shark-Themed Bedroom Inspiration
One key element in creating a serene oceanic atmosphere for our shark-themed bedroom is incorporating shark duvet covers. These covers not only add a touch of elegance to the room but also evoke a sense of adventure and mystery.
Here are two reasons why shark duvet covers are the perfect choice for your shark-themed bedroom decor:
- Immersive Experience: With realistic shark designs and vibrant colors, these duvet covers transport you to an underwater world, making you feel like you’re sleeping in the depths of the ocean.
- Versatile Style: Shark duvet covers come in a variety of styles, from playful and whimsical to sophisticated and modern. Whether you want a fun and lively bedroom or a more refined and tranquil space, there’s a shark-inspired bedding option that suits your taste.
Transforming Your Sleep Space
To truly transform our sleep space into a serene oceanic atmosphere, we can achieve this by incorporating shark duvet covers with their realistic designs and vibrant colors. Imagine drifting off to sleep surrounded by the calming presence of the deep blue sea, with sharks gracefully swimming across your bed. These duvet covers not only provide a visual delight but also create a sense of tranquility and relaxation.
With their intricate details and lifelike patterns, these covers bring the beauty of the ocean into your bedroom. The table below showcases some of the stunning shark duvet covers available, each offering a unique design that captures the essence of the underwater world.
Now, let’s dive into where you can find high-quality shark duvet covers to complete your oceanic bedroom makeover.
Where to Buy High-Quality Shark Duvet Covers
We can find high-quality shark duvet covers at various online retailers and specialty bedding stores. When searching for affordable shark duvet covers, consider these tips for styling them in a modern bedroom:
- Look for duvet covers with realistic shark prints to create a captivating oceanic theme.
- Opt for duvet covers made from soft and durable materials like cotton or microfiber for a comfortable and long-lasting experience.
By choosing the right shark duvet covers, you can transform your bedroom into a tranquil underwater oasis.
Now, let’s dive into the next section about shark duvet covers for a budget-friendly bedroom makeover.
Shark Duvet Covers for a Budget-Friendly Bedroom Makeover
Let’s explore how shark duvet covers can create a budget-friendly bedroom makeover.
Shark duvet covers aren’t only a fun and stylish addition to any bedroom, but they can also be a cost-effective way to transform your space. Whether you’re a college student looking to spruce up your dorm room or a homeowner wanting to create a unique guest bedroom, shark duvet covers offer a great solution. These covers come in a variety of designs and sizes, making it easy to find one that fits your budget. With their vibrant colors and eye-catching patterns, shark duvet covers can instantly breathe new life into any room without breaking the bank.
Now that you know how shark duvet covers can help you achieve a budget-friendly bedroom makeover, let’s move on to some tips for maintaining and cleaning these stylish covers.
What Are the Best Features to Look for in Shark Duvet Covers for an Ocean-Themed Bedroom?
When seeking the best shark duvet covers for bedrooms, it’s crucial to consider the material’s quality to ensure durability and comfort. Look for vibrant and realistic shark designs to add an immersive ocean theme to your bedroom. Easy maintenance and the right size for your bed are also essential features to look for.
Tips for Maintaining and Cleaning Shark Duvet Covers
Maintaining and cleaning shark duvet covers is essential for keeping them looking fresh and vibrant. As someone who desires mastery over their bedroom decor, it’s important to follow these tips to ensure your shark duvet covers remain in pristine condition:

- Regularly wash your shark duvet cover in cold water to prevent color fading and shrinkage.
- Use a gentle detergent specifically designed for delicate fabrics to avoid damaging the material.
- Avoid using bleach or harsh chemicals, as they can weaken the fabric and cause discoloration.
- When drying, opt for a low heat setting or air dry to prevent excessive wrinkling or shrinking.
- Store your shark duvet cover in a cool, dry place to protect it from dust and moisture.
By following these maintenance and cleaning tips, you can extend the lifespan of your shark duvet cover and continue to enjoy its oceanic charm for years to come.
Frequently Asked Questions
Are Shark Duvet Covers Suitable for Adults or Just for Kids?
Shark duvet covers aren’t just for kids; they’re a trendy home decor choice for adults too. Using animal themed bedding, like sharks, can tap into the psychology behind relaxation and stress relief, creating a tranquil oasis in our bedrooms.
Can I Use a Shark Duvet Cover in a Themed Bedroom That Is Not Oceanic?
We recently transformed our modern minimalist bedroom with a shark duvet cover, adding a touch of oceanic allure. Even in a tropical-themed bedroom, incorporating a shark duvet cover can create a unique and visually captivating atmosphere.
Do Shark Duvet Covers Come in Different Sizes?
Yes, shark duvet covers come in different sizes. We found that the best materials for shark duvet covers are soft and durable. Compared to other animal themed bedding options, shark duvet covers add a unique oceanic touch to any bedroom.
Are Shark Duvet Covers Machine Washable?
Yes, shark duvet covers are machine washable. We recommend using a gentle cycle and cold water to ensure the colors stay vibrant. Hang to dry or tumble dry on low.
Where Can I Find Unique and Creative Shark Duvet Cover Designs?
We found unique and creative shark duvet cover designs that glow in the dark at various online retailers. In addition to that, there are alternative ocean-themed bedding options available for a complete oceanic bedroom makeover.
Conclusion
In conclusion, diving into the world of shark duvet covers is a fin-tastic choice for anyone looking to transform their bedroom into an oceanic oasis.
With a wide variety of designs and colors to choose from, these covers are sure to make a splash.
So, why wait? Swim over to your favorite retailer and snag yourself a high-quality shark duvet cover today.
Your bedroom makeover will be jaws-droppingly amazing!
- About the Author
- Latest Posts
Introducing Charles, the Editor in Chief at ByRetreat, whose passion for interior design and editorial excellence elevates every remote workspace to new heights. With his keen eye for detail, impeccable taste, and expertise in design, Charles brings a wealth of knowledge and creativity to the ByRetreat team.
As the Editor in Chief of a renowned lifestyle blog, Charles has honed his skills in curating captivating content and staying up-to-date with the latest trends in interior design. His deep understanding of aesthetics and the power of storytelling through design enables him to create remote workspaces that are not only visually stunning but also rich in personality and meaning.
Mardi Gras Decoration
How Do You Weatherproof an Outdoor Wreath?

We’ve all been frustrated by the time and effort spent creating a gorgeous outdoor wreath, only to see it deteriorate in the face of the elements.
So, how do we ensure our carefully crafted wreaths withstand the unpredictable outdoor conditions? Well, there are some key strategies and techniques to weatherproof an outdoor wreath, and it's not just about choosing the right materials.
By following a few simple steps, we can protect our wreaths from the harsh realities of outdoor exposure and keep them looking vibrant and welcoming for longer.
Key Takeaways
- Choose a sturdy metal frame or a weather-resistant base to ensure durability in various weather conditions.
- Use weather-resistant foliage like cedar, eucalyptus, and boxwood that can withstand moisture, UV rays, and temperature fluctuations.
- Apply a protective sealant to the foliage and base to protect the wreath from the elements, using a high-quality outdoor spray.
- Secure the wreath with a thick wire gauge, preferably galvanized steel or coated wire, and anchor it to a sturdy hook or nail to prevent swaying or falling in windy conditions.
Choosing the Right Wreath Base
When selecting the right wreath base, we prefer using a sturdy metal frame to ensure durability and stability in various weather conditions. Metal frames offer excellent support and are ideal for creating substantial outdoor wreaths. Alternatively, there are also options like grapevine or straw bases which provide a more natural look. However, they may not hold up as well in harsh weather conditions.
To weatherproof an outdoor wreath, it's essential to consider the base material. Metal frames can withstand the elements, but it's still important to apply weatherproofing methods. We recommend using a clear outdoor varnish or sealant to protect the base from moisture and UV damage. Additionally, using weather-resistant faux greenery and decorations can help to prolong the life of the wreath.
For seasonal maintenance, regularly inspect the wreath base for any signs of rust or wear, especially after heavy rain or strong winds. If using a natural base, such as grapevine or straw, consider applying a protective coating to shield it from the elements. Proper care and maintenance of the wreath base will ensure that your outdoor wreath remains beautiful and intact throughout the seasons.
Selecting Weather-Resistant Foliage

After ensuring the durability of the wreath base by selecting a sturdy metal frame, the next step is to carefully choose weather-resistant foliage to enhance the wreath's longevity and appearance.
When selecting foliage for outdoor wreaths, it's crucial to prioritize weather-resistant options that can withstand various environmental conditions. Here are three key factors to consider when choosing weather-resistant foliage:
- Foliage Selection: Opt for foliage varieties known for their resilience to outdoor elements. Look for options like cedar, eucalyptus, and boxwood, which are naturally hardy and can maintain their appearance in different weather conditions.
- Weather Resistance: Prioritize foliage that's specifically labeled as weather-resistant or suitable for outdoor use. These types of foliage are often treated to withstand moisture, UV rays, and temperature fluctuations, ensuring their longevity.
- Longevity Maintenance with Water-Repellent Accents: Consider incorporating water-repellent accents, such as faux berries or succulents, into the wreath design. These accents not only add visual interest but also contribute to the wreath's longevity by repelling moisture and preventing premature deterioration.
Applying a Protective Sealant
To protect the outdoor wreath from the elements and ensure its longevity, it's essential to apply a protective sealant to the foliage and base. Before applying the sealant, ensure that the wreath is completely dry to prevent trapping moisture, which could lead to mold or decay.
Select a high-quality protective spray designed specifically for outdoor use, as this will provide the best defense against weather damage. When applying the sealant, hold the spray can approximately 8-12 inches away from the wreath and use a sweeping motion to evenly coat the foliage and base. Be thorough but avoid oversaturating the wreath, as excessive sealant can affect the natural appearance of the foliage.
After application, allow the wreath to dry completely in a well-ventilated area before hanging it outdoors. Repeat this protective spray application every few months, especially before harsh weather seasons, to reinforce the weatherproofing.
Securing With Durable Wire

Once the protective sealant has been applied to the outdoor wreath, the next step is to secure it with durable wire to ensure it withstands outdoor conditions. When selecting wire for securing an outdoor wreath, it's essential to consider the wire gauge and durability. A thicker wire gauge, such as 18 or 20, is recommended as it provides the strength needed to support the weight of the wreath and withstand outdoor elements. Additionally, opting for a durable wire material like galvanized steel or coated wire enhances its ability to resist rust and corrosion, making it suitable for long-term outdoor use.
When attaching the outdoor wreath, it's crucial to use methods that offer stability and security. Here are some effective attachment methods to consider:
- Twisting: Use the durable wire to create a loop around the top of the wreath, then twist the ends together to form a secure attachment point.
- Anchoring: Secure the wreath to a sturdy anchor point, such as a hook or nail, using the durable wire to prevent it from swaying or falling in windy conditions.
- Wrapping: Wrap the wire around the wreath and the hanging point, such as a wreath hanger or outdoor fixture, ensuring a tight and stable connection.
Adding Water-Repellent Accents
For enhanced weather resistance, consider incorporating water-repellent accents into the outdoor wreath design. Waterproofing methods and decorative accents can work hand in hand to protect your wreath from the elements and ensure its longevity. When adding water-repellent accents, it's essential to choose materials that can withstand seasonal changes and repel moisture effectively. Here are some practical options for incorporating water-repellent accents into your outdoor wreath:
| Water-Repellent Accents | Description | Benefits |
|---|---|---|
| Artificial Silk Flowers | Realistic appearance, water-resistant | Maintain color and shape in all weather |
| Waterproof Ribbon | Durable, weatherproof material | Withstands rain and snow without damage |
| Plastic Foliage | Waterproof and UV resistant | Retains color and texture in outdoor use |
| Synthetic Berries | Water-resistant, long-lasting | Adds color and texture while repelling water |
| Outdoor LED Lights | Weatherproof, energy-efficient | Adds illumination and ambiance |
Avoiding Direct Sunlight Exposure

When it comes to outdoor wreaths, direct sunlight exposure can cause fading, drying, and deterioration.
To protect your wreath, consider hanging it in a shaded area or using a protective covering, such as an awning or a porch overhang.
Regular maintenance, such as misting with water and inspecting for any signs of damage, can also help prolong the wreath's lifespan.
Sunlight Exposure Risks
To protect our outdoor wreath from sunlight exposure risks, it's important to avoid placing it in direct sunlight, as this can cause fading and damage to the materials. Here are some practical tips to minimize sunlight exposure risks:
- Use UV-Protective Spray: Apply a UV-protective spray specifically designed for outdoor use to shield the wreath from harmful UV rays.
- Choose Shaded Areas: Position the wreath in shaded areas, such as under a porch or tree, to reduce direct sunlight exposure and prevent heat damage.
- Consider Overhangs or Awnings: Hang the wreath under overhangs or awnings to provide additional protection from intense sunlight and heat.
Protective Covering Options
As we consider protective covering options to avoid direct sunlight exposure, it's crucial to safeguard our outdoor wreath from potential damage caused by prolonged sun exposure.
Protective coatings such as UV-resistant sprays or weatherproofing accessories like a clear plastic cover can effectively shield the wreath from the harsh effects of the sun. When applying a protective coating, ensure that it's specifically designed for outdoor use and won't cause discoloration or damage to the materials of the wreath.
Additionally, a clear plastic cover can act as a barrier, preventing direct sunlight from reaching the wreath while still allowing it to receive adequate airflow.
These protective covering options are practical and relatively easy to implement, providing an extra layer of defense against the sun's damaging rays.
Maintenance for Longevity
In order to ensure the longevity of your outdoor wreath, it's essential to take measures to avoid direct sunlight exposure, which can cause significant damage over time. Here are some longevity tips and preservation techniques to help maintain the quality of your outdoor wreath:
- Choose Shaded Areas: Position the wreath in a location that receives minimal direct sunlight exposure during the day, such as under a porch or in a shaded area of your outdoor space.
- Rotate the Wreath: Regularly rotate the wreath to ensure that all sides receive an equal amount of sunlight, preventing uneven fading and deterioration.
- Use UV Protective Spray: Apply a UV protective spray specifically designed for outdoor use to shield the wreath from the harmful effects of direct sunlight.
Sheltering From Heavy Rain

When it comes to sheltering outdoor wreaths from heavy rain, waterproofing techniques and protective covering options are essential. We need to ensure that the wreath is shielded from excessive moisture to prevent damage and maintain its appearance.
From waterproof sprays to using a covered porch or awning, there are various effective methods to protect the wreath from the elements.
Waterproofing Techniques
How can we ensure that our outdoor wreath remains intact and beautiful even during heavy rain? When it comes to waterproofing techniques for outdoor wreaths, using weatherproofing accessories is essential.
Here are some practical methods to shield your wreath from heavy rain:
- Plastic Wrap: Encase the wreath in multiple layers of clear plastic wrap, ensuring that it's fully covered and sealed against the elements.
- Waterproof Spray: Apply a coat of waterproof spray specifically designed for outdoor use. This will provide an additional layer of protection against moisture.
- Overhang Placement: If possible, hang the wreath in a location that has some natural shelter, such as under a covered porch or awning, to reduce its exposure to heavy rain.
Implementing these waterproofing techniques will help safeguard your outdoor wreath, ensuring it remains a stunning addition to your exterior decor, even during inclement weather.
Protective Covering Options
To shield an outdoor wreath from heavy rain, consider utilizing protective covering options such as a sturdy, water-resistant canopy or a custom-made shelter to ensure its preservation and longevity. Additionally, applying protective spray options can further enhance the wreath's ability to withstand heavy rain. Here are some weatherproofing techniques along with their benefits:
| Protective Covering Options | Description | Benefits |
|---|---|---|
| Sturdy, Water-Resistant Canopy | A durable, weatherproof canopy that shields the wreath from direct exposure to heavy rain. | Provides immediate protection and keeps the wreath dry during heavy downpours. |
| Custom-Made Shelter | Tailored shelter designed to fit the specific dimensions of the wreath, offering maximum protection from heavy rain. | Ensures complete coverage and prevents water from reaching the wreath, preserving its appearance. |
| Protective Spray Options | Specially formulated sprays that create a water-resistant barrier on the wreath's surface. | Enhances the wreath's ability to repel water, reducing the risk of damage from heavy rain. |
Regular Maintenance and Cleaning

We regularly maintain and clean our outdoor wreath to ensure it remains in optimal condition throughout the changing seasons. Here are some essential steps we take to keep our outdoor wreath looking fresh and vibrant:
- Inspect for Damage: Regularly inspect the wreath for any signs of damage, such as loose foliage, broken ornaments, or fading colors. Address any issues promptly to prevent further deterioration.
- Gentle Cleaning: Use a soft brush or cloth to gently remove dust, dirt, and debris from the wreath. For more stubborn dirt, a light misting with water and a gentle wipe can help freshen up the foliage.
- Seasonal Touch-Ups: As the seasons change, consider giving your wreath a seasonal touch-up. For example, in the fall, you might add some faux berries or colorful leaves, while in the winter, a few sparkling snowflakes or ornaments can enhance its festive appeal.
Storing During Harsh Conditions

When it comes to storing outdoor wreaths during harsh conditions, we need to consider protective storage solutions that shield the wreath from the elements.
Preventing moisture and mold is crucial, so we'll cover methods for keeping the wreath dry and mold-free.
Additionally, we'll explore the importance of choosing durable materials that can withstand extreme weather.
Protective Storage Solutions
During harsh conditions, it's essential to protect outdoor wreaths by utilizing effective storage solutions to ensure their longevity and quality. Here are some practical storage solutions to shield your outdoor wreaths from the elements:
- Protective Coverings: Use breathable, weather-resistant covers specifically designed for wreaths to shield them from rain, snow, and UV rays. These covers allow air circulation while keeping moisture out, preventing mold and mildew growth.
- Moisture Control: Place moisture-absorbing packets, such as silica gel or activated charcoal, inside the storage container to maintain optimal humidity levels and prevent moisture damage.
- Elevated Storage: Store the wreaths in elevated areas, such as shelves or hooks, to prevent them from sitting directly on the ground and absorbing moisture.
Moisture and Mold Prevention
After addressing the protective storage solutions for outdoor wreaths, it's crucial to focus on effective methods for moisture and mold prevention during harsh conditions to ensure the wreaths remain in optimal condition.
To prevent mildew and mold growth, it's essential to store the wreaths in a dry, well-ventilated area with good air circulation. Before storing, ensure that the wreaths are completely dry to avoid trapping moisture, which can lead to mold formation.
Consider using moisture-absorbing products such as silica gel packets or moisture-absorbing crystals inside the storage containers to control humidity levels. Additionally, regularly inspect the stored wreaths for any signs of moisture or mold, and promptly address any issues that arise.
Choosing Durable Materials
To ensure the longevity of outdoor wreaths during harsh conditions, it's essential to select durable materials that can withstand the elements and protect the wreaths from damage. When choosing materials for an outdoor wreath, it's crucial to prioritize durability and weather resistance. Here are three key factors to consider:
- Weather-Resistant Foliage:
Look for artificial foliage made from durable materials such as UV-resistant plastic or fade-resistant fabric. These materials can withstand prolonged exposure to sunlight and resist fading, ensuring that the wreath remains vibrant and attractive even in harsh weather conditions.
- Rust-Proof Frames:
Opt for wreath frames made from materials like stainless steel or coated metal to prevent rust and corrosion. This will ensure the structural integrity of the wreath, even when exposed to moisture and humidity.
- Waterproof Accents:
Choose weatherproof embellishments such as waterproof ribbons, plastic ornaments, or coated pinecones to prevent water damage and maintain the wreath's visual appeal during rainy or snowy weather.
Utilizing a Protective Cover

Using a protective cover helps shield the outdoor wreath from the elements, prolonging its lifespan and maintaining its appearance.
When it comes to protective cover alternatives, there are several options to consider. One popular choice is a clear plastic cover that fits over the entire wreath, providing a barrier against rain, snow, and wind.
Another alternative is to use a large, resealable plastic bag, which can be sealed around the wreath, offering protection while still allowing for easy access.
DIY weatherproofing tips also include using a water-resistant spray to coat the wreath, creating a protective barrier against moisture.
Additionally, consider creative protection techniques such as using an old umbrella or creating a small shelter to shield the wreath from harsh weather.
Whatever method you choose, ensuring that the protective cover completely shields the wreath and is securely in place is crucial.
Securing Proper Hanging Placement

Positioning the outdoor wreath at the proper height and in the right location is essential to ensure it's both visually appealing and well-protected from the elements. To achieve this, follow these steps:
- Hanging Technique: When hanging the wreath, use a sturdy hook or nail that can support the weight of the wreath. Avoid flimsy hooks or strings that may break under pressure. Ensure the wreath is hung securely to prevent it from swaying in strong winds.
- Proper Height: Hang the wreath at eye level to make it more visible and aesthetically pleasing. Ensure it isn't too high or too low, as this can affect its overall impact.
- Weatherproofing Methods: Consider using a protective sealant on the wreath to safeguard it from moisture and UV damage. Additionally, choose a location that provides some natural protection, such as under a covered porch or eaves.
Monitoring and Touching Up

After hanging the outdoor wreath, regularly inspect it for any signs of wear, damage, or fading, and touch up any weatherproofing treatments as needed to maintain its durability and appearance.
Inspecting the wreath every few weeks allows you to catch any issues early. Look for any peeling paint, fading colors, or damage from weather exposure. If you notice any wear and tear, you can touch up the weatherproofing to extend the life of your wreath.
For touching up techniques, start by gently cleaning the surface with a soft brush or cloth to remove any dirt or debris. Then, reapply a weatherproofing spray or sealant according to the manufacturer's instructions. Pay special attention to the areas that are most exposed to the elements.
Additionally, consider using UV protective sprays to prevent color fading from sun exposure.
Frequently Asked Questions
Can an Outdoor Wreath Be Left Outside All Year Round, or Should It Be Taken Down During Certain Seasons?
We always take into account the seasonal display and outdoor wreath care.
It's essential to consider weatherproofing techniques to ensure the wreath withstands the elements. Leaving an outdoor wreath outside all year round is possible, but it's important to choose weather-resistant materials and regularly maintain it.
However, for optimal preservation, we recommend wreath storage during harsh seasons to prolong its lifespan and keep it looking its best.
Will the Protective Sealant Affect the Color or Appearance of the Foliage on the Wreath?
We've found that using a protective sealant can indeed affect the color and appearance of the foliage on the wreath.
However, there are various protective options available to weatherproof an outdoor wreath without compromising its appearance.
To preserve the color and retain the appearance, one can opt for sealants specifically designed for outdoor use.
Additionally, choosing foliage that's naturally resistant to the elements can also help maintain the wreath's aesthetic appeal.
How Often Should the Wreath Be Checked for Any Damage or Wear and Tear?
We understand the concern about finding time to check the wreath often. But to ensure longevity, we recommend checking it every 2 weeks. If you notice any wear and tear, replace damaged parts promptly.
Use a clear protective sealant to prevent damage. Repair techniques include fluffing foliage, replacing damaged pieces, and touching up any faded areas.
This regular maintenance will keep your wreath looking its best for longer.
What Is the Best Way to Store an Outdoor Wreath During Harsh Winter Conditions?
When it comes to storing outdoor wreaths during winter, we've found a few effective methods.
Hanging them in a sealed container or bag can protect them from harsh conditions. Some folks also apply a sealant to help with winter protection.
It's important to check for any damage or wear and tear regularly and make necessary repairs. Using wind-resistant materials can also help ensure the wreath stays intact during winter.
Are There Any Specific Types of Wire That Are Recommended for Securing an Outdoor Wreath to Withstand Windy Conditions?
For securing a wreath in windy conditions, we recommend using a sturdy wire, such as galvanized steel or aluminum wire. These types of wire are durable and can withstand outdoor elements.
When securing the wreath, ensure to use multiple anchor points to distribute the pressure evenly. This will help keep the wreath in place during strong winds.
Additionally, consider using a wire that matches the color of the wreath for a seamless and secure attachment.
Conclusion
So, with these simple steps, you can ensure your outdoor wreath stays looking fresh and beautiful through all kinds of weather.
Remember to give it a little TLC from time to time and it will thank you with a long, vibrant life.
Now go forth and confidently decorate your outdoor space, knowing that your wreath is ready to weather whatever Mother Nature throws at it.
- About the Author
- Latest Posts
Introducing Ron, the home decor aficionado at ByRetreat, whose passion for creating beautiful and inviting spaces is at the heart of his work. With his deep knowledge of home decor and his innate sense of style, Ron brings a wealth of expertise and a keen eye for detail to the ByRetreat team.
Ron’s love for home decor goes beyond aesthetics; he understands that our surroundings play a significant role in our overall well-being and productivity. With this in mind, Ron is dedicated to transforming remote workspaces into havens of comfort, functionality, and beauty.
Decor
The Sims 4 How to Change a Cc to Decor

As an enthusiastic fan of The Sims 4, I have always been captivated by the countless opportunities Custom Content (CC) provides to elevate my gaming experience.
However, I often found myself wanting to transform certain CC items into decor objects. This led me on a quest to uncover the secrets of changing CC to decor in The Sims 4.
In this article, I will share my findings and guide you through the step-by-step process, troubleshooting common issues, and unlocking a whole new level of creativity in your virtual world.
Key Takeaways
- The Sims 4 Studio program can be used to convert custom content items into decor.
- When choosing suitable CC items, consider how they will fit into existing decor and harmonize with furniture and color schemes.
- Customizing CC as decor allows for repurposing and transforming objects to add unique accents and match existing styles.
- Troubleshooting common issues with CC involves checking for updates, placing files correctly, and resolving conflicts for a smooth experience.
Understanding Custom Content (CC
Understanding how to change CC to decor in The Sims 4 is essential for creating a personalized and unique gameplay experience. Using CC in building designs allows players to add a wide variety of new objects, furniture, and decorations to their virtual homes. It opens up a whole world of possibilities for customization and creativity.
However, managing and organizing CC can be a bit overwhelming at times. Here are some tips to help you stay organized.
First, create separate folders for different types of CC, such as furniture, decorations, and build mode objects. This will make it easier to find what you’re looking for when building or decorating.
Additionally, regularly clean out your CC folder to remove any unused or outdated items. This will help keep your game running smoothly and prevent conflicts between different CC items.
The Difference Between CC and Decor
Contractions are commonly used to differentiate between custom content (CC) and decorative items in The Sims 4. CC allows players to personalize their game and add unique decor styles. Understanding CC limitations is important in order to avoid game glitches or crashes.
Here are some key points to keep in mind:
- CC is custom-made content created by players or third-party creators.
- CC can include new hairstyles, clothing, furniture, and more.
- Decorative items in the game are pre-made by the developers.
- CC can be downloaded and installed to enhance gameplay.
- Using CC for unique decor styles allows players to create their own personalized virtual spaces.
Finding the Right CC for Your Decor Needs
When it comes to finding the right CC for your decor needs, there are a few key points to consider.
First, knowing some search tips can greatly enhance your ability to find exactly what you’re looking for.
Second, matching your CC to your decor style is essential for creating a cohesive and visually pleasing space.
And finally, checking CC reliability ratings can help ensure that you’re downloading high-quality and functional items for your game.
Let’s dive in and explore these important aspects of finding the perfect CC for your decor.
CC Search Tips
To find the perfect custom content for your decor in The Sims 4, try using specific search terms and don’t forget to utilize filters like color and style. When searching for CC (custom content), it can be overwhelming to sift through the vast options available. That’s where search filters come in handy.
Here are some tips to help you find exactly what you’re looking for:
- Use specific search terms: Instead of searching for ‘chair,’ try searching for ‘modern blue armchair’ to narrow down the results.
- Utilize color filters: If you have a specific color scheme in mind, filter your search results by color to find CC that matches your decor.
- Try different styles: Experiment with different style filters like contemporary, vintage, or bohemian to find CC that fits your aesthetic.
- Check for compatibility: Make sure the CC you choose is compatible with your game version and expansions.
- Read user reviews: Before downloading CC, take a look at user reviews to see if others have had positive experiences with the content.
With these search tips and filters, you’ll be able to find the perfect custom content to enhance your decor in The Sims 4. Happy decorating!
Matching Decor Styles
One way to narrow down your options and find the perfect custom content for your decor in The Sims 4 is by utilizing search filters like color and style.
Matching decor styles is essential to create a cohesive and visually pleasing environment in your virtual home. When customizing CC as decor, it’s important to consider the overall aesthetic and theme you want to achieve.
Whether you prefer modern, vintage, or bohemian styles, there are countless options available to match your desired look. From furniture to wall decorations and even floor patterns, custom content allows you to personalize every aspect of your in-game decor.
By selecting CC that complements your chosen style, you can create a unique and personalized space that reflects your virtual world’s personality.
Now, let’s explore another important aspect of custom content: CC reliability ratings.
CC Reliability Ratings
Make sure you check out the reliability ratings of the custom content you download to ensure a smooth and glitch-free gameplay experience. Custom content, or CC, is a popular way to enhance your Sims 4 game with new clothing, hair, furniture, and more.
However, not all CC is created equal, and it’s important to know which creators have a track record of producing high-quality and reliable content. Here are five reasons why checking CC reliability ratings is crucial:
- Avoiding game crashes and glitches
- Ensuring compatibility with game updates
- Saving time by avoiding low-quality CC
- Supporting reliable and talented creators
- Enhancing your gameplay with reliable and well-made custom content
Assessing Compatibility: Is the CC Editable
Assess if the CC is editable by checking the file type and specifications. When it comes to assessing CC compatibility, it’s important to determine if the CC is editable in order to make any necessary conversions.
Start by checking the file type of the CC object. Most commonly, editable CC objects come in the form of .package files. Additionally, pay attention to the specifications of the CC object. Some objects may have restrictions or limitations that prevent editing.
For example, if the creator has specified that the object cannot be modified, it may not be possible to convert it into a decor object. By thoroughly assessing the editability of the CC, you can determine if it can be converted into a decor object or if you will need to explore other options.
Now, let’s move on to the next section and learn how to convert CC into decor objects.
Converting CC Into Decor Objects
To convert your custom content into decor objects, you’ll need to follow a few simple steps.
First, open your desired CC in a 3D modeling software.
Next, remove any interactive or functional elements to ensure it functions purely as decor.
Then, modify the object’s size, shape, and textures as desired.
Once you’re satisfied with the changes, export the object as a new package file.
Finally, place the new package file in your Sims 4 Mods folder and load the game to see your converted CC as a decor object.
Converting CC to objects allows you to repurpose CC for decor, giving your game a unique touch. With a few adjustments, you can transform functional items into eye-catching decor pieces. Be sure to follow these steps carefully to ensure a smooth conversion process. Happy decorating!
Steps to Change CC to Decor in The Sims 4
When it comes to custom content (CC) in The Sims 4, one of the most exciting aspects is the ability to convert CC into decor objects.
In this discussion, I will guide you through the CC conversion process, providing step-by-step instructions and tips on how to successfully transform your favorite CC items into decorative pieces for your Sims’ homes.
Additionally, I will share some insights on choosing suitable CC items for conversion and offer ideas on how to customize CC to seamlessly blend with your desired decor themes.
CC Conversion Process
First, you’ll need to locate the custom content item you want to convert to decor in The Sims 4. Once you have the item, follow these steps to convert it successfully:
- Open the Sims 4 Studio program.
- Click on the ‘My Project’ tab and select the custom content item you want to convert.
- Click on the ‘Tools’ tab and choose the ‘Convert to Decor’ option.
- Adjust the settings and options according to your preferences.
- Click on the ‘Convert’ button to start the cc conversion process.
During the conversion process, it’s important to keep an eye out for any troubleshooting issues that may arise. Common issues may include missing textures, incorrect positioning, or compatibility errors. If you encounter any problems, try reinstalling the custom content or checking for updates.
Additionally, make sure you have the latest version of Sims 4 Studio installed to ensure a smooth conversion process.
Choosing Suitable CC Items
Once you’ve decided on the style and theme of your game, it’s essential to select custom content items that complement your vision.
When it comes to cc item selection, it’s important to consider how these items will fit into your existing decor. Look for pieces that harmonize with your current furniture, color scheme, and overall aesthetic.
Incorporating cc into existing decor can be done by choosing items that have similar styles or by using cc to add unique accents to your space. Whether you’re looking for a modern touch, vintage charm, or something completely out-of-the-box, there is a wide range of cc items available to suit your needs.
By carefully selecting and incorporating cc items into your decor, you can create a truly customized and personalized game experience.
Now, let’s dive into the next section about customizing cc as decor.
Customizing CC as Decor
Now that we have chosen suitable custom content (CC) items for our Sims 4 game, let’s explore how we can repurpose some of these items and turn them into room decor.
The great thing about CC is that it allows for endless customization options, including transforming objects into furniture pieces or decorative items. Here are some ideas to get started:
-
Repurposing a painting as a wall hanging: Take a CC painting and resize it to fit the wall. Hang it up using the game’s wall placement tool, and voila! You have a unique piece of wall decor.
-
Using a rug as a tapestry: If you have a CC rug with an intricate design, consider hanging it on the wall as a tapestry. It can add a touch of texture and visual interest to any room.
-
Turning a chair into a decorative prop: Resize a CC chair to a smaller scale and place it in a corner of a room as a decorative prop. This can add a cozy touch and fill empty spaces.
-
Transforming a dresser into a decorative table: Resize a CC dresser to a smaller size and place it against a wall. Add some decorative items on top, such as vases or books, to create a stylish table.
-
Using small CC objects as decorative accents: Take smaller CC objects, like plants or sculptures, and scatter them around a room to add personality and visual interest.
Troubleshooting: Common Issues and Solutions
If you’re having trouble with your custom content not appearing as decor in The Sims 4, try checking if you have the latest updates installed. Sometimes, installation problems can prevent custom content from working properly.
Make sure you have followed all the instructions correctly and that the files are placed in the right folders. If you’re still encountering issues, it could be due to conflicts with other mods or custom content. Try removing any conflicting items and test the decor again.
Resolving conflicts can be tricky, but it’s worth it to have your custom content display correctly. Additionally, make sure to regularly update your mods and custom content to avoid compatibility issues.
Troubleshooting installation problems and resolving conflicts are essential steps in ensuring a smooth experience with custom content in The Sims 4.
Enhancing Your Gameplay With Custom Decor Options
To enhance your gameplay, try incorporating custom decor options into your experience. Custom content (CC) objects can add a personal touch to your Sims 4 world, allowing you to create a unique and immersive environment. Here are five ways you can make the most of custom decor options:
-
Customizing CC Objects: Many CC objects come with customization options, allowing you to change colors, patterns, and textures to match your style and preferences. Take advantage of these options to create a cohesive and personalized look for your in-game spaces.
-
Mixing CC and Base Game Objects: Don’t be afraid to mix custom content with the base game objects. This combination can create interesting and visually appealing scenes in your game.
-
Creating Themed Rooms: Use CC objects to create themed rooms, such as a cozy reading nook or a futuristic workspace. This will add depth and variety to your gameplay.
-
Building Outdoor Spaces: Custom decor options are not limited to indoor spaces. Use CC objects to build stunning outdoor areas, from lush gardens to relaxing patios.
-
Experimenting with Different Styles: With an abundance of custom content available, you can explore different styles and aesthetics. Try incorporating various CC objects to experiment and find the perfect look for your Sims’ homes.
Incorporating custom decor options into your gameplay can elevate your Sims 4 experience, making it more visually appealing and tailored to your preferences. So go ahead and explore the world of custom content to enhance your virtual world!
Frequently Asked Questions
Can I Use Custom Content From Previous Versions of the Sims in the Sims 4?
Yes, you can use custom content from previous versions of The Sims in The Sims 4. To convert custom content to decor objects, you’ll need to use a modding tool like Sims 4 Studio.
Are There Any Limitations to the Number of Custom Content Items I Can Have in My Game?
In The Sims 4, there are pros and cons to using a large amount of custom content. It can enhance gameplay but also slow down the game. To manage it, organize your custom content in folders and regularly update mods.
How Can I Ensure That the Custom Content I Download Is Safe and Free From Viruses?
To ensure the safety of downloaded custom content for The Sims 4, I recommend using reputable websites that offer virus-free content. Additionally, always have an updated antivirus program and scan any files before installing them into your game.
Can I Change the Colors or Textures of Custom Content Objects to Match My Desired Decor?
Certainly! By utilizing custom content in creative ways, like repurposing furniture as decorative objects, you can easily match your desired decor in The Sims 4. It’s a fantastic way to add personal touches to your virtual spaces.
Will Converting Custom Content to Decor Objects Affect the Performance or Stability of My Game?
Converting custom content to decor in The Sims 4 doesn’t affect game performance or stability. To do it without issues, follow these steps: select the object, enable bb.moveobjects cheat, then use the eyedropper tool to change its colors or textures.
Conclusion
In conclusion, changing custom content (CC) to decor in The Sims 4 is a simple process that can greatly enhance your gameplay experience.
By understanding the difference between CC and decor, finding the right CC for your needs, and assessing compatibility, you can easily convert CC into beautiful decor objects.
Following the steps provided and troubleshooting common issues, you’ll be able to create a custom decor collection that perfectly suits your style.
Don’t miss out on the opportunity to enhance your gameplay with these custom decor options!
- About the Author
- Latest Posts
Introducing Charles, the Editor in Chief at ByRetreat, whose passion for interior design and editorial excellence elevates every remote workspace to new heights. With his keen eye for detail, impeccable taste, and expertise in design, Charles brings a wealth of knowledge and creativity to the ByRetreat team.
As the Editor in Chief of a renowned lifestyle blog, Charles has honed his skills in curating captivating content and staying up-to-date with the latest trends in interior design. His deep understanding of aesthetics and the power of storytelling through design enables him to create remote workspaces that are not only visually stunning but also rich in personality and meaning.
-

 Vetted4 weeks ago
15 Best Poe Cameras for Home Security – Reviews & Buying Guide
-

 Vetted3 days ago
15 Best Grocery Carts to Make Shopping a Breeze
-

 Vetted1 week ago
15 Best Gravel for Driveway: The Ultimate Guide for a Durable and Stunning Entrance
-

 Vetted22 hours ago
15 Best Steam Generators for Showering Bliss: Reviewed & Rated
-

 Beginners Guides3 weeks ago
I Inhaled Vinegar Fumes
-

 Vetted2 weeks ago
15 Best Hot Tubs of 2024: Luxurious Relaxation at Your Fingertips
-

 Vetted4 weeks ago
15 Best Blinds for Bathroom Windows to Enhance Privacy and Style
-

 Vetted3 days ago
15 Best Dripless Caulk Guns for Mess-Free Sealing


