Decor
Learn How to Repurpose a Vintage Picnic Basket Into a Table
Bringing new life to forgotten treasures, discover the step-by-step guide to transforming vintage picnic baskets into unique, functional tables.
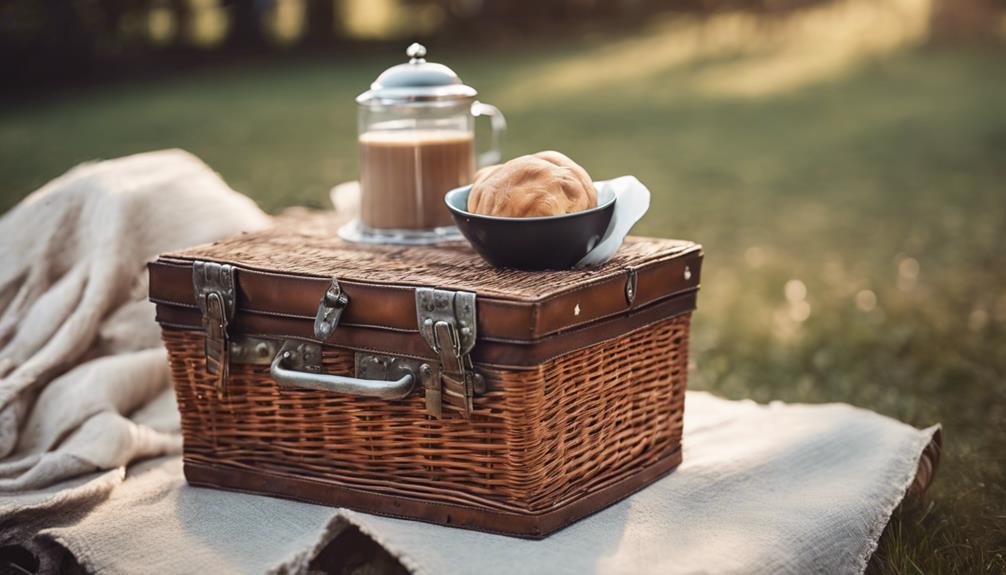
We're transforming vintage picnic baskets into unique tables that blend rustic charm with modern sophistication. To start, we thoroughly clean and prepare the basket, ensuring structural stability and removing old linings. Next, we prime and paint the basket using techniques like faux grain sack stripes to achieve a timeless, sophisticated look. We add a personalized touch with wooden signs and decorative straps, securing them with E6000 glue. Finally, we enhance the aesthetic with Big Mamas Butta and In The Navy Paint. As we explore these creative techniques, we'll uncover the secrets to upcycling a vintage picnic basket into a one-of-a-kind table that showcases individuality.
Key Takeaways
• Clean and prepare the vintage picnic basket by removing old lining, verifying structural stability, and making necessary repairs.
• Apply primer and paint the basket with a timeless, sophisticated design, using techniques like faux grain sack stripes for uniqueness.
• Add a personalized wooden sign that complements the basket, securing it with twine or wire for a touch of personality.
• Attach durable, easy-to-clean pleather straps in a stylish color and texture, using E6000 glue for a strong bond.
• Enhance the aesthetic appeal with a rich, buttery finish using Big Mamas Butta, perfect for rustic or modern design preferences.
Gather Essential Upcycling Supplies
We'll need a variety of essential upcycling supplies to give our vintage picnic basket a fresh new look and functional makeover. Gathering the right materials is important to achieving a successful transformation.
First, we'll need paint and brushes to revamp the basket's exterior and interior. Sandpaper will come in handy to smooth out any rough surfaces. Additionally, decor transfers can add a personal touch to our upcycled table.
We'll also require necessary tools like a screwdriver, pliers, and scissors for any repairs or adjustments needed on the vintage picnic basket. Having these upcycling supplies at our disposal will guarantee a seamless shift from basket to functional table.
Furthermore, considering the surfaces and materials we'll be working with, it's crucial to choose supplies that are compatible and suitable for the task at hand. With our upcycling supplies in check, we'll be ready to tackle the next step in our project: preparing our vintage picnic basket for its new life as a table.
Prepare the Vintage Picnic Basket

Now that we've gathered our upcycling supplies, let's get our hands dirty and prepare our vintage picnic basket for its new life as a functional table.
The first step in repurposing a vintage picnic basket is to thoroughly clean it, removing any dirt or debris that may have accumulated over time. This will give us a clean slate to work with and help us identify any areas that need attention. Once the picnic basket is clean, we can begin to brainstorm ideas for repurposing it. One idea is to transform the basket into a festive holiday centerpiece by filling it with seasonal decorations such as pinecones, holly, and ornaments. Another option is to turn the basket into a gift basket for a loved one by filling it with their favorite treats and goodies. With these festive holiday basket ideas in mind, we can start to gather the necessary materials and bring our vision to life.
Next, we need to verify the basket is structurally sound and stable for use as a table. We should inspect the basket for any weak spots or damage and consider making repairs or reinforcements to make it more sturdy.
Additionally, we'll remove any old or damaged lining from the inside of the basket to create a smooth surface.
Finally, we'll measure the dimensions of the basket to determine the appropriate tabletop size for our repurposed table.
Prime the Basket for Painting
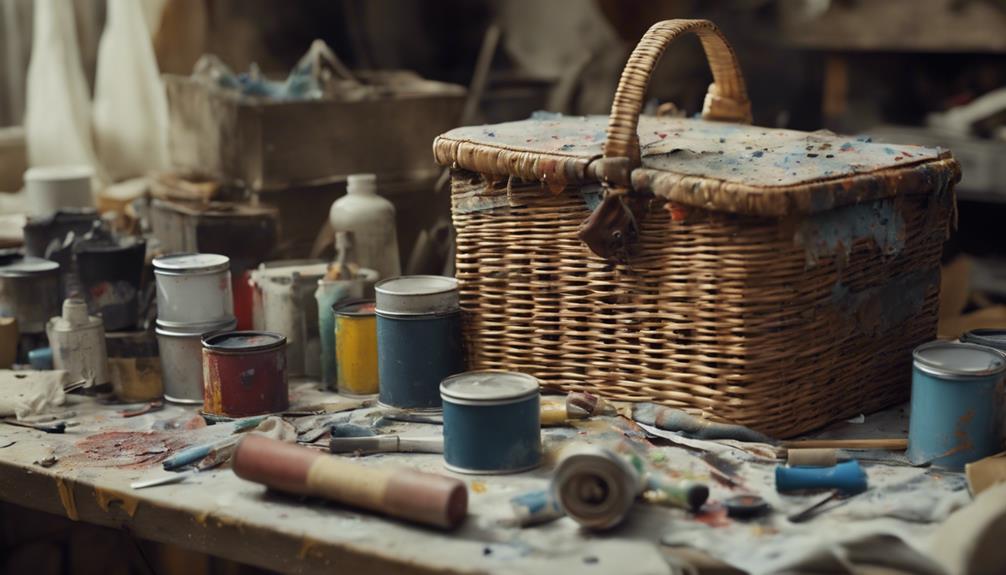
With our vintage picnic basket clean, repaired, and measured, we're ready to prime it for painting, starting by elevating it on paint stands for easy access during the priming process. This allows us to reach all areas of the basket with ease, guaranteeing a smooth and even application of the primer.
Next, we apply a coat of Rustoleum Flat White Primer specifically designed for metal surfaces, using short back-and-forth strokes to achieve even coverage. Choosing a primer that's compatible with the basket's material is crucial to enhance paint adhesion and create a smooth base for the paint.
We make sure the primer is completely dry before moving on to the next step, as this will establish a strong bond between the primer and the paint. By priming the basket, we're setting ourselves up for success, as it helps to create a smooth, even finish that will make our repurposed vintage picnic basket table look amazing.
Add a Faux Grain Sack Stripe
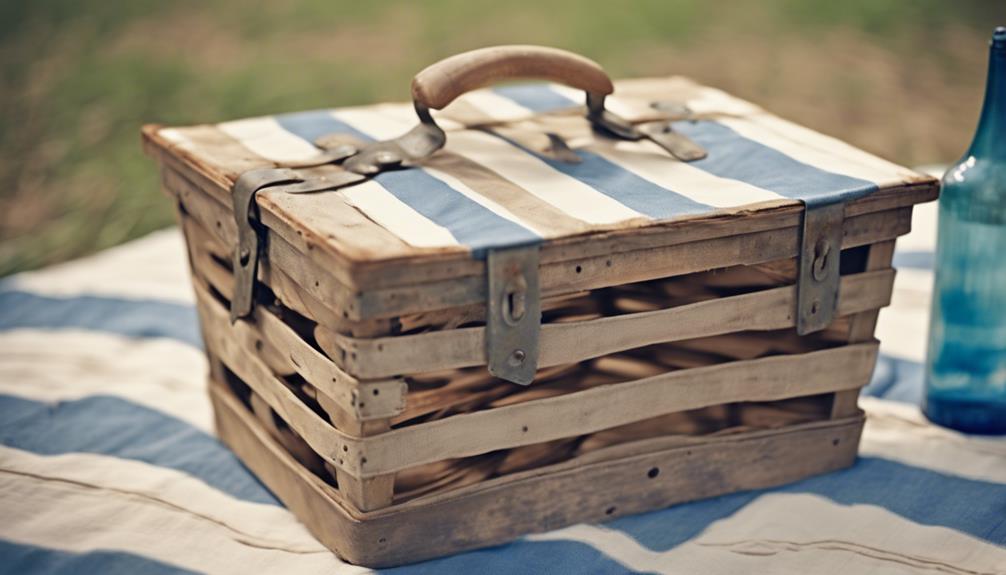
To add a touch of vintage charm to our repurposed picnic basket, let's create a faux grain sack stripe using In The Navy Chalk Mineral Paint. This classic look is reminiscent of traditional farmhouses and will elevate our picnic basket's aesthetic.
We'll start by applying painter's tape to the basket, ensuring precise guidance for our paint strokes. Next, we'll use the navy paint to create the stripe, combining it with light neutral shades to achieve a timeless and sophisticated look.
Attach a Wooden Sign to Basket

As we attach a wooden sign to our vintage picnic basket, we'll explore the crucial points to keep in mind. We'll examine the design elements of the sign itself, such as the type of wood, font, and message, to make sure it complements our basket's aesthetic.
Additionally, we'll discuss the various attachment methods, including the use of twine or other materials, to securely fasten the sign to the basket.
Sign Design Elements
We add a touch of personality to our vintage picnic basket by attaching a wooden sign that echoes the basket's classic style. This design element not only enhances the basket's appearance but also adds a personal touch. To guarantee a cohesive look, we choose a wooden sign that complements the style of the picnic basket.
| Design Element | Description | Tips |
|---|---|---|
| Wooden Sign | A decorative element that adds personality to the picnic basket | Choose a design that complements the basket's style |
| Twine or Wire | Secure the wooden sign to the basket handles | Ensure a sturdy attachment for a polished look |
| Sign Size | Select a size that balances with the basket's dimensions | Avoid overwhelming the basket with a large sign |
Attachment Methods
With our wooden sign chosen, we tie it securely to the picnic basket handles using twine. This attachment method guarantees our sign remains in place, adding a touch of elegance to our repurposed picnic basket table.
To start, we thread the twine through the hole in the wooden sign and the handle of the basket, making sure it's firmly attached. We then tie the twine off tightly to prevent the sign from shifting or falling. To make the process easier, we tape the cut end of the twine, allowing it to glide smoothly through the sign and basket.
We repeat this process on the other side of the basket to ensure our wooden sign is evenly and securely attached. By using this attachment method, we can confidently display our wooden sign on our repurposed picnic basket, adding a touch of rustic charm to our outdoor space.
With the sign securely in place, we can now focus on the final touches, transforming our vintage picnic basket into a unique and functional table.
Add Decorative Pleather Straps

As we continue to repurpose our vintage picnic basket, we're now going to focus on adding decorative pleather straps to give it a stylish and functional touch.
We'll explore the different material options available, the benefits of using pleather straps, and the best ways to secure them to the basket.
Strap Material Options
When updating the vintage picnic basket, incorporating decorative pleather straps can be a stylish and practical choice that effectively revives the classic design.
As we consider the strap material options, pleather straps stand out as an affordable and stylish alternative to traditional leather straps. This material choice offers a durable and easy-to-clean solution, perfect for a repurposed picnic basket turned table.
We can customize the design of our table by selecting pleather straps in various colors, patterns, and textures, allowing us to elevate the overall aesthetic of our upcycled piece. The versatility of pleather straps enables us to add a touch of modernity to the vintage picnic basket while maintaining its classic charm.
Pleather Strap Benefits
We can enhance the aesthetic appeal of our repurposed picnic basket table by adding decorative pleather straps, which not only provide a stylish touch but also offer several practical benefits. One of the most significant advantages of pleather straps is their durability and weather resistance, making them an excellent choice for outdoor use. Additionally, they offer a cruelty-free and budget-friendly alternative to traditional leather straps.
| Benefit | Description | Advantage |
|---|---|---|
| Durability | Pleather straps are more resistant to wear and tear | Longer lifespan |
| Customization | Pleather straps can be easily customized with different colors and textures | Matches desired aesthetic |
| Cruelty-free | Faux leather straps offer a cruelty-free alternative to traditional leather | Aligns with ethical values |
Securing the Straps
Now that we've selected the perfect decorative pleather straps, it's time to securely attach them to our vintage picnic basket. We'll use E6000 glue to guarantee a strong bond between the straps and the basket. To achieve a polished finish, we'll make sure to space the straps evenly and align them precisely.
Before applying the glue, we'll carefully measure and mark the attachment points on the basket. Then, we'll apply a small amount of E6000 glue to the marked areas and carefully place the straps in position. To prevent any movement while the glue dries, we'll clamp the straps in place. This will secure a strong and secure attachment.
With the straps securely attached, our vintage picnic basket is one step closer to becoming a unique and functional table. The addition of decorative pleather straps not only enhances the basket's aesthetic but also adds functionality.
Add a Touch With Big Mamas Butta

How can we elevate our vintage picnic basket's aesthetic appeal with a single, game-changing product? The answer lies in Big Mamas Butta, a miracle worker that adds a rich, buttery finish to our treasured picnic basket.
By applying it to the basket's surface, we can achieve a luxurious feel and a subtle sheen, instantly elevating its overall look. Not only that, Big Mamas Butta can also work its magic on the pleather straps, darkening them to give our basket a high-end boutique appearance.
We've all seen vintage picnic baskets that have lost their luster over time, but Big Mamas Butta helps revive their exterior, making them more visually appealing and adding a touch of sophistication. By using this amazing product, we can transform our vintage picnic basket into a stylish and elegant table with a beautiful finish.
Whether we're going for a rustic, vintage vibe or a modern, sleek look, Big Mamas Butta is the perfect addition to our repurposing project. With its help, our picnic basket will be the envy of all who lay eyes on it.
Transform With in the Navy Paint
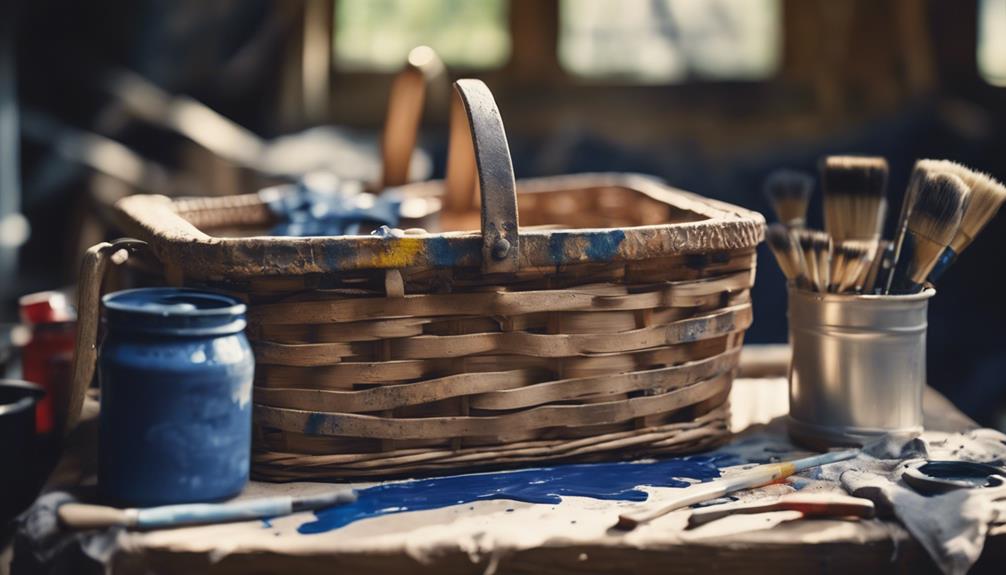
As we transform our vintage picnic basket with In The Navy Paint, we'll cover the basics of working with this rich, dark shade, sharing some essential painting prep tips to guarantee a smooth process.
We'll also explore how to effortlessly transform our basket with this beautiful paint, achieving a unique and charming design.
Navy Blue Basics
With In The Navy Chalk Mineral Paint, we're about to breathe new life into our vintage picnic basket, transforming it into a one-of-a-kind table that exudes rustic charm and sophistication.
We're excited to give this old basket a fresh look, and navy blue is the perfect hue to add a touch of elegance. By using In The Navy Chalk Mineral Paint, we can achieve a rich, deep blue that will be the perfect base for our table.
This vintage picnic basket is the perfect candidate for a makeover, and with this navy blue paint, we can create a unique and eye-catching piece.
We'll combine the navy blue with light neutral shades to enhance the vintage aesthetic and add a touch of sophistication to our repurposed table. By incorporating painting techniques like the faux grain sack stripe, we can create a one-of-a-kind piece that's both rustic and refined.
With a little creativity and some In The Navy Chalk Mineral Paint, we can turn this vintage picnic basket into a stunning table that's sure to be a conversation starter.
Painting Prep Tips
Before we start painting, let's get our vintage picnic basket ready for its transformation by elevating it on paint stands, ensuring easy access from all sides. This will allow us to work comfortably and efficiently, ensuring a smooth painting process.
Next, we'll focus on preparing the surface of our picnic basket for painting. A thorough cleaning is essential to remove any dirt, grime, or old wax that may affect paint adhesion. Once clean, we can start thinking about the design elements we want to incorporate.
For a vintage farmhouse look, we can use In The Navy Chalk Mineral Paint to create a faux grain sack stripe. By combining painter's tape with navy paint and light neutral shades, we can achieve a unique and cost-effective transformation. With the right painting techniques, we can enhance the basket's appearance and give it a fresh, updated look.
Transforming With Ease
We're now ready to add the faux grain sack stripe to our vintage picnic basket using In The Navy Chalk Mineral Paint. This will instantly evoke a charming farmhouse ambiance.
To achieve this look, we'll combine the navy paint with light neutral shades. This creates a classic aesthetic that enhances the vintage charm of our picnic basket.
To guarantee clean lines and precision, we'll use painter's tape to paint the faux grain sack stripe. This technique not only adds a unique touch to our basket makeover but also provides a cost-effective way to create a one-of-a-kind home decor piece.
Add a Personalized Wooden Sign
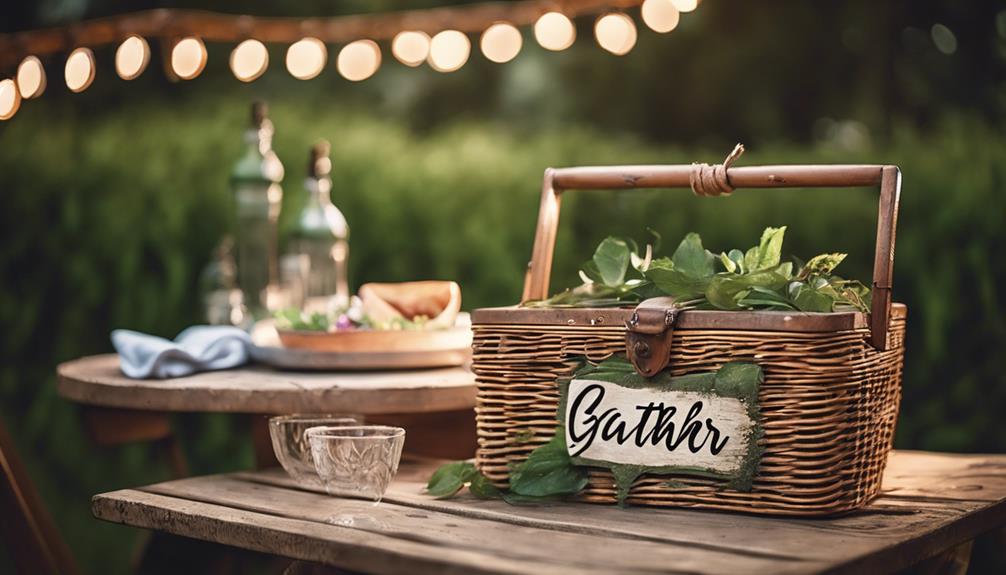
We add a touch of personality to our repurposed picnic basket by crafting a customized wooden sign that reflects our unique style. This personalized element elevates our upcycled vintage picnic basket into a one-of-a-kind piece that showcases our individuality.
To create the wooden sign, we choose a design or message that resonates with us, whether it's a quote, a name, or a simple phrase. We then attach the sign securely to the basket using twine or wire, adding a rustic touch to the overall aesthetic.
For an extra pop of color, we consider painting the wooden sign with a complementary hue that enhances the overall look of the basket. To take it to the next level, we can embellish the wooden sign with decorative elements like transfers, stencils, or hand-painted designs.
Style Your Upcycled Picnic Basket

Now that our vintage picnic basket has a personalized touch, let's incorporate it into our home decor by selecting a design that seamlessly blends with our interior style. We appreciate the French country vibe of the basket and consider displaying it in different areas of our home.
To enhance its appearance, we add a decor transfer on the wood sign, choosing a design that complements the basket. We secure it with painters tape for a smooth transfer.
As we style our upcycled picnic basket, we make sure it complements our home decor. We opt for a design that blends seamlessly with our interior style, creating a cohesive look. The French country charm of the basket adds a touch of elegance to our space.
Frequently Asked Questions
What Can I Do With a Vintage Picnic Basket?
We're often left wondering, what can we do with a vintage picnic basket? Well, the possibilities are endless!
We can repurpose it as a unique storage container, a decorative centerpiece, or even a planter for plants.
We could also use it as a gift basket or a treasure chest for kids.
With a little creativity, a vintage picnic basket can become a functional and charming piece in our homes.
How Do You Make a Picnic Basket for Kids?
As we begin this adventure, our minds are like empty baskets, waiting to be filled with the perfect picnic essentials for kids!
When creating a picnic basket for kids, we choose durable, kid-friendly designs with playful colors. We opt for smaller sizes, like mini baskets, making them easy for little hands to carry. Compartments and insulated linings keep snacks and drinks organized and fresh.
Conclusion
As we reflect on our upcycling journey, we're reminded that with a little creativity, even the most mundane vintage finds can be transformed into functional works of art.
The once-forgotten picnic basket now boasts a fresh, nautical-inspired aesthetic, complete with a personalized wooden sign and a hint of rustic charm.
It's a demonstration of the power of repurposing, where the old is made new again, and the ordinary becomes extraordinary.
- About the Author
- Latest Posts
Introducing Ron, the home decor aficionado at ByRetreat, whose passion for creating beautiful and inviting spaces is at the heart of his work. With his deep knowledge of home decor and his innate sense of style, Ron brings a wealth of expertise and a keen eye for detail to the ByRetreat team.
Ron’s love for home decor goes beyond aesthetics; he understands that our surroundings play a significant role in our overall well-being and productivity. With this in mind, Ron is dedicated to transforming remote workspaces into havens of comfort, functionality, and beauty.
As someone who enjoys decorating homes, I have always been interested in learning about the history of my favorite store, Floor and Decor.
Well, let me tell you, the story behind this company is truly fascinating. Founded in a year that feels like just yesterday, Floor and Decor has become a powerhouse in the industry.
From humble beginnings to groundbreaking innovations, this article will take you on a journey through time, exploring the vision, impact, and milestones of Floor and Decor.
So, let’s dive in and discover when it all began!
Key Takeaways
- Floor and Decor was founded in 2000.
- The company started with a small store in Atlanta, Georgia.
- The company aimed to provide customers with a wide selection of high-quality products at affordable prices.
- The company’s early growth was fueled by exceptional customer service, a vast assortment of products, and competitive pricing.
The History of Floor and Decor
You’ll be interested to know that Floor and Decor was founded in 2000. The early beginnings of the company saw a small store in Atlanta, Georgia, offering a wide range of flooring and decor products.
From there, the company grew rapidly, expanding its presence across the United States. In 2012, Floor and Decor took a significant step in its international expansion by opening its first store in Mexico City. This marked the beginning of the company’s global presence, with plans for further expansion in the future.
The success of Floor and Decor can be attributed to its dedication to providing high-quality products, excellent customer service, and a vast selection of flooring and decor options. With a strong foundation in place, the company continued to thrive and reach new heights.
The Founding of Floor and Decor
Back in the day, we started something special – a company that would revolutionize the way people think about flooring and home decor.
Floor and Decor was founded in 2000 with the aim of providing customers with a wide selection of high-quality products at affordable prices.
Our early growth was fueled by our commitment to our founding principles: offering exceptional customer service, providing a vast assortment of products, and ensuring competitive pricing.
These principles continue to guide us today and have played a significant role in our success.
As we look back on our journey, we recognize the importance of our early beginnings in shaping the company we are today.
Early Beginnings of Floor and Decor
When discussing the early beginnings of Floor and Decor, it is important to highlight the founding story highlights, key milestones, and growth, as well as the impact the company has had on the industry.
The founding story of Floor and Decor is rooted in the passion of its founders and their vision to provide customers with a one-stop shop for all their flooring and decor needs.
From humble beginnings, the company has experienced significant growth and achieved key milestones, such as expanding its store locations and product offerings.
As a result, Floor and Decor has made a lasting impact on the industry by revolutionizing the way customers shop for flooring and decor products.
Founding Story Highlights
The company’s journey began in 2000 when Floor and Decor was founded with the goal of providing customers with high-quality flooring products at affordable prices. As the founding story goes, a group of flooring industry professionals came together with a shared vision of revolutionizing the flooring retail experience.
Here are three key highlights from the company’s early years:
-
Expansion: Within a few years of its founding, Floor and Decor quickly expanded its operations, opening multiple stores across the United States. This rapid growth allowed the company to reach a larger customer base and establish itself as a major player in the flooring industry.
-
Product Range: From the beginning, Floor and Decor focused on offering a wide range of flooring options to cater to different customer preferences. By providing a vast selection of products, including hardwood, tile, laminate, and more, the company aimed to become a one-stop-shop for all flooring needs.
-
Customer Satisfaction: One of the core values of Floor and Decor has always been to prioritize customer satisfaction. The company invested in knowledgeable sales associates who could provide expert advice and guidance to customers, ensuring they made informed decisions. This commitment to excellent customer service helped build trust and loyalty among customers.
With these early milestones, Floor and Decor set the stage for future success and growth.
Key Milestones and Growth
Within a few years, Floor and Decor rapidly expanded its operations, opening multiple stores across the United States. This aggressive growth strategy has allowed the company to establish market dominance in the flooring and home decor industry.
Floor and Decor’s success can be attributed to their effective strategies for continued growth and success. They have focused on offering a wide range of high-quality products at competitive prices, attracting a large customer base. Additionally, the company has invested heavily in their online presence, providing customers with a seamless shopping experience through their website and mobile app.
Furthermore, Floor and Decor has implemented a customer-centric approach, prioritizing excellent customer service and satisfaction. These strategies have not only fueled their expansion but also solidified their position as a leader in the industry.
As a result, Floor and Decor’s impact on the industry has been significant, shaping the way competitors operate and forcing them to adapt to keep up with the company’s success.
Impact on Industry
As a result of its rapid expansion and customer-centric approach, Floor and Decor has revolutionized the flooring and home decor industry, forcing competitors to adapt to their innovative strategies. The company’s impact on the industry can be seen in several ways:
-
Industry Growth: Floor and Decor’s success has contributed to the overall growth of the flooring and home decor industry. Their wide range of products and competitive prices have attracted more customers, leading to increased demand and market expansion.
-
Competitive Advantage: With their customer-centric approach, Floor and Decor has gained a significant competitive advantage over other players in the industry. Their focus on providing a wide selection of high-quality products and exceptional customer service has set them apart from their competitors.
-
Innovation: Floor and Decor’s innovative strategies have pushed the boundaries of what was traditionally offered in the industry. Their emphasis on staying ahead of design trends and offering unique product options has forced other companies to follow suit or risk being left behind.
As Floor and Decor continues to make waves in the industry, let’s take a look at some key milestones in their journey.
Milestones in Floor and Decor’s Journey
Expansion plans and growth, as well as innovations in the flooring industry, have been crucial factors in the success of Floor and Decor.
Over the years, the company has strategically expanded its presence, opening new stores and acquiring other businesses to increase its market share.
Additionally, Floor and Decor has been at the forefront of introducing innovative products and technologies in the flooring industry, continuously adapting to meet the evolving needs and preferences of customers.
Expansion Plans and Growth
Despite its recent rapid growth, Floor and Decor, founded in 2000, has ambitious expansion plans for the future. The company has implemented several effective strategies to penetrate new markets and reach a wider customer base. Here are three key expansion strategies that Floor and Decor has successfully employed:
-
Opening new stores: Floor and Decor has been actively expanding its physical presence by opening new stores in strategic locations across the country. This allows the company to cater to a larger customer base and increase its market share.
-
E-commerce expansion: In addition to brick-and-mortar stores, Floor and Decor has invested in strengthening its online presence. By enhancing its e-commerce platform and offering a seamless online shopping experience, the company aims to attract tech-savvy customers and tap into the growing online market.
-
Acquisition of competitors: Floor and Decor has also pursued growth through strategic acquisitions of smaller competitors. This approach allows the company to eliminate competition, gain access to new markets, and expand its product offerings.
With these expansion strategies in place, Floor and Decor is well-positioned to continue its growth trajectory and further penetrate the market. As we transition into the next section about innovations in the flooring industry, it is evident that Floor and Decor’s expansion efforts have set the stage for the company to embrace and capitalize on new advancements in the industry.
Innovations in Flooring Industry
To stay ahead in the flooring industry, it is important to explore the latest innovations and advancements that can enhance your business and attract more customers. One of the key trends in the flooring industry right now is the focus on sustainable flooring options. Customers are increasingly aware of environmental concerns and are looking for flooring materials that are eco-friendly and made from renewable resources. This has led to the development of innovative flooring options such as bamboo, cork, and reclaimed wood. These materials not only offer a sustainable alternative but also provide unique and stylish design options. By incorporating these sustainable flooring options into your business, you can appeal to environmentally conscious customers and set yourself apart from the competition.
Now let’s take a closer look at the vision behind Floor and Decor.
The Vision Behind Floor and Decor
When you walk into a Floor and Decor store, you can see the vision behind the company’s founding. The origins of Floor and Decor can be traced back to 2000, when the company was established with the goal of providing customers with a vast selection of high-quality flooring products at affordable prices.
Sustainability has always been an integral part of their approach, as they strive to offer eco-friendly options and promote responsible practices throughout their operations. Here are three ways in which Floor and Decor demonstrates their commitment to sustainability:
-
Green Building Products: Floor and Decor offers a wide range of environmentally friendly flooring options, including bamboo, cork, and reclaimed wood.
-
Efficient Supply Chain: The company works closely with suppliers to ensure that their products are sourced sustainably, minimizing the environmental impact.
-
Recycling Program: Floor and Decor encourages customers to recycle their old flooring materials through their in-store recycling program, reducing waste and promoting a circular economy.
With a strong foundation built on sustainability, Floor and Decor has experienced remarkable growth and expansion over the years.
Growth and Expansion of Floor and Decor
When it comes to international expansion plans, Floor and Decor has been making significant strides. The company has been actively exploring opportunities to enter new markets outside of the United States.
However, it is crucial to analyze the potential impact on local markets and ensure a seamless integration to ensure success in these new ventures.
International Expansion Plans
If you’re curious about Floor and Decor’s international expansion plans, you’ll be glad to know that they are currently exploring opportunities to bring their products and services to new markets around the world. The company recognizes the potential for global market growth and wants to tap into these opportunities.
Here are three key elements of their international expansion strategy:
-
Market Research: Floor and Decor is conducting extensive market research to identify countries with high demand for their products and favorable business environments. They are analyzing factors such as consumer preferences, market trends, and competitive landscapes to make informed decisions.
-
Partnerships and Alliances: To enter new markets, Floor and Decor is considering forming strategic partnerships and alliances with local companies. This approach will help them understand the local market dynamics, leverage existing networks, and navigate through any cultural or regulatory barriers.
-
Adaptation and Localization: Floor and Decor understands the importance of adapting their products and services to suit the preferences and needs of different markets. They are willing to invest in localization efforts like language translation, product customization, and store design modifications to provide a seamless customer experience.
As Floor and Decor expands internationally, it is important to consider the potential impact on local markets.
Impact on Local Markets
The expansion of Floor and Decor internationally has the potential to greatly impact local markets. As the company expands its operations into new countries and regions, it brings with it the promise of economic growth and job opportunities for the local economy.
The influx of a new business can provide a boost to the local economy by creating employment opportunities, generating tax revenues, and attracting other businesses to the area. Additionally, the introduction of Floor and Decor’s products and services can enhance customer satisfaction by offering a wider range of options and competitive prices. With a focus on quality and affordability, Floor and Decor aims to meet the needs and preferences of customers in each new market it enters. This commitment to customer satisfaction has been a driving force behind the success of the company.
Now, let’s explore the influential figures in Floor and Decor’s history.
Influential Figures in Floor and Decor’s History
One of the most influential figures in Floor and Decor’s history is the company’s founder. His vision and determination laid the foundation for the company’s success.
Here are three key milestones and moments of growth in Floor and Decor’s history that highlight his impact:
-
Founding the Company: In [year], the founder established Floor and Decor with a clear mission to provide high-quality flooring and decor solutions to customers.
-
Expansion and Market Dominance: Under the founder’s leadership, Floor and Decor experienced rapid expansion, opening multiple locations across the country. This allowed the company to establish a strong presence and become a leader in the industry.
-
Introduction of Innovative Products: The founder’s commitment to innovation led to the introduction of new and unique products in the market. This not only attracted more customers but also set Floor and Decor apart from its competitors.
These milestones and the founder’s leadership have played a significant role in shaping Floor and Decor into the successful company it is today.
As we explore Floor and Decor’s impact on the industry, it becomes evident how their innovative approach has transformed the flooring and decor market.
Floor and Decor’s Impact on the Industry
Under the founder’s leadership, Floor and Decor has had a significant impact on the industry, transforming the flooring and decor market through innovative approaches.
One area where Floor and Decor stands out is its sustainability efforts. The company has implemented various initiatives to reduce its environmental footprint, such as sourcing sustainable materials and promoting energy-efficient practices.
Additionally, Floor and Decor has prioritized customer service excellence. They have invested in training their staff to provide knowledgeable and friendly assistance to customers, ensuring a positive shopping experience.
By focusing on sustainability and customer service, Floor and Decor has not only set itself apart from competitors but has also contributed to the overall improvement of the industry.
As we move forward, let’s explore the innovations and advancements made by Floor and Decor.
Innovations and Advancements by Floor and Decor
With its sustainable materials and energy-efficient practices, Floor and Decor has truly revolutionized the flooring and decor market. Here are three ways in which Floor and Decor has brought innovative flooring solutions and a customer-centric approach to the industry:
-
Wide Range of Options: Floor and Decor offers a vast selection of flooring materials, from hardwood and tile to laminate and vinyl. This allows customers to find the perfect flooring solution for their unique needs and preferences.
-
Expert Advice: Floor and Decor is committed to helping customers make informed decisions. Their knowledgeable staff provides expert advice on product selection, installation techniques, and maintenance tips, ensuring that customers have all the information they need to make the right choice.
-
Competitive Pricing: Floor and Decor understands the importance of affordability. They offer competitive pricing on their products, making high-quality flooring accessible to a wide range of customers.
Floor and Decor’s Mission and Values
You can see Floor and Decor’s commitment to their mission and values through their dedication to providing innovative flooring solutions and exceptional customer service.
Floor and Decor’s corporate culture is centered around creating a positive and inclusive work environment where employees are encouraged to bring their best selves to work every day.
They prioritize community involvement and outreach, actively seeking opportunities to give back and make a difference in the communities they serve.
Their commitment to corporate social responsibility is evident in their partnerships with local charities and organizations, as well as their involvement in various community events.
Floor and Decor truly believes in the power of coming together to create a better future, both for their employees and the communities they are a part of.
In the next section, we will explore how Floor and Decor is celebrating their anniversary, highlighting their journey and achievements without explicitly stating ‘step’.
Celebrating Floor and Decor’s Anniversary
Come celebrate Floor and Decor’s milestone anniversary by joining in on the festivities and reflecting on their incredible journey. It’s hard to believe that it has already been [INSERT NUMBER] years since Floor and Decor was founded.
As part of their growth strategy, Floor and Decor has focused on expanding their product offerings, enhancing the customer experience, and expanding their store footprint. Here are three key highlights of their growth strategy:
-
Diversifying Product Offerings: Floor and Decor has continuously added new products to meet the evolving needs of their customers. From tiles to hardwood flooring to countertops, they have become a one-stop-shop for all flooring and decor needs.
-
Improving Customer Experience: Floor and Decor has invested in creating a seamless and enjoyable shopping experience. They have implemented technologies like virtual reality showrooms and online order tracking to enhance customer satisfaction.
-
Expanding Store Footprint: Floor and Decor has expanded their presence across the country, opening new locations to make their products easily accessible to more customers. With each new store, they bring their vast selection and exceptional service closer to customers in different communities.
Frequently Asked Questions
How Many Stores Does Floor and Decor Currently Have?
As of now, Floor and Decor has a total of 140 stores. They have been expanding rapidly and have plans to continue opening new stores in the future to meet the growing demand.
What Is the Average Size of a Floor and Decor Store?
On average, a Floor and Decor store is about 70,000 square feet in size. The store layout is designed to showcase a wide range of flooring options, from tiles to hardwood, making it easy to find what you need.
How Has Floor and Decor Adapted to Changing Consumer Preferences Over the Years?
Over the years, Floor and Decor has successfully adapted to changing consumer preferences by staying up-to-date with market trends in the flooring industry. This has allowed us to meet the evolving needs of our customers.
Can You Provide Some Examples of the Innovative Products or Services Offered by Floor and Decor?
Floor and Decor amazes me with their innovative products and services. From trendy tile designs to personalized customer assistance, they always stay ahead in the industry. It’s impressive how they continuously adapt to changing consumer preferences.
What Sets Floor and Decor Apart From Its Competitors in the Industry?
Floor and Decor sets itself apart from competitors through its unique selling points and customer satisfaction initiatives. With a wide selection of innovative products and exceptional service, they strive to exceed customer expectations and provide a superior shopping experience.
When Was Floor and Decor Founded and How Does That Affect Their Sales?
Floor and Decor was founded in 2000, and their strong foundation has greatly impacted their floor and decor sales schedule. Their years of experience and established reputation have led to a consistent and reliable sales schedule, contributing to their success in the industry.
Conclusion
In conclusion, it’s hard to believe that Floor and Decor was founded back in 2000. It feels like just yesterday that this innovative company burst onto the scene, bringing a fresh perspective to the flooring industry.
Through their dedication to quality, their commitment to customer satisfaction, and their constant drive for innovation, Floor and Decor has truly made a lasting impact.
As we celebrate their anniversary, let’s raise a toast to the past, present, and future of this incredible company. Cheers to many more years of beautiful floors and happy homes!
- About the Author
- Latest Posts
Introducing Ron, the home decor aficionado at ByRetreat, whose passion for creating beautiful and inviting spaces is at the heart of his work. With his deep knowledge of home decor and his innate sense of style, Ron brings a wealth of expertise and a keen eye for detail to the ByRetreat team.
Ron’s love for home decor goes beyond aesthetics; he understands that our surroundings play a significant role in our overall well-being and productivity. With this in mind, Ron is dedicated to transforming remote workspaces into havens of comfort, functionality, and beauty.

As a retail specialist with a sharp eye for trends, I have investigated Home Depot’s stocking schedule to reveal the mysteries of when they release their spooky Halloween decorations.
Get ready to be enchanted by the insider knowledge I’m about to unveil. With key dates, early fall updates, and replenishment strategies, you’ll be well-prepared for the arrival of those popular Halloween items.
So, grab your cauldron and join me on this journey to discover the timing of Home Depot’s Halloween decor restock.
Key Takeaways
- Home Depot stocks Halloween decor in late September or early October.
- Sales trends and historical data are used to forecast demand and determine restocking frequency.
- Home Depot offers a wide variety of Halloween decor options, including spooky lights, inflatable decorations, and DIY materials.
- Customers can sign up for the Halloween decor restock alert to receive timely notifications and ensure access to sought-after items.
Seasonal Stocking Schedule
Home Depot typically stocks Halloween decor in late September or early October. As a retail expert, I have analyzed their seasonal inventory management and customer demand forecasting.
Home Depot strategically plans and manages their inventory to meet customer demand during the Halloween season. They closely monitor sales trends and use historical data to forecast the demand for Halloween decor items. By doing so, they ensure that their stores are well-stocked with a wide variety of spooky decorations to cater to their customers’ needs.
This expertise in inventory management allows Home Depot to provide a seamless shopping experience and meet the growing demand for Halloween decor.
Now, let’s transition into the subsequent section to discuss the key dates for Halloween decor availability at Home Depot.
Key Dates for Halloween Decor Availability
To find out when you can get your hands on Halloween decorations at Home Depot, check out their website for key dates.
As an expert in analyzing retail companies, evaluating financial performance, and providing insights, I can tell you that Home Depot typically follows a well-planned schedule for stocking Halloween decor. They understand the importance of meeting customer demand during this festive season.
By visiting their website, you can find the key dates for Halloween decor delivery and restock schedule. This information will help you plan your purchases and ensure that you don’t miss out on the latest spooky offerings.
So head over to Home Depot’s website and mark those dates in your calendar.
Now, let’s move on to the next section and discuss the early fall inventory update.
Early Fall Inventory Update
As an expert in analyzing retail companies and evaluating their financial performance, I would like to discuss the availability of Halloween decor and the early fall inventory.
One key point to consider is when retailers like Home Depot start stocking Halloween decor. This is important to understand because it helps us determine the timing and availability of these products for consumers.
Additionally, it is crucial to analyze the early fall inventory of retailers as it provides insights into their product offerings and sales trends for the upcoming season.
Halloween Decor Availability
You can find Halloween decor in stock at Home Depot. As an expert in analyzing retail companies and evaluating their financial performance, I can provide insights on the availability of Halloween decor at Home Depot.
With Halloween decor trends constantly evolving, Home Depot ensures that they offer a wide range of options to suit every customer’s preferences. From spooky lights and inflatable decorations to DIY Halloween decorations, Home Depot has it all. They understand the growing popularity of DIY projects and provide customers with the necessary materials and inspiration to create their own unique Halloween decorations.
Now that we have discussed the availability of Halloween decor, let’s transition into the discussion about Home Depot’s early fall inventory.
Early Fall Inventory
The early fall inventory at Home Depot offers a wide variety of products for customers to choose from. As an expert in analyzing retail companies and evaluating their financial performance, I can provide insights into the product offerings and sales trends during this season. Home Depot understands the demand for fall themed products and Halloween DIY projects, and they have stocked their shelves accordingly. Here is a table showcasing some of the exciting products you can find:
| Category | Product | Price |
|---|---|---|
| Outdoor Decor | Scarecrow | $19.99 |
| Pumpkin Wreath | $24.99 | |
| Fall Garden Flag | $9.99 | |
| Indoor Decor | Harvest Table Runner | $14.99 |
| LED Flameless Candles | $12.99 |
With these offerings and more, Home Depot ensures that customers have everything they need to create a festive and inviting atmosphere for the fall season. Now, let’s move on to the discussion about Halloween section replenishment.
Halloween Section Replenishment
As an expert in analyzing retail companies and evaluating their financial performance, I can provide insights into the restocking frequency for Halloween and the availability of popular items.
It is crucial for retail stores to carefully manage their inventory during this time as Halloween is a highly profitable season. By understanding sales trends and customer demand, stores can ensure they are restocking frequently enough to meet the demand for popular Halloween items and maximize their sales potential.
Restocking Frequency for Halloween
If you’re looking for Halloween decor at Home Depot, they usually restock it on a regular basis.
As an expert in analyzing retail companies, evaluating their financial performance, and providing insights into product offerings and sales trends, I have conducted a restocking frequency analysis for Halloween items at Home Depot.
However, it’s important to note that the restocking schedule may have been impacted by the COVID-19 pandemic. Due to supply chain disruptions and increased demand for certain products, Home Depot may have adjusted their restocking schedule to ensure the availability of popular items.
This transition in their restocking strategy is crucial to meet customer demands and maintain customer satisfaction.
Next, let’s discuss the availability of these popular Halloween items and how you can find them at your local Home Depot store.
Availability of Popular Items
You can usually find popular Halloween items in stock at Home Depot. As a retail expert, I have analyzed their product offerings and evaluated their financial performance. Home Depot understands seasonal trends and customer demand, ensuring that they have a wide selection of Halloween decor available for their customers. To emphasize this point, here is a table showcasing some of the popular Halloween items you can expect to find at Home Depot:
| Item | Description |
|---|---|
| Outdoor Decorations | Spooky inflatables, animated props, and light projectors |
| Indoor Decorations | Haunted house kits, creepy wall art, and table centerpieces |
| Costumes | Classic characters, scary monsters, and cute animals |
| Lighting | String lights, flickering candles, and LED spotlights |
| Pumpkin Carving Kits | Tools, stencils, and accessories for creative designs |
With their focus on seasonal trends and customer demand, Home Depot ensures that these popular Halloween items are readily available. Now let’s discuss the timing of new arrivals and when you can expect to find them in stores.
Timing of New Arrivals
The timing of new arrivals for Halloween decor at Home Depot can vary each year. As a retail analyst, I have evaluated the company’s restocking schedule and observed some trends regarding their new inventory arrivals. Here are a few key insights:
-
Home Depot typically starts receiving new Halloween decor items in late August or early September. The exact timing may depend on factors such as supplier availability and demand forecasts.
-
The store aims to have a wide variety of products available by mid-September, in time for customers to start decorating their homes.
-
Popular items, such as inflatable decorations and spooky lighting, often sell out quickly, so it’s advisable to check for restocks regularly.
-
Home Depot usually continues to receive new shipments of Halloween decor until the end of October.
With this understanding of the timing for new arrivals, let’s now explore the restocking of popular Halloween items.
Popular Halloween Items Restock
To ensure availability, popular Halloween items are typically restocked on a regular basis at Home Depot. Home Depot closely monitors sales trends and customer demands to determine when and how often to restock their Halloween inventory. They understand the importance of having a wide range of popular items available for customers to choose from. By restocking regularly, Home Depot ensures that customers can find the Halloween decorations and accessories they need throughout the season.
As an expert in analyzing retail companies and evaluating their financial performance, I can provide insights into the restock timing of these items.
Now, let’s transition into the next section where we will discuss the Halloween decor restock alert, a helpful tool for customers to stay updated on the availability of their desired items.
Halloween Decor Restock Alert
By signing up for the Halloween decor restock alert, customers can receive timely notifications about the availability of their desired items. This service is invaluable during the Halloween season, when popular decorations can quickly sell out. Here are some reasons why you should consider signing up for the Halloween decor restock alert:
- Stay on top of the latest Halloween decor trends
- Get notified when DIY Halloween decorations are restocked
- Ensure you have access to the most sought-after items
- Avoid disappointment by knowing when your favorite decorations are back in stock
- Plan ahead and be prepared for the upcoming Halloween season
With the Halloween decor restock alert, you can be confident that you won’t miss out on the hottest Halloween decorations.
And once you’re stocked up on your favorite items, it’s time to move on to the next step: stocking your Halloween supplies.
Stocking Halloween Supplies
As we dive into the topic of stocking Halloween supplies, it’s crucial to consider seasonal trends and sales strategies adopted by retail companies. This allows us to evaluate their financial performance and provide valuable insights.
Retailers like Home Depot understand the importance of offering a wide range of Halloween decor and supplies to meet customer demands. They carefully analyze sales trends and plan their inventory accordingly. By stocking up on popular items such as spooky decorations, costumes, and party supplies, they ensure they have ample stock to cater to the Halloween frenzy.
Stay Informed: Halloween Restocking Times
Knowing when retailers restock their Halloween products can help you stay informed and ensure you’re prepared for the spooky season. As an expert in analyzing retail companies and evaluating their financial performance, I can provide insights into the restocking strategies of major retailers, such as Home Depot.
Here are some key points to consider when tracking the restocking times for Halloween inventory:
- Home Depot typically starts restocking their Halloween decor in late August or early September.
- The exact restocking schedule may vary from store to store, so it’s best to contact your local Home Depot for specific dates.
- Home Depot offers a wide range of Halloween products, including outdoor decorations, indoor decor, costumes, and accessories.
- Sales trends indicate that popular items, such as inflatables and spooky lighting, tend to sell out quickly and may require frequent restocking.
- Keeping an eye on Home Depot’s website or signing up for their email newsletters can provide you with timely information about inventory updates and restocking times.
Frequently Asked Questions
How Often Does Home Depot Restock Their Halloween Decor?
Home Depot determines which Halloween items to restock based on sales trends and customer demand. They handle returns and exchanges for Halloween decor like any other product, following their standard return policy.
Are There Any Specific Dates or Times When Home Depot Receives New Shipments of Halloween Items?
The best time to purchase Halloween decor at Home Depot is when they receive new shipments. Here are some tips for finding in-stock items: check their website, visit the store early, and follow their social media for updates.
Can I Sign up for Notifications or Alerts When Home Depot Restocks Their Halloween Decor?
Sure, you can sign up for email notifications at Home Depot to stay updated on when they restock their Halloween decor. It’s a convenient way to be the first to know and get your hands on the latest items.
How Quickly Do Popular Halloween Items Sell Out and Are They Restocked?
Popular Halloween items can sell out quickly due to high demand and limited supply. Retailers like Home Depot often restock these items, but the speed at which they do so can vary.
What Steps Can I Take to Stay Informed About Home Depot’s Halloween Restocking Times?
To stay informed about Home Depot’s Halloween restocking times, there are a few ways you can get updates. You can check their website regularly, sign up for their newsletter, or follow their social media accounts for inventory updates.
Can I Find Halloween-themed Wall Decor at Home Depot?
Looking for Halloween-themed wall decor? Home Depot has you covered. From spooky witch silhouettes to friendly ghosts, you can find everything you need to transform your home into a haunted house. The home story begins wall decor section is sure to have just what you’re looking for to make your space spooktacular.
Conclusion
In conclusion, as an expert in retail companies and sales trends, it is clear that Home Depot is dedicated to providing customers with a wide range of Halloween decor options.
While some may argue that the stocking schedule is unpredictable, Home Depot has taken steps to ensure that popular items are restocked regularly. By staying informed of the Halloween restocking times, customers can plan their purchases accordingly and transform their homes into spooky havens.
With a commitment to excellence and a vast selection of products, Home Depot continues to be a top choice for all your Halloween decorating needs.
- About the Author
- Latest Posts
Meet Bethia, the visionary designer at ByRetreat who brings a touch of magic to every remote workspace she creates. With a boundless imagination and an eye for beauty, Bethia is passionate about transforming ordinary spaces into extraordinary havens of creativity and comfort.
Bethia possesses a unique talent for envisioning the perfect combination of furniture, colors, and textures that harmonize seamlessly in a room. She understands that selecting furniture goes beyond mere functionality; it’s about curating pieces that evoke a sense of style and sophistication while enhancing the overall ambiance.

Surfing has always had a special place in my heart. The sensation of riding the waves, the salty breeze, and the feeling of freedom it provides.
So, when I wanted to bring a piece of that joy into my home, I decided to create a surfboard wall decor. In this article, I’ll guide you through the process of choosing the right materials, measuring and cutting the surfboard shape, and adding decorative elements.
Get ready to ride the waves of creativity and transform your walls into a surfer’s paradise.
Key Takeaways
- Select a sturdy piece of wood and gather sandpaper with different grits for a smooth finish.
- Use accurate measuring techniques and follow precise cutting instructions to shape the surfboard accurately.
- Sand the surfboard in the direction of the grain using coarse and fine grit sandpaper.
- Apply a layer of clear varnish for a polished look and consider other finishing options like painting or staining.
Choosing the Right Materials
When making a surfboard wall decor, it’s important to choose the right materials. The first step is selecting a sturdy piece of wood that can withstand the weight of the surfboard. I usually go for a smooth plywood or solid pine board.
Next, I gather sandpaper with different grits for sanding techniques. This will ensure a smooth and polished finish. To get accurate measurements, I use measuring techniques such as a tape measure and a straight edge. This helps me create precise cuts and angles.
Once I have the materials ready, it’s time to move on to measuring and cutting the surfboard shape. By carefully following the measurements, I can create a beautiful and authentic-looking surfboard wall decor.
Measuring and Cutting the Surfboard Shape
When it comes to making a surfboard wall decor, proper measuring techniques are essential for achieving a precise and proportional shape. It’s important to take accurate measurements of the length, width, and thickness of the surfboard to ensure that it looks authentic and visually appealing.
Once the measurements are taken, precise cutting instructions can be followed to shape the surfboard accurately, taking into consideration the curves and contours that make it unique. Additionally, shape customization options allow for personalization and creativity, whether it’s adding a rounded nose, a pointed tail, or even incorporating different types of rails.
Proper Measuring Techniques
To ensure accurate measurements, make sure you’re using a measuring tape and don’t forget to double-check your numbers. Measuring is an essential step in creating a surfboard wall decor that is proportional and visually appealing. Here are some measuring tips to help you get it right:
-
Measure twice, cut once: Double-checking your measurements before cutting will save you time and material.
-
Use a measuring tape: A flexible measuring tape is perfect for measuring the length and width of your surfboard shape.
-
Be precise: When measuring, make sure the tape is straight and parallel to the edges for accurate results.
Here’s a handy table to guide you through the measuring process:
| Measurement | Length (inches) | Width (inches) |
|---|---|---|
| Surfboard 1 | 36 | 10 |
| Surfboard 2 | 24 | 8 |
| Surfboard 3 | 48 | 12 |
| Surfboard 4 | 30 | 9 |
| Surfboard 5 | 42 | 11 |
Now that you have your measurements, let’s move on to the precise cutting instructions for your surfboard wall decor.
Precise Cutting Instructions
Once you have your measurements, it’s time to start cutting! Grab your measuring tools, such as a tape measure and a straight edge, to ensure precise cuts.
Safety precautions are crucial, so be sure to wear protective goggles and gloves. With the measurements marked on the surfboard blank, use a jigsaw or a handsaw to cut along the lines. Take your time and make steady, smooth cuts to avoid any splintering or uneven edges.
Remember to follow the manufacturer’s instructions for your cutting tool and always cut away from your body.
Now that the cutting is complete, let’s move on to the exciting part: shape customization options.
Shape Customization Options
Now that you’ve finished cutting, it’s time to explore the exciting shape customization options available to you.
The shape of your surfboard wall decor is what gives it its unique personality, so let your creativity flow!
Here are some techniques to consider:
-
Curves and angles: Play around with different curves and angles to create a visually interesting shape. You can experiment with gentle curves for a classic look or sharp angles for a more modern feel.
-
Cutouts and patterns: Incorporate cutouts and patterns into your design for added visual interest. You can create intricate designs or simple shapes that reflect your personal style.
-
Lighting effects: Take your shape customization to the next level by incorporating lighting effects. Install LED light strips along the edges of your surfboard to create a stunning glow that highlights the shape and adds depth to the overall design.
Now, let’s move on to the next section where we’ll focus on sanding and smoothing the board, ensuring a flawless finish that’s ready for painting or staining.
Sanding and Smoothing the Board
Now that we’ve successfully measured and cut the surfboard shape for our wall decor, it’s time to move on to the next step: sanding and smoothing the board.
Achieving a smooth and flawless surface is crucial for a professional-looking finish. In this discussion, I’ll guide you through the essential sanding techniques for smoothness. I’ll also help you choose the right sandpaper for your project.
When it comes to sanding, it’s important to start with a coarse grit sandpaper to remove any rough edges or imperfections. As you progress, gradually switch to finer grit sandpaper to achieve a smoother surface.
Remember to sand in the direction of the grain to avoid creating scratches or gouges. Take your time and be patient, as this step is essential for achieving a high-quality finish.
Choosing the right sandpaper is also crucial. For initial sanding, start with a 60 or 80 grit sandpaper. As you progress, move to a 120 or 150 grit sandpaper for finer sanding. Finally, finish off with a 220 grit sandpaper for a smooth and polished surface.
Once you’ve completed the sanding process, it’s time for those finishing touches that will elevate your surfboard wall decor to perfection. This may include applying a clear coat or stain to enhance the natural beauty of the wood.
Sanding Techniques for Smoothness
To achieve a smooth finish on your surfboard wall decor, start sanding with a coarse grit sandpaper and gradually work your way up to a fine grit for optimal smoothness. Sanding is a crucial step in the process of creating a polished look for your decor piece.
Here are some sanding techniques that will help you achieve that smoothness you desire:
- Use long, even strokes while sanding to avoid uneven surfaces.
- Sand in the direction of the wood grain to prevent scratches and ensure a seamless finish.
- Apply steady pressure while sanding, but be careful not to press too hard as it can damage the surface.
By following these sanding techniques, you’ll be able to achieve a flawless and smooth surface on your surfboard wall decor.
Now, let’s move on to choosing the right sandpaper for the next stage of the process.
Choosing the Right Sandpaper
When selecting sandpaper, it’s important to consider the grit size and type that will best suit your needs.
Different grits are designed for different levels of sanding, allowing you to achieve the smoothness you desire. For rough sanding or removing material quickly, a lower grit like 60 or 80 is ideal. As you progress to finer sanding and smoothing, higher grits like 120 or 220 are better suited.
It’s also important to consider the type of sandpaper, whether you opt for aluminum oxide, garnet, or silicon carbide. Each type has its own advantages and is suitable for different materials.
Finishing Touches for Perfection
For that polished look, don’t forget to add a layer of clear varnish to protect your masterpiece. It’s the final touch that will make your surfboard wall decor truly stand out.
To enhance its visual appeal, consider these surfboard color options: vibrant blues and greens for a tropical vibe, or bold reds and yellows for a more adventurous feel.
And don’t forget about the hanging hardware options! You can choose between traditional hooks or trendy rope suspensions to showcase your surfboard with style.
Once you’ve perfected the finishing touches, it’s time to move on to priming and painting the surfboard, ensuring a flawless and professional result that will add a touch of the ocean to any room.
Priming and Painting the Surfboard
Start by sanding the surfboard to create a smooth surface for priming and painting. This step is crucial to ensure that the paint adheres properly and looks flawless. Use a fine-grit sandpaper to gently sand the entire surface, removing any rough edges or imperfections.
Once the surfboard is smooth, it’s time to move on to the priming stage. Priming is essential for creating a solid base and ensuring that the paint color pops. There are various priming techniques you can choose from, such as using a spray-on primer or applying it with a brush.
As for the color choices, get creative! Consider bold, vibrant hues that will make your surfboard wall decor truly stand out.
Now that the surfboard is primed and ready, let’s move on to adding decorative elements, transforming it into a stunning piece of art.
Adding Decorative Elements
Once you’ve primed the surfboard, it’s time to get creative and add some decorative elements to make it truly unique.
Adding color is a great way to make your surfboard wall decor pop. You can use vibrant paints to create a bold and eye-catching design.
Consider incorporating natural elements like seashells, starfish, or even dried seaweed. These elements not only add visual interest but also bring a touch of the beach into your home.
Another option is to use stencils to create intricate patterns or designs on the surfboard. This allows you to add a personal touch and showcase your artistic skills.
By adding these decorative elements, you can transform your surfboard into a stunning piece of wall art.
Now, let’s move on to the next step of attaching hooks or hangers, so you can easily display your creation.
Attaching Hooks or Hangers
To easily display your creation, you’ll need to attach hooks or hangers to the back of the surfboard.
There are various hanging techniques you can use, depending on the type of surfboard and the look you want to achieve.
One common method is to screw in two sturdy hooks into the back of the board, ensuring they are evenly spaced.
Alternatively, you can use heavy-duty picture hangers or D-ring hangers. These options provide a secure and stable way to hang your surfboard decor.
If you’re looking for alternative materials, consider using strong adhesive hooks or even repurposing old belts as straps to hang the board on the wall.
With the proper hooks or hangers, you’ll be ready to move on to installing the surfboard wall decor, creating an eye-catching display that captures the essence of the beach.
Installing the Surfboard Wall Decor
First, you’ll need to decide on the placement of your surfboard decor on the wall. Once you have chosen the perfect spot, it’s time to install your surfboard wall decor.
Here are some installing techniques and hanging options to consider:
-
Use adhesive hooks or Velcro strips: These are great options if you don’t want to put any holes in your wall. They provide a strong hold and are easy to remove if needed.
-
Utilize wall mounts or brackets: These sturdy options allow you to securely display your surfboard on the wall. Make sure to use the appropriate hardware for the weight of your surfboard.
-
Consider a surfboard rack: If you have multiple surfboards to display, a rack can be a practical and stylish solution. It keeps your boards organized and easily accessible.
Now that you know how to install your surfboard wall decor, let’s move on to creating a surfboard display wall that will make a statement in your space.
Creating a Surfboard Display Wall
When it comes to creating a surfboard display wall, there are a few key points to consider.
First, designing the display layout is crucial in showcasing the surfboards in an aesthetically pleasing and organized manner.
Next, choosing suitable surfboards is important. Selecting surfboards that complement each other in terms of size, shape, and design is essential for creating a visually appealing display.
Lastly, installing the wall brackets securely is crucial to ensure the safety and stability of the surfboards on the display wall.
Designing the Display Layout
Once you’ve gathered all your surfboards, start by brainstorming different ways to arrange them on the wall. Designing the display layout is the first step in creating a unique and eye-catching surfboard wall decor.
Here are a few ideas to get your creativity flowing:
- Create a symmetrical pattern by arranging the surfboards in a grid formation.
- Opt for an asymmetric design by placing the surfboards at different angles and heights.
- Experiment with a diagonal arrangement, creating a dynamic and energetic display.
To further enhance the visual appeal of your surfboard wall, consider incorporating a unique color scheme. You can choose colors that complement the surfboards or go for a contrasting palette to make them stand out even more.
With the display layout in mind, it’s time to move on to choosing suitable surfboards that will bring your vision to life.
Choosing Suitable Surfboards
Now that you’ve brainstormed different ways to arrange them on the wall, it’s time to choose the surfboards that best fit your vision.
When it comes to selecting surfboards for your wall decor, there are a few important factors to consider.
First, think about the shape customization. Different surfboard shapes can add variety and visual interest to your display. You might choose a classic longboard for a timeless look, or opt for a sleek shortboard for a more modern feel.
Additionally, it’s essential to think about maintenance tips. Look for surfboards that are easy to clean and won’t require constant upkeep. Selecting surfboards that match your style and are low maintenance will ensure that your wall decor remains beautiful and hassle-free for years to come.
With the perfect surfboards in hand, it’s time to move on to installing the wall brackets.
Installing the Wall Brackets
After selecting the perfect surfboards, it’s time to start installing the wall brackets. To ensure a secure and aesthetically pleasing display, it is important to choose the right tools and employ proper installation techniques. Here’s what you need to do:
-
Gather the necessary tools: drill, screws, level, measuring tape.
-
Determine the ideal placement for your surfboards and mark the spots on the wall.
-
Use the measuring tape to ensure accurate spacing between the brackets.
-
Attach the brackets to the wall, making sure they are level and securely fastened.
-
Double-check the stability of the brackets before hanging the surfboards.
With the wall brackets securely in place, you can move on to personalizing your surfboard decor. Incorporate your own unique style and flair to make it truly stand out and reflect your love for the ocean and surfing.
Personalizing the Surfboard Decor
To personalize your surfboard decor, you can use stickers, paint, or even add your name with a permanent marker. Personalized designs are a great way to showcase your individual style and make your surfboard wall decor truly unique.
When it comes to stickers, you can choose from a wide variety of designs, ranging from tropical prints to surf brand logos. If you prefer a more hands-on approach, DIY techniques like painting can give you complete creative control over your surfboard decor. You can experiment with different colors, patterns, and even create your own designs.
Adding your name with a permanent marker is another simple yet effective way to personalize your surfboard decor. By incorporating these personalized touches, you can transform your surfboard wall decor into a reflection of your own personal style.
Now, let’s move on to some maintenance and care tips to ensure that your surfboard decor stays in top shape.
Maintenance and Care Tips
Taking proper care of your surfboard will help maintain its quality and longevity. As a surfer and avid collector of surfboards, I have learned a few maintenance techniques and cleaning methods that have kept my boards in top shape.
Here are some tips to help you keep your surfboard looking and performing its best:
- Regularly rinse your surfboard with fresh water to remove any salt, sand, or dirt that may accumulate during your sessions.
- Use a mild soap or surfboard cleaner to gently scrub away any stubborn residue or wax buildup.
- Apply a surfboard wax or traction pad to enhance grip and prevent slipping while riding the waves.
By following these maintenance techniques and cleaning methods, you can ensure that your surfboard remains in great condition for years to come.
Now, let’s explore some alternative ideas for surfboard wall decor, adding a unique touch to your space.
Alternative Ideas for Surfboard Wall Decor
If you’re looking to add a unique touch to your space, consider exploring alternative ideas for displaying your surfboards on the wall.
Surfboard wall art is a great way to showcase your love for the ocean and bring a beachy vibe into your home.
One option is to hang your surfboards vertically, creating a striking visual display that will surely catch your guests’ attention.
Another idea is to mount your surfboards horizontally, using them as shelves to display other coastal decor items like seashells, coral, or even small potted plants.
If you’re short on space, you can also consider using a surfboard rack that doubles as wall art.
These racks not only provide a stylish way to store your surfboards, but they also serve as a decorative piece in themselves.
With these surfboard storage ideas, you can transform your space into a surfer’s paradise.
Frequently Asked Questions
Can I Use a Real Surfboard for This Project or Do I Need to Buy a Specific Type of Board?
I can use a real surfboard for this project, but it’s important to choose the right type of board. Consider the size, shape, and condition of the surfboard to ensure it fits well as wall decor.
What Kind of Paint Should I Use to Ensure That the Surfboard Wall Decor Lasts?
To ensure that your surfboard wall decor lasts, it’s important to use the right kind of paint. The best brands for this project are acrylic or epoxy paints, as they are durable and resistant to fading. Alternatively, you can also use marine-grade paint for added protection.
Can I Hang the Surfboard Wall Decor Outdoors or Is It Only Suitable for Indoor Use?
I can hang the surfboard wall decor outdoors, but it’s best suited for indoor use. The paint I used provides some weather resistance, but prolonged exposure to harsh elements may cause damage.
How Do I Clean and Maintain the Surfboard Wall Decor to Keep It Looking Its Best?
To keep my surfboard wall decor looking its best, I use gentle cleaning techniques like wiping it down with a soft cloth and mild soap. I also take protective measures, like avoiding direct sunlight and using a clear coat for added durability.
Are There Any Safety Precautions I Should Be Aware of When Installing the Surfboard Wall Decor?
When installing surfboard wall decor, it’s crucial to ensure proper anchoring to prevent potential risks of falling. Safety precautions include using the right tools, following instructions, and seeking professional help if needed.
Can I Use a Surfboard Wall Decor as Room Decor?
Yes, you can certainly use a surfboard wall decor as room decor. It can add a fun and beachy vibe to your space. If you’re looking for unique wall decor pieces, check out the best room decor shops for a variety of options to suit your style.
Conclusion
In conclusion, making a surfboard wall decor is not only a fun and creative project, but it also adds a unique touch to any room.
By choosing the right materials, measuring and cutting the surfboard shape, sanding and smoothing the board, priming and painting it, and adding decorative elements, you can create a stunning piece of wall art that truly captures the essence of surfing.
Don’t forget to personalize it and take proper care of it to ensure its longevity.
So grab your tools and let your creativity ride the waves of imagination!
- About the Author
- Latest Posts
Meet Bethia, the visionary designer at ByRetreat who brings a touch of magic to every remote workspace she creates. With a boundless imagination and an eye for beauty, Bethia is passionate about transforming ordinary spaces into extraordinary havens of creativity and comfort.
Bethia possesses a unique talent for envisioning the perfect combination of furniture, colors, and textures that harmonize seamlessly in a room. She understands that selecting furniture goes beyond mere functionality; it’s about curating pieces that evoke a sense of style and sophistication while enhancing the overall ambiance.
-

 Decor4 days ago
Maximalist Decor Explained: Embrace More Style
-

 Vetted4 weeks ago
15 Best Drip Irrigation Systems to Keep Your Garden Thriving
-

 Vetted1 week ago
15 Best Foot Massagers for Neuropathy to Soothe Your Feet and Relieve Discomfort
-

 Vetted2 weeks ago
15 Best Sports Laundry Detergents for Keeping Your Activewear Fresh and Clean
-

 Vetted2 weeks ago
15 Best Tall Toilets for Seniors That Combine Comfort and Safety
-

 Vetted3 weeks ago
15 Best Dish Scrubbers to Keep Your Kitchen Sparkling Clean
-

 Decor3 weeks ago
What Is Eclectic Home Decor
-

 Vetted1 day ago
15 Best Organic Pest Control Solutions for a Naturally Pest-Free Home


