Beginners Guides
Erase Sharpie from Plastic: Best Methods Revealed
2025
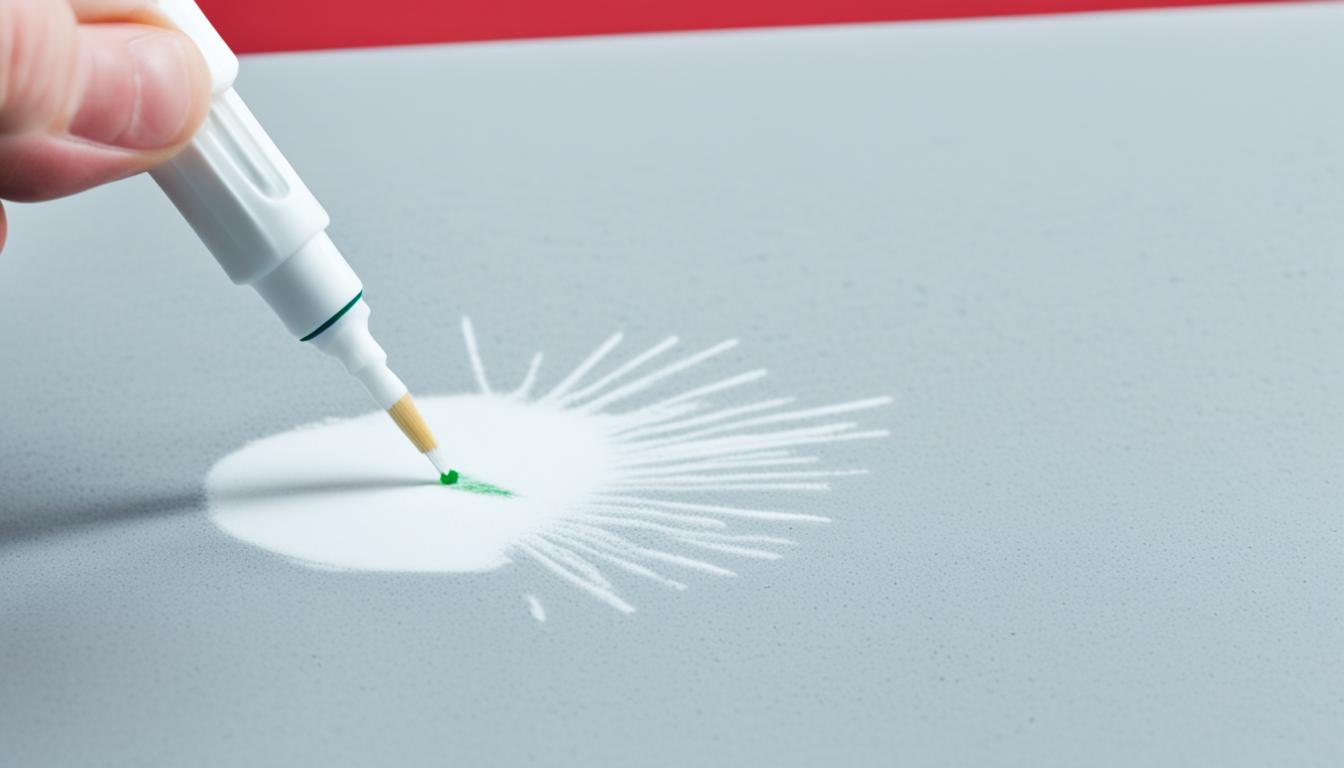
Did you know that permanent marker stains can be one of the most stubborn and challenging marks to remove? Especially when it comes to plastic surfaces, where the ink seems to latch on with an iron grip. But fear not! There are effective methods to erase Sharpie from plastic and restore your items to their former glory.
Key Takeaways:
- Permanent marker stains on plastic can be successfully removed with the right methods.
- Identifying the type of marker (water-based or oil-based) is crucial for determining the appropriate removal technique.
- Isopropyl alcohol and acetone are common solvents used to remove permanent marker from plastic.
- Mr. Clean Magic Eraser is an effective tool for lifting permanent marker off hard plastics.
- Always test the cleaning method on a small, inconspicuous area first and rinse thoroughly after cleaning.
Determine the Type of Marker
Before attempting to remove permanent marker from plastic, it is important to determine the type of marker used. Permanent markers can be either water-based or oil-based. Regular Sharpies are typically water-based, while Sharpie paint pens are oil-based.
To identify the type of marker, a dab of isopropyl alcohol can be applied to the marker using a cotton swab. If the pigment is picked up, it is likely a water-based marker. If not, it is an oil-based marker.
If you’re unsure whether your marker is water-based or oil-based, this simple test can help you distinguish the type before proceeding with the removal process.
Knowing the type of marker is essential as it determines the appropriate method and solvents to use for successful marker removal without damaging the plastic surface.
Removing Marker from Plastic
When it comes to removing permanent marker from plastic, there are several methods that can be effective. One of the mildest solvents to try is isopropyl alcohol. This can be easily applied using a clean, plain white paper towel. Simply soak the towel in alcohol and gently dab it on the marker stain. Then, lift up the towel to remove the ink. Isopropyl alcohol acts as a solvent, breaking down the marker pigments and making them easier to remove.
If isopropyl alcohol doesn’t do the trick, you can consider using acetone. However, it’s important to exercise caution when using acetone on plastic, as it is a stronger solvent that may potentially damage the surface. It’s always recommended to test the acetone on a discreet area first before proceeding with the full application. Apply the acetone to a clean, plain white paper towel, and gently dab it on the stain. Again, lift up the towel to remove the ink. Exercise caution and avoid prolonged contact with the plastic surface.
Another effective method for removing marker from plastic is using a Mr. Clean Magic Eraser. This versatile cleaning tool has been reported to be quite effective in lifting permanent marker off hard plastics. Simply wet the Magic Eraser and gently scrub the marker stain. The abrasive texture of the Magic Eraser helps to lift off the marker ink without damaging the plastic surface.
Comparison Table: Methods for Removing Marker from Plastic
| Method | Effectiveness | Caution |
|---|---|---|
| Isopropyl Alcohol | Effective | Minimal risk of damage, test on a discreet area first |
| Acetone | Potentially effective, but higher risk of damage | Test on a discreet area first, exercise caution |
| Mr. Clean Magic Eraser | Highly effective | Gentle scrubbing may be required |
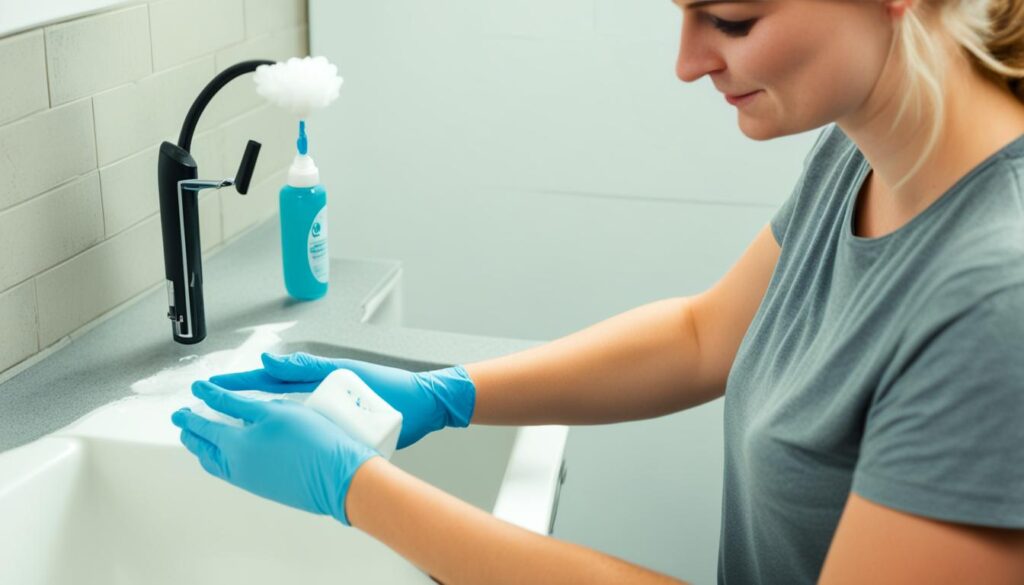
Remember, even though these methods have been reported to be effective, it’s always a good idea to test them on a small, inconspicuous area of the plastic surface first. This helps ensure that the solvent or cleaning tool doesn’t cause any damage or discoloration. Additionally, always rinse the plastic thoroughly after cleaning to remove any residue from the cleaning solution.
With these methods and a bit of patience, you can successfully remove permanent marker stains from plastic and restore the surface to its original condition.
Removing Marker from a Whiteboard
When it comes to removing permanent marker from a whiteboard, there are a few effective methods to try. One popular option is to use rubbing alcohol or hand sanitizer, both of which contain alcohol that helps dissolve the marker ink. You can apply rubbing alcohol using a cloth or cotton ball, gently rubbing the stained area until the ink starts to lift off. Hand sanitizer can be directly applied to the marker stain, allowing the alcohol to break down the ink. Remember to use these products sparingly and avoid saturating the whiteboard.
If you’re looking for an alternative solution, here’s a surprising trick: cover the marker writing with a removable whiteboard marker. Allow it to sit for a few seconds and then erase the marks as you normally would. The solvent in the dry-erase marker helps re-solubilize the resins in the permanent inks, making it easier to remove the stain. This method can be particularly useful for older or stubborn marker stains.
Remember, always test any cleaning method on a small, inconspicuous area of the whiteboard first to ensure it doesn’t cause any damage or discoloration.

With these tried and true techniques, you’ll be able to effectively remove permanent marker from your whiteboard, leaving it clean and ready for your next brainstorming session or presentation.
Removing Marker from Fabric
To remove permanent marker from fabric, immediate treatment is recommended. When dealing with a marker stain on fabric, it’s important to act quickly before the ink sets in. Here are some effective methods for removing marker stains from fabric:
1. Mineral Oil or Petroleum Jelly
Start by encircling the stain with mineral oil or petroleum jelly to prevent it from spreading further. This creates a barrier that hinders the ink from reaching clean areas of the fabric.
2. Isopropyl Alcohol
Using an eyedropper or cotton swab, apply isopropyl alcohol directly to the marker stain. Gently blot the stain with a clean cloth, working from the outside towards the center to avoid spreading the ink. Isopropyl alcohol acts as a solvent, breaking down the ink pigment and making it easier to remove.
3. Dishwashing Liquid
If the marker stain persists, mix a small amount of dishwashing liquid with warm water to create a soapy solution. Gently rub the solution into the stain using a clean cloth or sponge. Allow the solution to sit on the stain for at least 30 minutes, or overnight for tougher stains. Finally, rinse the fabric thoroughly with warm water to remove any remaining soap residue.
4. Amodex Ink & Stain Remover
Another effective option for removing marker stains from fabric is to use Amodex Ink & Stain Remover. This specialized product is formulated to tackle stubborn ink stains and is safe to use on a variety of fabrics. Apply a small amount of Amodex Ink & Stain Remover to the stained area and gently rub it with a brush. Rinse the fabric or launder it according to the care instructions.
Remember to always check the fabric care label before attempting any stain removal method and perform a patch test in an inconspicuous area to ensure the fabric isn’t damaged or discolored by the treatment.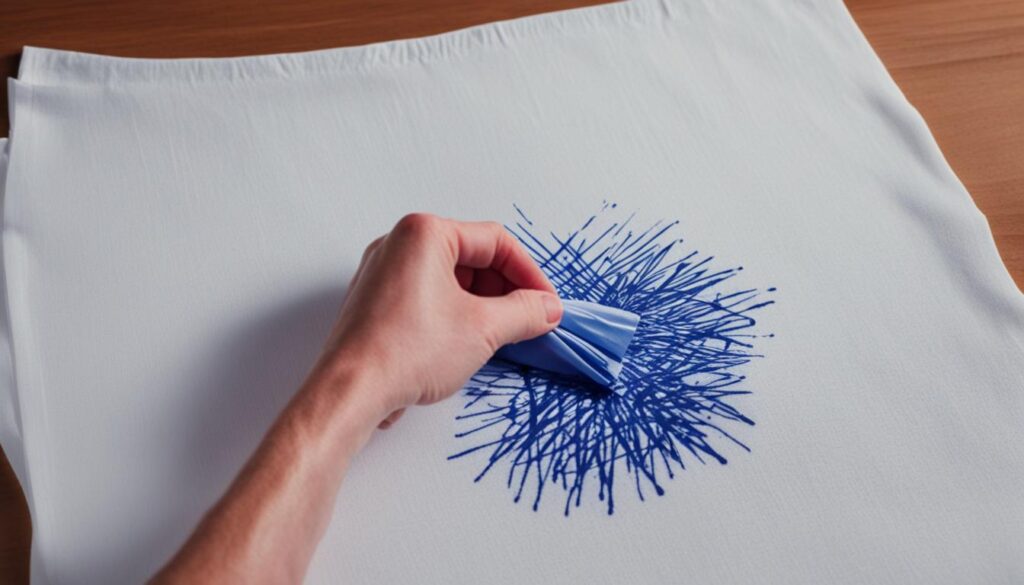
| Method | Materials Needed | Steps |
|—————|———————|——————————————————————-|
| Mineral Oil or Petroleum Jelly | Mineral oil or petroleum jelly| 1. Encircle the stain with the oil or jelly.
2. Prevent the stain from spreading. |
| Isopropyl Alcohol | Isopropyl alcohol, eyedropper or cotton swab| 1. Apply alcohol to the stain.
2. Blot the stain gently.
3. Work from the outside towards the center. |
| Dishwashing Liquid | Dishwashing liquid, warm water | 1. Create a soapy solution.
2. Rub the solution into the stain.
3. Let it sit for 30 minutes to overnight.
4. Rinse the fabric thoroughly. |
| Amodex Ink & Stain Remover | Amodex Ink & Stain Remover, brush | 1. Apply Amodex to the stained area.
2. Gently rub with a brush.
3. Rinse or launder the fabric. |
These methods can help you successfully remove marker stains from fabric, allowing you to salvage your favorite garments and avoid costly replacements. Remember to act quickly, choose the appropriate method for your fabric type, and test any products or solutions in an inconspicuous area before applying them to the stain.
Removing Marker from Wood
Removing permanent marker from wood can be a bit more challenging compared to other surfaces due to its porous nature. While some marks can be easily wiped off, others may require additional steps such as light sanding or refinishing. However, before resorting to drastic measures, it’s worth trying a technique known as the “drip blot” method.
The “drip blot technique” involves applying a solvent directly onto the marker stain, allowing it to dissolve the ink, and then blotting the area with an absorbent material like a clean white paper towel or cloth. This method can be effective in removing marker stains from wood without causing damage, but it’s crucial to test the chosen solvent on an inconspicuous area first to ensure it doesn’t harm the wood’s finish.
If the marker stain is on a wooden surface that can’t be easily laundered, such as furniture or walls with semi or high gloss paint, there are a few alternative solutions to consider. Rubbing alcohol or a Magic Eraser may work on these surfaces, but it’s important to exercise caution and test these methods in a hidden area to avoid any unwanted damage.
For larger and more stubborn marker markings, using a primer before painting over the area can help conceal the writing effectively. This technique can be particularly useful when restoring wooden furniture or walls with significant marker stains, ensuring a seamless and professional finish.
| Pros of the “drip blot” technique | Cons of the “drip blot” technique |
|---|---|
|
|
Expert Tip:
When removing marker stains from wood, always start with the mildest method and gradually escalate to stronger solvents or techniques if needed. Testing on a hidden area first and exercising patience throughout the process will help protect the wood and achieve the best results.
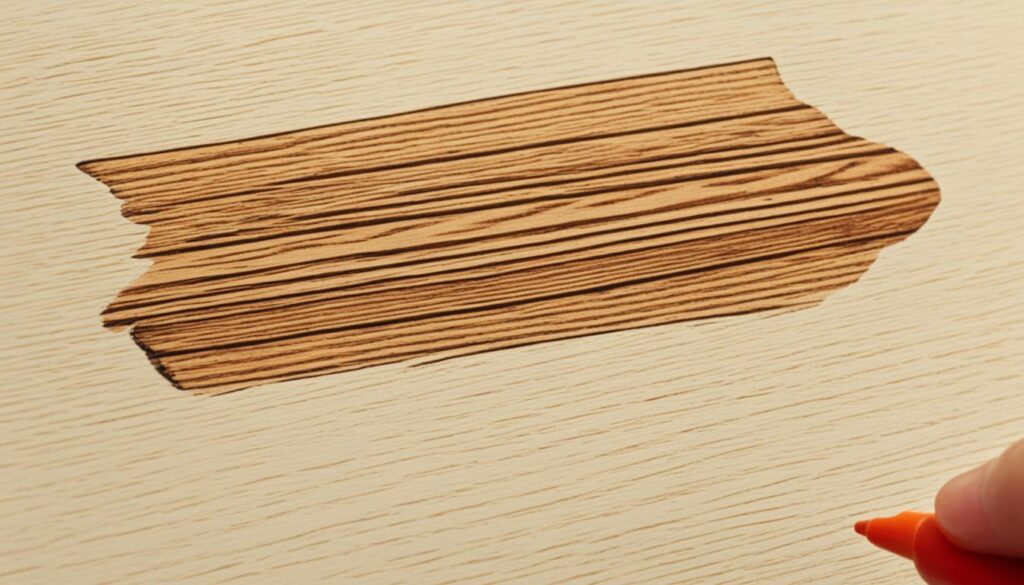
Removing permanent marker from wood requires a delicate touch, as preserving the integrity of the wood surface is essential. By using the appropriate methods and tools, such as the “drip blot” technique, it is possible to remove marker stains and restore the natural beauty of wood items.
Other DIY Methods for Removing Marker
If the previous methods didn’t fully remove the permanent marker from plastic, there are several other DIY methods you can try. These alternative solutions can gradually fade the stains away, providing you with more options for stubborn marker removal.
Tea Tree Oil
Tea tree oil is a natural remedy known for its various cleaning properties. You can apply a few drops of tea tree oil to a cotton bud and gently rub it into the stain. Over time, the tea tree oil will gradually fade the marker away without damaging the plastic surface.
Baking Soda Paste
A baking soda paste made by mixing toothpaste and baking soda can be an effective solution for clearing off Sharpie marks on plastic. Apply the paste directly to the stain and gently scrub it in with a soft cloth or sponge. The abrasive properties of baking soda will help lift the marker, while the toothpaste adds a mild cleaning element to the mixture.
Hand Sanitizer
Hand sanitizer contains high alcohol content, making it an effective solvent for dissolving marker stains on plastic items. Simply apply a small amount of hand sanitizer to a clean cloth or sponge and rub it onto the stain until it starts to lift. The alcohol in the hand sanitizer will break down the ink, allowing it to be easily wiped away.
Hairspray
Hairspray, specifically the alcohol content in hairspray, can also be used to fade marker stains on plastic. Spray a small amount of hairspray directly onto the stain and lightly scrub it with a cloth or sponge. The alcohol in the hairspray will help dissolve the marker ink, making it easier to remove.
Stain Remover
If all else fails, you can try using a specialized stain remover designed to tackle Sharpie stains on plastic. Amodex Ink & Stain Remover is a popular choice that effectively eliminates stubborn markers. Follow the instructions on the product’s packaging and use a brush to gently rub the stain remover into the marker stain. Rinse or launder the plastic item afterward to ensure the residue is completely removed.
With these other DIY methods, you have additional options for removing permanent marker stains from plastic. Whether you choose tea tree oil, baking soda paste, hand sanitizer, hairspray, or a dedicated stain remover, you can experiment and find the solution that works best for your specific marker removal needs.
| DIY Method | Materials | Instructions |
|---|---|---|
| Tea Tree Oil | Tea tree oil, cotton bud | Apply a few drops of tea tree oil to a cotton bud and gently rub it into the stain. Repeat until the marker fades away. |
| Baking Soda Paste | Toothpaste, baking soda | Mix toothpaste and baking soda to create a paste. Apply the paste to the stain and scrub gently with a cloth or sponge. |
| Hand Sanitizer | Hand sanitizer, clean cloth or sponge | Apply a small amount of hand sanitizer to a cloth or sponge and rub it onto the stain until it starts to lift. Wipe away the ink. |
| Hairspray | Hairspray, cloth or sponge | Spray a small amount of hairspray onto the stain and lightly scrub it with a cloth or sponge. Wipe away the dissolved ink. |
| Stain Remover | Amodex Ink & Stain Remover, brush | Follow the instructions on the stain remover’s packaging. Gently rub the stain remover into the marker stain using a brush. Rinse or launder the plastic item. |
Try these DIY methods and rest assured that one of them will effectively remove the stubborn marker stains from your plastic items.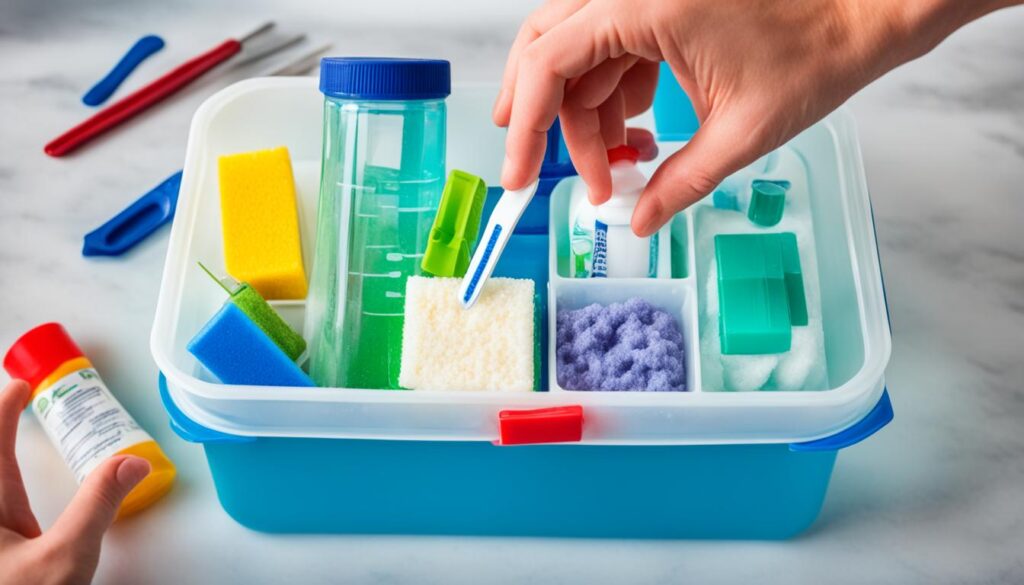
Pro Tips for Removing Marker from Plastic
When attempting to remove permanent marker from plastic, it is important to follow some pro tips to ensure successful and safe removal. These tips will help you tackle the stubborn stains effectively without damaging the plastic surface.
1. Test on Inconspicuous Area
Before applying any cleaning solution or method to remove the marker, it is crucial to test it on a small, inconspicuous area of the plastic surface. This test will determine whether the solution or method may cause discoloration or damage to the plastic. Choose an area that is hidden or less visible, and observe the results before proceeding with the full stain removal process.
2. Avoid Acetone-Based Solutions
Acetone is a strong solvent that can effectively remove permanent marker stains. However, it is highly recommended to avoid using acetone-based solutions on plastic surfaces. Acetone has the potential to make the plastic appear cloudy or even cause damage. Instead, opt for milder solvents or cleaning methods specifically designed for plastic surfaces.
3. Rinse Thoroughly
After successfully removing the marker stain, it is essential to thoroughly rinse the plastic item. This step is especially important if the plastic item comes into contact with food or if it will be used near sensitive areas. Rinse the plastic under running water or wipe it down with a clean, damp cloth to eliminate any residue from the cleaning solution. This will ensure that no traces of the cleaning solution remain on the surface and prevent any potential adverse effects.
By following these pro tips, you can confidently remove permanent marker stains from plastic surfaces, restoring their original appearance without causing any damage. Remember to test, avoid acetone-based solutions, and rinse thoroughly for optimal results.
| Pro Tips for Removing Marker from Plastic |
|---|
| Test on Inconspicuous Area |
| Avoid Acetone-Based Solutions |
| Rinse Thoroughly |
Understanding the Science Behind Marker Removal
Permanent markers use solvent-based ink, which consists of a solvent that evaporates and leaves behind the color pigment. This ink adheres firmly to the surface, making it difficult to remove. The challenge in removing marker from plastic lies in breaking down the pigment without causing damage to the plastic underneath.
The various methods mentioned earlier work by either dissolving the ink or lifting it off the surface using abrasives or solvents. By understanding the science behind marker removal, you can effectively tackle stubborn stains and restore your plastic items to their original state.
“The pigment adherence of permanent marker ink poses a unique challenge when it comes to removal. The ink’s solvent-based composition allows it to bind tightly to the surface, making it resistant to simple cleaning methods.”
When attempting to remove permanent marker, it’s important to choose a method that can break down the pigment without compromising the integrity of the plastic. Solvent-based markers require specific techniques and products to effectively remove the ink stain. By using the right combination of solvents, abrasives, and cleaning agents, you can achieve successful marker removal results.
Breaking Down the Pigment
The breaking down of the pigment involves applying a substance that can dissolve the ink or lift it off the surface. Solvent-based ink is designed to resist fading or smudging, so it requires a specialized approach.
Methods such as using isopropyl alcohol, acetone, or specialized stain removers work by dissolving the pigment, making it easier to wipe away. These substances break down the ink’s adherence to the plastic, allowing it to be lifted or dissolved during the cleaning process.
Choosing the Right Method
The effectiveness of each method will vary depending on the type and density of the permanent marker ink, as well as the type of plastic surface being treated. It’s important to remember that not all methods are suitable for all situations.
For instance, the alcohol method using isopropyl alcohol is a common and gentle approach for removing marker ink from plastic. It’s effective on most plastic surfaces and is less likely to cause damage. However, caution should be exercised when using stronger solvents such as acetone, as they can potentially damage the plastic if not used properly. Testing the cleaning solution on a small, inconspicuous area is always recommended.
The strength and durability of the plastic should also be taken into account when choosing a removal method. More delicate or porous plastics may require gentler techniques, while harder or non-porous plastics can handle stronger solvents or abrasives.
Protecting the Plastic Surface
When removing marker ink from plastic, it’s essential to protect the plastic surface from any potential damage. This can be achieved by:
- Testing the cleaning solution on a small, inconspicuous area before applying it to the entire surface.
- Using a gentle technique and gradually increasing the intensity if needed.
- Applying the cleaning solution with a soft cloth, sponge, or cotton swab to avoid scratching the plastic.
- Rinsing the plastic thoroughly after cleaning to ensure the removal of any residue.
By following these guidelines, you can safely and effectively remove marker ink from plastic surfaces without causing any harm.
Tackling Marker Stains with Patience and Care
Removing permanent marker from plastic can be a task that requires patience and the right tools. It’s important to approach the task with care and consideration for the material you’re working with. By understanding the science behind each method, you’ll be equipped with the knowledge to confidently tackle similar marker stain problems in the future.
Restoring plastic items to their former glory takes time and perseverance. Patience is key when dealing with stubborn marker stains. It may take multiple attempts and different techniques to completely remove the ink. Remember to remain patient throughout the process, working diligently to achieve the desired results.
Having the right tools is equally important. Depending on the type and intensity of the marker stain, different cleaning solvents or materials may be required. Gather the necessary supplies before starting the removal process to ensure you have everything you need.
One effective approach to restoring plastic items is by utilizing the proper cleaning methods and techniques. The combination of the right solvent and gentle scrubbing or blotting can make all the difference. By carefully following the instructions for each method and using the appropriate tools, you’ll increase your chances of successfully removing the marker stains.
Remember, restoring plastic items requires patience, the right tools, and a careful approach. Approach the task with care, ensuring you have the necessary supplies at hand. With perseverance and attention to detail, you’ll be able to remove stubborn marker stains and restore your plastic items to their original condition.
By applying these principles, you’ll be well-equipped to tackle marker stains on various plastic items. Whether it’s a beloved toy, a cherished piece of furniture, or any other plastic object, restoring them to their former glory is possible with the right approach and a little patience. Keep these tips in mind and confidently take on any marker stain challenge that comes your way.
Additional Cleaning Tips
When it comes to cleaning, there’s more than just removing permanent marker from plastic. Here are a few additional cleaning tips to help you tackle common stains and spills:
To remove stubborn rust stains from clothes and carpets, try using specific methods designed for rust stain removal. These methods may involve using commercially available rust stain removers or home remedies using ingredients like vinegar or lemon juice.
Grass stains can be notoriously tough to remove, especially from clothing. However, there are pantry staples that can come to the rescue. Try pre-treating the stain with a mix of baking soda and water or using a laundry detergent specially formulated to tackle tough stains.
Whether it’s dripping wax on a table or a candle mishap on fabric, removing candle wax can be a challenge. The key is knowing when to use cold or heat. For surfaces, freezing the wax with ice and then gently scraping it off can be effective. For fabrics, placing a paper towel over the wax and using a warm iron to melt and absorb it works well.
When it comes to paint removal from skin, scrubbing is not recommended as it can irritate the skin. Instead, try alternative methods such as using olive oil or baby oil to gently loosen the paint, followed by washing with mild soap and water.FAQ
How can I remove Sharpie from plastic?
How can I determine the type of marker used?
What are the best methods for removing marker from plastic?
How can I remove marker from a whiteboard?
What is the best way to remove marker from fabric?
How can I remove marker from wood?
Are there any other DIY methods for removing marker?
What are some pro tips for removing marker from plastic?
How does permanent marker ink work?
How should I approach removing marker stains with patience and care?
What are some additional cleaning tips?
- About the Author
- Latest Posts
Meet Katherine, the creative enthusiast at ByRetreat who infuses her boundless passion for design into every remote workspace she crafts. With an innate sense of creativity and an eye for unconventional beauty, Katherine brings a unique and inspiring perspective to the team.
Katherine’s love for design is infectious, and her ability to think outside the box sets her apart. She believes that true artistry lies in embracing a variety of styles and mixing them harmoniously to create captivating spaces. By combining different textures, colors, and patterns, Katherine weaves a tapestry of creativity that breathes life into each remote workspace.
Beginners Guides
The Best Time to Go on a Cruise for Perfect Weather
Sail through the maze of climate patterns to uncover the best times for perfect weather on a cruise, ensuring a memorable voyage awaits.

When it comes to choosing the best time to go on a cruise for perfect weather, it's like steering a maze of climate patterns to find that golden ticket. But fear not, as we have the compass to guide you in the right direction.
Understanding the seasonal nuances can make all the difference between a sun-kissed voyage and a rainy retreat. So, grab your sunscreen and pack your bags as we uncover the best times to set sail for idyllic weather conditions that will make your cruise a memorable experience.
Key Takeaways
- Caribbean cruises: December to mid-April for best weather conditions
- Alaskan cruises: Late June to mid-July for breathtaking landscapes
- Mediterranean cruises: April-May & September-October for ideal weather
- Hawaii cruises: Summer and fall months for dry weather and sunny skies
Ideal Months for Caribbean Cruises
For ideal weather conditions and a pleasant cruising experience in the Caribbean, consider booking your voyage between December and mid-April. During this period, the Caribbean boasts the best weather for cruises, with dry conditions and sunny skies prevailing. This stretch offers a fantastic opportunity to soak up the sun, enjoy water activities, and explore the stunning destinations in the region without the worry of rainstorms or excessive humidity.
Late summer into fall presents the cheapest time for Caribbean cruises, making it an excellent choice for budget-conscious travelers looking to experience the beauty of the Caribbean without breaking the bank. By opting for a cruise during this period, you can take advantage of lower prices and fewer crowds while still enjoying the warm waters and picturesque landscapes the Caribbean is known for.
Avoiding the peak season from December to April is advisable for those seeking a more peaceful and wallet-friendly experience. Sailing in late June through August allows travelers to steer clear of the crowds, particularly families on vacation during school breaks, making for a more relaxed and intimate cruise experience.
Optimal Weather for Alaskan Cruises

To maximize your Alaskan cruise experience, targeting late June through mid-July guarantees ideal weather conditions for enjoying the breathtaking landscapes and wildlife sightings in the region. During mid-July, you can witness the spectacular salmon run season, where various wildlife, including bears and bald eagles, gather along the rivers for this perfect phenomenon.
Late August to mid-September is another excellent window for Alaskan cruises, offering pleasant weather and often lower prices as it marks the end of the peak season. If your focus is on spotting whales, August is the prime time for your cruise, as these majestic creatures are commonly seen during this period.
For those seeking a balance between affordability and decent weather, mid-May to early June also presents a good opportunity to explore Alaska on a cruise. Keep these ideal weather periods in mind when planning your Alaskan adventure for an unforgettable experience.
Perfect Seasons for Mediterranean Cruises
April-May and September-October stand out as the prime seasons for Mediterranean cruises, offering ideal weather conditions and fewer crowds for a delightful experience exploring the region. During these shoulder seasons, the Mediterranean boasts milder temperatures and a more relaxed atmosphere compared to the peak tourist season in July and August. Traveling in April or May allows for pleasant sightseeing without the sweltering heat or overwhelming crowds. Likewise, September and October provide a serene setting for cruising with comfortable weather and less tourist congestion.
Additionally, prices for Mediterranean cruises tend to be lower from May to November, making it a cost-effective option for travelers seeking a budget-friendly voyage. Consider booking a Mediterranean cruise in May 2024 with MSC starting at $499/person to enjoy the perfect blend of favorable weather and affordable prices.
- Ideal weather conditions
- Fewer crowds
- Milder temperatures
- Lower prices during shoulder seasons
- Peak tourist season in July and August
Prime Time for Hawaii Cruises

The best time to start on a Hawaii voyage is usually during the summer and fall months when the weather is dry and the skies are sunny. Hawaii cruises are particularly rewarding from mid-September through October, offering ideal conditions for a memorable experience. If you're interested in whale watching, the period from late October through May is perfect for spotting these majestic creatures in their natural habitat. During this time, the weather remains pleasant, with minimal rainfall from August through October, ensuring a smooth sailing experience.
For travelers seeking a cost-effective option, January through March can be a good time to contemplate a Hawaii cruise, although weather conditions may vary slightly. These months often offer competitive pricing and fewer crowds, allowing you to enjoy the beauty of Hawaii at a more relaxed pace. Whether you're into adventure, relaxation, or simply soaking in the stunning scenery, a Hawaii cruise during the summer and fall months promises an unforgettable journey.
Best Weather for Australia & New Zealand Cruises
For those considering voyages beyond Hawaii, exploring the best weather for Australia & New Zealand cruises becomes paramount, especially as these regions offer unique experiences throughout the year. When planning your cruise to Australia and New Zealand, keep in mind the following key points for an enjoyable voyage:
- November to March: This period offers warm temperatures and sunny weather in major ports like Sydney, making it the best time to go on a cruise in Australia & New Zealand.
- Early February to mid-March: Experience the warmest weather in Australia during these months, ensuring a comfortable cruise.
- New Zealand's Climate: With a temperate climate, layering is recommended for cruises throughout the year to stay comfortable.
- Consider Off-Peak Months: October, November, or April can provide discounted fares in Australia outside the peak season, allowing for savings on your cruise.
- Reversed Seasons: Australia and New Zealand have reversed seasons compared to the northern hemisphere, influencing the ideal timing for a cruise in these regions.
Planning your trip around these factors will help you make the most of your cruise experience in Australia and New Zealand.
Conclusion
To guarantee the best time to go on a cruise for perfect weather is essential for a memorable and enjoyable experience. By researching the ideal months for different regions like the Caribbean, Alaska, Mediterranean, Hawaii, Australia, and New Zealand, you can secure smooth sailing and sunny skies.
Don't just take our word for it, investigate the truth of this theory yourself and discover the magic of cruising in ideal weather conditions.
- About the Author
- Latest Posts
Introducing Ron, the home decor aficionado at ByRetreat, whose passion for creating beautiful and inviting spaces is at the heart of his work. With his deep knowledge of home decor and his innate sense of style, Ron brings a wealth of expertise and a keen eye for detail to the ByRetreat team.
Ron’s love for home decor goes beyond aesthetics; he understands that our surroundings play a significant role in our overall well-being and productivity. With this in mind, Ron is dedicated to transforming remote workspaces into havens of comfort, functionality, and beauty.
Beginners Guides
The Best Time to Cruise for Budget-Friendly Deals
Fulfill your wanderlust dreams without draining your wallet by learning the key to scoring budget-friendly cruise deals.

When it comes to finding budget-friendly cruise deals, timing is key. Imagine setting sail on the crystal blue waters of the Caribbean or exploring the stunning glaciers of Alaska without breaking the bank.
There's a specific window of opportunity that savvy cruisers keep an eye on to secure the best rates and save some serious cash. But how do you know when to book your next adventure to make the most of your budget?
Let's uncover the secrets behind scoring the ultimate cruise deals and making your dream vacation a reality.
Key Takeaways
- Booking during wave season in January to March ensures budget-friendly deals.
- Monitoring prices post-booking for drops leads to potential refunds or upgrades.
- Repositioning cruises in spring and fall offer cost-effective options.
- Leveraging loyalty programs maximizes savings for affordable cruising.
Ideal Seasons for Budget-Friendly Cruises
When seeking budget-friendly cruise deals, timing plays an important role in securing the best value for your money. Shoulder seasons such as September, October, and early December present excellent opportunities for travelers looking for cheaper fares. These off-peak times often offer discounted rates and fewer crowds, making it an ideal choice for budget-conscious individuals.
Additionally, booking during wave season in January and February can lead to significant discounts and promotions, maximizing savings on your cruise vacation.
Repositioning cruises during spring and fall are another fantastic option for savvy travelers seeking affordable deals. These cruises often provide cost-effective choices as cruise lines move their ships between different regions.
Avoiding major holidays and school breaks is also key to securing cheaper cruise fares and ensuring a more relaxed cruising experience. Moreover, sailing from Florida during off-peak times can offer a wide range of options and better deals for those looking to save on their cruise adventures.
Strategies for Booking Affordable Cruises

To secure the best deals on cruises, it's important to employ strategic booking approaches that maximize cost savings and value for your vacation. When aiming for budget-friendly cruise deals, consider the following strategies:
- Booking in Advance: Securing your cruise early, especially during wave season from January to March, can lead to lower rates and additional benefits.
- Monitoring Fare Changes: Keep an eye on fluctuating fares and be ready to book when prices drop to secure the best deal.
- Being Flexible with Travel Dates: Flexibility can be key in finding affordable cruise options, as adjusting your travel dates slightly can result in significant savings.
- Considering Repositioning Cruises: Exploring repositioning cruises or sailing during shoulder seasons can offer unique routes and discounted prices.
- Utilizing Loyalty Programs and Off-Peak Times: Take advantage of loyalty programs, monitor price drops, and consider traveling during off-peak times to maximize your savings on cruise vacations.
Best Times to Score Cruise Deals
During wave season from January to March, travelers can capitalize on the best times to secure budget-friendly cruise deals. Booking well in advance is key to snagging the most favorable timing and rates for your cruise.
Additionally, considering repositioning cruises during the spring and fall can offer discounted prices, making them a great option for those seeking budget-friendly deals. It's also advisable to keep an eye out for price drops even after booking, as this could potentially lead to refunds or upgrades for your cruise experience.
Leveraging loyalty programs or memberships can grant you access to exclusive discounts and savings on your upcoming cruise. By being proactive and strategic in your approach to booking and monitoring deals, you can maximize your chances of finding the best cruise deals that align with your budget and preferences.
Timing Tips for Budget-Friendly Cruises

Let's explore practical strategies for maximizing your savings on budget-friendly cruises through strategic timing tips. When aiming to secure the best cruise deals that align with your budget, consider the following insights:
- Booking in Advance: Take advantage of wave season from January to March to lock in lower rates and secure desirable cabin options.
- Monitoring Prices: Keep an eye on price drops even after booking to potentially benefit from refunds or upgrades, enhancing your overall cruise experience.
- Loyalty Programs: Utilize loyalty programs or memberships to access additional discounts and exclusive perks, making your budget-friendly cruise even more cost-effective.
- Nearby Ports: Opt for cruises departing from nearby ports to save on airfare costs, enabling you to allocate more of your budget towards onboard activities and excursions.
- Discounts Galore: Embrace the array of discounts available during wave season and beyond, ensuring that you snag the best possible deal for your budget-friendly cruise adventure.
When to Book for Cruise Savings
Securing cruise savings hinges on strategic timing and proactive booking practices. To find the best deals, consider booking during wave season from January to March when many cruise lines offer enticing discounts.
Booking early not only guarantees better rates but also provides a wider selection of cabin choices. Keep an eye out for fare changes even after booking, as price drops may occur, presenting an opportunity for additional savings.
While waiting for last-minute deals can sometimes lead to the cheapest rates, this approach often comes with limited cabin availability. To stay informed about price fluctuations, utilize tools like the Shipmate app and Cruise Critic for efficient monitoring.
Conclusion
To summarize, cruising during the off-peak season can help us save some serious dough. Booking early during wave season is key to scoring those sweet deals.
So, let's set sail and make some memories without breaking the bank. Remember, early bird gets the worm – or should I say, the cruise discount!
- About the Author
- Latest Posts
Introducing Ron, the home decor aficionado at ByRetreat, whose passion for creating beautiful and inviting spaces is at the heart of his work. With his deep knowledge of home decor and his innate sense of style, Ron brings a wealth of expertise and a keen eye for detail to the ByRetreat team.
Ron’s love for home decor goes beyond aesthetics; he understands that our surroundings play a significant role in our overall well-being and productivity. With this in mind, Ron is dedicated to transforming remote workspaces into havens of comfort, functionality, and beauty.
Beginners Guides
Best Time to Go on an Alaskan Cruise for Wildlife Watching
Get ready to discover the optimal time for wildlife enthusiasts to embark on an Alaskan cruise – the ultimate season for extraordinary encounters awaits!

One could contend that any time of year is fitting for an Alaskan cruise, but if you genuinely want to maximize your wildlife watching opportunities, timing is key.
While many months offer glimpses of nature's wonders, there is a particular period that stands out above the rest.
Join us as we explore the intricacies of the Alaskan wilderness and uncover the secrets of when to set sail on a journey that promises unforgettable encounters with some of the most magnificent creatures on earth.
Key Takeaways
- Prime months for wildlife viewing in Alaska are May, June, and September.
- Peak whale watching season is from mid-June to August.
- Best time for bear spotting is between July and early September.
- Ideal months for bald eagle sightings in southeast Alaska are from May to September.
Prime Months for Wildlife Viewing
During the prime months of May, June, and September, Alaska offers the best conditions for wildlife enthusiasts to observe a diverse array of animals in their natural habitats. June marks the beginning of summer, a time when the landscape comes alive with the sights and sounds of wildlife.
July and August are ideal for witnessing brown bears fishing for salmon and catching glimpses of majestic moose roaming through the wilderness. These months provide ample opportunities for up-close wildlife viewing experiences, especially during the salmon run when bears gather along the rivers to feast.
As the summer changes into September, visitors can look forward to spotting humpback whales during their annual migration, as well as witnessing the spectacular spawning salmon and caribou herds moving across the land. The shoulder seasons offer a unique chance to explore Alaska inside and out, with fewer crowds and mosquitoes, making it an ideal time for wildlife enthusiasts to immerse themselves in the natural beauty of the region.
Peak Whale Watching Season

In the peak whale watching season in Alaska, which typically spans from mid-June to August, enthusiasts have the best opportunities to witness humpback whales and other species in their natural habitat. Humpback whales are commonly sighted during the summer months as they feed on small fish and krill.
Killer whales, also known as orcas, are best spotted in May and June near Ketchikan, Juneau, and Seward, hunting for seals and other marine mammals. Grey whales migrate to southern Alaska in late spring, showcasing their impressive breaching behaviors.
Blue whales, the largest animals on Earth, may be seen in July and August, traveling through Alaskan waters in search of food. Whale sightings can vary depending on the specific month of your Alaskan cruise, so choosing the right time within the peak season is important for maximizing wildlife watching opportunities while sailing through these majestic waters.
Best Time for Bear Spotting
Ideally situated between July and early September, the peak time for bear spotting in Alaska coincides with the salmon influx that attracts these magnificent creatures to the creeks and streams of the region. During this period, Grizzly bears can be observed in their natural habitat, offering a thrilling experience for wildlife enthusiasts. Royal Caribbean Cruise Tours in Alaska often include bear viewing excursions, enhancing the opportunity to witness these powerful animals up close. For best bear sightings, consider visiting during the salmon run in July, a time when bears are actively hunting for fish in creeks and streams, particularly in locations like Ketchikan. Alaska's diverse landscapes and ecosystems provide ample opportunities for bear viewing, from observing black bears to encountering majestic brown bears. Whether through guided tours or remote float plane trips, Alaska offers a range of experiences to witness these iconic creatures in their element.
| Best Time for Bear Spotting | |
|---|---|
| July | Salmon run |
| Early September | Grizzly bears |
| Creeks | Streams |
| Ketchikan | Royal Caribbean Cruise Tours |
Ideal Months for Eagle Sightings

The peak months for perfect bald eagle sightings in southeast Alaska are from May to September. During these months, as part of an Alaska cruise, birdwatching enthusiasts can witness the majestic bald eagles in their natural habitat. Southeast Alaska, home to around 30,000 bald eagles, offers ample opportunities for wildlife watching, especially near bodies of water where eagles are commonly spotted.
The Sitka Cultural Discovery excursion is a great way to observe bald eagles up close, as they're frequently seen near streams and bodies of water. With approximately 470 bird species in the region, including the iconic bald eagle, Southeast Alaska provides a diverse birdwatching experience for nature lovers.
Whether soaring through the skies or perched on branches overlooking the water, bald eagles are a common sight throughout the summer months in this pristine Alaskan wilderness. For those seeking unforgettable eagle sightings and a chance to immerse themselves in Alaska's rich wildlife, visiting during the peak months offers an unparalleled birdwatching experience.
Optimal Time for Otter Encounters
Best timing for observing otters in Alaska ranges from early spring through the end of July. During this period, the chances of encountering these enchanting creatures are at their peak. Here are some key points to keep in mind for prime otter encounters during your Alaskan cruise:
- Steller sea lions: While otters are more prevalent during spring and early summer, Steller sea lions can be spotted year-round in Alaska. Keep an eye out for these majestic marine mammals as they often share habitats with otters.
- Streams and creeks: Otters are frequently seen near streams and creeks, making these areas prime locations for wildlife watching. Cruise along these waterways to increase your chances of a memorable otter sighting.
- Wildlife tours: Participating in wildlife tours in Alaska can enhance your otter encounters. These tours often provide opportunities to get up close to Steller sea lions, with otters sometimes making surprise appearances alongside them.
- Sea otters near the ocean: Whether near the ocean or inland water bodies, otters are adaptable creatures that thrive in various environments. Keep a lookout for these playful animals during your Alaskan cruise for a truly immersive wildlife experience.
Conclusion
To sum up, our investigation confirms that the best time to go on an Alaskan cruise for wildlife watching is indeed during the peak season of July.
The abundance of wildlife sightings, perfect weather conditions, and increased chances of spotting bears, whales, eagles, otters, and other fascinating creatures make July the ideal month for an unforgettable Alaskan wildlife experience.
Don't miss out on this prime opportunity to witness the wonders of nature in their natural habitat.
- About the Author
- Latest Posts
Introducing Ron, the home decor aficionado at ByRetreat, whose passion for creating beautiful and inviting spaces is at the heart of his work. With his deep knowledge of home decor and his innate sense of style, Ron brings a wealth of expertise and a keen eye for detail to the ByRetreat team.
Ron’s love for home decor goes beyond aesthetics; he understands that our surroundings play a significant role in our overall well-being and productivity. With this in mind, Ron is dedicated to transforming remote workspaces into havens of comfort, functionality, and beauty.
-

 Vetted3 weeks ago
15 Best Drip Irrigation Systems to Keep Your Garden Thriving
-

 Vetted2 days ago
15 Best Foot Massagers for Neuropathy to Soothe Your Feet and Relieve Discomfort
-

 Vetted1 week ago
15 Best Sports Laundry Detergents for Keeping Your Activewear Fresh and Clean
-

 Vetted1 week ago
15 Best Tall Toilets for Seniors That Combine Comfort and Safety
-

 Vetted2 weeks ago
15 Best Dish Scrubbers to Keep Your Kitchen Sparkling Clean
-

 Beginners Guides4 weeks ago
Designing Your Retreat Center – Essential Tips
-

 Beginners Guides4 weeks ago
Are Retreats Profitable
-

 Decor2 weeks ago
What Is Eclectic Home Decor


