To reupholster a dining chair in 60 minutes, start by gathering your tools, fabric, padding, and workspace. Remove the old upholstery carefully, inspecting the frame for damage. Measure and cut new padding and fabric, leaving enough for seams. Secure the fabric with a staple gun or tacks, smoothing out wrinkles and trimming excess. Reassemble the chair tightly, ensuring stability. For a professional finish, adding decorative accents or finishing touches is the final step—continue to follow the process for a polished look.
Key Takeaways
- Prepare workspace and gather all tools, fabric, and padding before starting to save time.
- Carefully remove old fabric and inspect the frame for damage, cleaning thoroughly.
- Measure and cut new padding and fabric precisely, adding allowances for seams and comfort.
- Attach fabric tightly, starting from the center, and secure with staples or tacks for a smooth finish.
- Finish edges neatly, reassemble, and check for stability and evenness within the hour.
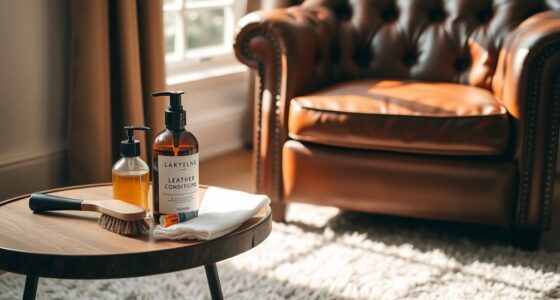
Gather Your Materials and Prepare Your Workspace

Before you begin reupholstering your dining chair, it’s essential to gather all the necessary materials and set up a clean, organized workspace. Start by choosing your color options and upholstery patterns, considering what complements your dining area and personal style. Browse fabric swatches and select a pattern that fits your vision, whether it’s bold or subtle. Collect tools like scissors, a staple gun, and a screwdriver. Keep your workspace free of clutter to make the process smoother. Having everything within reach reduces interruptions and keeps your project on track. Clear a large surface to work on comfortably, ensuring you can lay out fabric and remove old upholstery easily. Proper preparation saves time and helps you achieve a professional-looking result. Additionally, familiarize yourself with upholstery techniques to ensure a smooth reupholstering process.
Remove the Old Upholstery and Inspect the Frame
To start removing the old upholstery, carefully pry up staples or tacks using a flat-head screwdriver or staple remover. Once removed, gently peel back the fabric to expose the padding and frame. This step allows you to assess the condition of the frame and identify areas needing reinforcement. Here are key steps to follow:
Carefully remove staples, peel back fabric, and inspect the frame for damage or wear before proceeding.
- Check for loose joints or cracks in the frame.
- Look for signs of wear or damage that may require frame reinforcement.
- Use a vacuum or brush to clean upholstery debris and dust.
- Inspect the padding for deterioration, considering replacement if necessary.
Measure and Cut New Padding for Comfort
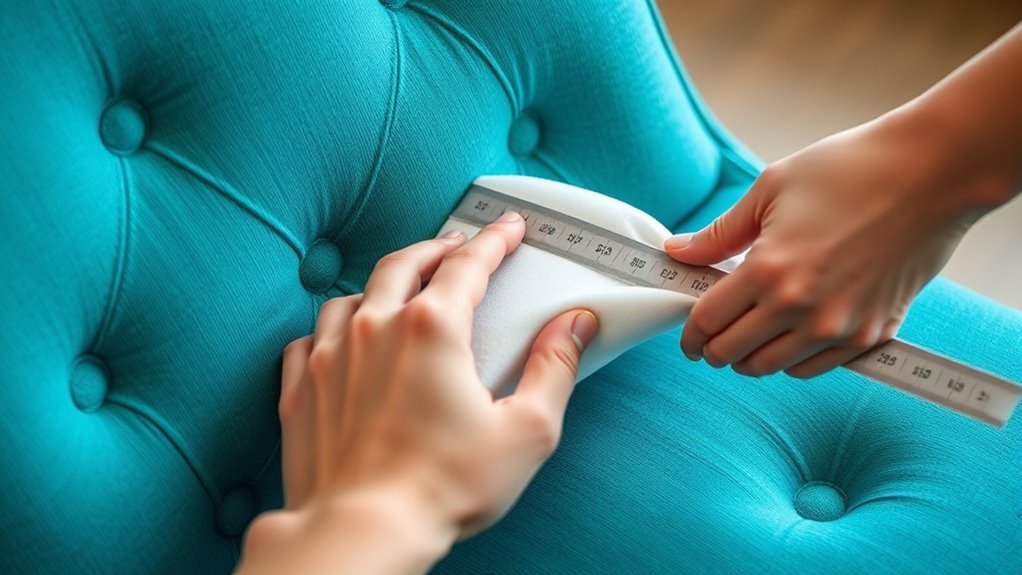
Start by checking the thickness of your existing padding to guarantee your new foam will match for comfort. Choose a foam material that offers the right support and feels comfortable to sit on. Then, measure your seat carefully so you can cut the foam precisely to fit the chair’s dimensions. Considering the use of high-quality filters can help keep your space odor-free and allergen-free during the reupholstery process.
Assess Existing Padding Thickness
Evaluating the existing padding thickness is an essential step to guarantee your new cushioning offers the proper comfort and support. First, carefully measure the current padding to determine if it’s too thin or thick for your desired fabric patterns. Next, compare the padding thickness with your comfort preferences—thicker padding provides more plushness, while thinner offers firmness. Then, inspect the evenness of the padding; uneven areas may need additional trimming or reinforcement. Finally, consider how the existing padding interacts with the chair’s overall structure to ensure stability. It’s also important to adhere to safety guidelines during the reupholstery process to prevent injuries and ensure a secure finish. By assessing these factors, you’ll select the right amount of padding to match your fabric patterns and achieve a comfortable, professional-looking reupholstery job.
Select Appropriate Foam Material
How do you choose the right foam material to guarantee your chair feels comfortable and supportive? Focus on foam density, which directly impacts cushioning comfort. Higher-density foam offers better support and durability, making it ideal for dining chairs that see regular use. Look for foam with a density around 1.8 to 2.5 pounds per cubic foot for suitable cushioning comfort. Lower-density foam may feel softer initially but can break down quickly, losing its supportive qualities. Conversely, very high-density foam might be firmer than desired, so select a balance that provides comfort without sacrificing support. Consider your personal preference and the chair’s usage when choosing foam density, ensuring your reupholstered seat remains comfortable for years to come. Additionally, understanding industry trends can help you select the most appropriate foam type for your project.
Measure for Accurate Cut
Before cutting the new padding, it’s vital to measure your chair precisely to guarantee a perfect fit. Accurate measurements ensure your fabric pattern aligns correctly and color coordination looks seamless. To get started:
- Measure the seat’s length and width, noting any curves or angles.
- Add 1-2 inches for seam allowances and padding thickness.
- Record the height of the backrest if you’re replacing or padding it.
- Double-check measurements against your fabric pattern to avoid misalignment.
- Incorporate any custom features such as armrests or unique contours that may affect your measurements.
Use these numbers to cut your foam and fabric accurately. Matching the fabric pattern properly will give your chair a professional look, while ensuring the padding fits comfortably. Taking precise measurements saves time and prevents mistakes, making your reupholstery quick and satisfying.
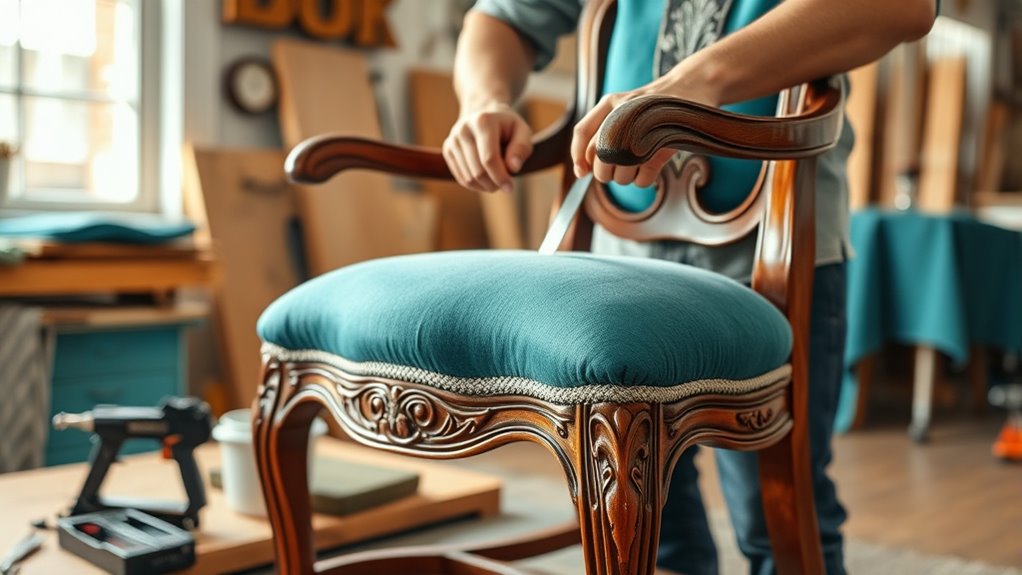
Cut and Attach Fresh Fabric for a Clean Look
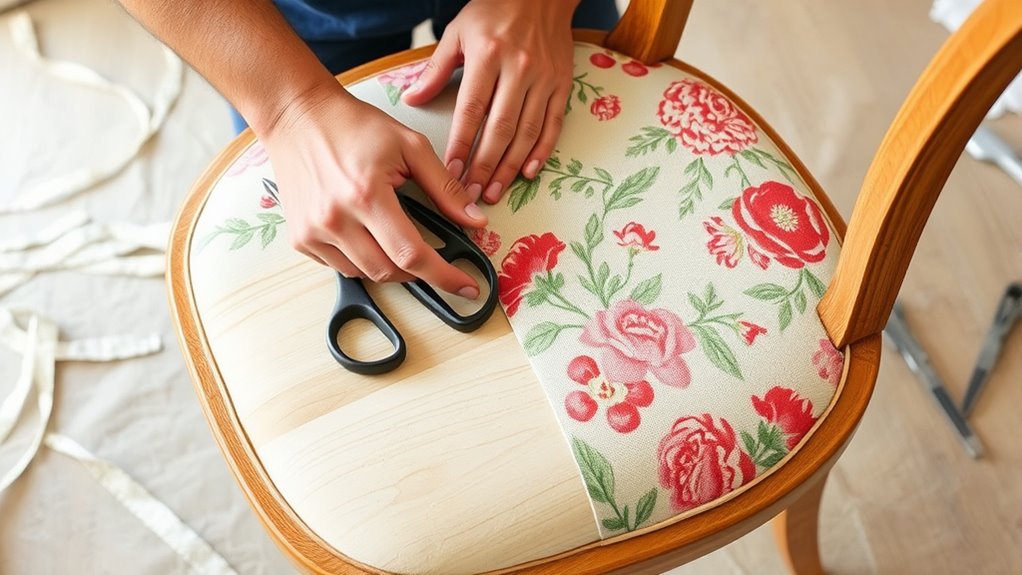
To achieve a polished look, start by carefully cutting your new fabric to fit the chair’s seat and backrest. Use sharp scissors to guarantee clean edges, maintaining your fabric selection and pattern matching in mind. Take your time aligning patterns so they flow seamlessly across the surfaces. This attention to detail adds professionalism and visual appeal. Additionally, considering protective styling benefits can help preserve your fabric and extend the life of your reupholstered chair.
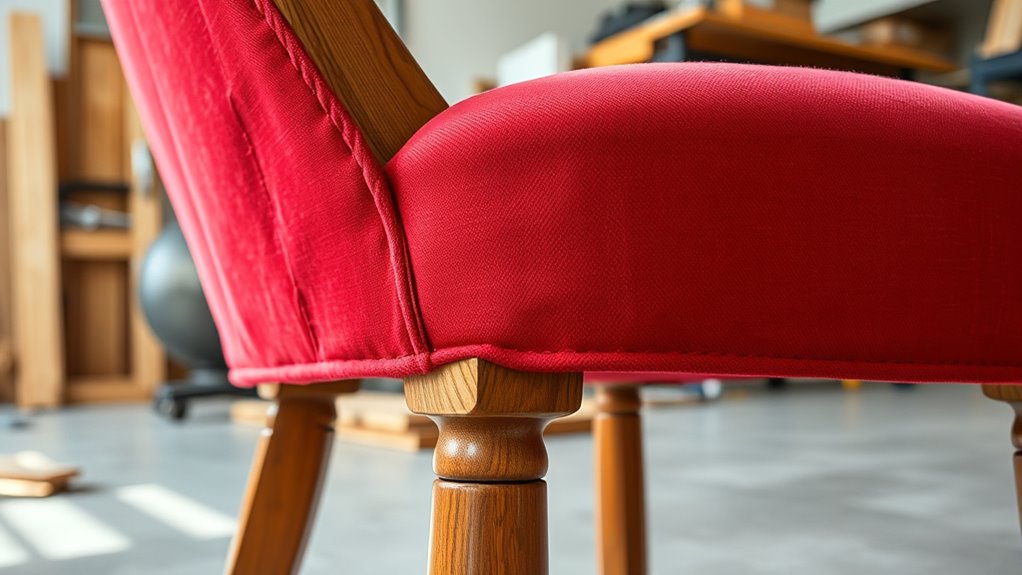
Secure the Fabric With Staple Gun or Upholstery Tacks

Secure the fabric tightly to the chair frame using a staple gun or upholstery tacks. Start at the center of one side, pulling the fabric smooth, then staple or tack it in place. Repeat this process on the opposite side, ensuring the fabric remains taut. For fabric patterns, align them carefully before securing to keep the design straight. Use a staple gun for a quick, even finish, or decorative tacks for a stylish touch. Here are some tips to make this easier:
Secure fabric tightly with staples or tacks, aligning patterns and smoothing for a polished look.
- Space staples or tacks about 1 inch apart for secure attachment.
- Stretch fabric evenly to avoid wrinkles or puckering.
- For decorative tacks, space them evenly along the edges for a balanced look.
- Keep a steady hand to prevent sagging or misaligned fabric.
- Ensuring proper tension helps prevent sagging and extends the upholstery’s lifespan.
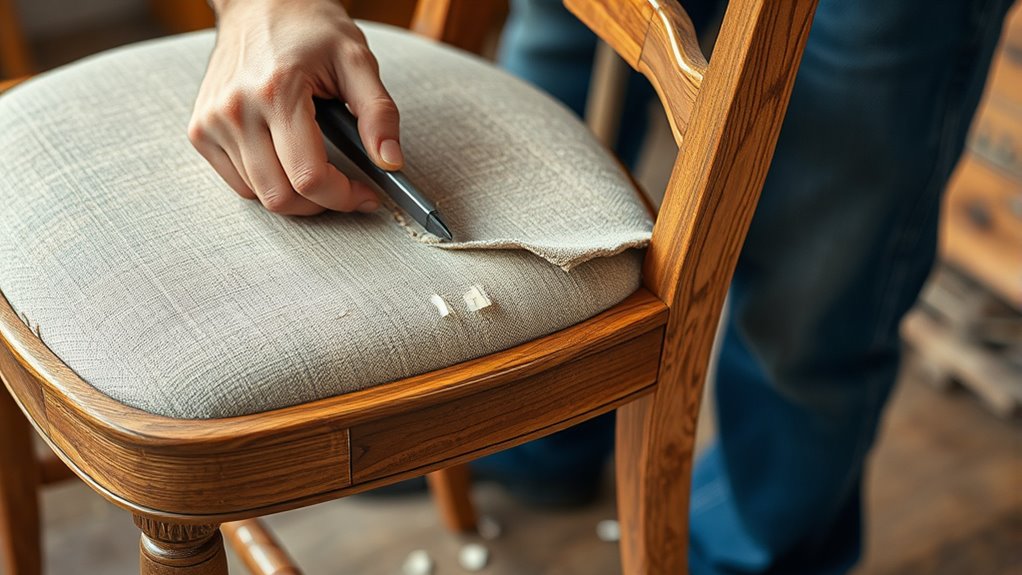
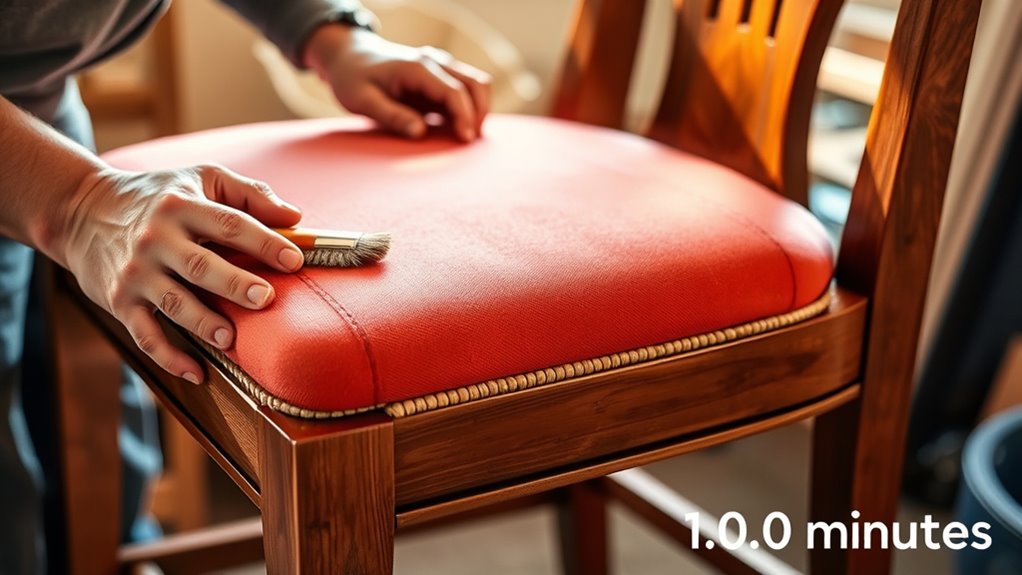
Trim Excess Material and Finish Edges

Next, you’ll want to neatly cut away any excess fabric to create a clean edge. Be sure to secure the edges properly to prevent fraying or unraveling. Using quality binding material will give your finished piece a polished and durable look. Incorporating AI-driven insights can also help you achieve more precise and consistent results in your reupholstery projects.
Neatly Cut Excess Fabric
As you finish upholstering the chair, carefully trim away any excess fabric close to the edge, ensuring a clean, professional look. Use sharp upholstery tools to make precise cuts, especially around fabric patterns to maintain alignment. Keep your scissors or rotary cutter steady for neat edges. Follow these steps:
- Match fabric patterns carefully before trimming.
- Use upholstery tools for clean, controlled cuts.
- Leave about a quarter-inch seam allowance.
- Tuck and fold edges neatly for finishing.
- Pay attention to fabric grain to prevent distortion during trimming.
This process prevents fraying and creates a polished appearance. Be mindful of the fabric’s direction, especially with patterned textiles, to avoid misalignment. Taking your time to trim evenly results in a professional, sleek finish that enhances your chair’s overall look.
Secure Edges Properly
To guarantee your reupholstered chair looks professional, it’s essential to trim any excess fabric carefully and finish the edges properly. Pay attention to fabric textures, ensuring they remain smooth and consistent along the edges. Use sharp scissors to trim fabric evenly, avoiding frayed or uneven cuts. When finishing edges, choose a seam or binding that complements your fabric’s color coordination for a polished look. Securing edges with staples or tacks helps prevent fraying and keeps the fabric tight. Smooth out any puckers or wrinkles as you go, so the fabric sits flat. Properly finished edges not only improve durability but also give your chair a clean, professional appearance, making your DIY project look expertly done.
Use Quality Binding Material
Using high-quality binding material is essential for creating a polished edge that lasts. The right binding material ensures your fabric selection stays secure and looks professional. To achieve this, follow these steps:
- Choose a durable binding material compatible with your fabric, such as cotton or nylon braid.
- Trim excess fabric carefully to prevent bulk under the binding.
- Wrap the binding tightly around the edges, pinning as needed for a smooth finish.
- Sew or glue the binding securely, ensuring no loose ends or fraying occur.
- Ensuring proper fabric selection aligns with your project’s durability and appearance goals.
Selecting quality binding material makes finishing easier and results in a cleaner, more durable edge. Proper trimming and finishing with the right fabric selection elevate your reupholstering project, giving your dining chair a professional look that lasts.
Reassemble and Check for Stability
Once you’ve reassembled the chair, it’s important to thoroughly check its stability before use. Verify all screws and joints are tight, and the frame feels secure. Test the cushion replacement by sitting gently and then more firmly to spot any wobbling. When inspecting the fabric selection, look for tightness and evenness, making sure the upholstery is smooth and secure. Use the following table to guide your check:
| Step | Action |
|---|---|
| 1 | Tighten all screws and joints |
| 2 | Sit and test stability |
| 3 | Check cushion firmness |
| 4 | Inspect fabric for wrinkles or looseness |
| 5 | Confirm overall balance and sturdiness |
Confirm everything feels solid before placing the chair back in use.
Add Final Touches to Perfect Your Chair’s Appearance
After guaranteeing your chair is stable and secure, it’s time to add the final touches that will elevate its appearance. Focus on decorative upholstery details that highlight your fabric pattern choices and add personality. Here are four ways to perfect your chair’s look:
- Trim excess fabric neatly for a clean, professional finish.
- Add decorative upholstery tacks or nailhead trim along the edges for style.
- Fluff and straighten the fabric to eliminate wrinkles and ensure smoothness.
- Consider adding a coordinating or contrasting fabric accent, like a piping or a small cushion, to enhance the fabric pattern.
These small adjustments make a big difference, turning your reupholstered chair into a stylish statement piece. Pay attention to detail, and your chair will look polished and inviting.
Frequently Asked Questions
Can I Reupholster a Chair Without Prior Sewing Experience?
You can definitely try DIY upholstery without prior sewing experience. Focus on simple techniques and choose easy-to-handle fabric for your reupholstery project. When selecting fabric, pick a durable material that matches your style and fits your chair’s shape. Use adhesive or staple guns for a straightforward process, avoiding complicated sewing. With patience and careful work, you’ll successfully reupholster your chair, creating a fresh, personalized look in no time.
What Types of Fabric Are Best for Dining Chairs?
When choosing fabric for your dining chairs, you want options with great fabric durability to withstand daily use and spills. Look for tightly woven fabrics like polyester blends or treated cotton that resist stains and wear. Additionally, consider color selection; darker shades or patterns hide stains better, making your chairs look fresh longer. Picking the right fabric guarantees your chairs stay stylish and functional, even after frequent family dinners and gatherings.
How Do I Prevent Wrinkles in the Fabric During Attachment?
To prevent wrinkles during fabric attachment, you should focus on proper fabric stretching and attachment techniques. Keep the fabric taut as you secure it, working from the center outward to evenly distribute tension. Use smooth, even pulls when stapling or tacking the fabric, ensuring it stays tight. This approach minimizes wrinkles, giving your upholstery a smooth, professional look. Consistent tension during fabric stretching is key to a flawless finish.
Is It Necessary to Replace the Entire Cushion?
Imagine gently lifting the cushion to inspect its condition; often, you don’t need cushion replacement if it’s still firm and in good shape. Reupholstery can refresh your chair’s look and boost upholstery durability without starting from scratch. Unless the cushion is torn or sagging considerably, keeping it saves time and effort. A well-placed new fabric can rejuvenate your chair, making it look brand new and comfortable again.
How Do I Safely Remove Staples Without Damaging the Wood?
When you’re doing staple removal, you want to safeguard the wood surface, so use a flat pry tool or putty knife to gently lift staples without scratching. Wear gloves to get a better grip and avoid slipping. If staples are stubborn, apply a little bit of penetrating oil and wait a few minutes. This method guarantees safe staple removal and wood protection, making your reupholstering process smoother and damage-free.
Conclusion
Now that your chair is almost ready, imagine the transformation it’ll bring to your space. With just a few finishing touches, you’ll reveal a stunning piece that’s both stylish and cozy. But wait—will your new fabric hold up to everyday use? Keep an eye on it over the coming weeks. Your project isn’t just about looks; it’s about creating something uniquely yours. Ready to see the magic come to life? The final reveal is just ahead.