Appliances
Paint Mugs
2025

When it comes to painting mugs, it’s just like having a blank canvas in your hands – the possibilities are limitless. We have all admired those beautifully painted mugs in hip cafes and artisan markets, and maybe even thought about how we could make our own one-of-a-kind designs at home. But where do you begin?
Well, let's just say that diving into the world of paint mugs is not only a creative endeavor but also a practical one. There's something truly satisfying about sipping from a mug that you've personalized yourself, and the process of transforming a simple ceramic vessel into a work of art is both meditative and rewarding.
So, how do you go about it?
Key Takeaways
- Choosing the right mugs is important for successful painting.
- Preparing your workspace properly is crucial for a smooth painting process.
- Selecting high-quality paints is essential for achieving desired results.
- Sketching your design and layout beforehand helps in planning and executing the painting effectively.
Choosing the Right Mugs
When selecting mugs for painting, consider the material, size, and shape to ensure the best canvas for your artistic vision.
Mug material considerations are crucial. Porcelain and ceramic mugs are ideal for painting due to their smooth surfaces, which allow the paint to adhere well. Avoid plastic mugs as they may not hold the paint effectively.
Size and shape preferences are equally important. A larger mug provides more space for creativity, while a smaller one may be better suited for intricate designs. The shape of the mug can also influence the overall look of your artwork. A mug with a wide, cylindrical body offers a different painting experience compared to a mug with a tapered shape.
Ultimately, the choice of material, size, and shape depends on your artistic style and the specific design you have in mind. By carefully considering these factors, you can ensure that the mugs you choose provide the perfect foundation for your creative expression.
Preparing Your Workspace

To create an efficient and inspiring workspace for painting mugs, consider organizing your tools and materials in a manner that promotes creativity and ease of access. Workspace organization is essential for a smooth and enjoyable painting process. Here's a helpful table to guide you in preparing your workspace:
| Tools | Materials | Safety Precautions |
|---|---|---|
| Paintbrushes | Ceramic mugs | Ventilation |
| Palette | Acrylic paints | Gloves |
| Water container | Paint markers | Protective clothing |
| Masking tape | Varnish | Eye protection |
| Paper towels | Stencils | Clean-up supplies |
Ensuring that your workspace is well-organized with all the necessary tools and materials readily available can significantly boost your painting experience. Additionally, safety precautions are crucial to protect yourself while working with paints and other materials. Adequate ventilation, protective clothing, gloves, and eye protection should be used to prevent any potential hazards. By creating a well-prepared and safe workspace, you can fully focus on unleashing your creativity and mastering the art of painting mugs.
Selecting the Perfect Paints
As we embark on the process of selecting the perfect paints for our mug-painting endeavor, let's consider the diverse range of colors and finishes that will bring our creative visions to life.
When choosing paints, it's crucial to prioritize both paint adhesion and color vibrancy. Opt for paints specifically formulated for use on ceramics to ensure optimal paint adhesion. These paints adhere firmly to the mug's surface, preventing chipping and flaking over time. Additionally, high-quality ceramic paints offer superior color vibrancy, ensuring that your designs remain vivid and eye-catching after the painting process.
When browsing through paint options, pay attention to the range of colors available. Look for paints that offer a wide spectrum of hues to allow for maximum creativity. Furthermore, consider the finishes offered, such as glossy, matte, or metallic, to achieve the desired aesthetic for your mugs. Selecting a combination of finishes can add visual interest to your designs.
Sketching Your Design

Now, let's talk about sketching your design. This is where the magic happens!
First, we'll explore different sources of inspiration to kickstart our creativity.
Then, we'll dive into choosing the perfect colors and patterns to bring our vision to life.
And finally, we'll discuss the essential step of sketching out our layout before we start painting.
Design Inspiration Sources
Exploring various design inspiration sources can spark creativity and lead to unique and visually appealing mug designs.
Finding design inspiration from nature and architecture can result in organic, fluid shapes and patterns. The intricate details of leaves, the symmetry of petals, or the angular lines of a skyscraper can all serve as starting points for stunning mug designs.
Additionally, drawing inspiration from vintage and retro styles can add a nostalgic charm to your creations. Think about the bold colors and geometric motifs of the 1960s, or the intricate floral patterns of the Victorian era. By incorporating these influences into your sketches, you can infuse your mug designs with a timeless appeal.
Embracing diverse sources of inspiration allows us to create mugs that resonate with a wide range of tastes and preferences.
Choosing Colors and Patterns
After gathering design inspiration from various sources, it's time to delve into the exciting process of choosing colors and patterns while sketching your mug design. When considering colors, keep in mind color psychology to evoke the desired emotions. Here are some tips for choosing colors and patterns:
- Consider the recipient's preferences and the intended use of the mug.
- Experiment with different color combinations to find the perfect harmony.
- Think about pattern placement to ensure it complements the mug's shape.
- Keep in mind the overall aesthetic you want to achieve and how the colors and patterns will contribute to it.
Sketching Your Layout
Considering the recipient's preferences and the intended use of the mug, we begin the exciting process of sketching our layout by translating our design concepts onto paper. Sketching techniques and layout planning are essential in creating a well-thought-out design for our mugs. We can draw inspiration from various sources such as nature, geometric patterns, or even personal memories to guide our creative design process. By sketching different layouts, we can experiment with the placement of our chosen patterns and colors, ensuring a balanced and visually appealing result. To assist you in this process, here are some basic sketching techniques and layout planning tips to get you started:
| Sketching Techniques | Layout Planning | Pattern Inspiration |
|---|---|---|
| Use light, loose lines | Consider mug shape and size | Nature and botanical motifs |
| Experiment with different compositions | Create a focal point | Geometric and abstract designs |
| Incorporate shading and details | Balance patterns and negative space | Personal memories and experiences |
Exploring Different Painting Techniques

Let's talk about the exciting world of painting techniques for mugs.
We'll explore different brush stroke techniques, learn how to layer paint colors effectively, and discover ways to add intricate details to our designs.
These techniques will help us create beautiful and personalized mugs that are sure to impress.
Brush Stroke Techniques
Using various brush stroke techniques can add depth and texture to your painted mugs, creating unique and visually appealing designs. Mastering these techniques is essential for achieving professional-looking results.
Here are some essential brush stroke techniques to consider:
- Blending Colors: Experiment with blending different shades to create smooth transitions and gradients on your mugs.
- Texture Techniques: Utilize techniques such as stippling, dry brushing, or sponging to add tactile interest and dimension to your designs.
- Cross-Hatching: This method involves creating intersecting lines to build up shading and form on the surface of the mug.
- Impasto: Apply thick layers of paint to create a textured, three-dimensional effect that adds a tactile quality to your mugs.
Layering Paint Colors
Layering paint colors is a fundamental technique in mug painting that allows for the creation of rich, dynamic designs with depth and dimension. Blending techniques are essential for achieving seamless transitions between colors.
To create smooth blends, start by applying the lighter color as a base and then gradually layer the darker color on top. Use a soft brush and gentle, overlapping strokes to blend the colors together, ensuring a gradual transition. Experiment with different brush sizes and pressures to master the art of color layering.
Adding Intricate Details
Mastering the art of layering paint colors provides a strong foundation for exploring different painting techniques, such as adding intricate details to your mug designs. When it comes to adding intricate details, consider the following techniques:
- Fine line: Utilize a fine-tipped brush to create delicate lines, allowing you to add intricate designs with precision and control.
- Intricate patterns: Experiment with various patterns such as lace, mandalas, or geometric designs to add complexity and visual interest to your mugs.
- Stencil work: Use stencils to achieve intricate designs with ease, ensuring uniformity and accuracy in your detailing.
- Texture techniques: Incorporate texture techniques like stippling or sgraffito to add depth and dimension to your designs, creating visually captivating mugs.
Adding Personalized Text or Quotes

To personalize your mug, consider adding a meaningful quote or a personal message that will make it a unique and cherished item. When choosing a font for your personalized text, opt for one that complements the overall design of the mug. Custom lettering can add a personal touch, allowing you to express your individuality. Consider the size and style of the font to ensure that it's easily readable and complements the mug's aesthetic.
Quote placement is crucial for achieving design balance. Consider the size and shape of the mug when determining where to place the quote or message. It should be positioned in a way that enhances the visual appeal of the mug while also allowing the text to stand out. Experiment with different placements before finalizing the design.
When designing your personalized text or quote, aim for a balance between creativity and clarity. The message should be easily legible while also adding to the overall visual appeal of the mug. By carefully considering font selection, custom lettering, quote placement, and design balance, you can create a personalized mug that's both visually stunning and deeply meaningful.
Incorporating Patterns and Shapes

When it comes to personalizing your mug, incorporating patterns and shapes can further enhance its visual appeal and make it truly one-of-a-kind. There are various ways to add artistic flair to your mug through patterns and shapes, allowing you to express your creativity and style.
- Geometric Shapes: Incorporating geometric shapes such as triangles, squares, or hexagons can give your mug a modern and structured look. These shapes can be arranged in captivating patterns to create a visually striking design.
- Bold Patterns: Utilizing bold patterns like stripes, chevron, or polka dots can add a pop of personality to your mug. Bold patterns can make a statement and instantly catch the eye.
- Abstract Designs: Experimenting with abstract designs can result in a truly unique mug. Incorporating organic shapes and free-flowing lines can create an artistic and unconventional look.
- Organic Shapes: Embracing organic shapes such as waves, curves, or asymmetrical forms can provide a more natural and fluid aesthetic to your mug. These shapes can add a touch of whimsy and playfulness to the design.
Using Stencils for Precision

Using stencils allows for precise and intricate designs to be easily transferred onto your mug, adding a professional touch to your personalized creation. When working with stencils, it's crucial to ensure that they're well-maintained for optimal precision.
Clean the stencils carefully after each use to remove any paint residue that could affect future designs. Additionally, inspect the stencil for any signs of wear and tear, as this can lead to smudged or imperfect patterns. To achieve the best results, invest in high-quality stencils that are durable and can withstand regular use.
When it comes to stencil design, customization is key. Look for stencils that align with your desired mug design and size. If you can't find the perfect stencil, consider creating your own using stencil blanks. This allows you to personalize the design to your liking and ensures a perfect fit for your mug.
Precision is essential when positioning the stencil on the mug, so take your time to ensure it's perfectly aligned before applying the paint.
Embracing Abstract and Splatter Designs

Embracing a more freeform approach, we can experiment with abstract and splatter designs to add a dynamic and spontaneous element to our mug painting endeavors. By incorporating abstract techniques, we can create improvisational designs that are unique and visually striking. Splatter art offers an opportunity to break away from traditional methods and explore unconventional patterns, allowing us to unleash our creativity in new and exciting ways.
- Abstract techniques provide endless possibilities for creating one-of-a-kind designs.
- Improvisational designs allow for a more organic and fluid artistic expression.
- Splatter art adds an element of surprise and energy to the mug, making each piece truly unique.
- Unconventional patterns break away from the ordinary, adding a modern and edgy touch to the mugs.
Embracing abstract and splatter designs opens the door to limitless creativity and allows us to bring a fresh and modern perspective to our mug painting projects. It's an opportunity to let go of rigid structures and embrace the freedom of self-expression through art.
Curing and Sealing Your Artwork

Once we've finished our masterpiece, the next step is crucial: curing and sealing our artwork.
We'll discuss the curing process and how it enhances the durability of our designs.
Additionally, we'll cover some valuable tips for sealing our artwork to ensure its long-lasting protection.
Curing Process Explained
After carefully painting and designing your mugs, the next crucial step is to ensure the artwork is properly cured and sealed for long-lasting beauty and durability.
Here's what you need to know about the curing process:
- Proper Drying: Allow the painted mugs to air dry for 24 hours before proceeding to the curing process.
- Heat Resistance: Place the mugs in a cold oven, then set the temperature to 350°F and bake for 30 minutes. After baking, let the mugs cool inside the oven to prevent rapid temperature changes.
- Avoid Microwave Use: While the cured mugs are heat resistant, it's best to avoid using them in the microwave to prolong the artwork's lifespan.
- Hand Wash Only: To maintain the artwork's vibrancy, hand wash the cured mugs instead of using a dishwasher.
Ensure the curing process is done meticulously to enjoy your beautifully painted mugs for years to come.
Sealing for Durability
To ensure long-lasting beauty and durability of your artwork, it is essential to properly seal and cure the painted mugs. Sealing techniques, best practices, and long-term durability maintenance tips are crucial for preserving the quality of your painted mugs. Here are some effective sealing techniques and maintenance tips for ensuring the longevity of your artwork:
| Sealing Technique | Best Practices | Maintenance Tips |
|---|---|---|
| Use a high-quality sealant | Apply thin, even coats | Hand wash only |
| Allow for proper curing time | Follow manufacturer's instructions | Avoid abrasive scrubbing |
| Consider using a dishwasher-safe sealant | Ensure proper ventilation during application | Avoid soaking in water |
Artwork Protection Tips
When protecting your artwork, ensuring proper curing and sealing techniques is essential for long-lasting durability and beauty. Here are some artwork protection tips to preserve and maintain your painted surfaces:
- Curing Time: Allow sufficient time for the paint to cure completely before sealing to prevent smudging or damage.
- Sealant Selection: Choose a high-quality sealant specifically designed for the type of paint used to ensure maximum protection.
- Application Method: Apply the sealant evenly in thin coats to avoid drips or streaks, ensuring complete coverage.
- Maintenance: Regularly inspect the sealed artwork for any signs of wear or damage, and reapply sealant as needed to maintain its protective properties.
Caring for Painted Mugs

Maintaining the vibrancy of painted mugs requires gentle hand-washing and avoiding harsh abrasives. When cleaning, opt for mild dish soap and a soft sponge to preserve the integrity of the painted design. Harsh scrubbing or abrasive cleaners can cause the paint to fade or chip over time. Additionally, it's essential to dry the mugs thoroughly after washing to prevent water spots and ensure the longevity of the artwork.
When it comes to storage solutions, consider using individual mug hooks or a designated cabinet with soft lining to prevent the painted surfaces from rubbing against each other. This helps to avoid scratches and chipping that can occur when mugs are stacked or stored haphazardly.
If you're displaying your painted mugs, ensure they aren't in direct sunlight, as prolonged exposure can cause the colors to fade.
Hosting a Paint Night With Friends

Gathering friends for a lively paint night brings out the artist in all of us. It's a fantastic way to unwind and unleash creativity in a social setting. To make your paint night a success, consider the following tips:
- Theme selection: Choose a theme that resonates with your friends. Whether it's a seasonal theme, abstract art, or a specific subject, having a theme can spark creativity and make the night more cohesive.
- Socializing tips: Encourage open conversation and mingling. Plan some icebreaker activities to get everyone chatting and feeling comfortable. Remember, it's not just about painting; it's about enjoying each other's company too.
- Hosting logistics: Prepare all the necessary supplies in advance, such as paints, brushes, and canvases. Set up the painting area with enough space for everyone to work comfortably. Consider providing aprons or old shirts to protect clothing.
- Refreshment ideas: Offer a selection of easy-to-eat snacks and drinks. Finger foods like cheese platters, fruit skewers, and mini sandwiches work well. For drinks, consider a signature cocktail or mocktail to add an extra element of fun to the evening.
Creating Matching Sets

To create matching sets of painted mugs, consider selecting a cohesive theme or color scheme that ties the designs together, adding a touch of uniformity to the collection. Mug customization allows for endless possibilities, so when creating matching sets, it's essential to have a clear vision of the overall design.
Think about incorporating elements such as coordinating patterns, complementary color palettes, or thematic motifs. Design coordination can be achieved through various techniques, including using the same base color for all mugs and then customizing each with different but complementary designs.
Alternatively, you could create a series of mugs that form a cohesive picture or message when placed together. Another approach could involve using a consistent style of painting or a specific artistic technique across all the mugs. By focusing on these aspects, you can ensure that the mugs not only match visually but also harmonize in terms of style and artistic expression.
Ultimately, creating matching sets is about achieving a balanced and cohesive look that reflects your creativity and attention to detail.
Exploring Specialized Paints and Techniques

Exploring specialized paints and techniques allows for the creation of unique and eye-catching designs on your mugs, elevating the artistic possibilities and adding a personal touch to each piece. When delving into the world of specialized paints and techniques, there are numerous creative avenues to explore.
Here are some key considerations to keep in mind:
- Blending Techniques: Experiment with various blending techniques such as wet-on-wet blending or dry brushing to achieve stunning color transitions and gradients on your mugs. Blending techniques can add depth and dimension to your designs, making them visually captivating.
- Color Theory: Understanding color theory is essential for creating harmonious and visually appealing designs. Explore the use of complementary, analogous, or monochromatic color schemes to evoke different moods and aesthetics in your mug paintings.
- Specialized Paints: Consider using specialized paints such as metallic, glow-in-the-dark, or textured paints to add a unique flair to your mugs. These paints can create striking visual effects and tactile experiences, making your mugs truly stand out.
- Layering Techniques: Experiment with layering different types of paints to create intricate and multi-dimensional designs on your mugs. Layering paints allows for the creation of complex patterns and textures, adding depth and visual interest to your artwork.
Showcasing Your Painted Masterpieces

After meticulously applying intricate designs and vibrant colors to your mugs, the next step is to find creative ways to showcase your painted masterpieces. Displaying your painted mugs in an attractive and eye-catching manner can elevate the overall impact of your artwork. Here are some presentation ideas and techniques to help you showcase your creations:
| Presentation Ideas | Techniques |
|---|---|
| Use a tiered display stand | Arrange mugs in a visually appealing pattern |
| Create a themed display | Utilize lighting to highlight specific mugs |
| Incorporate complementary items | Use decorative hooks to hang mugs on a wall |
| Use a glass cabinet | Incorporate natural elements like plants |
| Create a seasonal display | Implement rotating displays for variety |
When it comes to sharing your painted masterpieces, leveraging social media and online communities can help you reach a wider audience and connect with other artists. Consider creating engaging posts with high-quality images and relevant hashtags to attract attention and engage with fellow art enthusiasts. Sharing your work in online communities and forums can also provide valuable feedback and support from a community of like-minded individuals. By utilizing these displaying techniques and sharing strategies, you can effectively showcase your painted mugs to the world.
Frequently Asked Questions
Can I Use Regular Acrylic Paint for My Mug or Do I Need Specialized Paint?
We can use regular acrylic paint for the mug, but we should seal it with a food-safe sealant to make it durable.
Using stencils can help create intricate designs, and drip painting can add a unique touch.
It's essential to ensure that the paint is non-toxic and safe for use with food and drinks.
Additionally, hand-washing the painted mugs will help maintain the design's longevity.
What Are Some Unique Painting Techniques That Can Be Used on Mugs?
When exploring unique painting techniques, blending techniques can create a seamless transition of colors, adding depth and dimension to the artwork.
Textured effects, like stippling or sponging, can elevate the visual appeal of the piece, providing tactile interest and a dynamic finish.
These methods offer a creative way to experiment with different styles and add complexity to the art.
Is It Safe to Use Metallic or Glitter Paints on Mugs That Will Be Used for Drinking?
Yes, it's safe to use metallic or glitter paints on mugs meant for drinking, but safety precautions are important.
When considering painting over designs, choose specialized food-safe acrylic paints. These paints are designed for surfaces that come into contact with food and drink. Unique designs can be achieved by using various painting techniques with these specialized paints.
It's vital to ensure that the artwork is displayed safely, especially when using metallic or glitter paints.
Can I Paint Over a Design That I Don't Like, or Do I Need to Start Over With a New Mug?
We can absolutely revamp designs on mugs without starting over. Reusing materials and transforming mugs with creative alternatives is the way to go.
With a little bit of creativity, we can paint over the existing design to create a fresh look.
There are also other options such as using decals or adding embellishments to breathe new life into the old design.
It's all about finding inventive ways to update and personalize our mugs.
How Can I Safely Display My Painted Mugs Without Damaging the Artwork?
To safely display our painted mugs without damaging the artwork, we can use various artistic techniques to seal and protect the designs.
One effective method is to apply a heat-resistant sealant that will preserve the artwork while also making the mugs safe for display.
Additionally, using a display stand or shelf can help prevent any accidental damage.
This combination of sealing and strategic display will ensure the longevity and beauty of our painted mugs.
Conclusion
So, what're you waiting for? Grab some mugs, paint, and your creative spirit, and start transforming plain mugs into personalized works of art.
Don't worry if you're not an artist – with the right tools and techniques, anyone can create beautiful designs.
So why not give it a try and unleash your inner artist?
You'll be amazed at what you can create and the joy it brings to your daily coffee or tea routine.
- About the Author
- Latest Posts
Introducing Ron, the home decor aficionado at ByRetreat, whose passion for creating beautiful and inviting spaces is at the heart of his work. With his deep knowledge of home decor and his innate sense of style, Ron brings a wealth of expertise and a keen eye for detail to the ByRetreat team.
Ron’s love for home decor goes beyond aesthetics; he understands that our surroundings play a significant role in our overall well-being and productivity. With this in mind, Ron is dedicated to transforming remote workspaces into havens of comfort, functionality, and beauty.
Garage Door Opener
Silencing Your Garage Door Opener Humming: A Step-by-Step Guide
Discover how to silence your garage door opener humming with expert tips and tricks, transforming your space into a noise-free haven.

We’ve got you covered with practical steps to tackle the noise when it comes to silencing your garage door opener humming.
From pinpointing the source of the hum to exploring maintenance techniques, our guide offers a comprehensive approach to quieting your garage door opener.
By implementing these methods, you can create a peaceful environment without the constant background hum.
So, are you ready to transform your garage into a serene space?
Key Takeaways
- Inspect transformer for issues in Legacy 850/Standard Drive 650 models.
- Tighten all hardware components to minimize vibrations and humming.
- Regularly lubricate moving parts to reduce friction and noise.
- Adjust opener settings for optimized force and smooth operation.
Identifying the Source of Humming
To pinpoint the source of the humming noise in your garage door opener, start by examining the transformer located in the motor head for any signs of malfunction. The transformer is crucial for converting incoming power to the appropriate voltage needed to operate the DC motors in garage door openers like the Legacy 850 or Standard Drive 650.
If you own one of these models and notice a persistent humming sound, the transformer may be the culprit. For Legacy 850 or Standard Drive 650 units with a date code before 15198, replacing the transformer (part #39342RS) is often the solution. These replacement transformers for Overhead Door model openers can be easily sourced from www.OverheadDoorPartsOnline.com.
If you encounter any challenges during the replacement process or need further assistance, don't hesitate to reach out to your local Overhead Door distributor at 1-800-929-3667 for expert technical support. Identifying and addressing issues with the transformer can help silence the humming and ensure smooth operation of your garage door opener.
Inspecting and Tightening Hardware

Inspecting and tightening the hardware components of your garage door opener is crucial to identifying and addressing potential sources of humming noise. Begin by checking for loose nuts, bolts, and screws on the opener. Using a wrench, tighten all hardware components securely to reduce vibrations and minimize humming. Ensure that the mounting brackets, chains, and railings are properly fastened to prevent unnecessary movement and humming. It's also essential to inspect the motor head and drive system for any loose parts that could be causing the humming sound.
Regularly tightening and securing the hardware of your garage door opener is key to maintaining a quiet and efficient operation. Loose components can lead to increased vibrations and noise levels. By keeping all nuts, bolts, screws, mounting brackets, chains, railings, and motor head properly tightened, you can significantly reduce the humming noise coming from your garage door opener. This simple maintenance task can make a big difference in the overall performance of your garage door system.
Lubricating Moving Parts
When lubricating the moving parts of your garage door opener to reduce humming noise, ensure thorough coverage using a garage door lubricant or silicone-based option. Regular maintenance of your garage door opener includes proper lubrication of its moving parts such as the chain, belt, or screw drive. This lubrication helps reduce noise by preventing excess friction between the components. To assist you in understanding which lubricant to use and where to apply it, refer to the table below:
| Moving Parts | Recommended Lubricant |
|---|---|
| Chain Drive | Garage Door Lubricant |
| Belt Drive | Silicone-Based Lubricant |
| Screw Drive | Garage Door Lubricant |
Adjusting Garage Door Opener Settings

Adjust garage door opener settings to minimize humming noise by accessing the control panel and fine-tuning force and travel limits. Here's how to do it:
- Access the Control Panel:
- Locate the control panel on your garage door opener, usually found near the motor unit.
- Open the panel cover to reveal the adjustment settings.
- Adjust Force Settings:
- Use a flathead screwdriver to adjust the force settings on the opener.
- Increase or decrease the force to find the optimal setting that reduces resistance and noise.
- Fine-Tune Travel Limits:
- Locate the travel limit adjustment screws on the control panel.
- Gradually adjust the travel limits for both opening and closing directions.
- Test the door after each adjustment to ensure it opens and closes smoothly without excessive noise.
Seeking Professional Help
For addressing unusual humming sounds in your garage door opener, it is advisable to seek professional assistance from a certified technician. When dealing with a persistent humming noise coming from your garage door opener, it is crucial to involve experts who can accurately diagnose and resolve the issue. Certified technicians have the knowledge and experience to identify the source of the unusual sound and provide appropriate solutions to eliminate it effectively.
To guide you in understanding the benefits of seeking professional help, refer to the table below:
| Benefits of Seeking Professional Help | |
|---|---|
| 1. Expert Diagnosis | Certified technicians can pinpoint the exact cause of the humming noise. |
| 2. Precise Resolution | Professionals offer targeted solutions to resolve the issue efficiently. |
| 3. Technical Support | Get access to specialized assistance for your garage door opener complications. |
| 4. Prevent Further Damage | Avoid potential harm by allowing trained professionals to handle the motor head. |
When faced with a garage door opener humming problem, don't hesitate to reach out to a certified technician for technical support and expert troubleshooting.
Frequently Asked Questions
How Do I Silence My Garage Door Opener?
To silence your garage door opener, locate the source of the noise, which may be the motor head. Check the transformer for any issues causing the humming sound.
If you have a Legacy 850 or similar model, consider replacing the transformer part. For specific parts and guidance, visit OverheadDoorPartsOnline.com or reach out to a local distributor for assistance.
This process will help eliminate the unwanted noise from your garage door opener.
Why Is My Garage Door Opener Making a Humming Noise?
We discovered why our garage door opener is humming. It seems the culprit might be a faulty transformer in the motor head.
This issue is common in garage door openers with DC motors like the Overhead Door Phantom (777CD) and Legacy 850 (2029). If you have a Legacy 850 with a date code before 15198, replacing the transformer (part #39342RS) could be the fix.
Look for replacement transformers at www.OverheadDoorPartsOnline.com or call 1-800-929-3667 for help.
How Do I Make My Garage Door Not Loud?
To make our garage door not loud, we can start by lubricating the moving parts to reduce noise from friction. Check for loose chains or belts that might be causing the loudness.
Upgrading to a belt-driven opener can also help for quieter operation. Inspect the motor head for loose components.
If the noise persists, it's best to seek help from a professional technician for an effective solution.
How Do I Stop My Electric Buzzing?
If you're looking to halt that electric buzzing, we've got you covered.
First, pinpoint the source of the sound, often linked to a malfunctioning transformer in the motor head. Models like the Overhead Door Phantom (777CD) and Legacy 850 (2029) with DC motors commonly face this issue.
For specific models like the Legacy 850 or Standard Drive 650 predating 15198, think about replacing the transformer (part #39342RS).
Need replacement transformers? Check out www.OverheadDoorPartsOnline.com.
Conclusion
In conclusion, by following the steps outlined in this guide, we can effectively address the issue of garage door opener humming and ensure a more peaceful and efficient operation.
Remember, with regular maintenance and proper care, we can achieve a quieter and smoother functioning garage door opener.
Don't hesitate to seek professional assistance if needed, as it can further enhance the performance of your garage door system.
- About the Author
- Latest Posts
Introducing Ron, the home decor aficionado at ByRetreat, whose passion for creating beautiful and inviting spaces is at the heart of his work. With his deep knowledge of home decor and his innate sense of style, Ron brings a wealth of expertise and a keen eye for detail to the ByRetreat team.
Ron’s love for home decor goes beyond aesthetics; he understands that our surroundings play a significant role in our overall well-being and productivity. With this in mind, Ron is dedicated to transforming remote workspaces into havens of comfort, functionality, and beauty.
Do you ever feel exhausted from spending endless hours in the kitchen, feeling like you’re trapped in a continuous loop of chopping, stirring, and measuring?
Well, fear not, fellow home chefs, because we have the solution for you! Introducing 11 smart kitchen gadgets that will revolutionize the way you cook and elevate your culinary skills to new heights.
From a smart refrigerator that keeps your groceries fresh and organized, to a voice-activated assistant that helps you multitask with ease, these gadgets are a game-changer.
With Wi-Fi enabled ovens, automated herb gardens, and intelligent instant pots, you’ll be cooking like a pro in no time.
So, get ready to take your cooking to the next level with these must-have gadgets that every home chef needs.
Key Takeaways
- Smart kitchen gadgets like smart refrigerators, Wi-Fi enabled ovens, smart coffee makers, and automatic pot stirrers revolutionize food storage, cooking, and meal preparation.
- These smart appliances offer features such as remote control and monitoring, energy-saving technology integration, precise temperature settings, and real-time notifications for convenient and efficient cooking experiences.
- Smart kitchen appliances help reduce food waste, save time and effort in the kitchen, and provide a perfectly brewed cup of coffee or a deliciously cooked meal.
- Additional smart kitchen gadgets like precision sous vide cookers, smart slow cookers, smart air fryers, and automated herb gardens further enhance culinary creations, offer convenience, optimize energy usage, and promote a sustainable lifestyle.
Smart Refrigerator
We rely on our smart refrigerators to keep our food fresh and organized. These innovative appliances have revolutionized the way we store and manage our groceries, offering a range of features that go far beyond simple temperature control.
A smart refrigerator is equipped with energy-saving technology integration, making it not only convenient but also environmentally friendly. With advanced sensors and connectivity capabilities, a smart refrigerator can optimize energy usage based on your usage patterns. It can automatically adjust temperature settings during off-peak hours and limit energy consumption when the door is left open. This not only saves you money on your energy bills but also reduces your carbon footprint.
Additionally, a smart refrigerator can help you streamline your grocery shopping experience. With built-in cameras, you can easily check the contents of your fridge from anywhere using your smartphone. This eliminates the need to guess what you have or what you need to buy, ensuring that you never run out of essentials.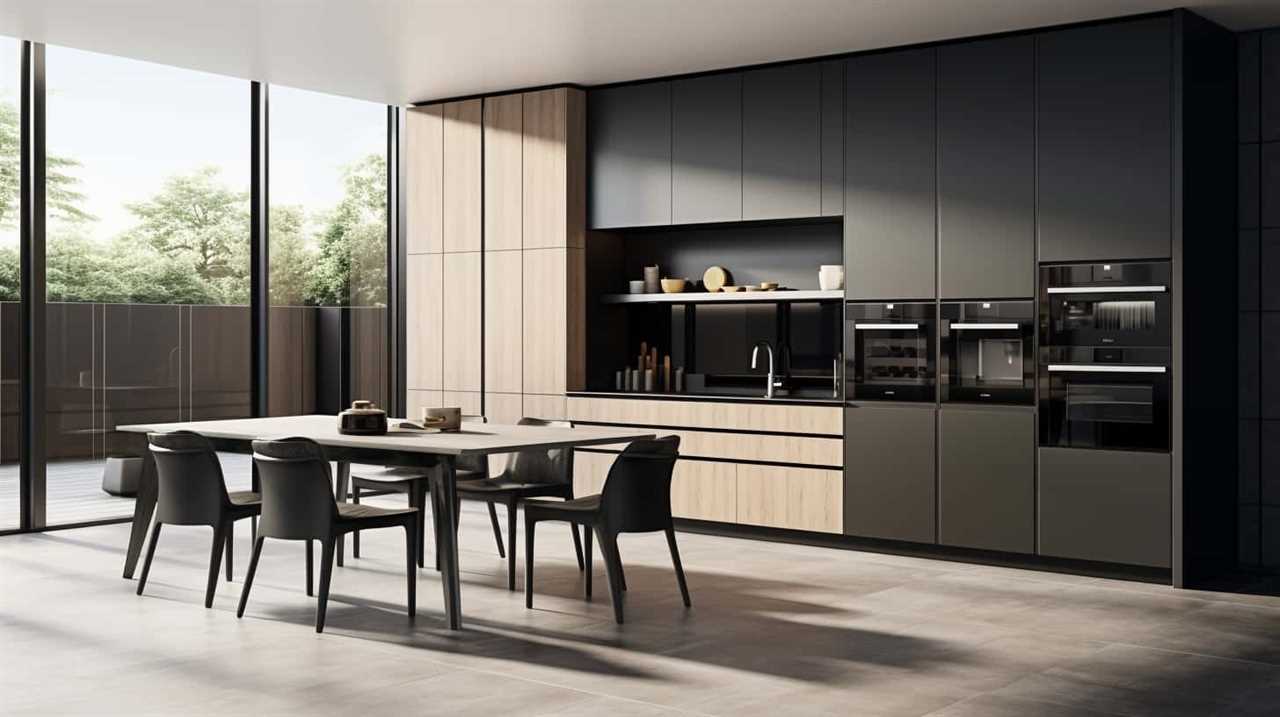
Furthermore, these intelligent appliances offer sophisticated organization features. They can categorize your groceries, track their expiration dates, and even suggest recipes based on the available ingredients. This not only saves you time but also helps reduce food waste.
Wi-Fi Enabled Oven
When it comes to upgrading your kitchen, a Wi-Fi enabled oven is a must-have for any home chef.
With the ability to control your oven remotely, you can start preheating while you’re still at the grocery store or adjust the temperature from the comfort of your couch.
Not only does it provide convenience, but it also offers enhanced cooking precision, allowing you to set precise temperatures and timers for perfectly cooked meals every time.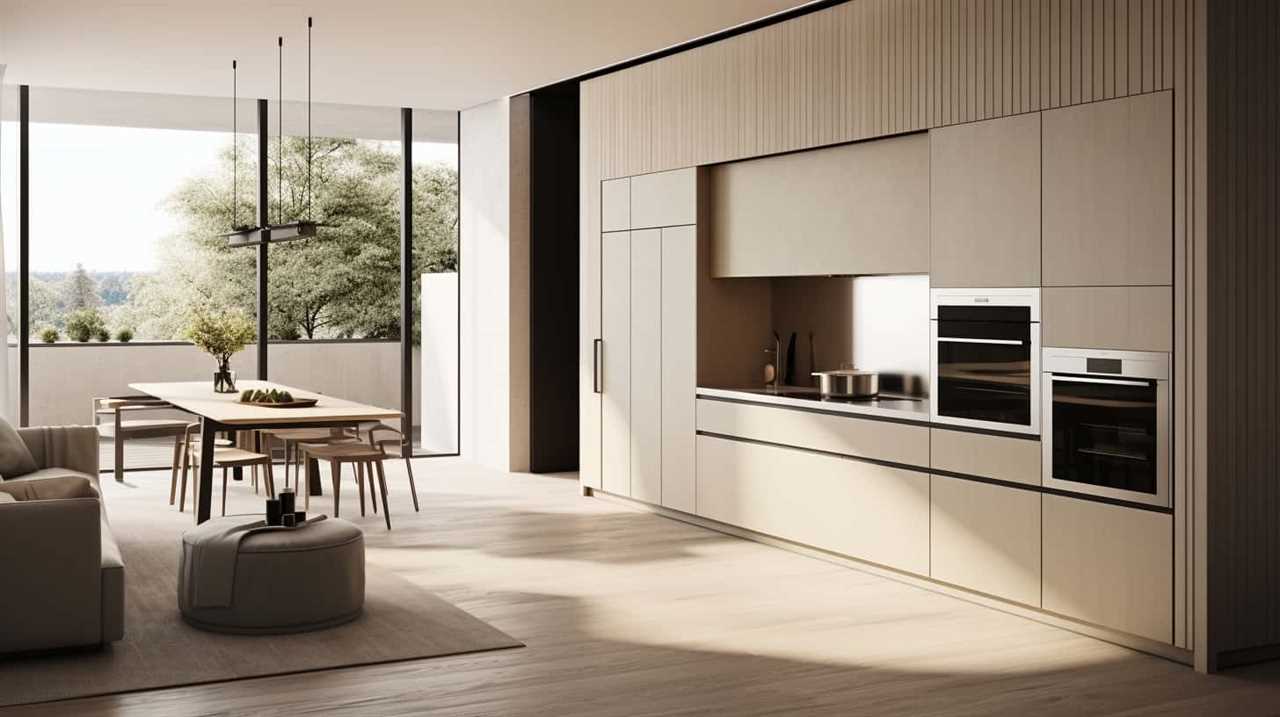
Plus, with integrated energy-saving technology, you can cook your favorite dishes while saving on energy consumption.
Remote Cooking Convenience
One essential addition to the smart kitchen is a Wi-Fi enabled oven, allowing us to remotely control and monitor our cooking process. With this innovative technology, we can now take control of our culinary creations from anywhere in the house or even when we’re not at home.
Here are some exciting features that come with a Wi-Fi enabled oven:
- Remote recipe sharing: Share your favorite recipes with friends and family, allowing them to recreate your delicious dishes with ease.
- Smart kitchen lighting: Adjust the lighting in your kitchen to create the perfect ambiance for cooking, all from the convenience of your smartphone.
- Real-time notifications: Receive alerts when your food is ready or when there’s a need for adjustment, ensuring perfectly cooked meals every time.
- Temperature control: Adjust the oven temperature remotely to ensure precise cooking results, giving you complete control and mastery over your recipes.
With a Wi-Fi enabled oven, cooking becomes a seamless and enjoyable experience, giving you the freedom to experiment and create culinary masterpieces with ease.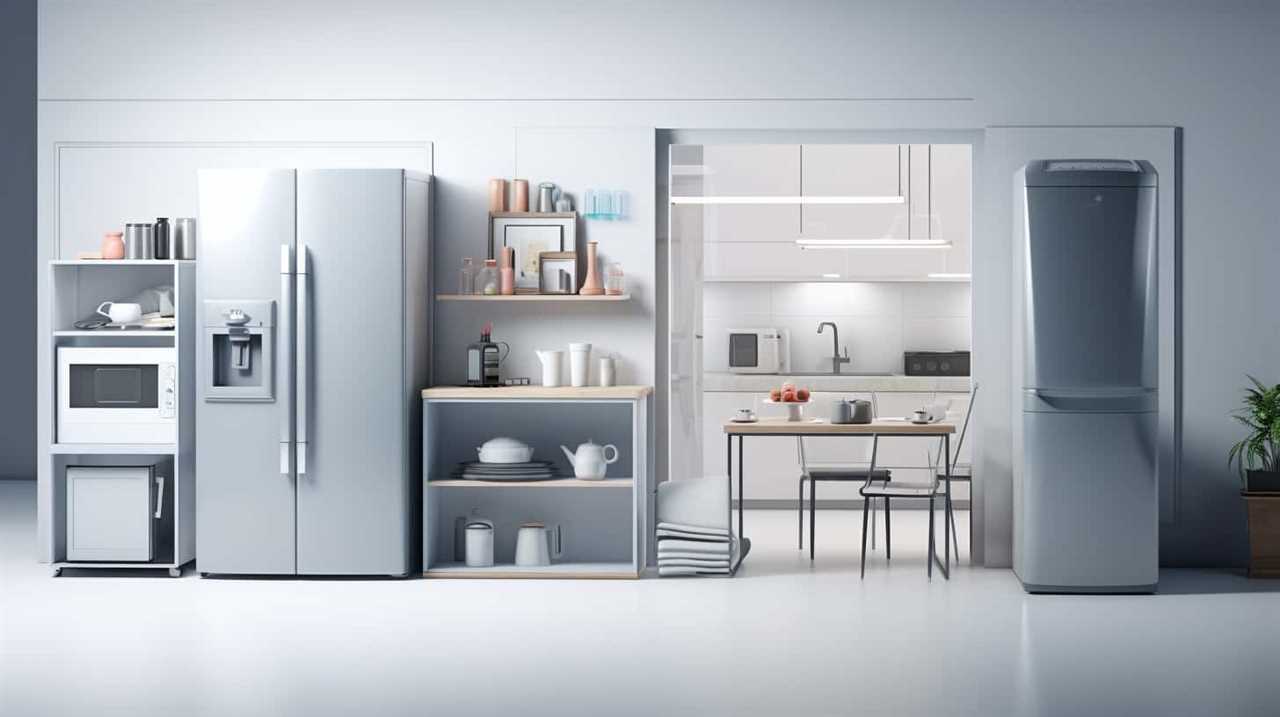
Enhanced Cooking Precision
To achieve enhanced cooking precision, a Wi-Fi enabled oven allows us to remotely control and monitor the cooking process using innovative technology. With precision cooking techniques becoming increasingly popular among home chefs, having an oven that offers advanced temperature control is essential. Imagine being able to adjust the temperature of your oven from the palm of your hand, ensuring that your dish is cooked to perfection every time.
To give you a better understanding of the capabilities of a Wi-Fi enabled oven, here is a table showcasing some of its key features:
| Feature | Description |
|---|---|
| Remote Control | Adjust temperature and cooking time from your smartphone or tablet. |
| Temperature Monitoring | Receive real-time alerts and updates on the progress of your dish. |
| Recipe Integration | Access a wide range of recipes and cook them with precision using guided cooking features. |
| Multi-Zone Cooking | Control different temperature zones within the oven to cook multiple dishes simultaneously. |
| Energy Efficiency | Track and optimize energy usage to reduce electricity consumption. |
With a Wi-Fi enabled oven, you can take your cooking to the next level by harnessing the power of technology and achieving unparalleled cooking precision. Say goodbye to overcooked or undercooked meals and hello to perfectly cooked dishes every time.
Energy-Saving Technology Integration
By integrating energy-saving technology into our Wi-Fi enabled oven, we’re able to optimize electricity consumption and reduce energy waste. This innovative feature allows us to take a step towards a more sustainable and eco-friendly kitchen. Here are some benefits of our energy-saving technology: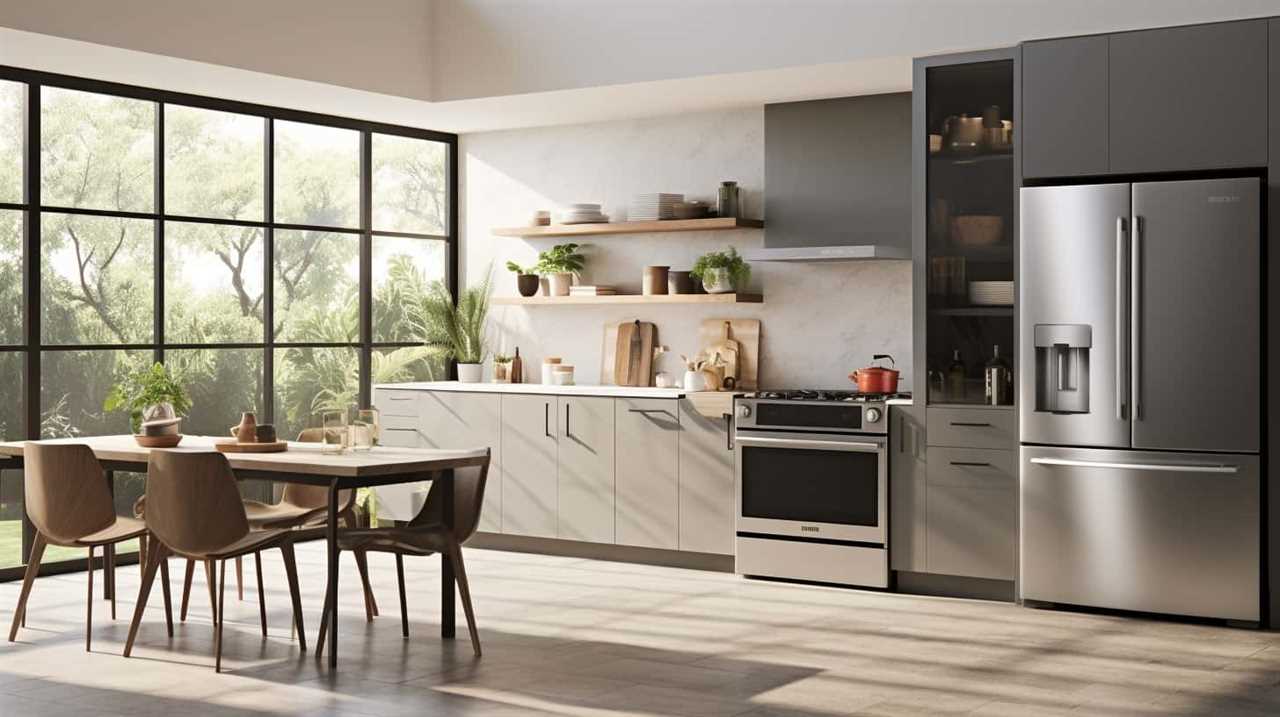
- Reduced electricity bills: With energy-efficient appliances, you can save money on your monthly electricity bills. Our Wi-Fi enabled oven intelligently manages power consumption, ensuring that only the necessary amount of energy is used.
- Environmental consciousness: By investing in energy-efficient appliances, you’re contributing to a greener future. These appliances help reduce greenhouse gas emissions and minimize your carbon footprint.
- Smart lighting control: Our Wi-Fi enabled oven integrates with smart lighting control systems, allowing you to optimize energy usage throughout your kitchen. You can easily dim or turn off unnecessary lights, saving electricity without sacrificing functionality.
- Enhanced cooking experience: Energy-saving technology doesn’t compromise on performance. Our Wi-Fi enabled oven still delivers exceptional cooking results while conserving energy. You can enjoy perfectly cooked meals while knowing you’re helping the environment.
With these energy-saving features, you can transform your kitchen into a more sustainable and efficient space, making a positive impact on both your wallet and the planet.
Voice-Activated Assistant
With a voice-activated assistant, we can effortlessly control and streamline our cooking experience. Imagine being able to adjust oven temperatures, set timers, and even search for recipes without lifting a finger. Voice-activated assistants like Amazon Alexa or Google Assistant have revolutionized the way we interact with our smart kitchen gadgets.
The benefits of voice-activated assistants in the kitchen are undeniable. They offer convenience and efficiency, allowing us to perform tasks hands-free. We can simply ask our assistant to preheat the oven, add items to our shopping list, or even find substitutions for ingredients. This not only saves time but also enhances safety by reducing the need for manual interaction with appliances while cooking.
However, voice-activated assistants also have their limitations. Accurate voice recognition can sometimes be a challenge, leading to misunderstandings or incorrect commands. Additionally, privacy concerns have been raised regarding the constant listening and data collection by these devices.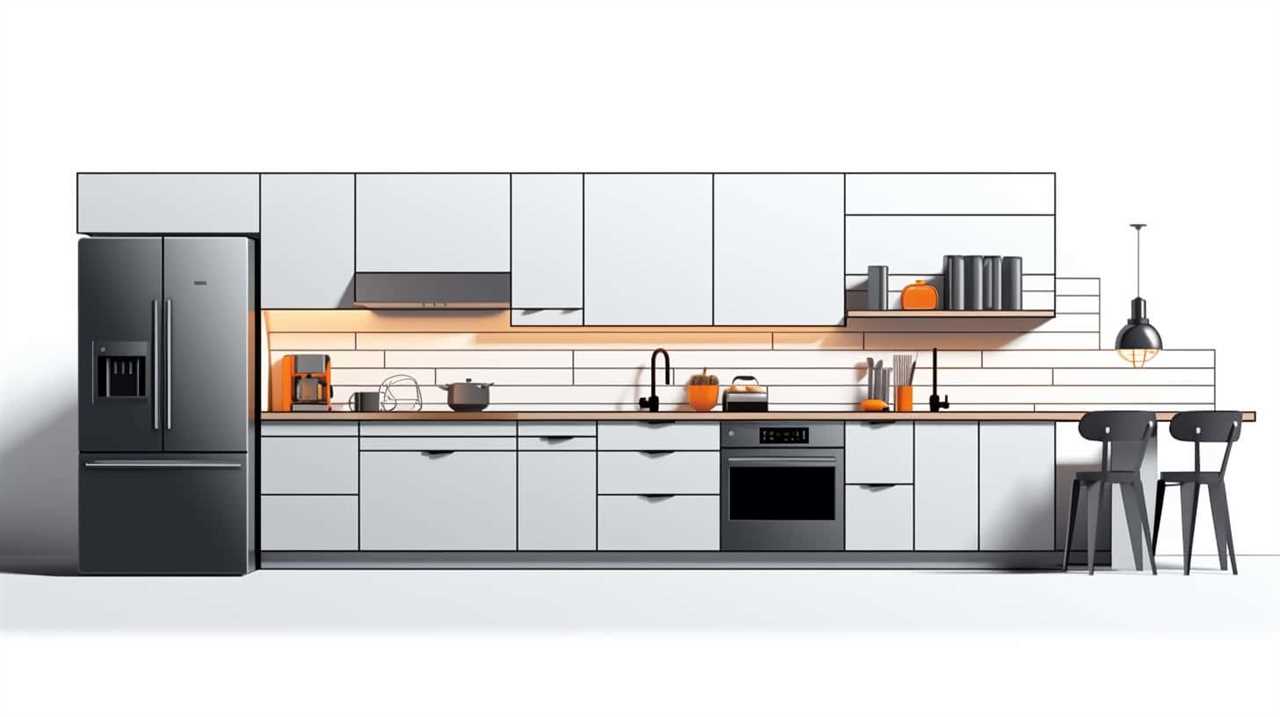
Nevertheless, the future of voice-activated assistants in the kitchen looks promising. As technology continues to advance, we can expect more seamless integration with kitchen appliances. Imagine a future where our voice-activated assistant can suggest personalized recipes based on our dietary preferences or even provide step-by-step cooking instructions.
Smart Coffee Maker
Now let’s move on to another must-have smart kitchen gadget: a smart coffee maker. Gone are the days of waiting for ages for your coffee to brew. With a smart coffee maker, you can have a perfectly brewed cup of coffee ready for you as soon as you wake up.
Here are four reasons why a smart coffee maker is an essential addition to your connected kitchen appliances:
- Convenience: A smart coffee maker allows you to control and monitor your coffee brewing process from anywhere using your smartphone. No more rushing to the kitchen first thing in the morning, simply set the timer and wake up to the aroma of freshly brewed coffee.
- Customization: With a smart coffee maker, you can easily adjust the strength and temperature of your coffee to suit your taste preferences. Plus, some models even come with a built-in smart coffee grinder, ensuring that you always use freshly ground beans for the perfect cup.
- Energy Efficiency: Many smart coffee makers come with energy-saving features, such as automatic shut-off and power management. This not only helps you save on electricity bills but is also better for the environment.
- Integration: A smart coffee maker can seamlessly integrate with other connected kitchen appliances, allowing you to create a fully automated and synchronized cooking experience.
Now that we’ve explored the wonders of a smart coffee maker, let’s move on to our next kitchen gadget: the automatic pot stirrer.
Automatic Pot Stirrer
An automatic pot stirrer is a valuable addition to any smart kitchen setup. This automated mixing device takes the hassle out of stirring pots and allows for hands-free cooking. With an automatic pot stirrer, you can say goodbye to constantly standing over the stove, tirelessly stirring your dishes.
Imagine being able to set your pot to simmer and walk away knowing that your food will be perfectly stirred. Whether you’re making soups, sauces, or even risotto, this smart gadget ensures even heat distribution and prevents food from sticking to the bottom of the pot.
Here is a comparison table to help you choose the best automatic pot stirrer for your kitchen:
| Features | Brand A | Brand B | Brand C |
|---|---|---|---|
| Price | $50 | $70 | $90 |
| Power | 300W | 400W | 500W |
| Timer | Yes | Yes | No |
| Speeds | 3 | 5 | 4 |
As you can see, each brand offers different features at varying price points. Consider your specific needs and budget when choosing the right automatic pot stirrer for you.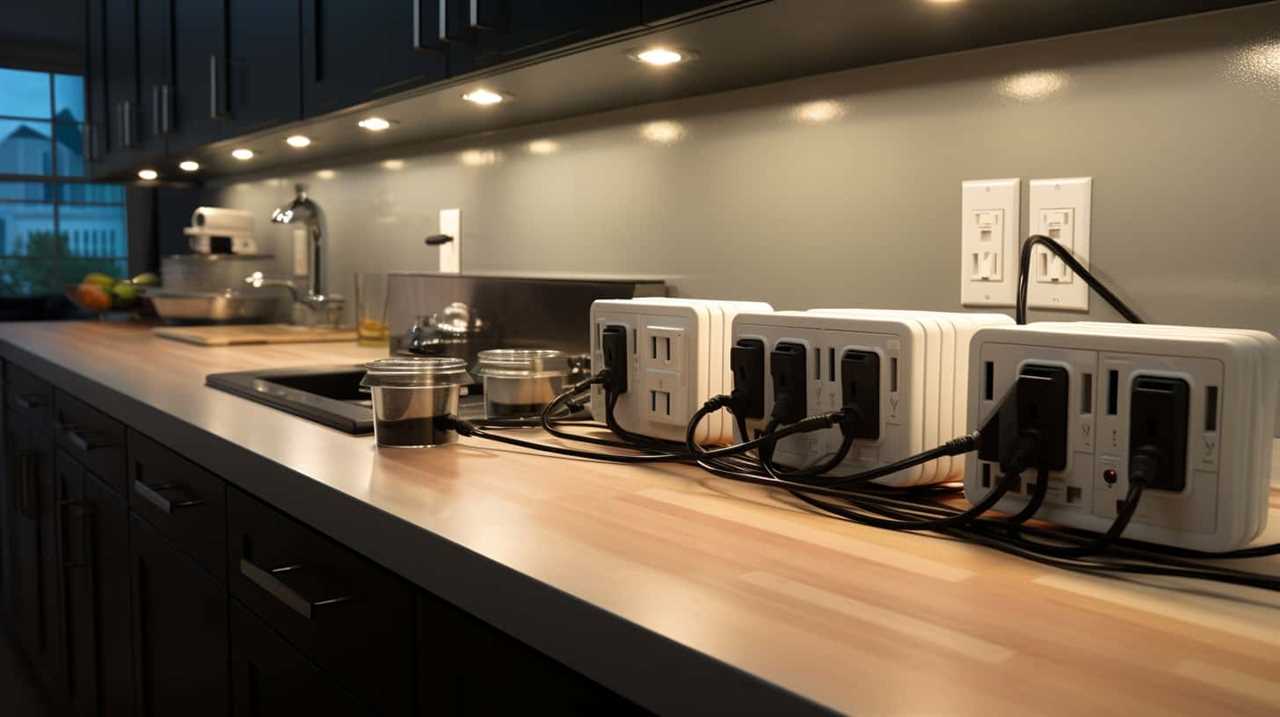
With an automatic pot stirrer, you can save time and effort in the kitchen, allowing you to focus on other tasks or simply relax while your meal cooks itself. Embrace the convenience and efficiency of hands-free cooking with this innovative gadget.
Precision Sous Vide Cooker
We highly recommend investing in a precision sous vide cooker for our smart kitchen setup. This gadget is a game-changer for any home chef looking to elevate their cooking skills. Sous vide technology allows for precise and consistent cooking temperatures, resulting in perfectly cooked meals every time.
Here are four reasons why a precision sous vide cooker is a must-have:
- Restaurant-quality results: With precision cooking, you can achieve the same level of tenderness and juiciness found in high-end restaurants. Your meats will be cooked to perfection, with flavors and textures that are hard to achieve using traditional cooking methods.
- Time-saving convenience: Sous vide cooking takes the guesswork out of meal preparation. Simply set the desired temperature and cooking time, and let the precision sous vide cooker do the rest. It frees up your time to focus on other tasks while your food cooks slowly and evenly.
- Improved flavor infusion: By vacuum sealing your ingredients in a bag before cooking, you can lock in flavors and aromas. This technique allows for better flavor infusion, resulting in more flavorful and delicious dishes.
- Versatility in cooking: Whether you’re cooking meats, vegetables, or even desserts, a precision sous vide cooker can handle it all. It’s a versatile tool that gives you the flexibility to experiment with various recipes and ingredients.
Investing in a precision sous vide cooker will bring your cooking to a whole new level of precision and perfection. It’s a must-have gadget for any home chef who desires mastery in the kitchen.
Smart Slow Cooker
Now let’s talk about the Smart Slow Cooker, a game-changer for busy home chefs.
With its time-saving meal prep feature, you can easily set up your ingredients in the morning and come home to a deliciously cooked meal.
But it doesn’t stop there – this smart gadget also offers convenient cooking features, allowing you to adjust temperature and cooking times with just a few taps on your smartphone.
And the best part?
The Smart Slow Cooker enhances flavor infusion, ensuring that every bite is packed with mouthwatering taste.
Time-Saving Meal Prep
To streamline meal preparation and maximize efficiency in the kitchen, our go-to solution is the use of a smart slow cooker. With its advanced features and convenience, this kitchen gadget is a game-changer for busy home chefs.
Here are four reasons why a smart slow cooker is a must-have for time-saving meal prep:
- Meal planning made easy: The smart slow cooker allows you to plan your meals in advance, ensuring that you have delicious, home-cooked meals ready when you need them.
- Kitchen organization simplified: With the smart slow cooker, you can prepare ingredients in the morning and let the cooker do the rest. This frees up valuable counter space and reduces the number of pots and pans you need to use.
- Precise cooking control: The smart slow cooker offers precise temperature control and cooking timers, allowing you to achieve perfect results every time.
- Remote monitoring and control: Some smart slow cookers can be connected to your smartphone, allowing you to monitor and control the cooking process from anywhere. This means you can start cooking while you’re at work and come home to a hot, ready-to-eat meal.
Convenient Cooking Features
Maximizing efficiency in the kitchen, our solution for convenient cooking features includes utilizing a smart slow cooker. With its time-saving recipes and multi-functional capabilities, this appliance is a game-changer for any home chef.
Imagine coming home to the aroma of a perfectly cooked meal, without having to spend hours in the kitchen. The smart slow cooker allows you to set the cooking time and temperature remotely using your smartphone, so you can have dinner ready when you walk through the door.
It also offers a variety of cooking modes, such as sautéing, steaming, and baking, making it a versatile addition to your kitchen arsenal. Whether you’re a busy professional or a culinary enthusiast, the smart slow cooker will revolutionize the way you cook.
Say goodbye to long hours spent slaving over the stove and hello to effortless, delicious meals.
Enhanced Flavor Infusion
Utilizing a smart slow cooker, we enhance flavor infusion in our dishes. With the help of advanced technology, our cooking experience is taken to a whole new level. Here are some ways we achieve flavor perfection:
- Smart Spice Rack: Our smart slow cooker comes equipped with a built-in smart spice rack, allowing us to easily access and incorporate a wide variety of spices into our dishes. This ensures that every bite is bursting with flavor.
- Flavor Infusion Techniques: Our smart slow cooker incorporates innovative flavor infusion techniques, such as steam infusion and sous vide cooking. These methods enhance the flavors of our ingredients, resulting in dishes that are rich, tender, and incredibly delicious.
- Precision Temperature Control: With precise temperature control, our smart slow cooker ensures that our dishes are cooked at the perfect temperature for maximum flavor extraction. This means that every ingredient is cooked to perfection, resulting in mouthwatering dishes.
- Customizable Cooking Settings: Our smart slow cooker allows us to customize our cooking settings, giving us the flexibility to experiment with different flavors and cooking techniques. This allows us to create unique and tasty dishes that truly reflect our culinary creativity.
Now, let’s move on to the next exciting smart kitchen gadget: the bluetooth food scale.
Bluetooth Food Scale
We love using a smart Bluetooth food scale to accurately measure ingredients for our recipes. This innovative kitchen gadget combines wireless connectivity with cooking accuracy, making it an essential tool for any home chef.
With a Bluetooth food scale, we can easily connect it to our smartphones or tablets, allowing us to conveniently track and record our measurements in real-time.
Gone are the days of guessing or estimating ingredient quantities. With a Bluetooth food scale, we can achieve precise measurements, ensuring that our recipes turn out perfectly every time. The scale uses advanced technology to deliver accurate readings, taking the guesswork out of cooking and baking.
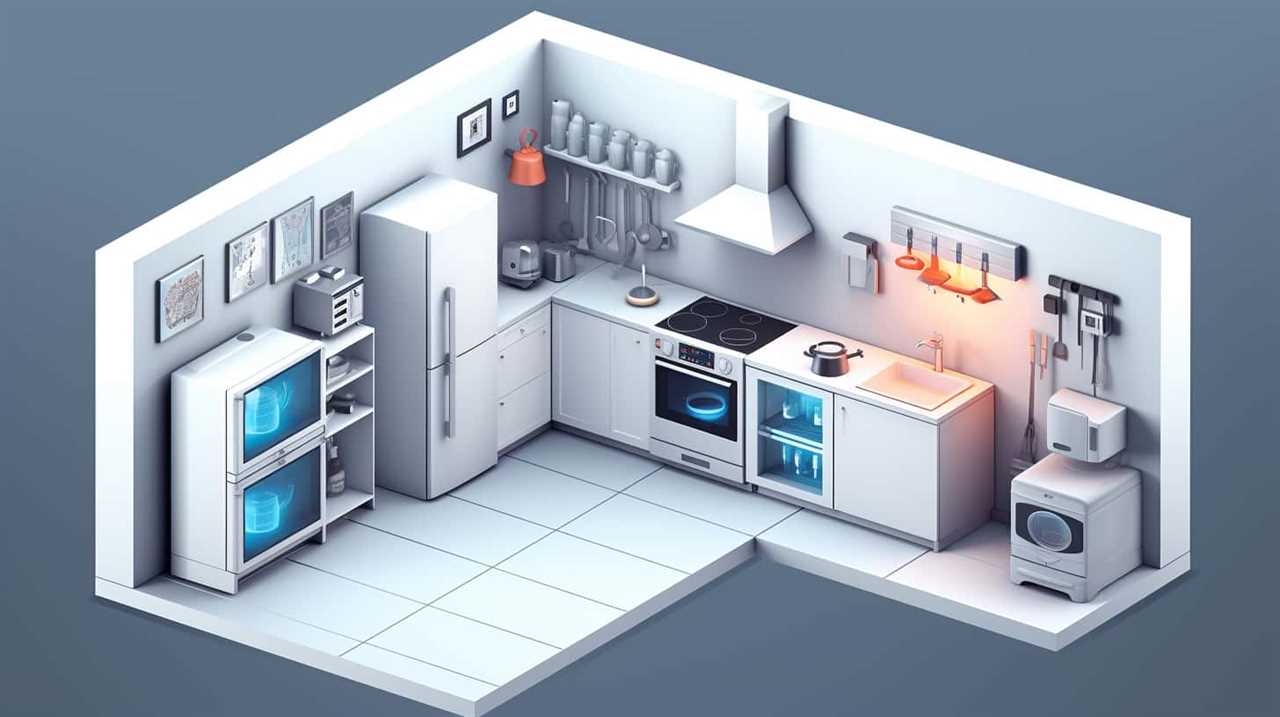
Not only does a Bluetooth food scale provide precise measurements, but it also offers additional features that enhance our cooking experience. Some models come with built-in timers and recipe apps, helping us stay organized and efficient in the kitchen. We can easily follow recipes and measure ingredients simultaneously, ensuring that everything is done with precision and in a timely manner.
As we transition into the next section about the ‘intelligent instant pot,’ we can see how the Bluetooth food scale complements this smart kitchen gadget. By accurately measuring ingredients with our Bluetooth food scale, we can ensure that our recipes are perfectly executed in our intelligent instant pot, creating delicious and flavorful meals with ease.
Intelligent Instant Pot
To get the most out of our cooking experience, let’s harness the power of the intelligent instant pot. This innovative kitchen gadget combines intelligent meal planning with automated pressure cooking to revolutionize the way we prepare meals. Here are four reasons why the intelligent instant pot should be a staple in every home chef’s kitchen:
- Effortless Meal Prep: With the intelligent instant pot, meal planning becomes a breeze. It has built-in sensors that can detect the type of ingredients you put in and suggest suitable cooking times and temperatures. Gone are the days of constantly monitoring the stove or oven – the instant pot takes care of everything.
- Time-Saving Convenience: The automated pressure cooking feature of the intelligent instant pot significantly reduces cooking time. It uses advanced algorithms to calculate the optimum pressure and temperature, resulting in faster cooking without sacrificing flavor or tenderness.
- Versatility and Customization: Whether you’re in the mood for a hearty stew or a delicate dessert, the intelligent instant pot has you covered. It offers a multitude of cooking modes, from slow cooking to sautéing, and even has a yogurt-making function. Plus, you can easily customize settings to suit your preferences.
- Smart Control and Connectivity: The intelligent instant pot can be controlled remotely using a smartphone app. Imagine being able to start cooking dinner on your way home from work, so it’s ready when you arrive. With its Wi-Fi and Bluetooth capabilities, this smart kitchen gadget keeps you connected and in control.
With the intelligent instant pot, you can elevate your cooking skills to the next level. It’s a game-changer that empowers home chefs to create delicious, healthy meals with ease and precision.
Smart Air Fryer
One essential kitchen gadget that every home chef needs is a smart air fryer. This innovative device combines the convenience of a traditional air fryer with the power of smart technology.
With a smart air fryer, you can enjoy all your favorite fried foods with a fraction of the oil and calories. It uses hot air circulation to cook food evenly and crisp it up to perfection. The smart features allow you to control and monitor the cooking process using your smartphone or voice commands. You can adjust the temperature, cooking time, and even receive notifications when your food is ready.
But the benefits of a smart air fryer go beyond just convenience. It also offers a range of healthy cooking options. You can use it to make crispy vegetables, juicy chicken breasts, or even bake a batch of guilt-free cookies. With its precise temperature control and rapid cooking capabilities, you can achieve delicious results every time. Plus, the smart technology ensures that you never overcook or burn your food.
Whether you’re a health-conscious chef or just looking for a convenient way to enjoy your favorite fried foods, a smart air fryer is a must-have kitchen gadget. It combines the best of both worlds – delicious taste and healthy cooking options.
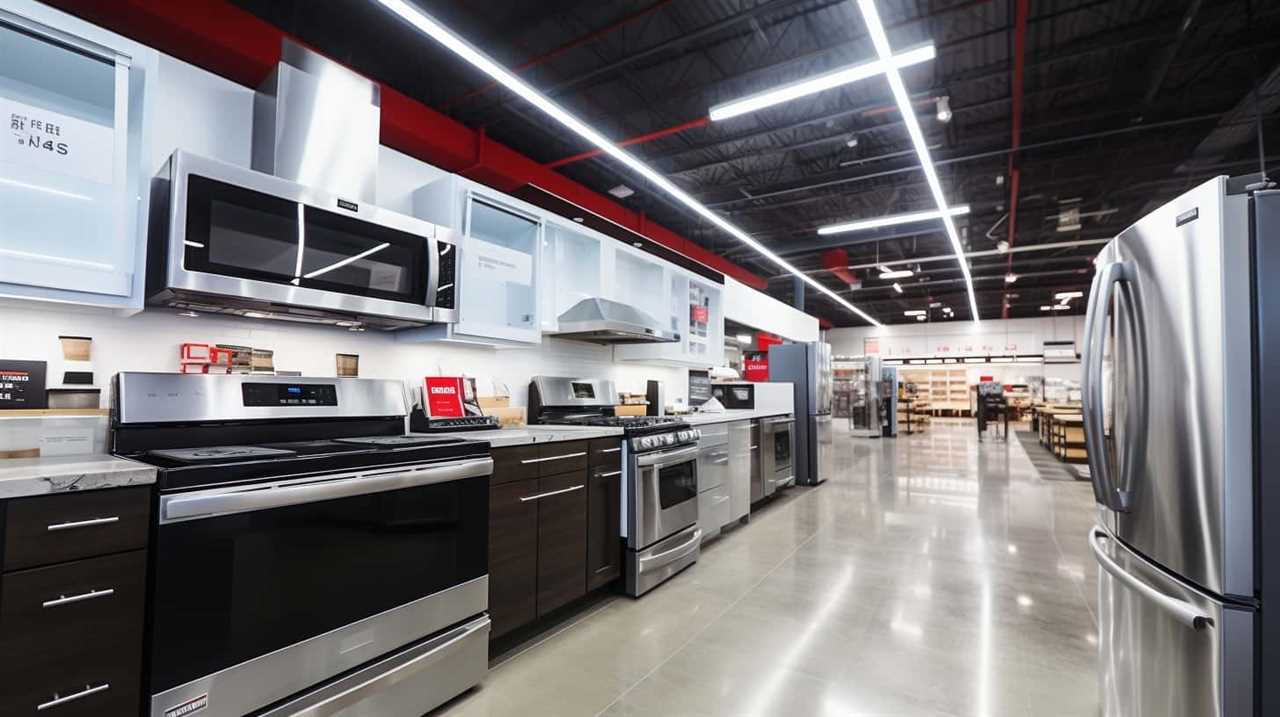
Automated Herb Garden
Continuing from the previous subtopic, let’s explore another essential kitchen gadget that every home chef needs: an automated herb garden.
With advancements in technology, smart herb gardens have become a game-changer for those who want to elevate their cooking skills. Here are some benefits of having an automated herb garden in your kitchen:
- Convenience: Imagine having fresh herbs at your fingertips, without the hassle of going to the store or dealing with wilted herbs. An automated herb garden allows you to grow a variety of herbs right in your kitchen, ensuring their freshness whenever you need them.
- Space-saving: If you have limited space in your kitchen, an automated herb garden is a perfect solution. These compact devices can fit on your countertop or even hang on the wall, providing you with a convenient and space-saving way to grow your favorite herbs.
- Efficiency: Smart herb gardens use automated indoor gardening techniques to optimize the growth of your herbs. With built-in sensors and timers, they ensure the right amount of light, water, and nutrients for your plants, resulting in healthier and more abundant harvests.
- Sustainability: By growing your own herbs, you reduce your reliance on store-bought produce, which often comes wrapped in plastic and travels long distances. An automated herb garden allows you to embrace a more sustainable lifestyle by cultivating fresh, organic herbs right at home.
Incorporating a smart herb garden into your kitchen not only enhances the flavors of your dishes but also brings a sense of pride and accomplishment as you master the art of growing your own ingredients. With these automated indoor gardening techniques, you can enjoy the benefits of fresh herbs all year round, elevating your culinary creations to new heights.
Frequently Asked Questions
How Much Energy Does a Smart Refrigerator Consume Compared to a Traditional Refrigerator?
Smart refrigerators consume significantly less energy compared to traditional refrigerators. This energy consumption comparison is one of the many benefits of owning a smart refrigerator.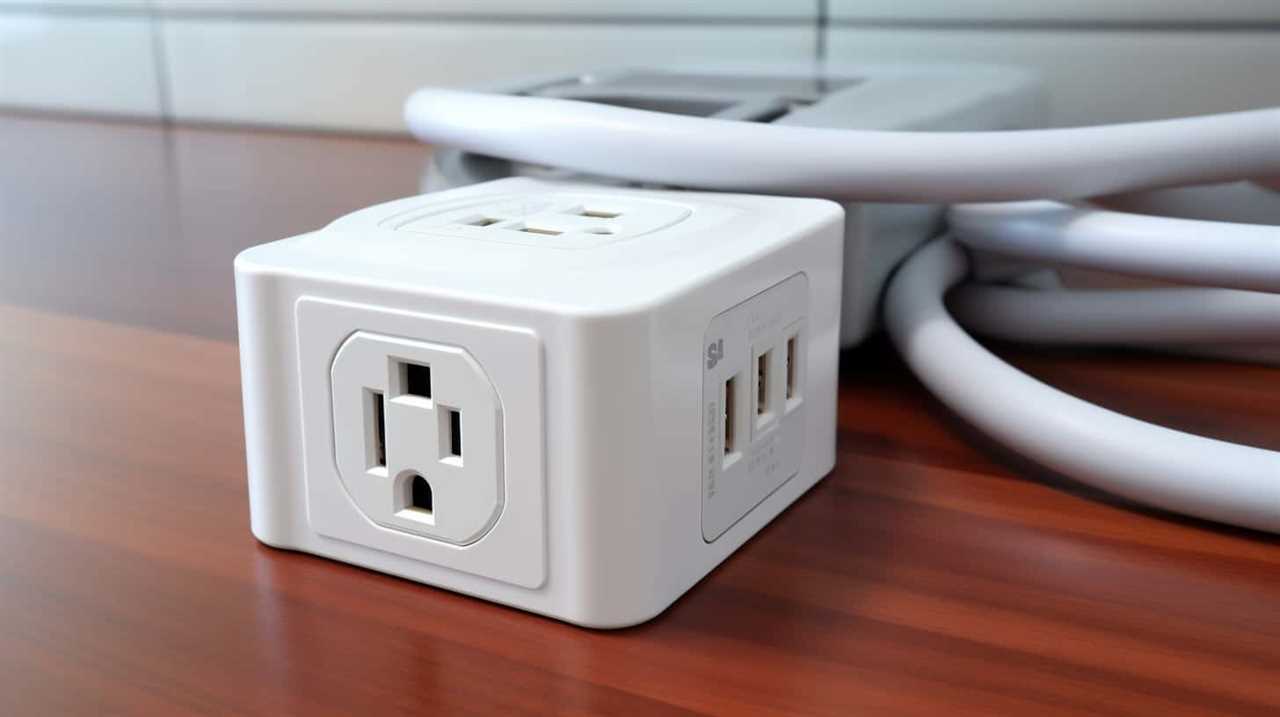
With advanced features like energy-saving modes, temperature control, and smart sensors, these gadgets optimize energy usage to keep your food fresh while minimizing electricity consumption.
Can a Voice-Activated Assistant Be Paired With Other Smart Kitchen Gadgets Like the Smart Coffee Maker or the Automated Herb Garden?
Yes, a voice-activated assistant can be paired with other smart kitchen gadgets like the smart coffee maker or the automated herb garden. This integration offers convenience and efficiency in the kitchen. With a simple voice command, you can brew your coffee or tend to your herbs without lifting a finger.
However, there are some drawbacks to using voice activated assistants in the kitchen, such as potential misinterpretation of commands or limited compatibility with certain gadgets.
What Is the Cooking Capacity of a Smart Slow Cooker?
The cooking capacity of a smart slow cooker is essential to know for any home chef. It allows us to plan and prepare meals efficiently.

With programmable settings, we can set the cooking time and temperature according to our recipe, ensuring perfectly cooked dishes every time. This feature is especially helpful for busy individuals who want to come home to a delicious meal without spending hours in the kitchen.
Can the Bluetooth Food Scale Be Connected to a Smartphone App for Tracking Nutritional Information?
Yes, the Bluetooth food scale can indeed be connected to a smartphone app for tracking nutritional information. This innovative feature allows us to easily monitor our food intake and make informed choices about our diet.
Additionally, by integrating the scale with a smart refrigerator, we can optimize our meal planning and reduce food waste. Not only does this save us time and money, but it also promotes sustainability by minimizing energy consumption.
It’s truly a game-changer for any home chef seeking mastery in the kitchen.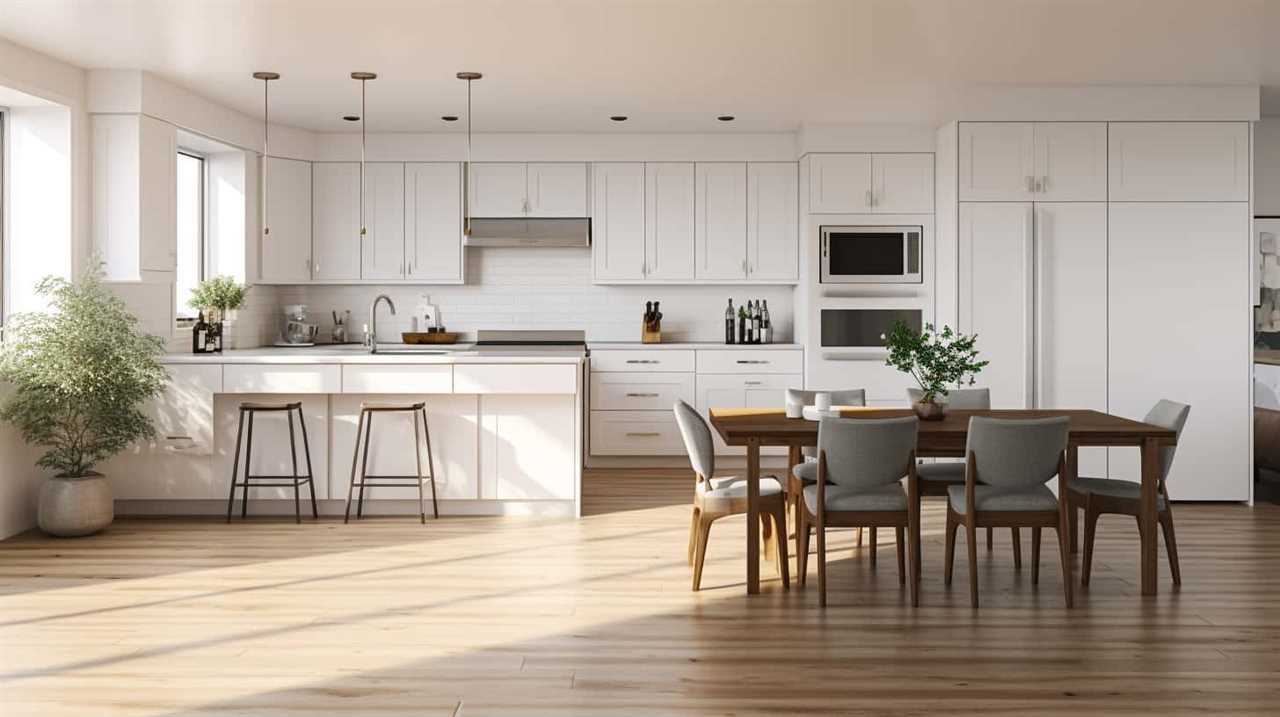
Are There Any Safety Features in Place for the Automated Pot Stirrer to Prevent Accidents or Spills?
When it comes to the automated pot stirrer, safety is a top priority. This innovative gadget is designed with built-in safety features to prevent accidents and spills. With its advanced technology, it ensures that the pot is securely attached and stable, minimizing the risk of any mishaps.
Additionally, the automated pot stirrer is equipped with sensors that can detect any irregularities or potential hazards, instantly alerting the user and taking necessary precautions. So you can confidently cook without worrying about any safety concerns.
Are Any of the Smart Kitchen Gadgets Environmentally Friendly?
Many smart home eco devices, including smart kitchen gadgets, are designed with sustainability in mind. These gadgets use energy-efficient technology and eco-friendly materials to reduce their environmental impact. From smart thermostats to composting appliances, there are plenty of options for creating an environmentally friendly kitchen.
Conclusion
In conclusion, these 11 smart kitchen gadgets are a game-changer for any home chef. With the convenience of a smart refrigerator, the efficiency of a Wi-Fi enabled oven, and the help of a voice-activated assistant, cooking has never been easier.
Don’t forget the smart coffee maker for that perfect cup of joe and the automatic pot stirrer to save you time and effort. So why wait? Embrace the future of cooking and upgrade your kitchen with these technologically-savvy gadgets.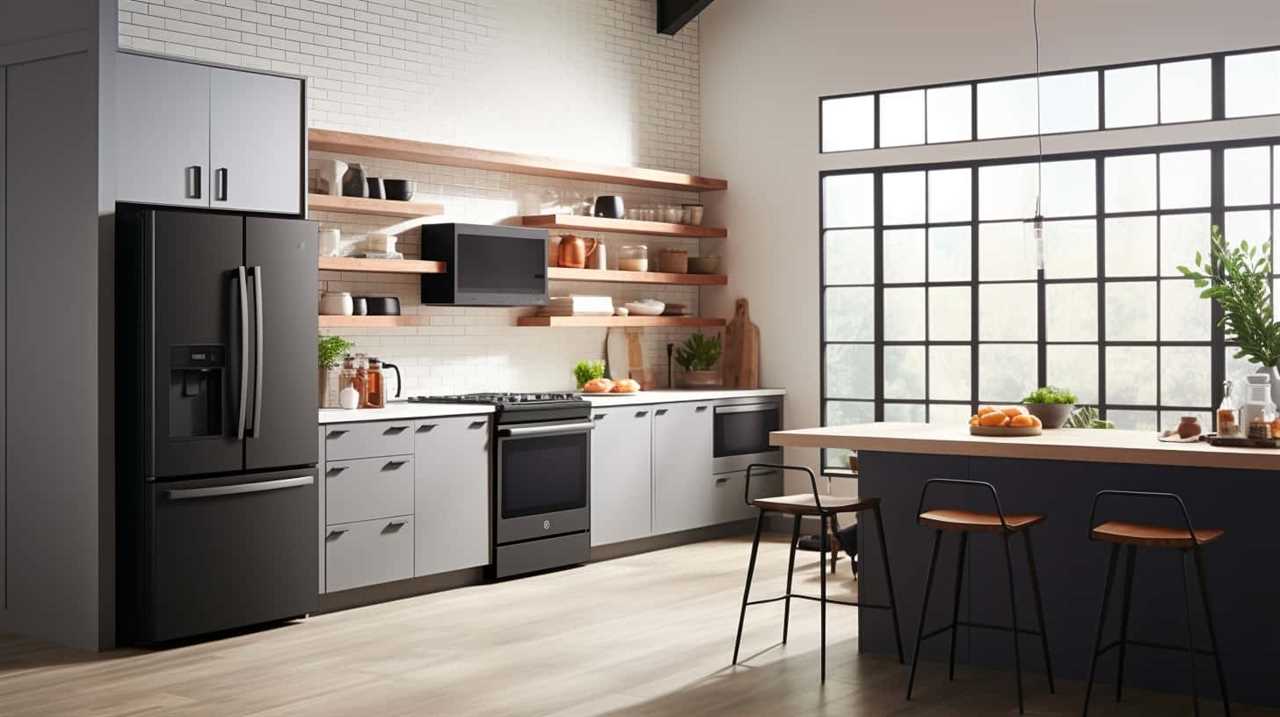
Remember, ‘The kitchen is the heart of the home.’
- About the Author
- Latest Posts
Introducing Charles, the Editor in Chief at ByRetreat, whose passion for interior design and editorial excellence elevates every remote workspace to new heights. With his keen eye for detail, impeccable taste, and expertise in design, Charles brings a wealth of knowledge and creativity to the ByRetreat team.
As the Editor in Chief of a renowned lifestyle blog, Charles has honed his skills in curating captivating content and staying up-to-date with the latest trends in interior design. His deep understanding of aesthetics and the power of storytelling through design enables him to create remote workspaces that are not only visually stunning but also rich in personality and meaning.
Garage Door Opener
Finding the Ideal Garage Door Opener Outlet Location
Get ready to discover the crucial factors determining the perfect placement for your garage door opener outlet.

When determining the best spot for a garage door opener socket, think of it as finding the missing piece to make your garage convenient and functional.
The placement of this outlet can significantly impact the ease of use and safety of your garage door opener system. So, where should it be positioned for optimal performance?
Let's explore the key factors that come into play to ensure a seamless experience with your garage door opener.
Key Takeaways
- Place the outlet around 9 feet above the door for optimal accessibility and functionality.
- Position the outlet slightly off-center to avoid interference with future insulation and maintenance.
- Ensure safety by locating the receptacle 3 feet back and 10 feet from the outside wall.
- Consult with professionals to guarantee proper placement and enhance usability.
Importance of Outlet Placement
Why is the placement of the outlet for your garage door opener crucial for optimal functionality and safety?
When it comes to the garage door opener, the electrical outlet placement plays a significant role in ensuring smooth operation and safety. By strategically locating the outlet around 9 feet above the door, slightly off-center, accessibility is enhanced without impeding future insulation or drywall modifications. This positioning also minimizes the risk of interference with the garage door opener's mechanisms, promoting seamless functionality.
Moreover, considering factors like ease of access, safety, and compliance with electrical regulations is essential for a secure and efficient garage door opener setup. Therefore, choosing the right spot for the outlet is paramount to guaranteeing the proper functioning and safety of your garage door opener.
It's not just about convenience; it's about ensuring that your garage door opener operates optimally while meeting essential safety standards and regulatory requirements.
Factors Affecting Outlet Location

Considering the layout and structure of your garage, several key factors influence the optimal placement of the outlet for your garage door opener. The door height plays a crucial role, with the ideal outlet location typically around 9 feet above the door for convenient access.
It's essential to position the outlet slightly to the side to avoid interference with future insulation and drywall work. Communicating with builders before installation can ensure the proper placement and prevent common mistakes that might arise.
Be cautious not to place the receptacle too far from the door as this could lead to issues with the opener cord reaching comfortably. Ensuring that the outlet location allows for smooth operation and easy maintenance is crucial for long-term convenience.
Safety Considerations for Outlet Placement
For optimal safety and convenience in outlet placement for your garage door opener, it's essential to position the receptacle 3 feet back from the end of the open garage door and approximately 10 feet from the outside wall. Placing the outlet in this specific location helps prevent any potential hazards that could arise from the door mechanisms or the opener's cord. By ensuring the receptacle is behind the opener, you maintain a clear pathway when the door is fully open, decreasing the risk of tripping or entanglement.
To further enhance safety, it's crucial to confirm that the cord length of the opener, typically between 3 to 4 feet, comfortably reaches the receptacle without any stretching or strain. If needed, use lumber to frame out a lower place to secure the cord of the opener to the receptacle adequately. Additionally, prioritize installing a Ground Fault Circuit Interrupter (GFCI) protected receptacle to add an extra layer of safety measures to your garage.
Convenience and Accessibility of Outlets

To ensure optimal convenience and accessibility for your garage door opener outlet, positioning it approximately 9 feet above the door allows for easy access during operation. This placement ensures that the outlet is within reach of the opener cord, reducing the risk of any operational issues. Additionally, consider situating the outlet slightly off-center to accommodate future insulation and drywall work, providing flexibility for any renovations.
When communicating with builders about the placement of the garage door opener outlet, make sure to convey the importance of having it positioned at the right height and distance from the door. Common mistakes, such as placing the receptacle too far from the door, can hinder optimal accessibility and convenience. By discussing the outlet location with builders beforehand, you can ensure that it is installed in a way that meets your needs and maximizes usability.
To illustrate further, here is a table outlining the key considerations for positioning your garage door opener outlet:
| Consideration | Description |
|---|---|
| Height Above Door | Approximately 9 feet for easy access during operation. |
| Distance from Opener Cord | Within reach to prevent operational issues. |
| Off-Center Placement | Slightly off-center to accommodate future insulation and drywall work. |
| Communication with Builders | Discuss with builders to determine the best outlet placement before installation. |
| Avoiding Common Mistakes | Ensure the receptacle is not placed too far from the door for optimal accessibility. |
Tips for Optimal Garage Door Opener Outlet Location
When determining the ideal location for your garage door opener outlet, prioritize accessibility and functionality by placing it at a height of around 9 feet above the door. This placement ensures easy reach and connection to the opener cord, facilitating seamless operation.
To optimize your garage door opener outlet location, consider the following tips:
- Positioning: Place the outlet slightly to the side to avoid interference with future insulation and drywall work.
- Consultation: Communicate with builders or professionals before installation to ensure proper placement and avoid common mistakes.
- Reachability: Avoid placing the receptacle too far from the door to prevent issues with the opener cord reaching the power source.
- Functionality: Ensure the outlet location allows for easy access and connection to maintain a smooth and efficient operation of your garage door opener.
Frequently Asked Questions
Where Should a Garage Door Opener Outlet Be Placed?
We recommend placing a garage door opener outlet near the ceiling, around 9 feet above the door for easy access. Positioning it slightly to the side can prevent interference and future issues with insulation or drywall.
Opt for a location a few feet above the door height and off-center for practical accessibility. Avoid surface mounting and ensure it's within reach of the opener cord.
Consult professionals for proper placement to avoid common mistakes.
Where Should Outlets Be Placed in a Garage?
When outfitting a garage with outlets, strategic placement is key. Consider functionality and convenience. Ensure outlets are accessible and comply with safety standards to avoid interference with garage door openers.
Optimal positioning is crucial for smooth operation. By placing outlets thoughtfully, we guarantee efficiency and ease of access. Properly spaced outlets contribute to a well-organized, functional workspace.
Take care in positioning outlets for a seamless garage experience.
Can the Garage Door Opener Be on Same Circuit as Garage Receptacles?
Yes, the garage door opener can be on the same circuit as the garage receptacles. This setup is convenient for installation and operation, simplifying wiring and electrical planning.
It's a common practice in residential settings to share the circuit between the garage door opener and receptacles. However, it's crucial to consult with an electrician to ensure the circuit can handle the combined load of both devices effectively.
How Do I Program My Garage Door Opener Outlet?
We've programmed many garage door opener outlets! Locate the 'Learn' button on the unit. Press and release it, then quickly hit the remote's button to program it.
Wait for the light to flash, showing successful programming. Test the remote for proper operation.
Always follow the manufacturer's instructions for specific steps. It's as easy as that to program your garage door opener outlet.
Conclusion
In conclusion, finding the ideal location for your garage door opener outlet is like finding the perfect key for a locked door – it unlocks convenience and safety.
By considering factors such as placement, safety measures, and accessibility, you can ensure smooth operation and peace of mind.
Remember, consulting with a professional and following best practices can guarantee a seamless experience every time you open your garage door.
- About the Author
- Latest Posts
Introducing Ron, the home decor aficionado at ByRetreat, whose passion for creating beautiful and inviting spaces is at the heart of his work. With his deep knowledge of home decor and his innate sense of style, Ron brings a wealth of expertise and a keen eye for detail to the ByRetreat team.
Ron’s love for home decor goes beyond aesthetics; he understands that our surroundings play a significant role in our overall well-being and productivity. With this in mind, Ron is dedicated to transforming remote workspaces into havens of comfort, functionality, and beauty.
-

 Decor1 week ago
Maximalist Decor Explained: Embrace More Style
-

 Vetted2 weeks ago
15 Best Foot Massagers for Neuropathy to Soothe Your Feet and Relieve Discomfort
-

 Vetted3 weeks ago
15 Best Sports Laundry Detergents for Keeping Your Activewear Fresh and Clean
-

 Vetted3 weeks ago
15 Best Tall Toilets for Seniors That Combine Comfort and Safety
-

 Vetted4 weeks ago
15 Best Dish Scrubbers to Keep Your Kitchen Sparkling Clean
-

 Vetted2 days ago
15 Best Cleaners for Fiberglass Showers to Keep Your Bathroom Sparkling Clean
-

 Decor4 weeks ago
What Is Eclectic Home Decor
-

 Vetted7 days ago
15 Best Organic Pest Control Solutions for a Naturally Pest-Free Home


