Appliances
Different Light Bulb Bases
2025

Have you ever thought about the different types of light bulb bases that are currently on the market? From the traditional screw-in (Edison) base to the bi-pin, twist-lock, and candelabra bases, it seems like there is a base for every kind of fixture.
But why are there so many different bases, and how do you know which one to choose for your specific lighting needs? Understanding the differences between these bases can not only help you find the right bulb for your fixture but also ensure you achieve the perfect lighting ambiance in your space.
Key Takeaways
- Screw-in (Edison) Base is energy efficient, versatile, and supports various bulb types.
- Bayonet Base offers secure and quick installation, commonly used in automotive lighting.
- Twist-lock Base provides a reliable and stable connection, commonly used in modern fixtures.
- Bi-pin Base is versatile and commonly found in fluorescent tubes and some LED bulbs.
- GU24 Base is an efficient alternative, compatible with CFLs and LED bulbs, and eliminates the need for mercury.
- Candelabra Base accommodates smaller bulbs, provides an elegant touch to decorative fixtures.
- Medium (E26/E27) Base has slight differences in threading and voltage compatibility between E26 and E27.
- Miniature (E10/E11) Base is available in two sizes with different wattage limits, handle with care due to small size.
- Intermediate (E17) Base is versatile for outdoor lighting and accommodates larger bulbs for brighter illumination.
- Candelabra (E12) Base is compact yet powerful, suitable for chandeliers and decorative fixtures.
- Wedge Base is a sleek alternative commonly used in landscape and automotive lighting.
Screw-in (Edison) Base
What makes the screw-in (Edison) base unique and versatile in the world of lighting fixtures?
The screw-in (Edison) base is a cornerstone of lighting technology, known for its energy efficiency, durability, and adaptability. This base type accommodates a wide range of bulbs, from compact fluorescent to LED, offering consumers flexibility in choosing the right bulb for their needs. Its durability ensures a secure fit, reducing the risk of damage during installation and use. Additionally, the screw-in base supports bulbs with varying color temperatures, allowing users to create different atmospheres within their spaces. Its dimmability feature further enhances its versatility, providing control over the ambiance and energy consumption.
The engineering behind the screw-in base showcases innovation and precision, catering to the demands of a technologically advanced market. This base has revolutionized the lighting industry, providing consumers with a reliable and adaptable solution for their lighting needs. With its combination of energy efficiency, durability, color temperature options, and dimmability, the screw-in (Edison) base stands as a testament to the mastery of lighting technology.
Bayonet Base

Alright, let's talk about the Bayonet Base.
This type of base features two or more pins that fit into corresponding slots on the socket.
The bayonet base is commonly used in automotive lighting and certain types of household fixtures.
Bayonet Base Features
The Bayonet Base features a unique design that allows the bulb to be securely and quickly installed with a simple twist. Its advantages include easy installation, a secure connection, and resistance to loosening due to vibrations.
However, it may be challenging to find a wide variety of bulb options compared to other bases. Retrofitting bayonet base fixtures can be achieved by using adapters for converting to other base types, or by replacing the socket entirely with a new one that accommodates a different base.
When retrofitting, it's essential to ensure compatibility with the fixture and to consider any potential changes in the bulb's positioning or appearance. Understanding these features is crucial for mastering the use of bayonet base fixtures and making informed decisions when selecting and installing light bulbs.
Bayonet Base Applications
Bayonet base applications encompass a diverse range of lighting fixtures and are known for their reliable and secure installation method. The bayonet base is commonly found in vintage lighting, where its sturdy and twist-lock design provides a classic touch to antique lamps and chandeliers. This traditional connection method ensures a stable and durable fit, making it ideal for historical and period lighting pieces. In addition, the bayonet base is widely used in automotive applications, particularly in older vehicles. Its secure and vibration-resistant nature makes it an excellent choice for automotive lighting, providing a dependable connection that can withstand the rigors of driving. Whether in vintage lighting or automotive use, the bayonet base continues to demonstrate its versatility and reliability.
| Bayonet Base Applications | Examples |
|---|---|
| Vintage Lighting | Antique lamps, chandeliers |
| Automotive | Older vehicle lighting |
Bi-pin Base
With the bi-pin base, we can easily and securely connect our light bulbs to the fixture. This type of base is commonly found in fluorescent tubes and some LED light bulbs.
Here are three important aspects to consider when dealing with bi-pin bases:
- Electrical connections: Bi-pin bases are designed to provide a reliable electrical connection between the light bulb and the fixture. The pins are positioned to ensure proper contact, allowing electricity to flow consistently and power the light source.
- Pin spacing: One critical characteristic of bi-pin bases is the distance between the pins. The standard spacing for bi-pin bases is crucial for ensuring compatibility with the corresponding sockets in the fixture. This uniformity allows for easy installation and replacement of bulbs.
- Versatility: Bi-pin bases are widely used in various lighting applications, from residential settings to commercial and industrial environments. Their versatility makes them suitable for different types of fixtures and lighting configurations, providing a convenient and efficient solution for diverse lighting needs.
Understanding the electrical connections, pin spacing, and versatility of bi-pin bases is essential for mastering the installation and maintenance of light fixtures utilizing this type of base.
Twist-lock Base

Let's talk about the twist-lock base, a unique and secure way to connect light bulbs to fixtures.
We'll cover an overview of the twist-lock base, explore the types of light fixtures it's compatible with, and provide guidance on its installation and removal.
This innovative base design offers a reliable and efficient way to keep light bulbs securely in place, ensuring optimal performance and safety.
Twist-Lock Base Overview
Twist-lock bases are commonly used in modern lighting fixtures due to their secure and reliable connection mechanism. These bases provide several benefits, including:
- Secure Connection: The twist-lock design ensures a snug and stable connection, reducing the risk of flickering or loose connections commonly associated with other base types.
- Versatility: Twist-lock bases are available in various sizes, making them compatible with a wide range of lighting fixtures, from ceiling lights to outdoor floodlights.
- Safety: The twist-lock mechanism offers an added layer of safety by minimizing the chances of accidental disconnection, especially in high-vibration environments or areas with frequent power fluctuations.
When comparing twist-lock bases to other types, their robust and dependable nature makes them a preferred choice for many lighting applications.
Compatible Light Fixtures
When installing lighting fixtures with twist-lock bases, it's essential to ensure compatibility for seamless integration within your space. Ensuring bulb compatibility and proper fixture selection is crucial to achieving optimal lighting performance. Here's a guide to help you select the right fixtures for twist-lock base bulbs:
| Fixture Type | Description |
|---|---|
| Recessed Lighting | Ideal for ambient and task lighting, compatible with twist-lock base bulbs for energy-efficient illumination. |
| Track Lighting | Offers versatility for directing light where needed, compatible with twist-lock base bulbs for adjustable lighting solutions. |
| Pendant Lighting | Adds a decorative element to the space, compatible with twist-lock base bulbs for stylish and functional illumination. |
Installation and Removal
To securely install or remove a twist-lock base bulb, align the tabs on the bulb with the notches in the socket and gently twist clockwise until it locks into place or counterclockwise to remove it.
When installing or removing twist-lock base bulbs, follow these installation tips for a smooth process:
- Safety Precautions: Always turn off the power before installing or removing the bulb to avoid electrical shock.
- Troubleshooting Techniques: If the bulb isn't locking into place, ensure that the tabs on the bulb align properly with the notches in the socket. If the bulb is difficult to remove, gently wiggle it while twisting counterclockwise.
- Energy Efficiency: To maximize energy efficiency, choose LED twist-lock base bulbs, which consume less energy and have a longer lifespan compared to traditional incandescent bulbs.
GU24 Base

The GU24 base is a unique and efficient alternative to traditional screw-in light bulb bases, offering a secure twist-and-lock mechanism for easy installation and removal of the bulb.
When it comes to energy efficiency, the GU24 base is a standout performer. Its design minimizes energy loss through heat, making it an environmentally responsible choice. This base is compatible with compact fluorescent lamps (CFLs) and LED bulbs, both of which are renowned for their low energy consumption and long lifespan.
By using the GU24 base, consumers can significantly reduce their energy consumption and carbon footprint while enjoying high-quality lighting. Its environmental impact is further enhanced by the reduction of hazardous materials, as the base design eliminates the need for mercury, a common component in traditional incandescent bulbs.
The twist-and-lock mechanism not only ensures a secure fit but also simplifies the installation process, making it a user-friendly option for both residential and commercial settings.
With its focus on energy efficiency and minimal environmental impact, the GU24 base represents a forward-thinking approach to lighting technology.
Medium (E26/E27) Base

Let's unravel the differences between E26 and E27 bases. Their compatibility with various fixtures and the wattage limits associated with each are important factors to consider. Understanding the nuances of these medium bases can greatly impact the performance and longevity of your light bulbs.
It's time to shed light on the technical aspects of these common bulb bases.
E26 Vs E27
Comparing the E26 and E27 medium bases reveals subtle differences that can impact the compatibility of light bulbs with fixtures.
Both E26 and E27 bases are widely used, but understanding their disparities is crucial for selecting the right bulb.
- Voltage Differences: E26 bases are typically designed for use with 120-volt systems, while E27 bases are commonly used with 220-240-volt systems. This difference is important to consider when selecting light bulbs for specific electrical setups.
- Socket Types: E26 and E27 bases have slightly different threadings, with E26 having 26.05 mm diameter and E27 having 26.45 mm. While this variance may seem small, it can affect the fit of the bulb within the fixture.
- International Standards: E26 is the standard size in the Americas and E27 is the standard in Europe. Understanding these international standards is essential when purchasing bulbs for use in different regions.
Understanding these nuances is essential for ensuring proper bulb fitting and electrical compatibility.
Compatibility
When considering the compatibility of medium (E26/E27) bases, it's crucial to understand the subtle differences that can impact the fit and electrical performance of light bulbs within fixtures.
Retrofit options are available to ensure that E26 and E27 bases can be used interchangeably, but it's important to note that E27 bases are slightly larger and may not fit into fixtures designed specifically for E26 bases.
When retrofitting, it's essential to check that the new bulb won't only physically fit but also maintain the same electrical specifications as the original.
Additionally, energy efficiency considerations come into play when choosing between E26 and E27 bases, as different bulb types can have varying energy efficiency.
Understanding the compatibility of medium bases is essential for ensuring the proper fit and electrical performance of light bulbs within fixtures.
Wattage Limits
Understanding the wattage limits for medium (E26/E27) bases is crucial for ensuring the safe and efficient operation of light bulbs within fixtures. Here are three key points to consider when it comes to wattage limitations:
- Understanding wattage limitations: Medium bases typically have a wattage limit of 60W for incandescent bulbs, but it's important to check the fixture's specifications for any specific restrictions. This ensures that the bulb doesn't generate excessive heat, which could lead to safety hazards.
- Choosing the right bulb for safety and efficiency: Opting for energy-efficient LED or CFL bulbs not only helps in reducing energy consumption but also provides a wider range of wattage options. This allows for flexibility in choosing the appropriate brightness level while staying within the wattage limits of the fixture.
- Verifying compatibility: Always verify the wattage limits and compatibility of the bulb with the fixture to avoid potential damage and ensure optimal performance.
Miniature (E10/E11) Base

Illuminating small spaces with precision and efficiency, the Miniature (E10/E11) base is a compact and versatile option for various lighting applications.
When it comes to E11 vs E10 compatibility, it's essential to ensure that the bulb base matches the socket. The E11 base is slightly smaller than the E10, so it's crucial to check the socket size before purchasing bulbs.
Additionally, understanding wattage limits is vital for safe operation. For E10 bases, the wattage should typically not exceed 7-10W, while E11 bases can handle slightly higher wattages, usually in the range of 7-15W.
When installing bulbs with a Miniature base, it's important to handle them carefully due to their small size. Always turn off the power before installation, and avoid overtightening the bulb to prevent damage to the base or socket threads.
With these considerations in mind, the Miniature (E10/E11) base provides an excellent option for compact lighting needs, offering efficient illumination in a small and versatile package.
Intermediate (E17) Base

The efficiency and precision of the Miniature (E10/E11) base make way for a seamless pivot into the Intermediate (E17) base, which caters to larger lighting needs with its adaptable design and capabilities. The E17 base holds many advantages, including:
- Versatility: The E17 base is versatile and can be utilized in a variety of lighting fixtures, making it a convenient choice for different indoor and outdoor settings.
- Durability: With its sturdy design, the E17 base is well-suited for outdoor lighting applications. It can withstand exposure to the elements, making it a reliable option for illuminating outdoor spaces.
- Enhanced Illumination: The E17 base accommodates larger bulbs, allowing for increased wattage and brighter illumination. This makes it ideal for lighting up larger outdoor areas such as gardens, pathways, and outdoor seating areas.
In outdoor lighting, the E17 base proves to be a valuable asset due to its adaptability, durability, and capability to provide enhanced illumination. Whether used in decorative outdoor fixtures or functional security lighting, the E17 base offers a reliable and efficient solution for various outdoor lighting needs.
Candelabra (E12) Base

Nestled within the realm of light bulb bases, the Candelabra (E12) base emerges as a compact yet powerful option for a range of lighting fixtures. Despite its diminutive size, this base accommodates a variety of bulb options, from incandescent to LED and compact fluorescent bulbs. Its small size makes it ideal for chandeliers, wall sconces, and decorative fixtures, offering a stylish and functional lighting solution.
When considering bulb options for the Candelabra (E12) base, energy efficiency is a crucial factor. LED bulbs, in particular, are a popular choice due to their low energy consumption and long lifespan. This makes them an environmentally friendly and cost-effective option for candelabra fixtures. Additionally, safety is paramount when using these bulbs, as the compact size means heat output is concentrated. It's essential to select bulbs that emit minimal heat to prevent damage to the fixture and reduce the risk of overheating.
The Candelabra (E12) base may be small, but it packs a punch in terms of versatility, energy efficiency, and safety considerations. When choosing bulbs for this base, it's important to prioritize efficiency and heat output to ensure a long-lasting and secure lighting solution.
Wedge Base

Emerging as a sleek and versatile alternative to the compact Candelabra (E12) base, the Wedge base offers a unique lighting solution for various fixtures. This base is particularly popular in landscape and automotive lighting due to its efficient design and easy installation process.
When considering the Wedge base, it's important to note the following:
- Installation Tips: When installing a wedge base bulb, it's crucial to handle the bulb carefully to avoid breakage. Additionally, ensure that the contacts align properly with the socket to prevent any potential connectivity issues.
- Compatibility Issues: While the wedge base is widely used, it's essential to verify the compatibility of the bulb with the fixture. Some fixtures may require a specific type of wedge base, so it's important to check the specifications before making a purchase.
- Advantages, Disadvantages: One advantage of the wedge base is its compact size, making it suitable for small fixtures. However, its small size can also be a disadvantage, as it may not be as secure or durable as larger bases in certain applications.
Understanding these installation tips and potential compatibility issues is crucial when working with wedge base bulbs, allowing for a seamless integration into various lighting fixtures.
Frequently Asked Questions
Can I Use a Screw-In (Edison) Base Light Bulb in a Fixture That Requires a Bayonet Base?
Yes, you can use a screw-in (Edison) base light bulb in a fixture that requires a bayonet base, but it requires a cross base adapter.
This ensures socket compatibility and maintains electrical compatibility between the different base types.
What Is the Difference Between a Medium (E26/E27) Base and a Candelabra (E12) Base?
We can differentiate E26 and E12 bases by their size and compatibility.
E26 bases, also known as medium bases, are larger and used for general lighting applications.
E12 bases, or candelabra bases, are smaller and often used for decorative lighting.
When considering compatibility, it's important to note that E26 and E12 bases aren't interchangeable.
Using a screw-in base in a fixture that requires a bayonet base can lead to electrical and mechanical issues.
Are Twist-Lock Base Bulbs Compatible With All Twist-Lock Sockets, or Are There Different Types of Twist-Lock Bases?
Twist-lock base bulbs are compatible with twist-lock sockets, but there are different types of twist-lock bases.
It's crucial to ensure the bulb matches the socket, as variations exist.
When selecting twist-lock base bulbs, consider options like CFL, LED, or halogen for energy efficiency.
During installation, align the tabs on the bulb base with the notches in the socket, then twist securely.
Understanding twist-lock base compatibility and socket variations is key for successful lighting solutions.
Can I Use a GU24 Base Bulb in a Fixture That Is Designed for a Bi-Pin Base?
Yes, a GU24 base bulb can be used in a fixture designed for a bi-pin base. The fixture compatibility allows for installation of different base types.
When considering voltage requirements and energy efficiency, it's essential to ensure that the GU24 bulb meets the fixture's voltage specifications and provides the desired energy efficiency.
Always refer to the fixture's manual for specific details on bulb compatibility and installation.
Are There Any Special Considerations for Using Miniature (E10/E11) Base Bulbs in Outdoor Fixtures?
Using e10/e11 base bulbs outdoors requires weather-resistant fixtures and appropriate voltage. Compatibility of screw-in (Edison) base bulbs in bayonet base fixtures depends on the fixture's design and electrical requirements. Ensure the bulb fits securely and the voltage and wattage are compatible. Always follow manufacturer guidelines for safe and effective use.
It's essential to prioritize safety and functionality when using these bulbs in outdoor settings.
Conclusion
In the world of light bulb bases, there's a vast array of options to choose from. It's like a buffet of possibilities, each base offering its own unique advantages and applications. From the common Edison screw to the less familiar bi-pin or bayonet bases, each serves a specific purpose depending on the fixture and lighting needs. Exploring the various types of light bulb bases can help ensure the perfect fit and functionality for any project or space. Whether it’s for a decorative chandelier or a practical desk lamp, choosing the right base is key to achieving both aesthetics and efficiency.
From the traditional screw-in to the sleek twist-lock, there's something for every lighting need.
So next time you're in need of a new light bulb, don't be afraid to explore the different bases available and find the perfect fit for your space.
- About the Author
- Latest Posts
Introducing Ron, the home decor aficionado at ByRetreat, whose passion for creating beautiful and inviting spaces is at the heart of his work. With his deep knowledge of home decor and his innate sense of style, Ron brings a wealth of expertise and a keen eye for detail to the ByRetreat team.
Ron’s love for home decor goes beyond aesthetics; he understands that our surroundings play a significant role in our overall well-being and productivity. With this in mind, Ron is dedicated to transforming remote workspaces into havens of comfort, functionality, and beauty.
Garage Door Opener
7 Steps to Wire Your Garage Door Opener Safely
Illuminate the key to a secure garage door opener installation by mastering the intricate art of wiring – discover the crucial step you can't afford to overlook!

When it comes to the proper functioning of your garage door opener, the wiring process is crucial in guaranteeing its safety and efficiency. By beginning with thorough preparation and compatibility checks, we establish a solid foundation for a successful installation.
Each subsequent action, from assembling components to incorporating safety features, contributes to a reliable setup. However, one crucial step often overlooked can make or break the entire process.
By paying close attention to the intricacies of wiring types and configurations, you'll pave the way for a seamless and secure garage door opener system that guarantees peace of mind.
Key Takeaways
- Prioritize safety measures and preparation to wire your garage door opener securely.
- Connect power sources and wiring correctly with dedicated circuits and proper grounding.
- Program remotes and perform safety checks to ensure the opener functions safely.
- Conduct final testing, adjustments, and maintenance for optimal garage door opener safety.
Gather Required Tools and Materials
To wire your garage door opener safely, we need to first gather the essential tools and materials required for the installation process. Following the installation instructions meticulously is crucial for a successful setup. Tools such as wire strippers, wire nuts, electrical tape, and a voltage tester are indispensable. The voltage tester ensures that the power is off before beginning any work, preventing any electrical mishaps.
When selecting wire nuts, make sure they're the appropriate size for the wires being connected to guarantee a secure connection. Using the correct gauge of wire, like 18 or 20 AWG, is essential for the efficient functioning of the garage door opener. Additionally, having materials such as Cat5 cable, bell wire, or thermostat wire on hand is vital for wiring the opener correctly.
Prepare the workspace by having a ladder or step stool available to access the ceiling area where the opener will be connected to power and wiring, ensuring a safe and effective installation process.
Turn Off Power to the Garage

Before commencing any wiring tasks, it's imperative to ensure that the power to the garage has been switched off at the circuit breaker. Failure to do so can result in electric shock or damage to the garage door opener components.
To safely turn off the power to the garage, follow these steps:
- Locate the main circuit breaker for the garage and switch it to the 'off' position.
- Use a voltage tester to double-check and confirm that the power is indeed off before proceeding with any work.
- Avoid taking any shortcuts or risks when dealing with electrical power in the garage.
- Remember, safety should always be the top priority when working with power sources in the garage.
Identify and Connect Power Source
When identifying and connecting the power source for your garage door opener, locate the nearest 110-volt AC outlet for optimal functionality. This power source is crucial for the installation of the power unit, ensuring seamless operation of your garage door.
It's advisable to use a dedicated 20-amp GFCI circuit to protect the new operator and guarantee safety during operation. Proper grounding and adherence to electrical safety measures are paramount to prevent any mishaps.
Additionally, consider implementing a surge protector, especially in lightning-prone areas, to safeguard the electronics of your garage door opener. To enhance reliability, utilize two separate low-voltage wiring circuits for redundancy in powering the garage door opener.
Connect Control Wires to Opener

When connecting control wires to your garage door opener, it's crucial to check the compatibility of the wires being used.
Securely fasten the wires to the designated terminals on the opener, following the wiring diagram provided by the manufacturer.
Lastly, remember to test the control wires post-installation to ensure the opener functions correctly.
Check Wire Compatibility
To ensure proper installation, it's crucial to verify the compatibility of the control wires with the garage door opener specifications. When checking wire compatibility, consider the following:
- Voltage and Gauge Requirements: Ensure the control wires meet the voltage and gauge specifications set by the manufacturer.
- Shielding or Insulation: Determine if the control wires need to be shielded or insulated for safety purposes.
- Connection to Terminals: Connect the control wires to the designated terminals on the garage door opener according to the manufacturer's instructions.
- Testing Connections: After connecting the wires, test them to confirm that the garage door opener functions correctly.
Secure Wire Connections
Securing wire connections to the garage door opener involves meticulously fastening the control wires using appropriate screws or connectors as specified by the manufacturer. It's crucial to install 22 gauge or better wires and follow the manufacturer's instructions to ensure proper polarity and prevent damage.
Double-check the wire connections to avoid short circuits or garage door opener malfunctions. Securely fasten the wires to the terminals, following the wiring diagram provided in the opener's manual for correct placement.
Test Control Wire
After securely fastening the wire connections to the garage door opener, the next step is to test the control wire for continuity and proper connections using a multimeter. To ensure a safe and effective installation, follow these steps:
- Use a multimeter to check for continuity in the control wire.
- Confirm that the control wires are correctly connected to the designated terminals on the garage door opener.
- Refer to the wiring diagram provided by the manufacturer for accurate wire placement.
- Secure the control wire connections with wire nuts or soldering to guarantee a reliable setup.
Testing the control wire is crucial in ensuring the proper functioning and safety of your garage door opener.
Secure and Organize Wiring
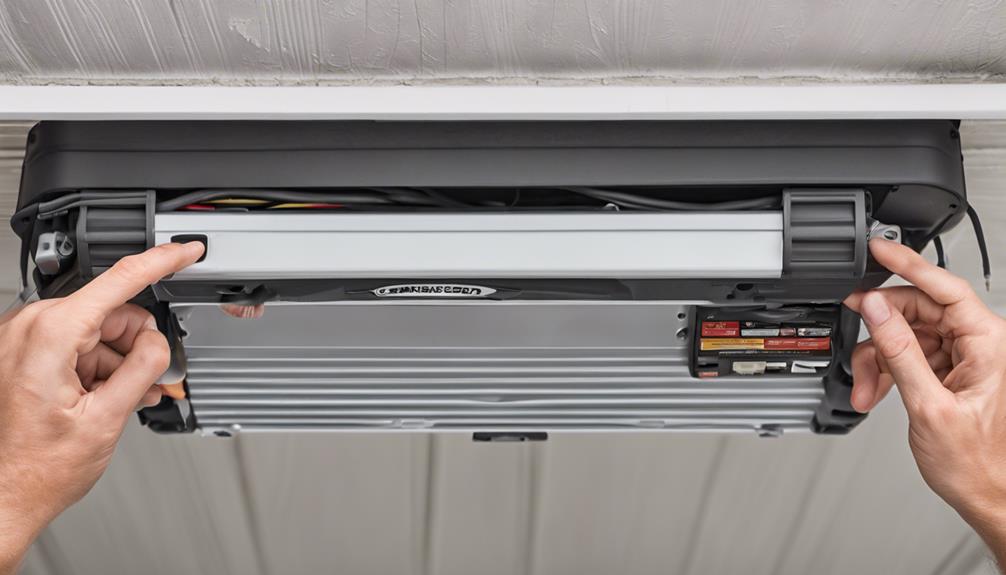
For optimal safety and functionality, we consistently secure and organize the wiring along the garage door opener rail using cable ties or clips. By attaching the wiring to the mounting bracket or the wall above the door, we ensure that it remains safely out of the way of moving parts and potential pinch points.
Utilizing wire loom or conduit adds an extra layer of protection, guarding the wiring against exposure to elements or accidental damage. Labeling each wire with its corresponding function is crucial for easy identification and future troubleshooting.
It's imperative to check all connections to guarantee they're tight and secure, minimizing the risk of electrical hazards or malfunctions. Properly securing and organizing the wiring not only enhances safety but also contributes to the overall efficiency and longevity of the garage door opener system.
Test the Garage Door Opener
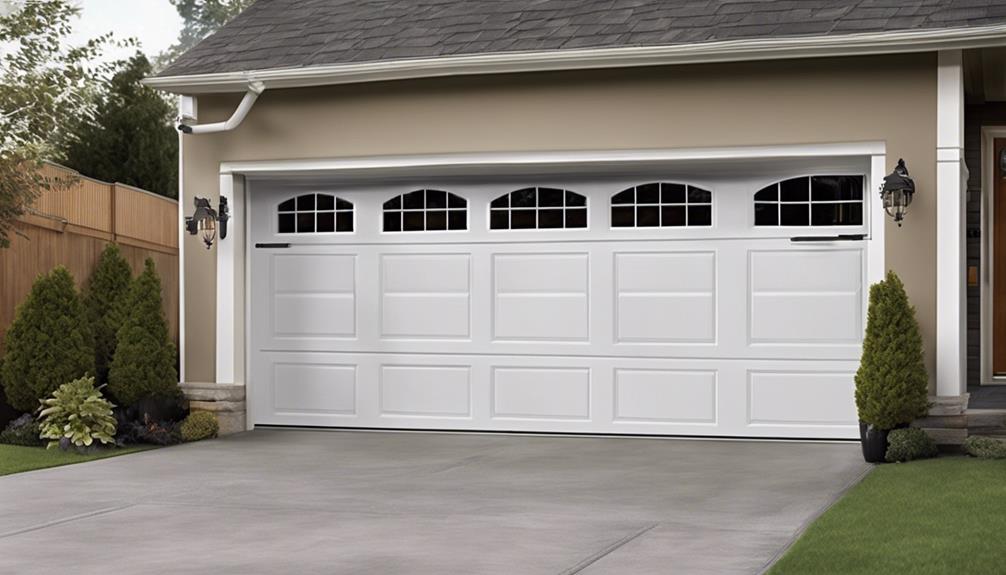
Let's begin by emphasizing the importance of checking the safety sensors, testing the remote functionality, and verifying the auto-reverse feature of your garage door opener.
These steps are crucial in ensuring the smooth and safe operation of your garage door system.
Regularly testing these features can help prevent accidents and keep your garage secure.
Check Safety Sensors
How do you ensure the safety sensors of your garage door opener are functioning optimally? Proper maintenance and testing of these sensors are essential for safe operation. Here are some steps to check your safety sensors effectively:
- Verify Alignment: Ensure the sensors are properly aligned to detect obstacles accurately.
- Test Functionality: Place an object in the door's path during closure to confirm the sensors trigger the reversal mechanism.
- Clean Sensors: Keep the sensors clean from dust or debris that could obstruct their operation.
- Regular Inspections: Regularly inspect and test the sensors to guarantee they're in good working condition.
Regular attention to these safety sensors will help prevent accidents and maintain the security of your garage door system.
Test Remote Functionality
To ensure the proper functioning of your garage door opener, it is crucial to test the remote functionality by syncing it with the opener and confirming smooth operation. Follow the instructions provided by the manufacturer for programming the remote. Press the learn/programming button on the opener and the corresponding button on the remote simultaneously. Listen for a clicking sound, indicating successful programming. Test the remote by opening and closing the garage door. Ensure the remote operates the door smoothly and consistently. Use the table below to keep track of the programming process.
| Step | Description |
|---|---|
| Press Learn Button | Press the learn/programming button on the opener. |
| Sync Remote Button | Simultaneously press the corresponding button on the remote. |
| Listen for Clicking Sound | Listen for a clicking sound to confirm successful programming of the remote. |
Verify Auto-Reverse Feature
To verify the auto-reverse feature of your garage door opener, conduct a test by placing an object, such as a roll of paper towels, in the path of the closing door. This test is crucial for ensuring the safety of your garage door system. Here are some key points to consider:
- The garage door should reverse immediately upon contact with the object to ensure safety.
- This feature is designed to prevent accidents and injuries by stopping and reversing the door if it encounters an obstruction.
- Remember to test the auto-reverse feature periodically to ensure it's functioning correctly.
- If the garage door opener fails the auto-reverse test, troubleshoot the issue promptly to avoid safety hazards.
Regularly testing the auto-reverse feature is essential for maintaining a safe garage environment.
Perform Safety Checks and Final Adjustments

Upon completing the wiring connections, the next crucial step is to verify the functionality of safety sensors and ensure they're aligned correctly and responsive.
Secure all wiring connections to prevent any potential electrical hazards. Test the safety sensors meticulously, adjusting their alignment as necessary to guarantee they detect obstacles and respond promptly.
Double-check all wiring connections to confirm accuracy, following the manufacturer's guidelines meticulously to ensure proper installation. Adjust the force sensitivity settings to guarantee that the garage door opener stops and reverses immediately upon detecting an obstruction.
Before considering the installation complete, conduct a final test of the garage door opener to ensure seamless operation and validate all safety features. Remember, safety is paramount when dealing with garage door openers, so thorough checks and adjustments are vital to prevent accidents and ensure the system functions as intended.
Frequently Asked Questions
How Do You Wire a Garage Door Safety Sensor?
When wiring a garage door safety sensor, we ensure proper installation of both sending and receiving units is essential.
Align the units correctly for the infrared beam to function effectively.
Connect the wires following the manufacturer's instructions meticulously.
Testing the sensors after installation is crucial to confirm correct wiring and functionality.
Regular maintenance and inspection of the sensors are necessary to guarantee safe garage door operation.
How Many Wires Do You Need for a Garage Door Opener?
We typically need a 2-wire bell wire for basic garage door opener functionality. Additional features like safety sensors and remote controls might require more wiring like Cat5 cable.
Using 18-2 thermostat wire or alarm cables is also common. In some setups, twisted pair wire can be handy. It's crucial to select the right wire type and gauge that align with the specific requirements of your garage door opener system.
Is It Safe to Install Your Own Garage Door Opener?
Yes, installing your own garage door opener can be safe if done correctly. Following manufacturer's instructions and having basic electrical knowledge are crucial. Improper wiring can pose safety hazards and void warranties, so caution is essential.
Understanding wiring diagrams and using the right tools are key for a successful installation. When in doubt about wiring or electrical work, it's wise to consult a professional for safety and proper functioning.
Can You Hardwire a Garage Door Opener?
Yes, we can hardwire a garage door opener. It involves connecting it directly to a power source without using a plug. This method provides a more secure and reliable power connection compared to using a standard electrical outlet.
It's essential to follow the manufacturer's instructions carefully to ensure safety and proper functionality. Hardwiring can eliminate the need for an electrical outlet near the motor unit, making for a more streamlined and permanent installation.
Conclusion
In the intricate dance of wiring a garage door opener, we must be the conductor orchestrating each step with precision and care. Like a skilled musician, we must harmonize the components, ensuring the safety and efficiency of the system.
By following the steps outlined, we can create a symphony of functionality that will open the doors to convenience and security in our everyday lives.
- About the Author
- Latest Posts
Introducing Ron, the home decor aficionado at ByRetreat, whose passion for creating beautiful and inviting spaces is at the heart of his work. With his deep knowledge of home decor and his innate sense of style, Ron brings a wealth of expertise and a keen eye for detail to the ByRetreat team.
Ron’s love for home decor goes beyond aesthetics; he understands that our surroundings play a significant role in our overall well-being and productivity. With this in mind, Ron is dedicated to transforming remote workspaces into havens of comfort, functionality, and beauty.
Garage Door Opener
5 Reasons to Choose PDS 800 Garage Door Opener
Hovering over the PDS 800 opener, discover the hidden gem that makes it a standout choice for your garage – the first reason awaits!

While delving into the world of garage door openers, there is a unique feature of the PDS 800 model that is frequently overlooked.
Curious to unravel the five standout features that make this opener a top choice for many discerning homeowners?
Let's begin by uncovering the first reason that sets the PDS 800 apart from the rest, paving the way for a discussion that promises to shed light on why this particular garage door opener might be the ideal solution for your needs.
Key Takeaways
- Whisper-quiet operation for a serene environment.
- Advanced security features for peace of mind.
- Enhanced durability and reliability for longevity.
- Smart home integration for convenience and control.
Whisper-Quiet Operation
We've found that the PDS 800 garage door opener excels in delivering whisper-quiet operation, ensuring minimal noise disruption in your daily routine. This opener boasts a soft-start and soft-stop DC drive motor, guaranteeing smooth and quiet door operation every time.
The beauty of this system lies in its energy-efficient DC-powered mechanism, which not only reduces noise but also provides reliable performance. Despite its powerful operation, the PDS 800 maintains a whisper-quiet demeanor, running at a speed comparable to AC models but without the annoying racket.
This feature is a game-changer for those seeking a peaceful environment, allowing you to operate your garage door without disturbing the tranquility of your surroundings. Say goodbye to clunky, noisy openers of the past and embrace the serenity that comes with the PDS 800's whisper-quiet technology.
Advanced Security Features
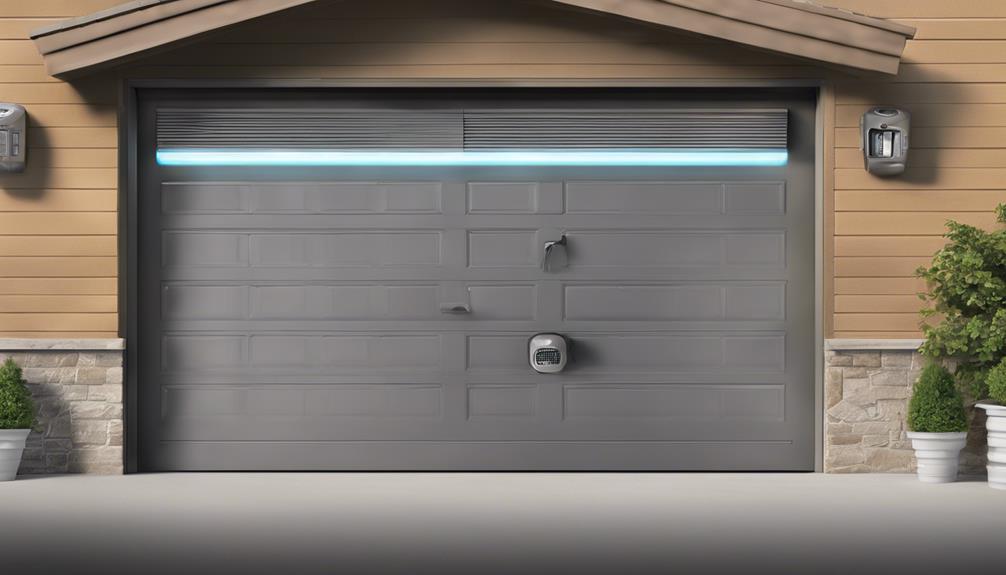
Enhancing the overall security of your property, the PDS 800 Garage Door Opener integrates cutting-edge security features to safeguard your garage and belongings effectively.
The advanced security features of the PDS 800 Garage Door Opener include:
- Rolling Code Technology: Prevents code grabbing by thieves, ensuring that only authorized individuals can access your garage.
- Security+ 2.0 Technology**: Sends a new code to the remote every time it's used, guaranteeing secure access and reliable performance.
- PosiLock System**: Ensures that the door remains securely locked when closed, deterring forced entry attempts and providing peace of mind.
These features work together to offer unparalleled security for your garage, giving you the confidence that your property and belongings are well-protected.
With these advanced security measures in place, you can trust the PDS 800 Garage Door Opener to deliver top-notch security and reliable performance for your peace of mind.
Enhanced Durability and Reliability
When considering the PDS 800 Garage Door Opener, one can expect unparalleled enhanced durability and reliability due to its heavy-duty components and long-term performance design.
Precision Door's PDS 800 model is specifically engineered to provide lasting durability for your new garage door, ensuring a reliable operation that withstands the test of time. The heavy-duty parts incorporated into this garage door opener are designed to endure daily use, offering consistent performance even in challenging weather conditions.
With Precision Door's dedication to quality and reliability, the PDS 800 opener guarantees a robust and long-lasting solution for your garage door system. Rest easy knowing that your new garage door will be equipped with a dependable opener that prioritizes durability, making it a solid investment for the future.
Trust in the PDS 800 to deliver the reliability and longevity you seek in a garage door opener.
Smart Home Compatibility
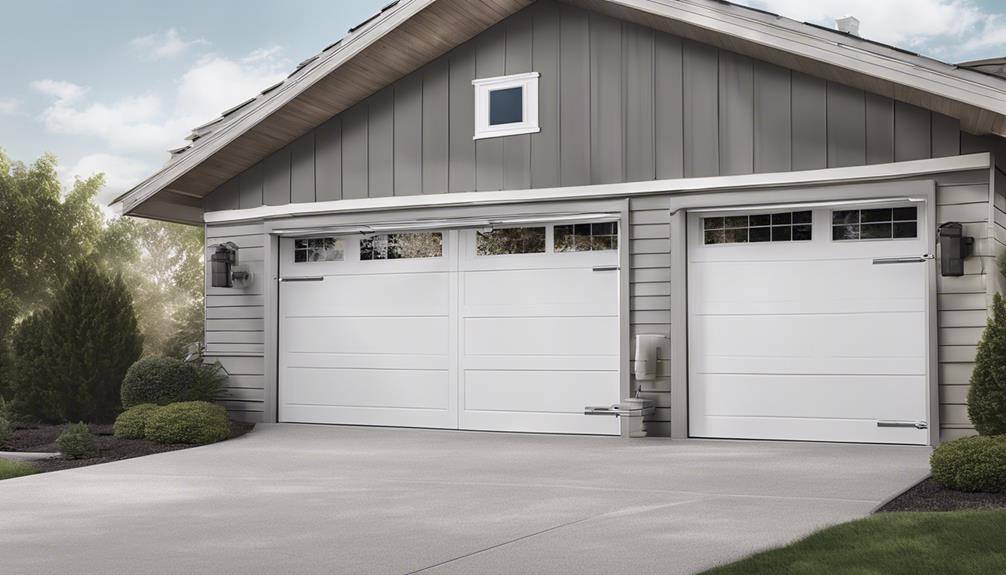
The seamless integration of the PDS 800 Garage Door Opener with smart home systems like HomeLink and Car2U allows for convenient remote control and monitoring capabilities, enhancing security and providing peace of mind. By connecting your PDS 800 Garage Door Opener to your smart home setup, you can effortlessly manage your garage door opening from anywhere, whether you're at home or on the go. Here's how smart home compatibility enhances your experience:
- Remote Control: Operate your garage door opener remotely through your smartphone or voice assistants like Alexa and Google Assistant.
- Monitoring: Keep an eye on your garage door opening status and receive notifications about any activity, adding an extra layer of security.
- Integration: Set schedules, integrate with other smart devices, and enjoy a fully connected home experience with the PDS 800 Garage Door Opener.
With smart home compatibility, you can take full control of your garage door, ensuring convenience and security at your fingertips.
Professional-Grade Performance
Delivering exceptional performance, the PDS 800 Garage Door Opener features a powerful 800 Newton DC motor designed for professional-grade operation. This motor ensures efficient and reliable opening of your garage door at AC-equivalent speeds, meeting the demands of a busy lifestyle. The soft-start and soft-stop DC drive motor guarantee smooth and quiet operation, minimizing noise disruptions. For added convenience and peace of mind, the optional Battery Backup feature ensures continuous opening functionality even during power outages. The PDS 800 model is engineered for durability, promising long-term reliable performance, making it an ideal choice for those seeking a top-tier garage door opener.
| Professional-Grade Performance Features | Benefits |
|---|---|
| 800 Newton DC motor | Powerful operation |
| AC-equivalent speed | Efficient opening |
| Soft-start and soft-stop DC drive motor | Smooth and quiet operation |
Frequently Asked Questions
What Brand of Garage Door Opener Is the Most Reliable?
We believe the most reliable brand of garage door opener is one that offers a proven track record of durability and performance.
It should feature advanced technology for smooth operation and energy efficiency.
A comprehensive warranty and excellent customer service are also essential factors to consider.
Trusting a reputable brand with a history of delivering top-notch products can provide peace of mind when selecting a reliable garage door opener.
What Is a PDS Garage Door Opener?
We're experienced with PDS Garage Door Openers, known for their efficient 800 Newton DC power and AC-equivalent speed performance.
These openers feature a soft-start and soft-stop DC drive motor for quiet and reliable operation.
Homeowners appreciate the optional Battery Backup for added peace of mind during power outages.
PDS Openers come with advanced features to ensure reliable and convenient usage, making them a top choice for many.
What Is the Benefit of a Higher HP Garage Door Opener?
Having a higher HP garage door opener brings numerous benefits. It provides more power for effortlessly lifting heavier doors, ensuring smoother operation and less motor strain. This results in increased durability, longevity, and the ability to handle larger, heavier doors.
Faster opening and closing speeds enhance convenience and efficiency. Ultimately, opting for a higher HP model like the PDS 800 guarantees reliable performance and improved functionality for any garage door system.
How Do I Know What Garage Door Opener to Buy?
When choosing a garage door opener, we consider factors such as:
- The size and weight of the door
- Power source
- Speed
- Additional features like battery backup
Analyzing these aspects helps us determine the best fit for our needs.
Researching different models, comparing their specifications, and seeking expert advice can guide our decision-making process.
It's crucial to prioritize safety, efficiency, and convenience when selecting the right garage door opener for our home.
Conclusion
In conclusion, the PDS 800 garage door opener is like a steadfast guardian for your home, ensuring smooth and secure access every time.
With its whisper-quiet operation, advanced security features, enhanced durability, smart home compatibility, and professional-grade performance, this opener truly stands out in the industry.
Trust in the reliability and top-notch performance of the PDS 800 to safeguard your garage door needs with precision and efficiency.
- About the Author
- Latest Posts
Introducing Ron, the home decor aficionado at ByRetreat, whose passion for creating beautiful and inviting spaces is at the heart of his work. With his deep knowledge of home decor and his innate sense of style, Ron brings a wealth of expertise and a keen eye for detail to the ByRetreat team.
Ron’s love for home decor goes beyond aesthetics; he understands that our surroundings play a significant role in our overall well-being and productivity. With this in mind, Ron is dedicated to transforming remote workspaces into havens of comfort, functionality, and beauty.
Garage Door Opener
What Do Dip Switches Do on a Garage Door Opener?
Unlock the mystery of DIP switches on garage door openers and discover how they hold the key to your home security—find out more inside!
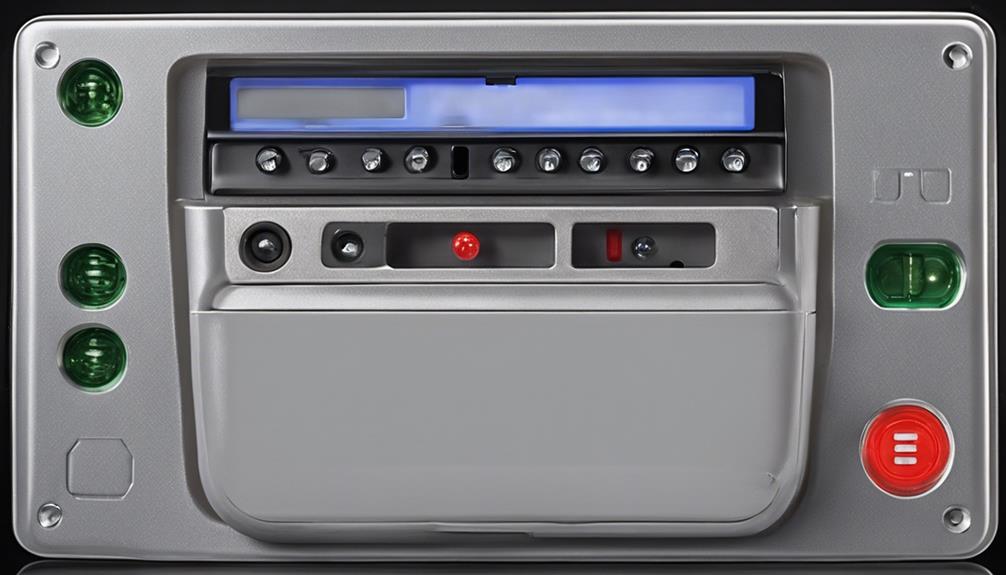
Were you aware that more than 70% of older garage door openers still use DIP switches for programming? Knowing how DIP switches work in your garage door opener is important for keeping your home safe and operational.
So, what exactly do these tiny switches do and how can they impact your daily routine? Let's explore the fascinating world of DIP switches on garage door openers and uncover their hidden significance in modern home security systems.
Key Takeaways
- Dip switches establish unique communication codes for secure garage door operation.
- Proper synchronization of dip switches ensures reliable remote control access.
- Changing dip switch settings regularly enhances security and prevents unauthorized entry.
- Dip switches play a crucial role in maintaining system security and communication integrity.
Role of Dip Switches in Programming
Dip switches play a crucial role in programming a garage door opener by enabling the establishment of a unique communication code between the remote control and the receiver. These switches are essential for setting a specific code pattern that ensures secure access to the garage. By positioning the dip switches in a particular way, a unique code is created, allowing the remote control to communicate effectively with the receiver.
Programming these dip switches correctly is vital for maintaining secure and reliable access to the garage. The code pattern established by the dip switches is the key to unlocking the full functionality of the garage door opener. Through this method, users can control the garage door with precision and confidence, knowing that the communication between the remote control and the receiver is secure and accurate.
Dip switches provide a fundamental yet highly effective way to manage the operation of the garage door opener.
Ensuring Secure Communication With Remote
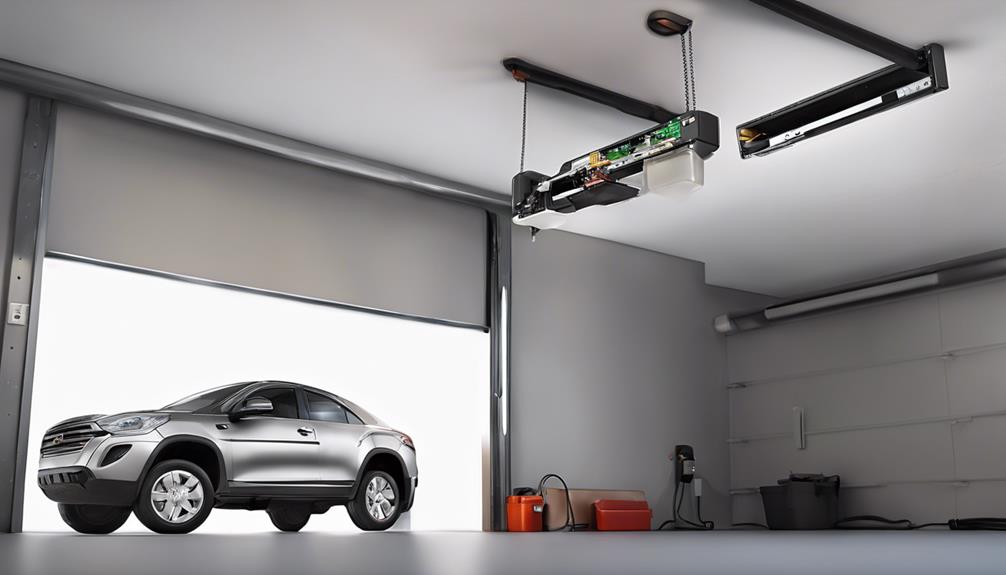
To establish a secure communication channel with the remote control, precise synchronization of the communication code pattern between the garage door opener and the receiver is essential. The dip switches play a vital role in ensuring secure communication by creating a unique code pattern that must match on both the remote control and the garage door opener. This specific code pattern prevents interference from other devices, enhancing the security of the system.
Proper synchronization of the dip switch settings is crucial for the garage door opener to respond accurately to the signals sent by the remote control. Regularly changing dip switch configurations adds an extra layer of security, preventing unauthorized access to the garage door opener. By maintaining the integrity of the communication between the garage door opener, receiver, and remote control through the proper use of dip switches, users can ensure that their garage remains secure and protected from external tampering.
Functionality of Garage Door Opener
Establishing the functionality of a garage door opener involves understanding its mechanisms for receiving and responding to signals from the remote control. The dip switches on a garage door opener play a crucial role in enabling communication between the remote control and the receiver. These dip switches are responsible for encoding and decoding signals, ensuring that the opener can interpret the commands sent by the remote accurately. Proper synchronization of the dip switches is essential to maintain seamless operation of the garage door opener. However, it's important to note that dip switches offer a basic method of security and may be less secure compared to newer technologies like rolling code systems.
| Functionality | Description |
|---|---|
| Communication | Enables interaction between the remote control and the garage door opener. |
| Encoding and Decoding | Converts signals from the remote control into actionable commands. |
| Security | Provides a basic level of access control, although less secure than newer technologies. |
Understanding the functionality of a garage door opener, especially the role of dip switches, is vital for ensuring the proper operation and security of your garage.
Importance of Dip Switches
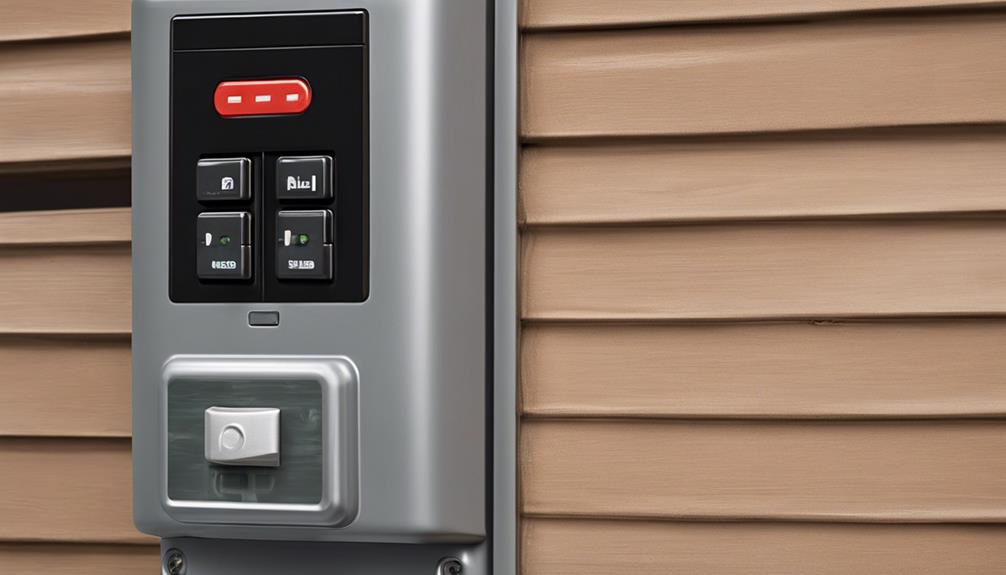
When configuring a garage door opener, understanding the significance of dip switches becomes paramount in ensuring seamless communication between the remote control and the receiver.
- Dip switches on a garage door opener enable customization of the code pattern for secure access.
- Setting the dip switches to the same pattern on both the remote control and the opener is crucial for effective communication.
- This cost-effective solution provides a simple way to control the garage door without unnecessary features.
- Proper synchronization of dip switches is essential to guarantee the seamless operation of the garage door opener.
- Dip switches play a vital role in establishing a secure and reliable connection between the remote control and the receiver, ensuring smooth functioning of the garage door opener system.
Programming Your Garage Door Opener
Understanding how to program the dip switches on your garage door opener is essential for securing communication between the remote control and the opener. Programming these settings correctly ensures that your garage door opener responds only to your remote's unique code, enhancing security and preventing unauthorized access. By adjusting the dip switches, you can sync the remote to the opener, creating a secure link that allows for seamless operation.
To program your garage door opener effectively, follow these steps:
| Step | Instructions |
|---|---|
| 1 | Locate the dip switches on your garage door opener. |
| 2 | Set the dip switches to a unique code position. |
| 3 | Sync your remote control to the opener by matching the code. |
| 4 | Regularly change the dip switch settings to enhance security and prevent unauthorized access. |
Proper programming of your garage door opener's dip switches is crucial for maintaining the integrity of your security system and ensuring smooth operation.
Frequently Asked Questions
When Did Garage Door Openers Stop Using DIP Switches?
We garage door openers stopped using DIP switches in the early 2000s with the introduction of rolling code technology. Rolling code tech provided unique and changing access codes for enhanced security.
This made DIP switches obsolete since they offered less secure communication. The transition to rolling codes marked a significant advancement in opener security and functionality.
Newer models now offer better protection compared to older versions that relied on DIP switches.
Do Genie Garage Door Openers Have DIP Switches?
We don't use DIP switches in Genie garage door openers. Our systems employ rolling code technology to ensure top-notch security.
Each remote use triggers a new code, preventing unauthorized access. This feature guarantees a high level of security and convenience without the need for DIP switches.
Does Liftmaster Have DIP Switches?
We don't use DIP switches in LiftMaster garage door openers. Instead, our systems rely on cutting-edge rolling code technology, enhancing security by altering the access code with each use.
This modern approach offers increased protection and convenient features like remote control programmability. Upgrading to a LiftMaster opener eliminates the need for dealing with DIP switches, providing an advanced and hassle-free solution for your garage door needs.
How Do Garage Door Switches Work?
Garage door switches work by establishing a connection between the remote control and the opener receiver. They utilize unique code combinations set on dip switches to operate the door. Synchronization of these switches is crucial for accurate signal reception.
While lacking encryption, dip switches are susceptible to security risks. Proper understanding and configuration of dip switches are essential for optimal garage door opener performance.
Conclusion
In conclusion, the DIP switches on a garage door opener act as the gatekeepers of communication, ensuring a secure connection between the remote control and the receiver.
Just like a key fits perfectly into a lock, programming these switches correctly is essential for the smooth functionality and security of your garage door system.
Remember to regularly update and adjust the DIP switches to keep your garage safe and secure.
- About the Author
- Latest Posts
Introducing Ron, the home decor aficionado at ByRetreat, whose passion for creating beautiful and inviting spaces is at the heart of his work. With his deep knowledge of home decor and his innate sense of style, Ron brings a wealth of expertise and a keen eye for detail to the ByRetreat team.
Ron’s love for home decor goes beyond aesthetics; he understands that our surroundings play a significant role in our overall well-being and productivity. With this in mind, Ron is dedicated to transforming remote workspaces into havens of comfort, functionality, and beauty.
-

 Vetted2 days ago
15 Best Drip Irrigation Systems to Keep Your Garden Thriving
-

 Beginners Guides1 week ago
Designing Your Retreat Center – Essential Tips
-

 Vetted2 weeks ago
15 Best Tile Adhesives for Outdoor Use – Top Picks for Durable and Weather-Resistant Installations
-

 Beginners Guides2 weeks ago
Are Retreats Profitable
-

 Vetted2 weeks ago
15 Creative Ways to Cover Up Popcorn Ceilings and Transform Your Space
-

 Vetted2 weeks ago
15 Best Playroom Storage Solutions to Keep Your Kids' Space Organized and Fun
-

 Vetted4 weeks ago
15 Best Ways to Label Clothes for Nursing Home Residents – Stay Organized and Efficient
-

 Vetted3 weeks ago
15 Best Dryer Vent Hoses to Keep Your Laundry Room Safe and Efficient


