Appliances
Painted Mugs
2025

When it comes to painting mugs, it’s not simply about picking up a brush and some paint. There are specific techniques and materials that can help your creations really shine.
But the real secret lies in the design and the personal touch you can add to each mug. It's not just about creating a pretty mug; it's about infusing it with personality and meaning.
So, how can you take your painted mugs to the next level and make them truly special?
Key Takeaways
- Choosing the right mug shape, size, and material is important for a personalized coffee-drinking experience.
- Using high-quality painting supplies such as brushes, acrylic paints, and a hair dryer ensures vibrant and long-lasting colors.
- Consider the recipient's preferences and interests when designing a painted mug for a personalized gift.
- Experiment with different design techniques, brush strokes, and color blending to bring the design to life.
Choosing the Right Mugs
Selecting the perfect mugs can transform your daily coffee ritual into a moment of artistry and joy. The right mug style can enhance the sensory experience and elevate the enjoyment of your favorite brew. When considering mug styles, it's essential to think about both form and function.
Whether you prefer a classic, elegant design or a more contemporary and playful look, the mug's shape, size, and material play a crucial role in your overall coffee-drinking experience. Custom designs add a personal touch, allowing you to express your individuality and style. From vibrant hand-painted motifs to intricate patterns, custom mugs can become a reflection of your personality, making your coffee moments even more special.
When choosing the perfect mug, it's important to consider how it feels in your hand and how it complements the aroma and taste of your coffee. The right mug should be an extension of your coffee ritual, enhancing every sip and creating a sense of connection and pleasure. With the variety of mug styles and custom designs available, finding the perfect one can turn your morning coffee into a delightful work of art.
Gathering Your Materials

Let's gather our materials and get ready to paint some mugs!
We'll need essential painting supplies like brushes, acrylic paint, and sealant.
Next, we'll select plain mugs and prepare our work area for a fun and creative painting session.
Essential Painting Supplies
Gathering the essential painting supplies for creating your painted mugs is a crucial step in ensuring a successful and enjoyable crafting experience. When it comes to painting mugs, the right tools are essential for achieving professional results.
Here are the must-have items:
- Quality Brushes: Select a variety of brush sizes for different painting techniques.
- Acrylic Paints: Invest in high-quality, dishwasher-safe acrylic paints for vibrant and long-lasting colors.
- Palette: A palette for paint mixing is essential to create custom colors and tones.
- Painter's Tape: Use this for creating clean lines and designs, and for protecting areas from paint.
- Hair Dryer: A hair dryer can be used for quick drying between layers, enabling efficient work and preventing smudging.
With these essential supplies, you'll be well-equipped to embark on your mug-painting adventure.
Selecting Plain Mugs
Our search for the perfect plain mugs to serve as our canvas led us to a charming local pottery shop. The anticipation of finding the ideal vessels for our mug decoration project filled us with excitement.
We scanned the shelves, examining each mug for the right shape, size, and surface texture. Smooth, unblemished mugs were essential for our DIY gifts. We wanted a set of mugs with a glossy finish to ensure that the paint adhered flawlessly.
The pottery shop offered an array of options, from classic white mugs to earthy, rustic tones. As we carefully selected our plain mugs, we envisioned the artistic possibilities that awaited us. Each mug held the promise of becoming a unique, personalized masterpiece, ready to bring joy to its recipient.
Preparing Work Area
As we finished selecting our perfect plain mugs at the charming local pottery shop, the next step was to prepare our work area by gathering all the materials we'd need for our creative endeavor. To ensure a smooth and enjoyable painting experience, here are the essential items to gather:
- Acrylic Paints: A vibrant selection of colors to bring your design to life.
- Paintbrushes: Various sizes for intricate detailing and broader strokes.
- Palette: For mixing and blending your custom hues.
- Protective Gear: Aprons and gloves to keep your clothes and skin safe from paint.
- Workspace Cover: A drop cloth or old newspaper to protect the surface and simplify cleanup.
Remember to organize your workspace thoughtfully, considering safety precautions, and creating a comfortable, inspiring environment to unleash your artistic vision.
Preparing Your Workspace

Arranging our tools and materials in an organized and inspiring manner sets the stage for a productive and enjoyable painting session. Setting up our workspace involves creating a comfortable environment that encourages creativity and focus.
We begin by organizing our supplies, ensuring that our brushes, paints, and mugs are easily accessible. Placing them within arm's reach minimizes distractions and streamlines the painting process.
Creating a comfortable environment also involves considering the lighting and seating arrangement. Adequate lighting is essential for accurate color perception and detail work. Positioning ourselves near a natural light source can enhance the overall painting experience. Additionally, choosing a comfortable chair provides the necessary support for long periods of creativity without sacrificing our physical well-being.
Furthermore, personal touches such as incorporating calming scents or playing soft background music can contribute to a soothing atmosphere. By paying attention to these details, we can transform our workspace into a sanctuary where artistic inspiration flourishes.
This thoughtful approach not only elevates the painting experience but also allows us to fully immerse ourselves in the creative process.
Selecting Your Design

With our workspace organized and inviting, we're now ready to embark on the exciting task of selecting a design for our painted mugs. The design we choose should reflect our personal style and creativity, making each mug a unique piece of art.
Here are some tips to help you in the process:
- Design Inspiration: Look for inspiration in nature, art, or even your favorite quotes. Use these elements to create a design that resonates with you personally.
- Custom Orders: Consider custom orders for personalized gifts. Whether it's a special occasion or simply a thoughtful gesture, customizing mugs with individual designs adds a personal touch.
- Trendy Patterns: Stay updated with the latest trends in patterns and designs. From minimalist geometric shapes to bold floral prints, there are endless possibilities to explore.
- Color Palette: Choose a color palette that complements the theme of your design. Experiment with different color combinations to find the perfect match.
- Sketching: Sketch out your ideas on paper before painting. This allows you to visualize the design and make any necessary adjustments before applying it to the mug.
Exploring Painting Techniques

Exploring painting techniques unlocks a world of creative possibilities, allowing us to bring our chosen designs to life with depth, texture, and vibrant colors. Blending colors is a fundamental technique that can elevate the visual impact of our painted mugs. By expertly blending two or more colors, we can achieve smooth transitions and create captivating gradients. This can be done using a variety of tools such as sponges, brushes, or even our fingers, each offering a unique texture and finish.
Different brush strokes also play a crucial role in the outcome of our painted mugs. Whether it's using bold, confident strokes to create a sense of movement and energy, or employing delicate, intricate strokes for fine detailing, the possibilities are endless. Experimenting with the pressure applied to the brush and the angle at which it meets the surface can result in diverse textures and visual effects, enhancing the overall appeal of our designs.
Mastering these techniques requires patience, practice, and a keen eye for detail. By honing our skills in blending colors and utilizing different brush strokes, we can elevate our painted mugs to captivating works of art, each one unique and visually stunning.
Applying the Base Coat

Alright, it's time to bring our painted mug to life by applying the base coat.
First, we need to carefully select the perfect base color that will complement our design.
Then, we'll apply a smooth and even layer of primer to ensure that our final design adheres flawlessly to the mug's surface.
Let's begin this exciting journey of turning a plain mug into a stunning piece of art!
Selecting the Base Color
We carefully select the base color for our painted mugs to ensure a vibrant and long-lasting finish. Our process involves experimenting with various shades and tones to find the perfect base color that complements the chosen patterns and textures.
Here's how we go about selecting the base color:
- Consider the overall theme and design of the mug
- Evaluate how the base color will interact with the chosen patterns
- Test different finishes to see how they enhance the base color
- Ensure the base color provides a suitable background for the desired textures
- Seek a balance between boldness and subtlety in the base color choice
Applying the Primer
After carefully selecting the base color for our painted mugs, we begin the process by applying the primer, also known as the base coat, to create a smooth and durable foundation for the intricate designs that will adorn the surface. Choosing the right primer is crucial for achieving the desired results. We consider factors such as adhesion to the mug surface, durability, and compatibility with the paint we'll be using.
Different primer techniques, such as spray application or brush application, can yield varying textures and finishes, allowing for creativity and customization. A smooth, even application is essential to ensure that the subsequent layers of paint adhere well and the colors appear vibrant.
With the primer in place, our mugs are now ready for the next exciting step in the painting process.
Adding Details and Accents

With delicate brushstrokes and a steady hand, the fine details and accents are meticulously added, enhancing the beauty of the painted mugs. When it comes to adding details and accents to painted mugs, it's essential to pay attention to the finer points. Here are some key techniques to consider:
- Fine Lines and Intricate Patterns: Utilize fine-tipped brushes to create intricate patterns and details, such as delicate floral designs or intricate geometric shapes.
- Subtle Color Highlights: Use a light touch to add subtle color highlights to certain areas, creating depth and visual interest within the design.
- Contrasting Elements: Incorporate contrasting elements, such as small dots or dashes, to add visual texture and complexity to the overall composition.
- Metallic Accents: Experiment with metallic paints or pens to add a touch of shimmer and elegance to specific parts of the design, like the rim or handle.
- Embossing and Texture: Consider incorporating embossing techniques or textured paints to add tactile elements, enhancing the sensory experience of the finished mug.
These techniques, when executed with precision and creativity, elevate the painted mugs to a level of artistry that truly captivates the beholder.
Curing and Sealing the Paint

Let's talk about the process of curing and sealing the paint on your mugs.
The curing process is essential for ensuring the longevity of the design, and we'll explore different techniques for achieving this.
Additionally, we'll discuss various sealing methods to protect the artwork and make the mugs safe for everyday use.
Curing Process
Upon completion of the painting process, we carefully apply a sealant to protect and enhance the vibrancy of the colors, ensuring a lasting, beautiful finish for your painted mugs.
The curing process is essential to achieve heat resistance and dishwasher safety for your painted mugs. Here's how we ensure the best results:
- We place the painted mugs in a designated curing area with controlled temperature and humidity.
- The mugs undergo a gradual increase in temperature to ensure the paint sets evenly and with maximum adhesion.
- After reaching the optimal temperature, the mugs are slowly cooled to room temperature to further enhance the durability of the paint.
- Our curing process guarantees that the paint becomes heat resistant, allowing the mugs to withstand hot beverages without compromising the design.
- The sealant used during the curing process ensures that the paint remains vibrant and dishwasher safe, providing long-lasting beauty and functionality.
We take pride in our meticulous curing process, ensuring that your painted mugs aren't only visually stunning but also durable and practical.
Sealing Techniques
We meticulously employ sealing techniques to ensure the enduring beauty and functionality of our painted mugs, preserving the vibrant colors and providing long-lasting durability.
After the curing process, we carefully seal the painted surface using a brush stroke method, ensuring even coverage and a flawless finish.
Once the paint has dried, heat setting becomes crucial in the sealing process. By carefully applying controlled heat, we effectively bond the paint to the surface of the mug, creating a protective barrier against wear and tear.
This meticulous sealing process not only enhances the visual appeal of the mugs but also ensures that the artwork remains intact, even with daily use.
Our commitment to mastering these sealing techniques guarantees that each painted mug is a work of art that can be cherished for years to come.
Caring for Your Painted Mugs

To maintain the vibrancy and longevity of the painted designs on your mugs, it's essential to follow proper care and handling guidelines. When it comes to caring for your painted mugs, it's crucial to ensure they're treated with the utmost care to preserve the beauty of the artwork. Here are some key points to consider:
- Gentle Hand Washing: Always hand wash your painted mugs with a mild dish soap and a soft sponge to avoid any damage to the painted design.
- Avoid Abrasive Materials: Refrain from using abrasive scrubbers or harsh cleaning chemicals as they can scratch or fade the painted surface.
- Proper Drying: After washing, carefully dry the mugs with a soft cloth to prevent water spots and potential damage to the painted design.
- Avoid Extreme Temperatures: Don't expose painted mugs to extreme temperature changes, as this can cause the paint to crack or peel over time.
- Handwashing Recommended: While some painted mugs may claim to be dishwasher safe, it's generally recommended to hand wash them to ensure the longevity of the painted design.
Following these guidelines will help ensure that your painted mugs remain vibrant and beautiful for years to come.
Gift Ideas and Personalization

Looking for a unique and personalized gift idea? Personalized gifts are a great way to show someone you care, and DIY projects like painted mugs offer a wonderful opportunity for customization. When considering gift ideas, personalization adds a special touch that makes the recipient feel truly cherished.
One of the most delightful aspects of personalized gifts is the thought and effort that goes into creating them. DIY projects such as painting mugs allow for endless creativity. You can tailor the design to suit the recipient's personality, incorporating their favorite colors, patterns, or even inside jokes. This level of customization ensures that the gift will be truly one-of-a-kind.
The process of personalizing a mug through painting isn't only enjoyable but also deeply meaningful. Each brushstroke is an expression of thought and love, making the gift all the more special. In a world filled with mass-produced items, personalized gifts stand out as unique and heartfelt.
Thus, when seeking to create a memorable and cherished gift, consider the beauty and sentiment behind personalized DIY projects like painted mugs.
Showcasing Your Masterpieces

As we immerse ourselves in the world of personalized gifts and the art of painting mugs, a new canvas emerges for us to explore – the art of showcasing our masterpieces.
When it comes to displaying our painted mugs, it's crucial to use creative techniques that highlight the unique designs and personalization. Here are some effective ways to showcase our masterpieces:
- Lighting: Experiment with different lighting setups to enhance the colors and details of the painted mugs. Soft, natural light can beautifully illuminate the designs, while spotlights can create dramatic effects.
- Custom Displays: Consider creating custom display stands or shelves specifically designed to showcase the painted mugs. These displays can add a touch of elegance and make the mugs stand out as unique pieces of art.
- Interactive Exhibits: Organize interactive exhibits where visitors can see the process of painting mugs and even try their hand at creating their own designs. This not only showcases the masterpieces but also engages the audience in the creative process.
- Themed Showcases: Arrange the painted mugs in themed showcases that tell a story or convey a specific mood. Grouping mugs by themes such as seasons, holidays, or emotions can create visually captivating displays.
- Digital Galleries: Create digital galleries or portfolios to showcase the painted mugs online, allowing a wider audience to appreciate and purchase these unique works of art. These platforms can also serve as a way to connect with potential customers and other artists.
What are the best techniques for painting mugs and cups?
When it comes to painting mugs and cups, the best techniques can be found in a painting cups tutorial video. This resource can offer valuable tips on choosing the right materials, preparing the surface, applying the paint, and adding personalized designs. Following a tutorial can help achieve professional-looking results.
Frequently Asked Questions
Can I Use the Same Techniques to Paint on Other Types of Ceramics, Such as Plates or Bowls?
Yes, the same painting techniques can be used on other ceramic surfaces like plates or bowls. We've mastered the art of painting on various ceramic items, ensuring the designs withstand the heat from hot beverages.
The key is in the preparation and application of the paint, taking into account the specific shape and surface of each item. With the right technique and attention to detail, you can create stunning designs on a variety of ceramic pieces.
How Can I Fix Any Mistakes or Smudges in the Design After the Paint Has Dried?
When fixing mistakes in a design after the paint has dried, we use various smudge removal techniques.
One method involves carefully scraping off the dried paint with a fine-tipped tool or razor blade.
Another approach is to lightly sand the area to smooth out imperfections.
Additionally, we can use a small brush or cotton swab dipped in rubbing alcohol to dissolve and remove smudges without damaging the surrounding design.
Are There Any Special Considerations for Painting on Mugs That Will Be Used for Hot Beverages?
When painting mugs, there are special considerations to ensure heat resistance and design durability. We use specific painting techniques that withstand hot beverages. It's crucial to choose the right type of paint and sealant for a lasting design.
Ensuring the paint is food-safe and non-toxic is also essential. We carefully consider the application process and curing time to guarantee the best results for our artistic creations.
Can I Use Regular Acrylic Paint or Do I Need to Use a Specific Type of Paint for Ceramic Surfaces?
We can use regular acrylic paint on ceramic surfaces, but for the best results, it's advisable to use a specific type of paint designed for ceramics. These paints are formulated to withstand heat and provide a durable finish.
When painting on ceramic surfaces, we recommend using techniques such as stippling, sponging, or even freehand brushwork. These methods can also be used for plates and bowls, adding a touch of creativity to everyday items.
Is It Possible to Paint Over a Pre-Existing Design on a Mug, or Do I Need to Start With a Blank Surface?
Yes, it's possible to paint over a pre-existing design on a mug.
There are various painting techniques and design inspirations to consider.
With the right materials and a creative approach, we can transform the existing design into something entirely new.
It's essential to prepare the surface properly and choose the appropriate paint for durability.
This process allows us to unleash our artistic vision and breathe new life into the mug's design.
Conclusion
After spending hours painting our mugs, we realized they were the perfect gift for our friend's birthday. As we handed them over, she burst into tears, overwhelmed by the personal touch and effort we put into them.
It was a moment we'll never forget, and it reminded us of the power of handmade gifts to truly touch someone's heart.
- About the Author
- Latest Posts
Introducing Ron, the home decor aficionado at ByRetreat, whose passion for creating beautiful and inviting spaces is at the heart of his work. With his deep knowledge of home decor and his innate sense of style, Ron brings a wealth of expertise and a keen eye for detail to the ByRetreat team.
Ron’s love for home decor goes beyond aesthetics; he understands that our surroundings play a significant role in our overall well-being and productivity. With this in mind, Ron is dedicated to transforming remote workspaces into havens of comfort, functionality, and beauty.
Garage Door Opener
7 Steps to Wire Your Garage Door Opener Safely
Illuminate the key to a secure garage door opener installation by mastering the intricate art of wiring – discover the crucial step you can't afford to overlook!
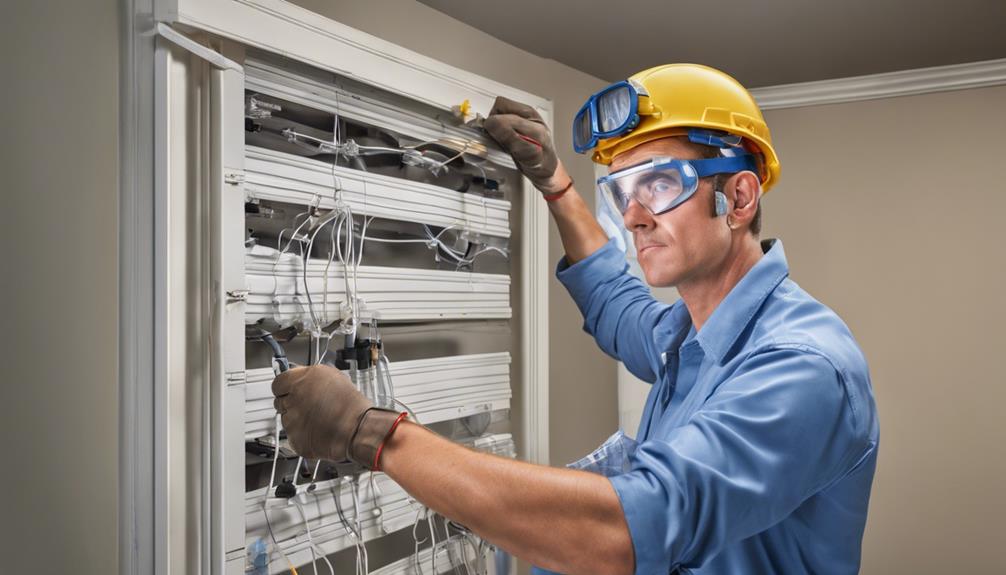
When it comes to the proper functioning of your garage door opener, the wiring process is crucial in guaranteeing its safety and efficiency. By beginning with thorough preparation and compatibility checks, we establish a solid foundation for a successful installation.
Each subsequent action, from assembling components to incorporating safety features, contributes to a reliable setup. However, one crucial step often overlooked can make or break the entire process.
By paying close attention to the intricacies of wiring types and configurations, you'll pave the way for a seamless and secure garage door opener system that guarantees peace of mind.
Key Takeaways
- Prioritize safety measures and preparation to wire your garage door opener securely.
- Connect power sources and wiring correctly with dedicated circuits and proper grounding.
- Program remotes and perform safety checks to ensure the opener functions safely.
- Conduct final testing, adjustments, and maintenance for optimal garage door opener safety.
Gather Required Tools and Materials
To wire your garage door opener safely, we need to first gather the essential tools and materials required for the installation process. Following the installation instructions meticulously is crucial for a successful setup. Tools such as wire strippers, wire nuts, electrical tape, and a voltage tester are indispensable. The voltage tester ensures that the power is off before beginning any work, preventing any electrical mishaps.
When selecting wire nuts, make sure they're the appropriate size for the wires being connected to guarantee a secure connection. Using the correct gauge of wire, like 18 or 20 AWG, is essential for the efficient functioning of the garage door opener. Additionally, having materials such as Cat5 cable, bell wire, or thermostat wire on hand is vital for wiring the opener correctly.
Prepare the workspace by having a ladder or step stool available to access the ceiling area where the opener will be connected to power and wiring, ensuring a safe and effective installation process.
Turn Off Power to the Garage
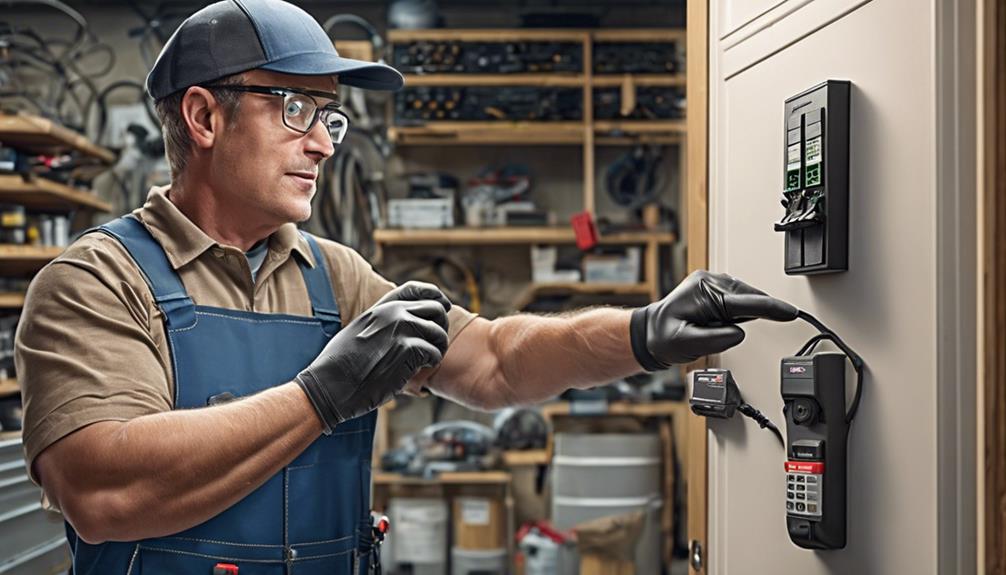
Before commencing any wiring tasks, it's imperative to ensure that the power to the garage has been switched off at the circuit breaker. Failure to do so can result in electric shock or damage to the garage door opener components.
To safely turn off the power to the garage, follow these steps:
- Locate the main circuit breaker for the garage and switch it to the 'off' position.
- Use a voltage tester to double-check and confirm that the power is indeed off before proceeding with any work.
- Avoid taking any shortcuts or risks when dealing with electrical power in the garage.
- Remember, safety should always be the top priority when working with power sources in the garage.
Identify and Connect Power Source
When identifying and connecting the power source for your garage door opener, locate the nearest 110-volt AC outlet for optimal functionality. This power source is crucial for the installation of the power unit, ensuring seamless operation of your garage door.
It's advisable to use a dedicated 20-amp GFCI circuit to protect the new operator and guarantee safety during operation. Proper grounding and adherence to electrical safety measures are paramount to prevent any mishaps.
Additionally, consider implementing a surge protector, especially in lightning-prone areas, to safeguard the electronics of your garage door opener. To enhance reliability, utilize two separate low-voltage wiring circuits for redundancy in powering the garage door opener.
Connect Control Wires to Opener

When connecting control wires to your garage door opener, it's crucial to check the compatibility of the wires being used.
Securely fasten the wires to the designated terminals on the opener, following the wiring diagram provided by the manufacturer.
Lastly, remember to test the control wires post-installation to ensure the opener functions correctly.
Check Wire Compatibility
To ensure proper installation, it's crucial to verify the compatibility of the control wires with the garage door opener specifications. When checking wire compatibility, consider the following:
- Voltage and Gauge Requirements: Ensure the control wires meet the voltage and gauge specifications set by the manufacturer.
- Shielding or Insulation: Determine if the control wires need to be shielded or insulated for safety purposes.
- Connection to Terminals: Connect the control wires to the designated terminals on the garage door opener according to the manufacturer's instructions.
- Testing Connections: After connecting the wires, test them to confirm that the garage door opener functions correctly.
Secure Wire Connections
Securing wire connections to the garage door opener involves meticulously fastening the control wires using appropriate screws or connectors as specified by the manufacturer. It's crucial to install 22 gauge or better wires and follow the manufacturer's instructions to ensure proper polarity and prevent damage.
Double-check the wire connections to avoid short circuits or garage door opener malfunctions. Securely fasten the wires to the terminals, following the wiring diagram provided in the opener's manual for correct placement.
Test Control Wire
After securely fastening the wire connections to the garage door opener, the next step is to test the control wire for continuity and proper connections using a multimeter. To ensure a safe and effective installation, follow these steps:
- Use a multimeter to check for continuity in the control wire.
- Confirm that the control wires are correctly connected to the designated terminals on the garage door opener.
- Refer to the wiring diagram provided by the manufacturer for accurate wire placement.
- Secure the control wire connections with wire nuts or soldering to guarantee a reliable setup.
Testing the control wire is crucial in ensuring the proper functioning and safety of your garage door opener.
Secure and Organize Wiring
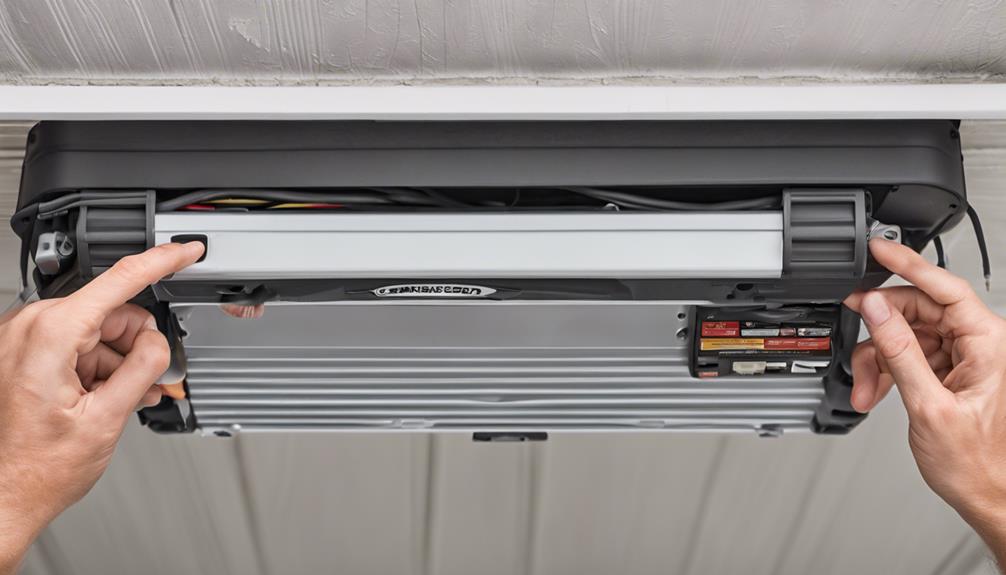
For optimal safety and functionality, we consistently secure and organize the wiring along the garage door opener rail using cable ties or clips. By attaching the wiring to the mounting bracket or the wall above the door, we ensure that it remains safely out of the way of moving parts and potential pinch points.
Utilizing wire loom or conduit adds an extra layer of protection, guarding the wiring against exposure to elements or accidental damage. Labeling each wire with its corresponding function is crucial for easy identification and future troubleshooting.
It's imperative to check all connections to guarantee they're tight and secure, minimizing the risk of electrical hazards or malfunctions. Properly securing and organizing the wiring not only enhances safety but also contributes to the overall efficiency and longevity of the garage door opener system.
Test the Garage Door Opener
Let's begin by emphasizing the importance of checking the safety sensors, testing the remote functionality, and verifying the auto-reverse feature of your garage door opener.
These steps are crucial in ensuring the smooth and safe operation of your garage door system.
Regularly testing these features can help prevent accidents and keep your garage secure.
Check Safety Sensors
How do you ensure the safety sensors of your garage door opener are functioning optimally? Proper maintenance and testing of these sensors are essential for safe operation. Here are some steps to check your safety sensors effectively:
- Verify Alignment: Ensure the sensors are properly aligned to detect obstacles accurately.
- Test Functionality: Place an object in the door's path during closure to confirm the sensors trigger the reversal mechanism.
- Clean Sensors: Keep the sensors clean from dust or debris that could obstruct their operation.
- Regular Inspections: Regularly inspect and test the sensors to guarantee they're in good working condition.
Regular attention to these safety sensors will help prevent accidents and maintain the security of your garage door system.
Test Remote Functionality
To ensure the proper functioning of your garage door opener, it is crucial to test the remote functionality by syncing it with the opener and confirming smooth operation. Follow the instructions provided by the manufacturer for programming the remote. Press the learn/programming button on the opener and the corresponding button on the remote simultaneously. Listen for a clicking sound, indicating successful programming. Test the remote by opening and closing the garage door. Ensure the remote operates the door smoothly and consistently. Use the table below to keep track of the programming process.
| Step | Description |
|---|---|
| Press Learn Button | Press the learn/programming button on the opener. |
| Sync Remote Button | Simultaneously press the corresponding button on the remote. |
| Listen for Clicking Sound | Listen for a clicking sound to confirm successful programming of the remote. |
Verify Auto-Reverse Feature
To verify the auto-reverse feature of your garage door opener, conduct a test by placing an object, such as a roll of paper towels, in the path of the closing door. This test is crucial for ensuring the safety of your garage door system. Here are some key points to consider:
- The garage door should reverse immediately upon contact with the object to ensure safety.
- This feature is designed to prevent accidents and injuries by stopping and reversing the door if it encounters an obstruction.
- Remember to test the auto-reverse feature periodically to ensure it's functioning correctly.
- If the garage door opener fails the auto-reverse test, troubleshoot the issue promptly to avoid safety hazards.
Regularly testing the auto-reverse feature is essential for maintaining a safe garage environment.
Perform Safety Checks and Final Adjustments

Upon completing the wiring connections, the next crucial step is to verify the functionality of safety sensors and ensure they're aligned correctly and responsive.
Secure all wiring connections to prevent any potential electrical hazards. Test the safety sensors meticulously, adjusting their alignment as necessary to guarantee they detect obstacles and respond promptly.
Double-check all wiring connections to confirm accuracy, following the manufacturer's guidelines meticulously to ensure proper installation. Adjust the force sensitivity settings to guarantee that the garage door opener stops and reverses immediately upon detecting an obstruction.
Before considering the installation complete, conduct a final test of the garage door opener to ensure seamless operation and validate all safety features. Remember, safety is paramount when dealing with garage door openers, so thorough checks and adjustments are vital to prevent accidents and ensure the system functions as intended.
Frequently Asked Questions
How Do You Wire a Garage Door Safety Sensor?
When wiring a garage door safety sensor, we ensure proper installation of both sending and receiving units is essential.
Align the units correctly for the infrared beam to function effectively.
Connect the wires following the manufacturer's instructions meticulously.
Testing the sensors after installation is crucial to confirm correct wiring and functionality.
Regular maintenance and inspection of the sensors are necessary to guarantee safe garage door operation.
How Many Wires Do You Need for a Garage Door Opener?
We typically need a 2-wire bell wire for basic garage door opener functionality. Additional features like safety sensors and remote controls might require more wiring like Cat5 cable.
Using 18-2 thermostat wire or alarm cables is also common. In some setups, twisted pair wire can be handy. It's crucial to select the right wire type and gauge that align with the specific requirements of your garage door opener system.
Is It Safe to Install Your Own Garage Door Opener?
Yes, installing your own garage door opener can be safe if done correctly. Following manufacturer's instructions and having basic electrical knowledge are crucial. Improper wiring can pose safety hazards and void warranties, so caution is essential.
Understanding wiring diagrams and using the right tools are key for a successful installation. When in doubt about wiring or electrical work, it's wise to consult a professional for safety and proper functioning.
Can You Hardwire a Garage Door Opener?
Yes, we can hardwire a garage door opener. It involves connecting it directly to a power source without using a plug. This method provides a more secure and reliable power connection compared to using a standard electrical outlet.
It's essential to follow the manufacturer's instructions carefully to ensure safety and proper functionality. Hardwiring can eliminate the need for an electrical outlet near the motor unit, making for a more streamlined and permanent installation.
Conclusion
In the intricate dance of wiring a garage door opener, we must be the conductor orchestrating each step with precision and care. Like a skilled musician, we must harmonize the components, ensuring the safety and efficiency of the system.
By following the steps outlined, we can create a symphony of functionality that will open the doors to convenience and security in our everyday lives.
- About the Author
- Latest Posts
Introducing Ron, the home decor aficionado at ByRetreat, whose passion for creating beautiful and inviting spaces is at the heart of his work. With his deep knowledge of home decor and his innate sense of style, Ron brings a wealth of expertise and a keen eye for detail to the ByRetreat team.
Ron’s love for home decor goes beyond aesthetics; he understands that our surroundings play a significant role in our overall well-being and productivity. With this in mind, Ron is dedicated to transforming remote workspaces into havens of comfort, functionality, and beauty.
Garage Door Opener
5 Reasons to Choose PDS 800 Garage Door Opener
Hovering over the PDS 800 opener, discover the hidden gem that makes it a standout choice for your garage – the first reason awaits!

While delving into the world of garage door openers, there is a unique feature of the PDS 800 model that is frequently overlooked.
Curious to unravel the five standout features that make this opener a top choice for many discerning homeowners?
Let's begin by uncovering the first reason that sets the PDS 800 apart from the rest, paving the way for a discussion that promises to shed light on why this particular garage door opener might be the ideal solution for your needs.
Key Takeaways
- Whisper-quiet operation for a serene environment.
- Advanced security features for peace of mind.
- Enhanced durability and reliability for longevity.
- Smart home integration for convenience and control.
Whisper-Quiet Operation
We've found that the PDS 800 garage door opener excels in delivering whisper-quiet operation, ensuring minimal noise disruption in your daily routine. This opener boasts a soft-start and soft-stop DC drive motor, guaranteeing smooth and quiet door operation every time.
The beauty of this system lies in its energy-efficient DC-powered mechanism, which not only reduces noise but also provides reliable performance. Despite its powerful operation, the PDS 800 maintains a whisper-quiet demeanor, running at a speed comparable to AC models but without the annoying racket.
This feature is a game-changer for those seeking a peaceful environment, allowing you to operate your garage door without disturbing the tranquility of your surroundings. Say goodbye to clunky, noisy openers of the past and embrace the serenity that comes with the PDS 800's whisper-quiet technology.
Advanced Security Features
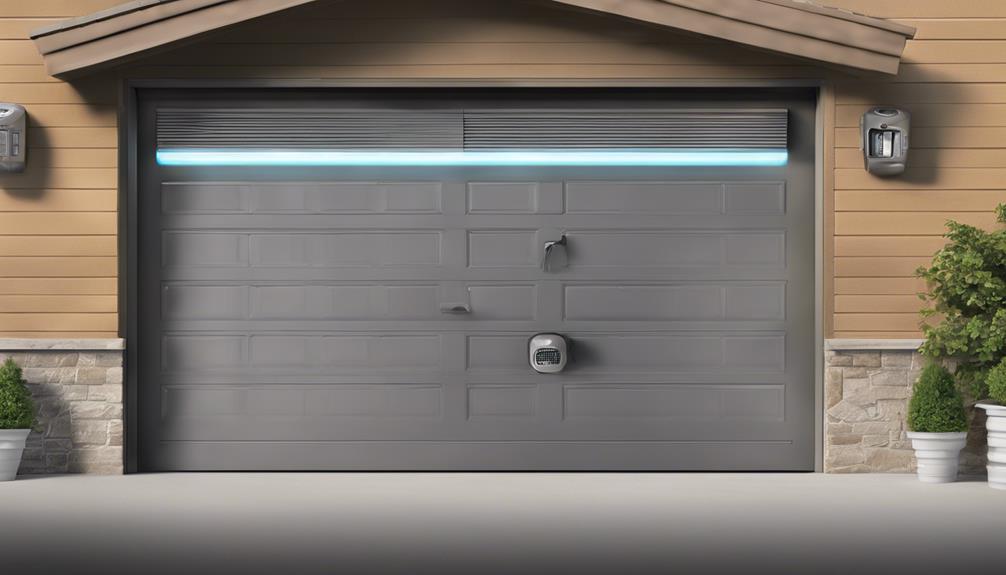
Enhancing the overall security of your property, the PDS 800 Garage Door Opener integrates cutting-edge security features to safeguard your garage and belongings effectively.
The advanced security features of the PDS 800 Garage Door Opener include:
- Rolling Code Technology: Prevents code grabbing by thieves, ensuring that only authorized individuals can access your garage.
- Security+ 2.0 Technology**: Sends a new code to the remote every time it's used, guaranteeing secure access and reliable performance.
- PosiLock System**: Ensures that the door remains securely locked when closed, deterring forced entry attempts and providing peace of mind.
These features work together to offer unparalleled security for your garage, giving you the confidence that your property and belongings are well-protected.
With these advanced security measures in place, you can trust the PDS 800 Garage Door Opener to deliver top-notch security and reliable performance for your peace of mind.
Enhanced Durability and Reliability
When considering the PDS 800 Garage Door Opener, one can expect unparalleled enhanced durability and reliability due to its heavy-duty components and long-term performance design.
Precision Door's PDS 800 model is specifically engineered to provide lasting durability for your new garage door, ensuring a reliable operation that withstands the test of time. The heavy-duty parts incorporated into this garage door opener are designed to endure daily use, offering consistent performance even in challenging weather conditions.
With Precision Door's dedication to quality and reliability, the PDS 800 opener guarantees a robust and long-lasting solution for your garage door system. Rest easy knowing that your new garage door will be equipped with a dependable opener that prioritizes durability, making it a solid investment for the future.
Trust in the PDS 800 to deliver the reliability and longevity you seek in a garage door opener.
Smart Home Compatibility
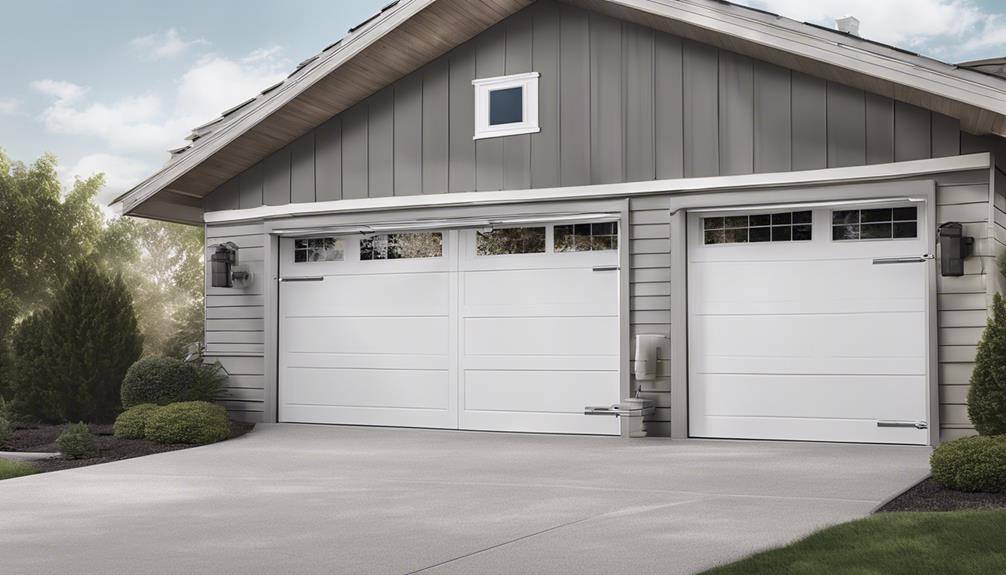
The seamless integration of the PDS 800 Garage Door Opener with smart home systems like HomeLink and Car2U allows for convenient remote control and monitoring capabilities, enhancing security and providing peace of mind. By connecting your PDS 800 Garage Door Opener to your smart home setup, you can effortlessly manage your garage door opening from anywhere, whether you're at home or on the go. Here's how smart home compatibility enhances your experience:
- Remote Control: Operate your garage door opener remotely through your smartphone or voice assistants like Alexa and Google Assistant.
- Monitoring: Keep an eye on your garage door opening status and receive notifications about any activity, adding an extra layer of security.
- Integration: Set schedules, integrate with other smart devices, and enjoy a fully connected home experience with the PDS 800 Garage Door Opener.
With smart home compatibility, you can take full control of your garage door, ensuring convenience and security at your fingertips.
Professional-Grade Performance
Delivering exceptional performance, the PDS 800 Garage Door Opener features a powerful 800 Newton DC motor designed for professional-grade operation. This motor ensures efficient and reliable opening of your garage door at AC-equivalent speeds, meeting the demands of a busy lifestyle. The soft-start and soft-stop DC drive motor guarantee smooth and quiet operation, minimizing noise disruptions. For added convenience and peace of mind, the optional Battery Backup feature ensures continuous opening functionality even during power outages. The PDS 800 model is engineered for durability, promising long-term reliable performance, making it an ideal choice for those seeking a top-tier garage door opener.
| Professional-Grade Performance Features | Benefits |
|---|---|
| 800 Newton DC motor | Powerful operation |
| AC-equivalent speed | Efficient opening |
| Soft-start and soft-stop DC drive motor | Smooth and quiet operation |
Frequently Asked Questions
What Brand of Garage Door Opener Is the Most Reliable?
We believe the most reliable brand of garage door opener is one that offers a proven track record of durability and performance.
It should feature advanced technology for smooth operation and energy efficiency.
A comprehensive warranty and excellent customer service are also essential factors to consider.
Trusting a reputable brand with a history of delivering top-notch products can provide peace of mind when selecting a reliable garage door opener.
What Is a PDS Garage Door Opener?
We're experienced with PDS Garage Door Openers, known for their efficient 800 Newton DC power and AC-equivalent speed performance.
These openers feature a soft-start and soft-stop DC drive motor for quiet and reliable operation.
Homeowners appreciate the optional Battery Backup for added peace of mind during power outages.
PDS Openers come with advanced features to ensure reliable and convenient usage, making them a top choice for many.
What Is the Benefit of a Higher HP Garage Door Opener?
Having a higher HP garage door opener brings numerous benefits. It provides more power for effortlessly lifting heavier doors, ensuring smoother operation and less motor strain. This results in increased durability, longevity, and the ability to handle larger, heavier doors.
Faster opening and closing speeds enhance convenience and efficiency. Ultimately, opting for a higher HP model like the PDS 800 guarantees reliable performance and improved functionality for any garage door system.
How Do I Know What Garage Door Opener to Buy?
When choosing a garage door opener, we consider factors such as:
- The size and weight of the door
- Power source
- Speed
- Additional features like battery backup
Analyzing these aspects helps us determine the best fit for our needs.
Researching different models, comparing their specifications, and seeking expert advice can guide our decision-making process.
It's crucial to prioritize safety, efficiency, and convenience when selecting the right garage door opener for our home.
Conclusion
In conclusion, the PDS 800 garage door opener is like a steadfast guardian for your home, ensuring smooth and secure access every time.
With its whisper-quiet operation, advanced security features, enhanced durability, smart home compatibility, and professional-grade performance, this opener truly stands out in the industry.
Trust in the reliability and top-notch performance of the PDS 800 to safeguard your garage door needs with precision and efficiency.
- About the Author
- Latest Posts
Introducing Ron, the home decor aficionado at ByRetreat, whose passion for creating beautiful and inviting spaces is at the heart of his work. With his deep knowledge of home decor and his innate sense of style, Ron brings a wealth of expertise and a keen eye for detail to the ByRetreat team.
Ron’s love for home decor goes beyond aesthetics; he understands that our surroundings play a significant role in our overall well-being and productivity. With this in mind, Ron is dedicated to transforming remote workspaces into havens of comfort, functionality, and beauty.
Garage Door Opener
What Do Dip Switches Do on a Garage Door Opener?
Unlock the mystery of DIP switches on garage door openers and discover how they hold the key to your home security—find out more inside!
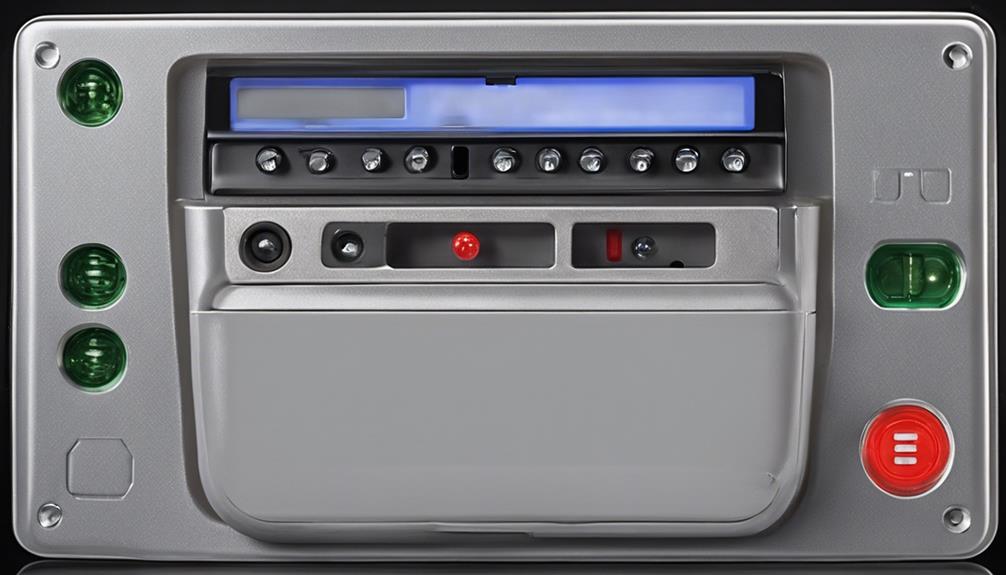
Were you aware that more than 70% of older garage door openers still use DIP switches for programming? Knowing how DIP switches work in your garage door opener is important for keeping your home safe and operational.
So, what exactly do these tiny switches do and how can they impact your daily routine? Let's explore the fascinating world of DIP switches on garage door openers and uncover their hidden significance in modern home security systems.
Key Takeaways
- Dip switches establish unique communication codes for secure garage door operation.
- Proper synchronization of dip switches ensures reliable remote control access.
- Changing dip switch settings regularly enhances security and prevents unauthorized entry.
- Dip switches play a crucial role in maintaining system security and communication integrity.
Role of Dip Switches in Programming
Dip switches play a crucial role in programming a garage door opener by enabling the establishment of a unique communication code between the remote control and the receiver. These switches are essential for setting a specific code pattern that ensures secure access to the garage. By positioning the dip switches in a particular way, a unique code is created, allowing the remote control to communicate effectively with the receiver.
Programming these dip switches correctly is vital for maintaining secure and reliable access to the garage. The code pattern established by the dip switches is the key to unlocking the full functionality of the garage door opener. Through this method, users can control the garage door with precision and confidence, knowing that the communication between the remote control and the receiver is secure and accurate.
Dip switches provide a fundamental yet highly effective way to manage the operation of the garage door opener.
Ensuring Secure Communication With Remote
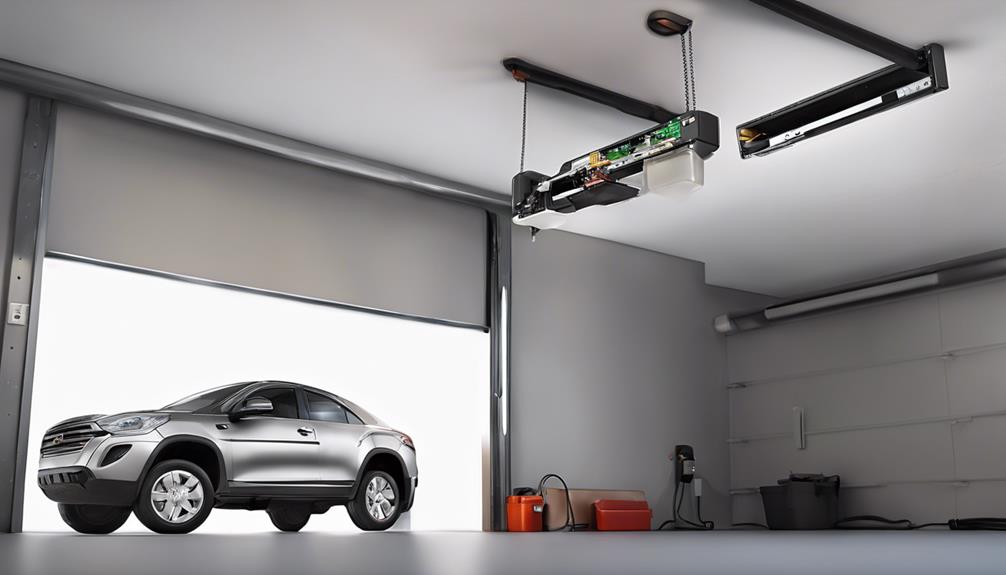
To establish a secure communication channel with the remote control, precise synchronization of the communication code pattern between the garage door opener and the receiver is essential. The dip switches play a vital role in ensuring secure communication by creating a unique code pattern that must match on both the remote control and the garage door opener. This specific code pattern prevents interference from other devices, enhancing the security of the system.
Proper synchronization of the dip switch settings is crucial for the garage door opener to respond accurately to the signals sent by the remote control. Regularly changing dip switch configurations adds an extra layer of security, preventing unauthorized access to the garage door opener. By maintaining the integrity of the communication between the garage door opener, receiver, and remote control through the proper use of dip switches, users can ensure that their garage remains secure and protected from external tampering.
Functionality of Garage Door Opener
Establishing the functionality of a garage door opener involves understanding its mechanisms for receiving and responding to signals from the remote control. The dip switches on a garage door opener play a crucial role in enabling communication between the remote control and the receiver. These dip switches are responsible for encoding and decoding signals, ensuring that the opener can interpret the commands sent by the remote accurately. Proper synchronization of the dip switches is essential to maintain seamless operation of the garage door opener. However, it's important to note that dip switches offer a basic method of security and may be less secure compared to newer technologies like rolling code systems.
| Functionality | Description |
|---|---|
| Communication | Enables interaction between the remote control and the garage door opener. |
| Encoding and Decoding | Converts signals from the remote control into actionable commands. |
| Security | Provides a basic level of access control, although less secure than newer technologies. |
Understanding the functionality of a garage door opener, especially the role of dip switches, is vital for ensuring the proper operation and security of your garage.
Importance of Dip Switches
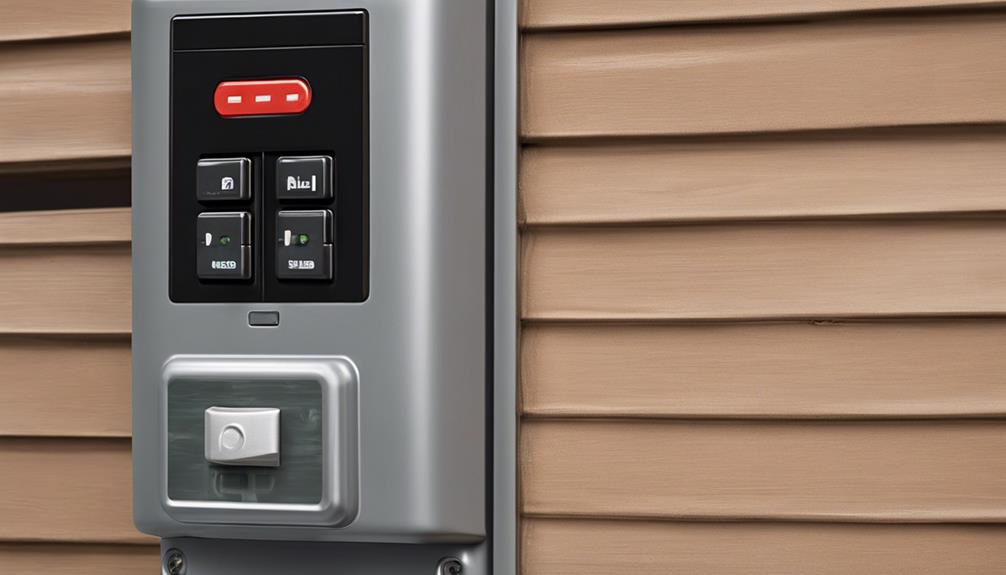
When configuring a garage door opener, understanding the significance of dip switches becomes paramount in ensuring seamless communication between the remote control and the receiver.
- Dip switches on a garage door opener enable customization of the code pattern for secure access.
- Setting the dip switches to the same pattern on both the remote control and the opener is crucial for effective communication.
- This cost-effective solution provides a simple way to control the garage door without unnecessary features.
- Proper synchronization of dip switches is essential to guarantee the seamless operation of the garage door opener.
- Dip switches play a vital role in establishing a secure and reliable connection between the remote control and the receiver, ensuring smooth functioning of the garage door opener system.
Programming Your Garage Door Opener
Understanding how to program the dip switches on your garage door opener is essential for securing communication between the remote control and the opener. Programming these settings correctly ensures that your garage door opener responds only to your remote's unique code, enhancing security and preventing unauthorized access. By adjusting the dip switches, you can sync the remote to the opener, creating a secure link that allows for seamless operation.
To program your garage door opener effectively, follow these steps:
| Step | Instructions |
|---|---|
| 1 | Locate the dip switches on your garage door opener. |
| 2 | Set the dip switches to a unique code position. |
| 3 | Sync your remote control to the opener by matching the code. |
| 4 | Regularly change the dip switch settings to enhance security and prevent unauthorized access. |
Proper programming of your garage door opener's dip switches is crucial for maintaining the integrity of your security system and ensuring smooth operation.
Frequently Asked Questions
When Did Garage Door Openers Stop Using DIP Switches?
We garage door openers stopped using DIP switches in the early 2000s with the introduction of rolling code technology. Rolling code tech provided unique and changing access codes for enhanced security.
This made DIP switches obsolete since they offered less secure communication. The transition to rolling codes marked a significant advancement in opener security and functionality.
Newer models now offer better protection compared to older versions that relied on DIP switches.
Do Genie Garage Door Openers Have DIP Switches?
We don't use DIP switches in Genie garage door openers. Our systems employ rolling code technology to ensure top-notch security.
Each remote use triggers a new code, preventing unauthorized access. This feature guarantees a high level of security and convenience without the need for DIP switches.
Does Liftmaster Have DIP Switches?
We don't use DIP switches in LiftMaster garage door openers. Instead, our systems rely on cutting-edge rolling code technology, enhancing security by altering the access code with each use.
This modern approach offers increased protection and convenient features like remote control programmability. Upgrading to a LiftMaster opener eliminates the need for dealing with DIP switches, providing an advanced and hassle-free solution for your garage door needs.
How Do Garage Door Switches Work?
Garage door switches work by establishing a connection between the remote control and the opener receiver. They utilize unique code combinations set on dip switches to operate the door. Synchronization of these switches is crucial for accurate signal reception.
While lacking encryption, dip switches are susceptible to security risks. Proper understanding and configuration of dip switches are essential for optimal garage door opener performance.
Conclusion
In conclusion, the DIP switches on a garage door opener act as the gatekeepers of communication, ensuring a secure connection between the remote control and the receiver.
Just like a key fits perfectly into a lock, programming these switches correctly is essential for the smooth functionality and security of your garage door system.
Remember to regularly update and adjust the DIP switches to keep your garage safe and secure.
- About the Author
- Latest Posts
Introducing Ron, the home decor aficionado at ByRetreat, whose passion for creating beautiful and inviting spaces is at the heart of his work. With his deep knowledge of home decor and his innate sense of style, Ron brings a wealth of expertise and a keen eye for detail to the ByRetreat team.
Ron’s love for home decor goes beyond aesthetics; he understands that our surroundings play a significant role in our overall well-being and productivity. With this in mind, Ron is dedicated to transforming remote workspaces into havens of comfort, functionality, and beauty.
-

 Vetted2 days ago
15 Best Drip Irrigation Systems to Keep Your Garden Thriving
-

 Beginners Guides1 week ago
Designing Your Retreat Center – Essential Tips
-

 Vetted2 weeks ago
15 Best Tile Adhesives for Outdoor Use – Top Picks for Durable and Weather-Resistant Installations
-

 Beginners Guides2 weeks ago
Are Retreats Profitable
-

 Vetted2 weeks ago
15 Creative Ways to Cover Up Popcorn Ceilings and Transform Your Space
-
 Vetted2 weeks ago
15 Best Playroom Storage Solutions to Keep Your Kids' Space Organized and Fun
-

 Vetted4 weeks ago
15 Best Ways to Label Clothes for Nursing Home Residents – Stay Organized and Efficient
-

 Vetted3 weeks ago
15 Best Dryer Vent Hoses to Keep Your Laundry Room Safe and Efficient


