Beginners Guides
Electric Griddle Temperature for Pancakes
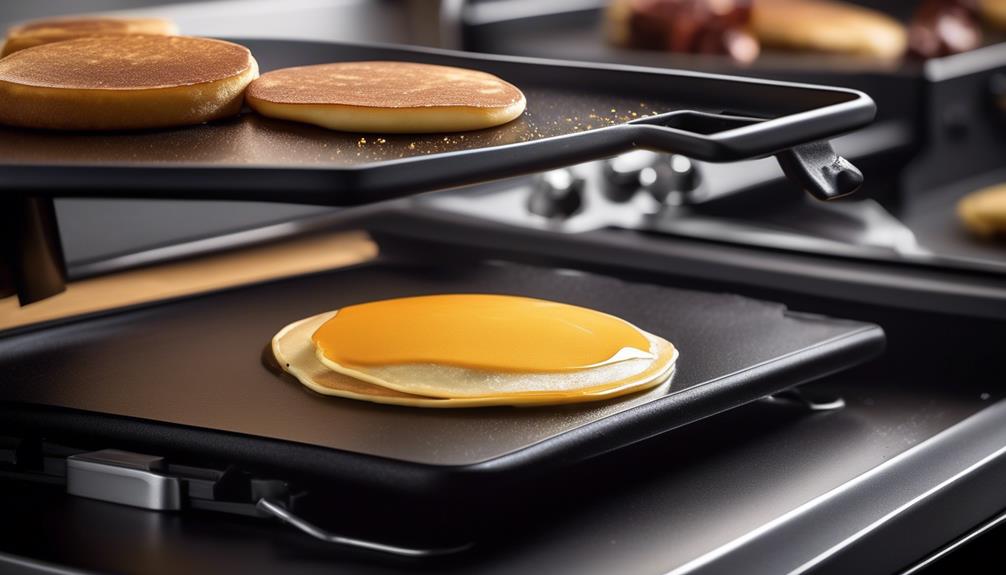
When cooking pancakes on an electric griddle, getting the temperature just right is crucial. If it’s too high, you run the risk of burning the outside and leaving the inside uncooked. If it’s too low, you’ll end up with pale, rubbery pancakes.
Temperature control is crucial for achieving the perfect pancake texture and flavor. As a professional chef, we've spent countless hours experimenting with different temperatures to perfect the art of pancake-making on an electric griddle.
But before we reveal the optimal temperature range, let's discuss why temperature control is crucial for achieving the perfect pancake texture and flavor.
Key Takeaways
- Maintaining correct temperature on electric griddle is crucial for fluffy, evenly cooked pancakes
- Achieving optimal temperature range is essential for perfect pancakes of different types
- Incorrect temperatures result in undercooked or overcooked pancakes, with burnt or rubbery texture
- Testing griddle temperature by sprinkling water and adjusting temperature accordingly ensures perfect results for each pancake
Importance of Temperature Control
Maintaining the correct temperature on an electric griddle is crucial for achieving perfectly fluffy and evenly cooked pancakes. Temperature consistency is key to ensuring that the pancakes cook evenly and don't end up burnt or undercooked. To achieve this, it's essential to preheat the electric griddle to the correct temperature and maintain it throughout the cooking process.
The ideal temperature for cooking pancakes on an electric griddle is around 375°F. This temperature allows the pancakes to cook through without burning on the outside.
When it comes to cooking techniques, using a consistent temperature enables us to employ various cooking methods to achieve different textures and flavors. For example, cooking pancakes at a slightly lower temperature results in a more even, golden-brown color, while a slightly higher temperature can create a slightly crispier exterior. Additionally, maintaining a consistent temperature allows for better control over the cooking process, ensuring that the pancakes are cooked to perfection each time.
Mastering the art of temperature control and cooking techniques on an electric griddle is essential for achieving the perfect pancakes.
Optimal Temperature Range
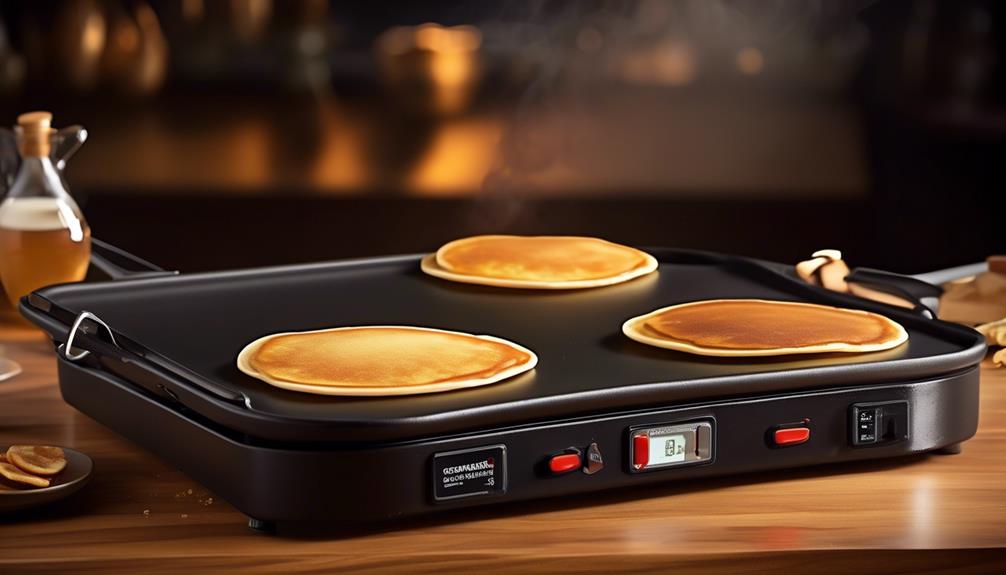
We find that achieving the optimal temperature range on the electric griddle is essential for consistently perfect pancakes. Cooking techniques and recipe variations can significantly impact the ideal temperature for pancake preparation. The table below outlines the optimal temperature range for cooking pancakes on an electric griddle, as well as some variations to consider for different pancake types.
| Pancake Type | Ideal Temperature Range | Cooking Techniques |
|---|---|---|
| Buttermilk | 375°F – 385°F | Pour batter in small circles and wait for bubbles to form before flipping. |
| Blueberry | 365°F – 375°F | Use lower heat to prevent berries from burning, flip when the edges look set. |
| Chocolate Chip | 355°F – 365°F | Cook at a slightly lower temperature to avoid scorching the chocolate chips. |
| Whole Wheat | 375°F – 385°F | Cook at a slightly higher heat to ensure thorough cooking of denser batter. |
| Vegan | 355°F – 365°F | Use a lower temperature to allow the batter to cook through without burning. |
Experimenting with different temperature ranges and cooking techniques based on the pancake type can help achieve the perfect texture and flavor for each recipe variation.
Effects of Incorrect Temperatures
When the temperature is incorrect, pancakes can either turn out undercooked in the center or overcooked and dry around the edges. Overheating the griddle can lead to pancakes cooking too quickly on the outside while the inside remains raw. This results in a gooey, unappetizing texture and an unevenly cooked pancake.
On the other hand, underheating the griddle can cause the batter to spread too much before setting, resulting in thin, rubbery pancakes. The impact of underheating is also evident in the prolonged cooking time, leading to dry and tough pancakes due to excessive evaporation of moisture. Additionally, pancakes cooked at a lower temperature may absorb more grease or oil, making them excessively oily and less appetizing.
It's crucial to maintain the correct temperature to achieve that perfect golden-brown color and a light, fluffy texture throughout the pancake. Finding the optimal temperature for your electric griddle is essential to ensure that the pancakes are cooked evenly, with a delicate balance of moistness and fluffiness.
Tips for Testing Griddle Temperature
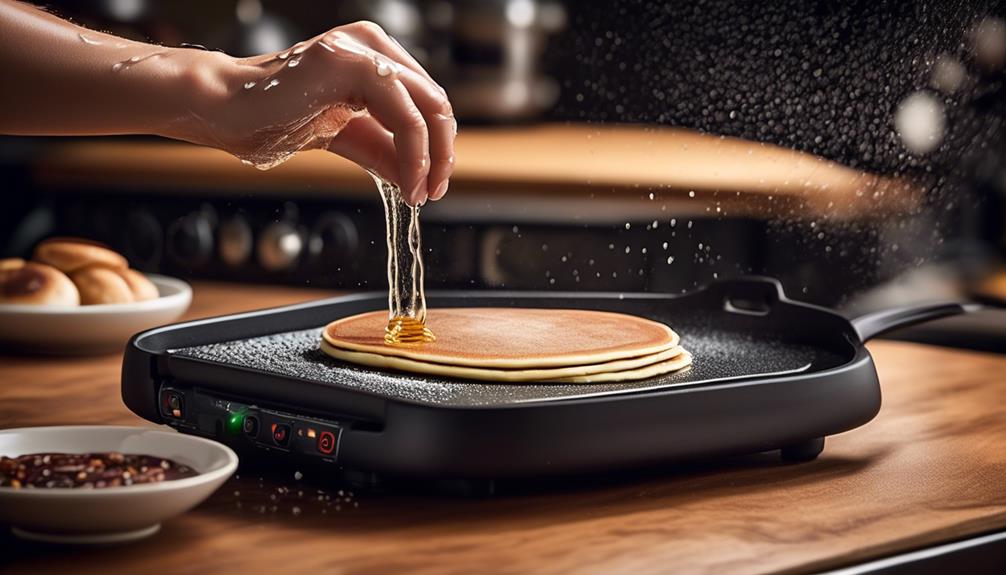
To ensure the griddle is at the right temperature, a simple test is to sprinkle a few drops of water onto the cooking surface and observe how they react. Here are some tips for testing griddle temperature:
- Even Heat Distribution: After preheating the griddle, sprinkle a few drops of water across the cooking surface. If the water droplets sizzle and evaporate evenly across the griddle, it indicates that the heat is evenly distributed, and the griddle is ready for cooking.
- Quick Reaction: The water droplets should sizzle upon contact and evaporate within a few seconds. This quick reaction indicates that the griddle is hot enough to cook pancakes evenly without burning them.
- Levelling the Surface: Before testing the temperature, ensure that the griddle is placed on a level surface to allow for even heat distribution and accurate testing.
- Consistency: Repeat the water droplet test in different areas of the griddle to ensure consistent heat distribution across the entire cooking surface.
Adjusting Temperature for Different Pancake Types
For optimal results when cooking various types of pancakes, adjusting the temperature of the electric griddle is essential. The texture and cooking time of pancakes vary depending on the type of batter and ingredients used.
When making fluffy buttermilk pancakes, set the griddle to a medium heat, around 350°F (175°C). This allows the pancakes to cook through evenly without burning while achieving a light and airy texture.
Thicker batters, such as those used for blueberry or chocolate chip pancakes, require a slightly lower temperature to ensure that the inside cooks fully without the outside becoming too dark. Adjust the griddle to a medium-low heat, approximately 325°F (163°C), to achieve the perfect balance.
For thinner and delicate pancakes like crepes, a low heat setting, around 275°F (135°C), is ideal. This lower temperature prevents overcooking and helps maintain a tender texture.
Additionally, adjusting the temperature based on the type of pancake batter used can affect the cooking time, ensuring that each pancake is perfectly cooked and delightful to eat.
Frequently Asked Questions
Can I Use an Electric Griddle for Pancakes if It Doesn't Have Temperature Control?
Yes, you can use an electric griddle for pancakes even if it doesn't have temperature control.
When it comes to griddle alternatives, a non-adjustable electric griddle can still produce delicious pancakes.
To ensure even cooking, preheat the griddle and test the temperature by sprinkling a few droplets of water.
As for pancake flipping techniques, use a spatula and wait for bubbles to form on the surface before flipping.
Are There Any Safety Concerns Related to Electric Griddle Temperatures for Making Pancakes?
When it comes to electric griddle safety, it's essential to understand the potential risks associated with improper temperature settings.
In pancake cooking, maintaining the right temperature is crucial to ensure they cook evenly and avoid burning.
It's important to be mindful of overheating the griddle, which can pose safety concerns.
Can I Use a Specific Type of Oil or Butter to Help Regulate the Griddle Temperature for Pancakes?
We can use a butter alternative to help regulate the griddle temperature for pancakes.
Additionally, the choice of oil can affect heat distribution on the griddle. It's important to select an oil with a high smoking point, like vegetable or canola oil, to maintain the desired cooking temperature.
This will help ensure even cooking and prevent the pancakes from burning.
How Do Different Altitudes Affect the Optimal Temperature for Cooking Pancakes on an Electric Griddle?
At high altitudes, the lower air pressure affects the optimal cooking temperature for pancakes on an electric griddle. The batter may need adjustments to maintain the desired pancake consistency.
Additionally, the cooking time could be slightly longer due to the altitude effects on heat transfer. It's essential to experiment and make slight modifications to the griddle temperature and cooking time to achieve perfect pancakes at different altitudes.
Are There Any Specific Temperature Adjustments Needed for Gluten-Free or Vegan Pancake Batter on an Electric Griddle?
We've found that specific temperature adjustments can be necessary for gluten-free or vegan pancake batter on an electric griddle. When dealing with altitude effects, temperature control becomes crucial to achieve the desired texture and flavor.
It's important to note that safety concerns should also be considered when making these adjustments. We've learned that fine-tuning the temperature settings for gluten-free or vegan pancake batter can lead to outstanding results.
What is the Ideal Temperature for Cooking Pancakes on an Electric Griddle?
The ideal pancake griddle temperature is around 375°F to 400°F. This allows the pancakes to cook evenly and develop a golden-brown color. A hotter griddle can result in uneven cooking and burnt pancakes, while a lower temperature can make them pale and doughy.
Conclusion
So, next time you're making pancakes on the electric griddle, remember that getting the temperature right is crucial for perfect pancakes.
It's no coincidence that the optimal temperature range ensures fluffy, golden-brown pancakes every time.
Keep an eye on the temperature and make any necessary adjustments to achieve the best results.
Happy flipping!
- About the Author
- Latest Posts
Introducing Ron, the home decor aficionado at ByRetreat, whose passion for creating beautiful and inviting spaces is at the heart of his work. With his deep knowledge of home decor and his innate sense of style, Ron brings a wealth of expertise and a keen eye for detail to the ByRetreat team.
Ron’s love for home decor goes beyond aesthetics; he understands that our surroundings play a significant role in our overall well-being and productivity. With this in mind, Ron is dedicated to transforming remote workspaces into havens of comfort, functionality, and beauty.
Beginners Guides
Modern Danish Design – 10 Tips To Bring It Home
You can bring Modern Danish Design into your home in various ways. The key is to embrace the concept of Hygge, or coziness. This can be accomplished by adding corner sofas and other comfortable furniture pieces. Additionally, lighting, plants, and other small details can also contribute to creating a cozy atmosphere.
Hygge is a Danish design idea

You can add architectural designs to your furniture or decorations to bring hygge to your home. Hygge refers to living in a more relaxed and peaceful environment. You can enhance your home’s natural beauty with natural materials. Plants can be placed in empty corners to add life and beauty to your home. Plants can clean your home. An aquarium or small indoor waterfall can bring nature inside your home.
Hygge is all about soft and plush textures. They provide comfort and sound absorption. You can use them to modify the decor in your home. To create a cozy atmosphere, thick, jewel-colored wool rug can be used during the winter months. Natural jute rugs are also available during warmer months.
Hygge is an idea that has been around since the beginning of time but has gained popularity in America. Hygge has been the subject of many books and articles in the last two years. The Oxford Words of the Year also includes the concept.
Natural lighting
Danish design is known for its popular motif of candlelight. It creates a warm and romantic atmosphere. Since the 20th century, many designers have tried to replicate this effect using electric lights. These five unique Danish lighting fixtures show that modern design can still create an inviting atmosphere.
The PH 5 Pendant is a timeless Danish design. Poul Henningsen designed this pendant. It has an unusual angled shape that diffuses light. These lights come in a variety of styles and finishes. You can choose a PH5 Pendant based upon the style and colour of your room.
The UK is also home of Danish modern design. It has open floor plans and sleek furniture. It’s also well-known for creating a calm atmosphere that helps to relieve the stress of modern life.
Wooden details
Modern Danish design features wood as a common feature. This gives homes a warm, inviting feeling. Danish people love entertaining, so they have large wooden tables, cabinets, fireplaces, and other features. Natural wood tones are prominent and the details are often very simple. Sometimes, wood details can be combined to give a more sophisticated look.
Modern Danish designs often have a slightly different wood grain. These pieces are usually made of teak or European oak wood. To highlight the natural grain, the wood is lightly polished. Modern Danish design features a minimalist aesthetic. To create modern, Scandinavian-inspired pieces, designers often focus on natural materials, including teak, rosewood, and European oak.
Danish modernism also features unusual names and shapes. The Klint Stool, Jacobsen’s egg chair and Jacobsen’s stool are two examples. The chairs were designed by these two men who were inspired by the natural world. Jacobsen also designed a chair that looks like an ant’s legs.
Plants
Modern Danish design emphasizes simplicity. Danish people don’t like clutter on their tables or sideboards. They like clean, simple spaces made from natural and elegant materials. To create contrast between materials and textures, use a soft touch with neutral colours.
Hygge is key to bringing this design into your home. Hygge promotes harmony and well-being by being rooted in the small things of life. Hygge also means to enjoy the moment. Hygge is a popular design concept and home decor. It focuses on natural materials and transparent textures.
The key element is light. Contemporary chandeliers and sphere tables lamps can create tranquil pools of light that increase the sense of hygge within a space.
Unmade beds
Danish designers like to keep things simple. Unmade beds can be a great way to create an intimate feeling. Niki Brantmark is the author and designer for My Scandinavian Home. She recommends that bed sheets not be ironed or wrinkled. Modern Scandinavian design requires stonewashed linen.
Twinkly lights
Twinkly lights are a wonderful addition to your hygge decor. They can be used almost anywhere and emit a more tranquil light than candles. The heart of Danish culture is the fireplace. It is a wonderful place to gather with family and friends. It is a symbol of warmth and fire, so it makes sense to share it with the ones you love.
The Danish design firm Muuto has created the Unfold pendant, which adds twinkling light to any room . It is made of soft silicone and available in a variety of colors. It’s slim and can fit in any space.
Scandinavian design places a strong emphasis on functionality and craftsmanship. Scandinavians are close to nature and their products reflect this. Lumens has a variety of Scandinavian-based brands, so there is something for everyone.
Natural textures
If you’re looking for Scandinavian-inspired decor, consider adding some natural textures to your home. The Ferm Living Anse Vase and Pot are modern designs made from natural sand-colored clay. It is a great touch to have the balanced cylindrical handle and hand-formed handles. These handles are also available in a variety of sizes and neutral colors.
Danish design is known for its simple, minimalist style. Because of its sleek design, the furniture is ideal for small homes and apartments. The Scandinavian interior design is known for its use of neutral tones in the living room and bedrooms. This style is all about functionality. Alvar Aaltos’ stackable stool is an example of this style. It combines simplicity and function. The hygge design concept is a key component of Scandinavian design. It is Danish for “warm colors-for-a cozy-teenage girl-room coziness”. A Nordic room will look cozy and warm with natural textures and warm colours.
Color palette
Modern Danish design colors emphasize natural elements. They can be used in many different ways. You can use browns, greens, and blues to create a relaxing space. Fresh flowers and plants can bring life to your home. This interior design style focuses on simplicity, functionality, natural materials, and elegance.
Modern Danish design’s color palette reflects Scandinavian minimalism, and is connected to the natural world. Danish design is well-known for its uncluttered spaces and slab doors. You can incorporate this look into your home, whether you are a modern homeowner or a Working From Home professional.
The Scandinavian color palette consists of neutral tones mixed with pops of color. It also uses organic materials like wool and wood. Because of their closeness to nature, the Nordic countries use neutral colors to counter the often dark and cold winter months. You can add warmth to this palette by using modern wall art and pops of color.
- About the Author
- Latest Posts
Introducing Ron, the home decor aficionado at ByRetreat, whose passion for creating beautiful and inviting spaces is at the heart of his work. With his deep knowledge of home decor and his innate sense of style, Ron brings a wealth of expertise and a keen eye for detail to the ByRetreat team.
Ron’s love for home decor goes beyond aesthetics; he understands that our surroundings play a significant role in our overall well-being and productivity. With this in mind, Ron is dedicated to transforming remote workspaces into havens of comfort, functionality, and beauty.
Beginners Guides
DIY Small Craft Room Ideas

A compact DIY crafting space is ideal for showcasing your creative talents. There are numerous ways to optimize space while keeping costs low. Effective storage is key in a crafting area. Small crafting spaces can benefit from wall-mounted storage solutions like a pegboard or metal grid. Utilize hangers to neatly store craft supplies, or opt for a mix of baskets and boxes for additional storage options.
Shelving units with open and closed shelves
Both open and closed shelving units can be used to make your craft room appear more spacious and organized. Open shelving allows you to easily see what your room has, but too many open shelves can create a feeling of clutter. Open shelving should not be used excessively.
Floating shelves
Floating shelves can be a great option if you have limited space. These shelves are the ideal way to store all types of stuff. Large open shelving units can be combined with drawers and shelves to provide ample storage. Alternative to shelves, ledges can be used.
Lazy Susan
A Lazy Susan makes storage a breeze. You can use this piece to organize small items, no matter how small your craft area is. You can organize your crafting supplies by spinning it and rotating them on it. Lazy Susans can also be used to decorate shelves. It can store small items or flower vases.
Glass shelf
A glass shelf can be a great way to organize your crafting supplies. This storage solution works well for Cricuts. You can also store scissors and other supplies.
Rolling storage carts
Rolling storage carts can be great for people with limited space. These carts can be placed under your desk or in your closets and allow you to easily access your crafting supplies. You can choose from a range of colors, and they come with storage inserts.
Labels
Labels are a great way to organize your workspace. These labels can be made by either using a cutting machine, or printed out and cut by hand. Affiliate links may be included in this post. These links earn us a small commission on sales made via the links.
Craft tables
A craft table with storage is a great option if your craft space is small and cramped. You will have more space and easier access to your supplies. Because they can be used in smaller spaces, craft tables are an excellent choice.
Pegboards
Pegboards are a great storage option, but can also be personalized. You can customize your pegboard storage by creating an organizer. This DIY project is simple and easy. You can find detailed instructions here to help you make it.
- About the Author
- Latest Posts
Introducing Ron, the home decor aficionado at ByRetreat, whose passion for creating beautiful and inviting spaces is at the heart of his work. With his deep knowledge of home decor and his innate sense of style, Ron brings a wealth of expertise and a keen eye for detail to the ByRetreat team.
Ron’s love for home decor goes beyond aesthetics; he understands that our surroundings play a significant role in our overall well-being and productivity. With this in mind, Ron is dedicated to transforming remote workspaces into havens of comfort, functionality, and beauty.
Beginners Guides
Wood Burning Ideas For Creative Gifts
Wood burning is an enjoyable method for crafting unique gifts. It can be utilized to produce a range of items such as coasters and trays. Ornaments are a sought-after gift choice and can be adorned with various pictures or festive designs. Additionally, you can create stylish bangles or earrings through wood burning. These pieces can be enhanced with delicate patterns or embellishments. Enhance your collection with decorative belt buckles using wood burning techniques.

Coasters personalized
Wood burning is an original way to personalize coasters. This ancient craft is quickly becoming one of the most popular DIY crafting styles. This method allows you to burn images onto wood, creating beautiful designs. The possibilities are limitless, whether you want to create a coaster for a friend, or add a personal touch on a gift.
A coaster can be made with just a date and a name, or it can be personalized with symbols and pictures. To play your favorite music, you can also put a Spotify code into the wood. Coasters personalized with your name and message are great for any occasion.
You can personalize your pattern to reflect you and your taste. You can choose between a number of quilt block designs and your own design. You can also burn a simple doodle on your coasters. If you want them to look like a quilt, you can make a series of circles and dots. Another great idea to personalize coasters is country decor.
Personalized spoons
First, you must select a design to use with your wood-burning spoons. Either draw the design on paper, or take a photograph. Use a pencil to trace the design onto the wood. To draw the design, use a Crayola pencil or a writing pencil. After you’ve created your outline add black ink.
Cut a piece of transfer tape slightly larger than your design . Next, apply the tape to the design and rub it to make sure it sticks. After the tape has adhered, flip the design upside down and place it on top of the spoon’s head. This vinyl will not be able to lay flat on a curved surface. It will likely have some wrinkles. These can be removed later.
There are many options to ensure safe wood-burning spoon foods. There are many sealers available, including Tung Oil. It can be applied directly to the wood burnt area or to the whole wooden spoon. Some designs are floral or botanical in nature.
Tin cans personalized
Tin cans can be customized in many ways. You can paint them, or use decorative tape to add color and pattern. They can be labeled with a unique brand name. To add some flair, you can decorate the cans with sequins or beads.
Tin cans can be personalized for many purposes. They can be used to make pencil holders or flower vases. You can make a simple tin can a keepsake for special occasions such as weddings and birthdays. It can be personalized with a message or illustration.
Another great wood-burning idea? Personalizing jewelry. It is possible to create earrings that are unique for any occasion, including Valentine’s Day and Halloween. These earrings can be made in many ways, and you could even learn calligraphy. You can also use the same technique to personalize a wooden container. Melissa Esplin has a great tutorial on how to use this technique.
Personalized trays
A wooden tray is a beautiful and unique gift idea. You can stain wood any color you like and have a message inscribed on it. Wooden trays can be personalized with a message or personalization to make unique gifts.
These personalized trays make wonderful gifts for weddings, new parents and roommates. These trays can be made from solid wood or a medium walnut stain. You can personalize the tray with the name of the couple, or the year that the family was established. This is a unique gift idea that will make a great gift for weddings, new parents, and roommates who feel they are part of the same family.
Wood-burnt serving trays are a unique way to present food. You can use one to serve sandwiches. You can customize them to fit the needs of each recipient.
- About the Author
- Latest Posts
Introducing Ron, the home decor aficionado at ByRetreat, whose passion for creating beautiful and inviting spaces is at the heart of his work. With his deep knowledge of home decor and his innate sense of style, Ron brings a wealth of expertise and a keen eye for detail to the ByRetreat team.
Ron’s love for home decor goes beyond aesthetics; he understands that our surroundings play a significant role in our overall well-being and productivity. With this in mind, Ron is dedicated to transforming remote workspaces into havens of comfort, functionality, and beauty.
-
 Vetted4 days ago
15 Best Boxwood Varieties for Thriving in Full Sunlight
-

 Vetted1 week ago
15 Best Ways to Label Clothes for Nursing Home Residents – Stay Organized and Efficient
-

 Vetted6 days ago
15 Best Dryer Vent Hoses to Keep Your Laundry Room Safe and Efficient
-

 Vetted6 days ago
15 Best Spider Sprays to Keep Your Home Arachnid-Free
-
 Vetted5 days ago
14 Best Cleaners for Aluminum Surfaces – Shine Bright Like a Diamond
-

 Vetted5 days ago
15 Best Nightstand Charging Stations to Keep Your Devices Organized and Ready to Go
-
 Vetted12 hours ago
15 Best Ways to Waterproof Wood for Ultimate Protection and Longevity
-

 Beginners Guides4 days ago
How to Slow Down My Ceiling Fan to Reduce Wind Chill


